- Android x86 emulator qemu x86
- How to Run Android in QEMU to Play 3D Android Games on Linux
- Prerequisites
- Android-x86 QEMU Installation Walkthrough
- Important Things You Should Know
- Improving App Compatibility in Android-x86
- Changing Resolution of Android-x86 Installation in QEMU Virtual Machine (VM)
- Showcase
- About the author
- Nitesh Kumar
Android x86 emulator qemu x86
Краткое описание:
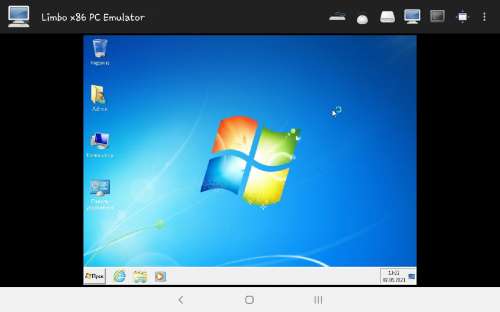
Limbo PC Emulator – это порт QEMU на платформу Android.
Описание:
Limbo PC Emulator — это порт QEMU (Quick Emulator) на платформу Android.
Полностью эмулируется виртуальная машина с 32/64-битным процессооом Intel/AMD и видео, звуковой и сетевой картами.
Display: VNC / SDL – способ вывода картинки на экран.
VNC – звук всегда отключен, мышь может «упираться в невидимую стену», но эмулятор может работать в фоне, во время работы можно переключаться на другие программы.
SDL – можно включить звук, при переключении на другие программы эмулятор приостанавливается.
Keyboard: выбор языка экранной клавиатуры.
Пока что поддерживается только английский язык (en-us).
Можно использовать любую экранную клавиатуру, но для полноценной работы с ОС рекомендуется клавиатура с клавишами Control, Alt и F1. F12 – например, Hacker’s Keyboard.
Также можно использовать внешнюю (Bluetooth / OTG) клавиатуру, тогда язык в ОС переключается как на ПК (зависит от настроек клавиатуры в ОС).
Mouse: эмуляция мыши.
ps2 – мышь PS/2. Подходит для систем, не поддерживающих устройства USB.
usb-mouse – мышь USB.
usb-tablet – сенсорная панель USB («тачпад»). Решает проблему в режиме VNC, когда мышь не движется дальше невидимой границы.
Кнопки мыши:
— левая – нажатие на экран;
— правая – громкость вниз;
— средняя – громкость вверх.
В режиме SDL мышь включается двойным (или долгим) нажатием на экран.
Возможно использовать внешнюю мышь (Bluetooth/OTG), но поддержка неполная.
Orientation: поворот экрана.
Для поворота экрана в Limbo датчик поворота телефона должен быть включен.
Auto – автоматический поворот в книжное/альбомное (вертикальное/горизонтальное) положение при повороте телефона.
Landscape – всегда горизонтальный экран.
Lanscape Reverse – перевёрнутый горизонтальный экран.
Portrait – всегда вертикальный экран.
Portrait Reverse – перевёрнутый вертикальный экран.
Always Toolbar – не убирать панель вверху при нажатии кнопки «назад».
Desktop Mode – режим внешней мыши, автоматически включается при подключннии мыши. При нажатии на экран сразу нажимается кнопка мыши. Без внешней мыши управление немного напоминает сенсорный экран.
Fullscreen – полноэкранный режим, скрывать панель состояния телефона.
External VNC – настройка управления через отдельную программу VNC.
External QMP – настройка управления через отдельную программу QMP.
Architecture: x86 / x64 – эмуляция 32 / 64-битных процессооов Intel.
Machine Type: выбор чипсета pc (i440fx) или q35 (ICH9).
CPU Model: модель процессора, позволяет ограничить возможности процессора.
CPU Cores: количество вычислительных ядер в процессоре.
RAM Memory (MB): объём памяти для виртуальной машины. Если поставить больше памяти, чем разрешает Андроид, эмулятор не запустится.
Enable MTTCG: использовать несколько ядер процессора телефона. Количество используемых ядер задаётся в CPU Cores. Пока что включается только на процессорах ARM64 (ARMv8).
Осторожно! При использовании нескольких ядер телефон может перегреться!
Disable HPET: отключить высокоточный таймер. Может помочь, если не запускается ОС.
Enable KVM: запретить эмуляцию процессора, использовать процессор телефона напрямую. Для машин x86/x64 KVM можно включить только на устройствах с процессорами Intel.
Disable TSC: отключить счётчик времени процессора, для Windows 7 и выше галочка должна быть выключена.
Disable ACPI: выключить расширенное управление устройствами. Может помочь запустить ОС, вышедшие до Windows 7. Автоматическое выключение машины с этой галочкой работать не будет.
Hard Disk A: / B: / C: / D:
Подключение образов жёстких дисков.
Поддерживаются форматы:
— IMG (Bochs);
— QCOW / QCOW2 (QEMU);
— VHD (Virtual PC);
— VDI (VirtualBox);
— VMDK (VMWare).
Shared Folder: подключение папки Андроида как диска виртуальной машины. Объём файлов в папке должен быть не более
Выбор способа загрузки.
Boot from Device: очерёдность загрузки.
Default = Hard Disk – жёсткий диск, дискета, cd-rom, по сети.
CD Rom – cd-rom, дискета, сеть, жёсткий диск.
Floppy – дискета, cd-rom, сеть, жёсткий диск.
Kernel, Initrd – запустить ядро Linux напрямую, без загрузочного диска.
Append: параметры запуска ядра Linux.
std – видеокарта Bochs (частично поддерживает стандарт VBE 3.0).
cirrus – Cirrus Logic CL-GD5446 PCI, совместима почти со всеми ОС.
vmware – видеокарта, совместимая с VMWare SVGA II.
nographic – не подключать видеокарту.
Эмуляция звуковой карты, работает оолько в режиме SDL.
none – не подключать карту;
sb16 – Creative Labs SoundBlaster 16;
ac97 – Intel 82801AA AC97;
adlib – совместимая с Adlib (OPL2, Yamaha YM3812);
cs4231a – совместимая с CS4231A;
gus – Gravis Ultrasound GF1;
es1370 – ENSONIQ AudioPCI ES1370;
hda – Intel HD Audio;
pcspk – стандартный динамик материнской платы;
all – включить все звуковые карты.
Network:
— None – не подключать сетевую карту;
— User – подключить сеть через роутер QEMU, работает везде;
— TAP – подключить сеть напрямую, работает не на всех устройствах.
Network Card: выбор сетевой карты.
DNS Server: задать сервер доменных имён – например, 8.8.8.8 (Google DNS).
Host Forward: настройка перенаправления портов роутером QEMU (в режиме User).
Дополнительные параметры Limbo.
High Priority – выполнять Limbo с максимальным приоритетом.
Extra QEMU Params: дополнительные параметры QEMU.
1) Напротив «Load Machine» нажимаете «None«, в открывшемся списке выбираете «New«.
2) Вводите любое название машины.
3) Limbo спросит, показать список совместимых ОС или не надо? «Continue» – да, «Cancel» – нет.
4) В настройках виртуальной машины подключаете образ загрузочного жёсткого диска или CD-ROM:
- образ жёсткого диска подключается в разделе «Disks». Загрузочный диск – только к «Hard Disk A:«;
- образ cd-rom подключается в разделе «Removable».
5) Пробуете запускать ВМ кнопкой Y вверху.
Загрузочные образы дисков можно взять здесь: Сборник образов ОС для BOCHS и QEMU.
Приятной эмуляции! 
USB устройства не поддерживаются (кроме мыши и клавиатуры, работающих с телефоном).
Источник
How to Run Android in QEMU to Play 3D Android Games on Linux
Qemu is a hardware virtualization solution for Linux that enables emulation of an entire OS installed on a virtual disk. VirGL is an OpenGL renderer added to recent QEMU builds, it allows you to create a virtual 3D capable graphics card inside QEMU virtual machine.
Using a combination of Android-x86, QEMU and VirGL technologies, we will boot and install complete Android OS in a virtual machine.
A compatibility note: This guide has been tested with Ubuntu 19.04 and instructions below will work for Ubuntu 19.04 or newer versions. QEMU in older versions of Ubuntu lacks VirGL support. You also need to have a Kernel-based Virtual Machine (KVM) compatible CPU on your system. Most modern CPUs have support for KVM but you can check its presence by running command below:
Any number greater than 0 implies KVM support. You still need to make sure that virtualization is enabled in the BIOS though. More information can be found here.
Prerequisites
We will start by installing required QEMU packages and adding username to KVM group. Run commands below:
Reboot your system. Download Android-x86 ISO image from here. Run the following command to create a virtual hard disk:
You can replace 10G with any number and it will create a virtual disk of that size in GB.
Android-x86 QEMU Installation Walkthrough
To boot into live image of Android-x86 inside a QEMU virtual machine, execute command:
Notice the “hda” and “cdrom” arguments. You have to make sure that they match names of virtual hard disk and downloaded Android-x86 iso image. If you have followed instructions correctly upto here, you should see a new window popup:
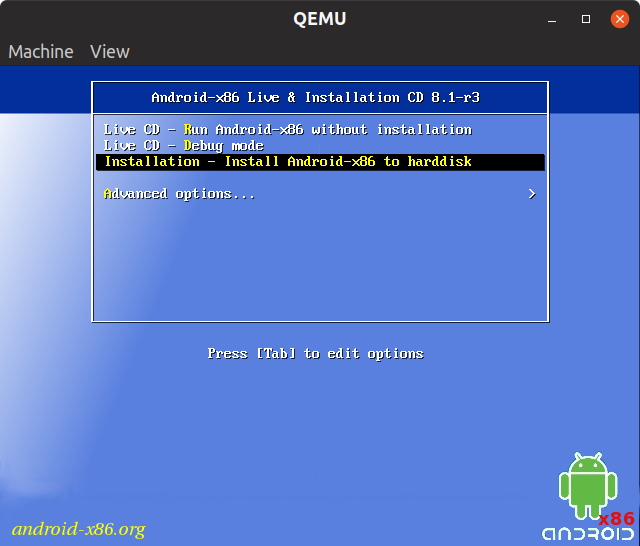
Select the “Installation” entry and wait for the partitioning screen to come up.
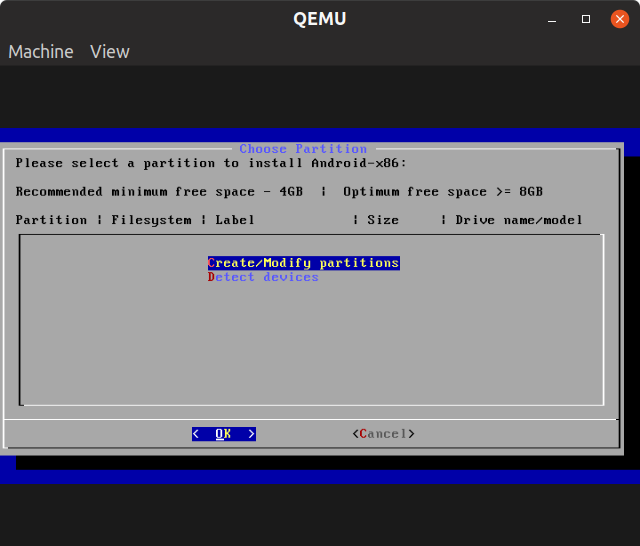
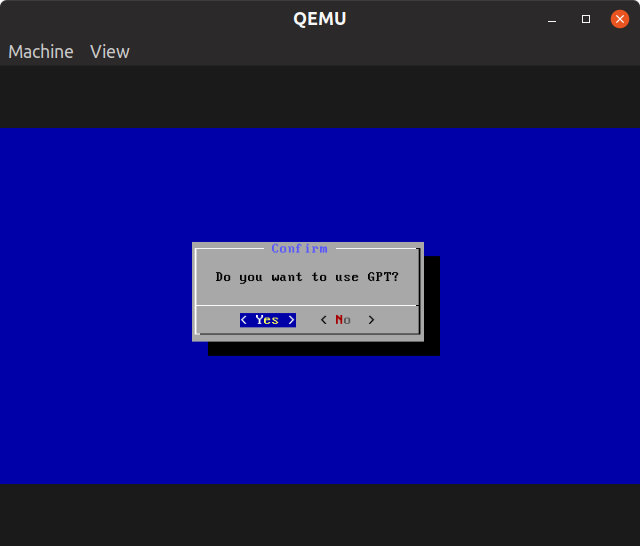
Choose “Create/Modify partitions”, and then GPT to be “Yes”.
Ignore warning on the next screen, just press any key to continue. You will see a partition manager.

Select “New” and then continue to hit the key for next four prompts. You don’t have to specify anything in prompts. Once done, you will see newly created file system in partition manager, as shown in the screenshot below:
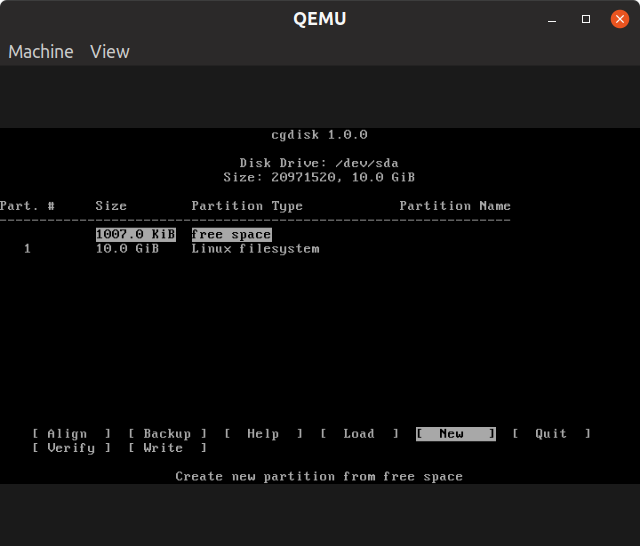
Hit “Write” option and then type “yes” to confirm. Select “Quit” option to exit partition manager. Choose “sda1” partition on next screen.
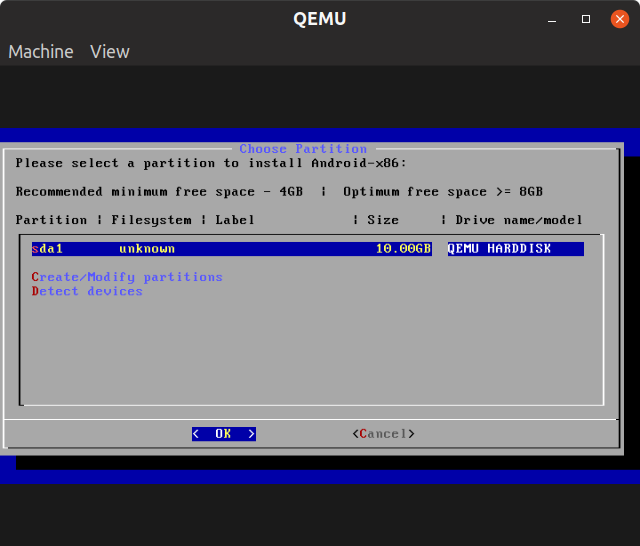
Select “ext4” to format the partition and select the “Yes” option when prompted.

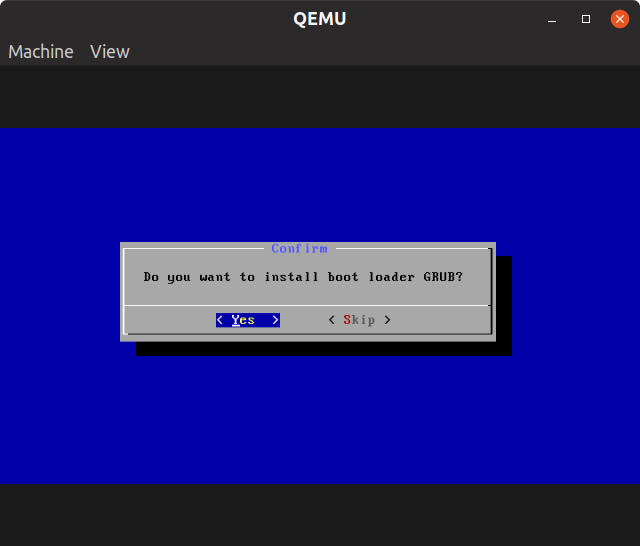
Choose “Yes” when prompted about GRUB boot loader.
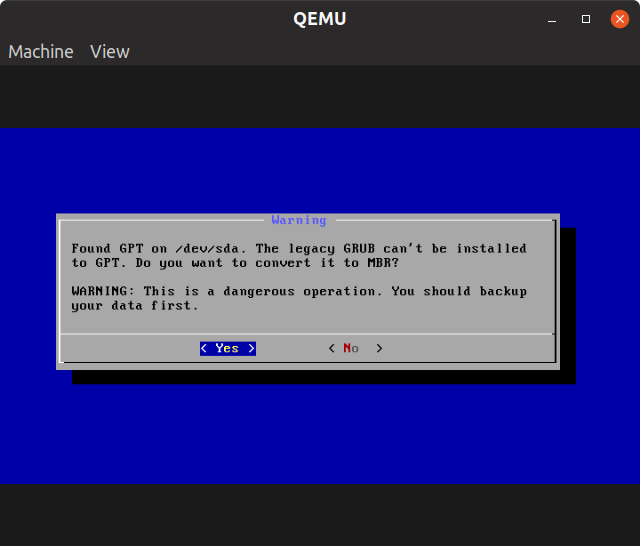
On the next screen, you may see a warning about conversion to “MBR”. Select “Yes”.
Wait for the installation to finish.
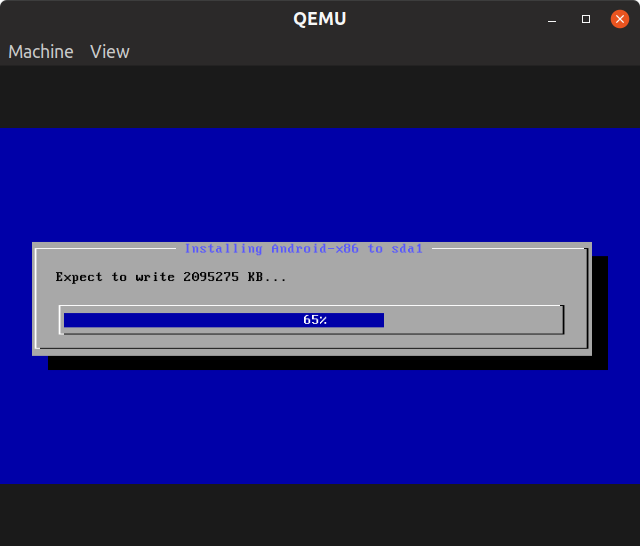
Don’t select any option, just close the window on the following prompt:
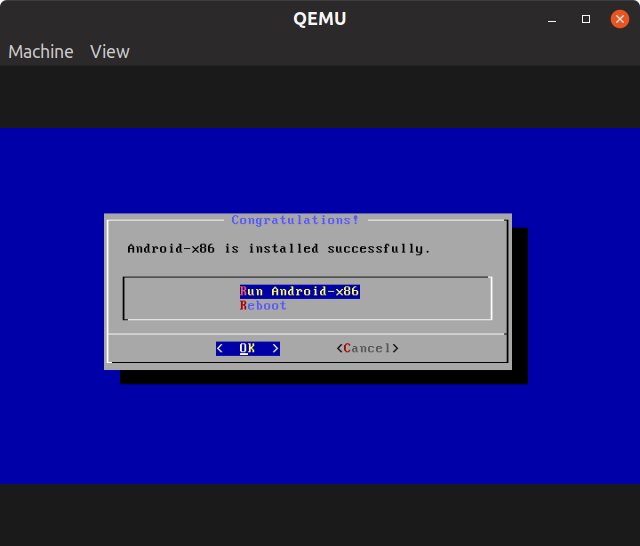
Android-x86 is now completely installed in a QEMU virtual machine. To boot into newly installed OS, we will use the same lengthy command from above while omitting “cdrom” argument.
You will see Android boot logo and then first run setup screen.
Wait for the installation to finish.
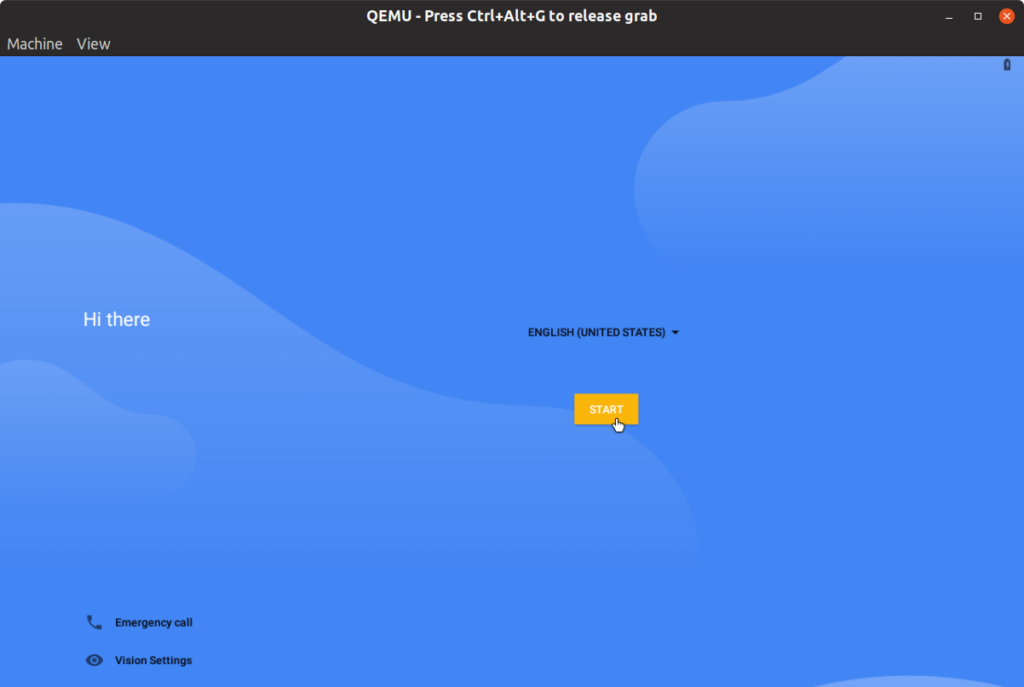
Just go through the setup to arrive at the home screen. Android-x86 has full Play Store support built-in. Note that the running virtual machine will grab all keystrokes and mouse events. To release the hold, you will have to press key combination.
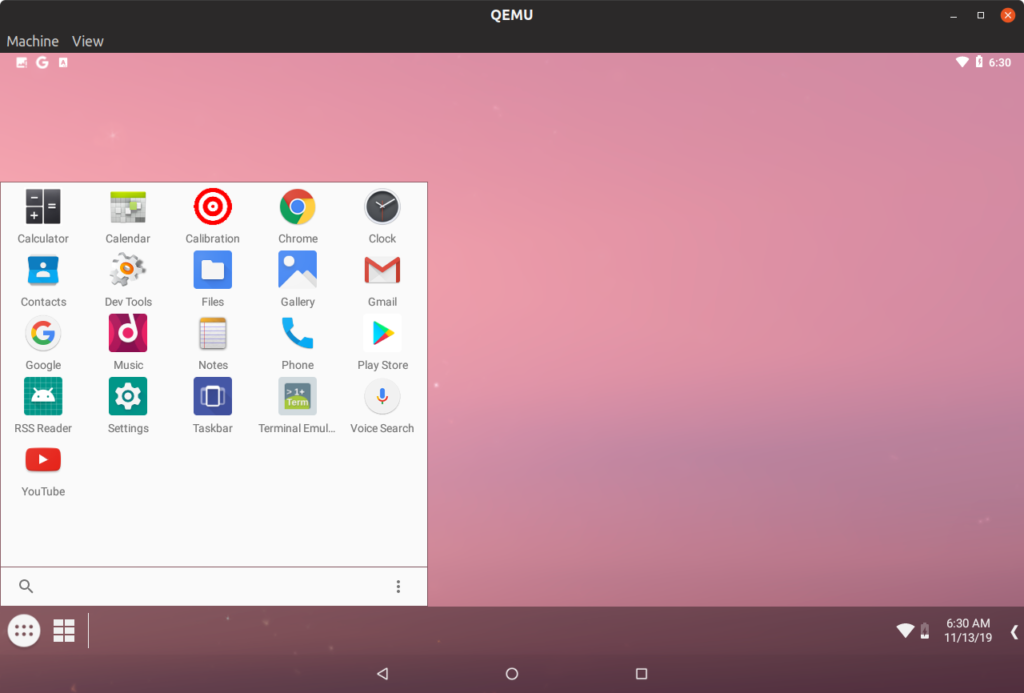
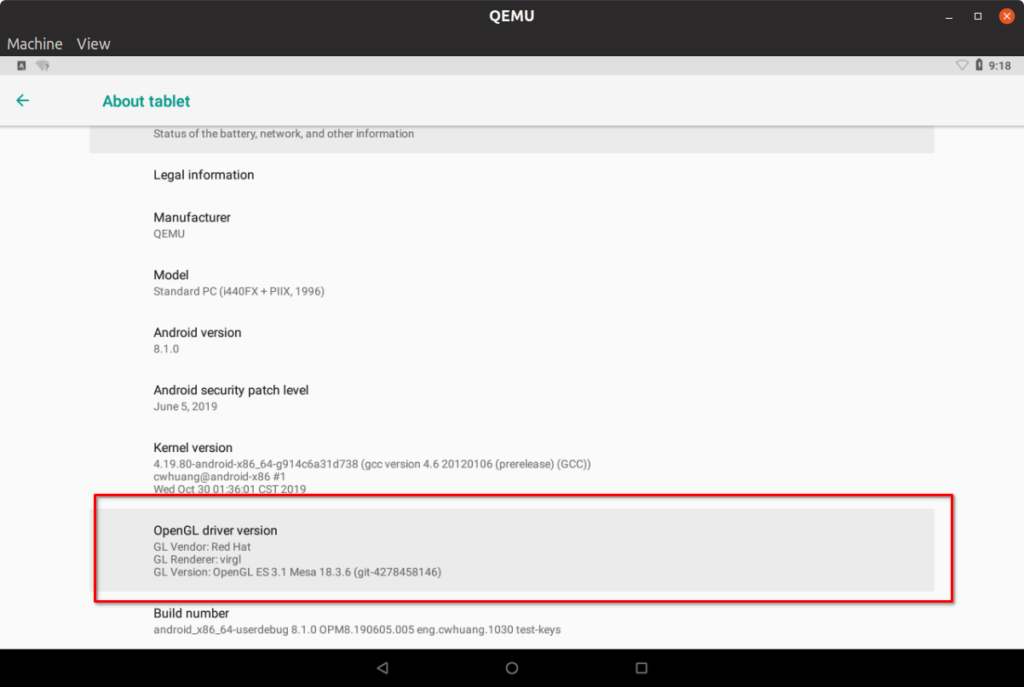
3D hardware acceleration support is present.
Important Things You Should Know
- You can customize the command we have used above to some extent: “-m” switch is for RAM, “-smp” switch is for CPU cores. If you want to explore all options, Gentoo Wiki has a pretty good explanation.
- will toggle immersive full screen experience.
- You can activate internet connectivity inside Android-x86 by tapping on “VirtWifi” option in “Wi-Fi” settings.
- Not everything will work in virtual machine, bluetooth for example.
- Hardware acceleration compatibility and performance will depend on your PC’s graphics card, drivers and CPU horsepower.
- Latest release of Android-x86 comes with free-form windows support. You can minimize, maximize, restore windows and snap them to corners, just like you would do on a desktop OS.
- Android-x86 lags behind current Android release by a version or two. It won’t however affect your ability to run apps and games.
- Android-x86 in QEMU virtual machine may not be a 100% smooth sail. You can expect some random crashes and force closes now and then.
Improving App Compatibility in Android-x86
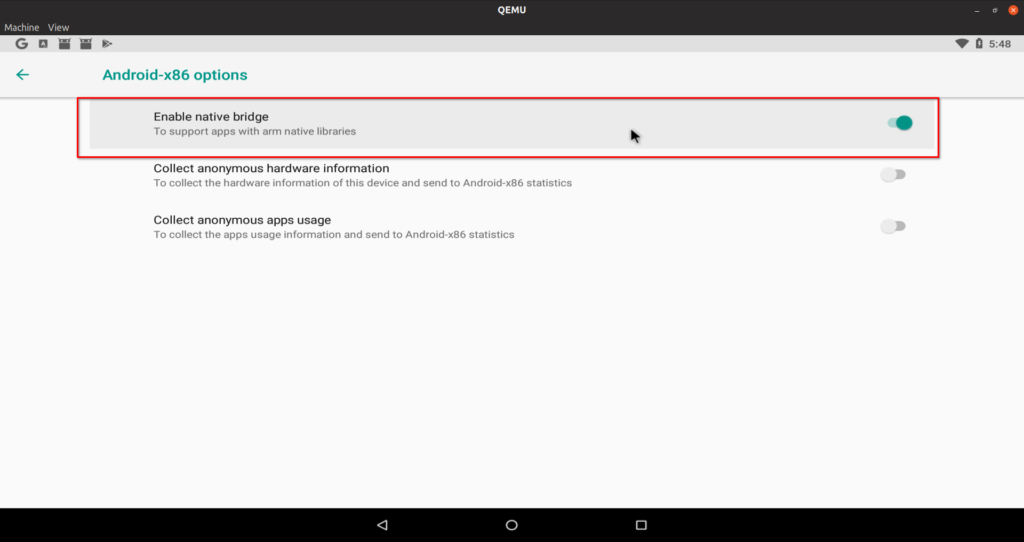
Some android apps may refuse to work with x86 architecture. Android-x86 includes a compatibility library that helps greatly but you may still find issues with certain apps. To enable the compatibility layer, toggle “native bridge” in system settings.
Lastly, we have a small issue yet to be fixed. Resolution of the Android-x86 virtual machine. If you have low end PC hardware, I would suggest you to run Android in windowed mode only at the default resolution (disable “Zoom To Fit” in “View” menu). If you have capable hardware, you can increase resolution by following the instructions below.
Changing Resolution of Android-x86 Installation in QEMU Virtual Machine (VM)
WARNING: All the command mentioned below are meant to be executed in Android-x86 VM installation (guest). DO NOT attempt to run these commands in your Ubuntu installation (host).
To permanently change resolution of Android VM, we need to run some commands in a terminal launched inside our running VM instance. Android-x86 comes with a terminal emulator app, launch it and run following commands one by one (allow root access when prompted):
Press once you see the text file to start editing mode. In the first entry, add your desired resolution in “video=widthxheight” format, as shown in the screenshot below:

To save the file, first hit key, then type “:wq” without quotes and then press key. Run the command below to safely unmount our mount point.
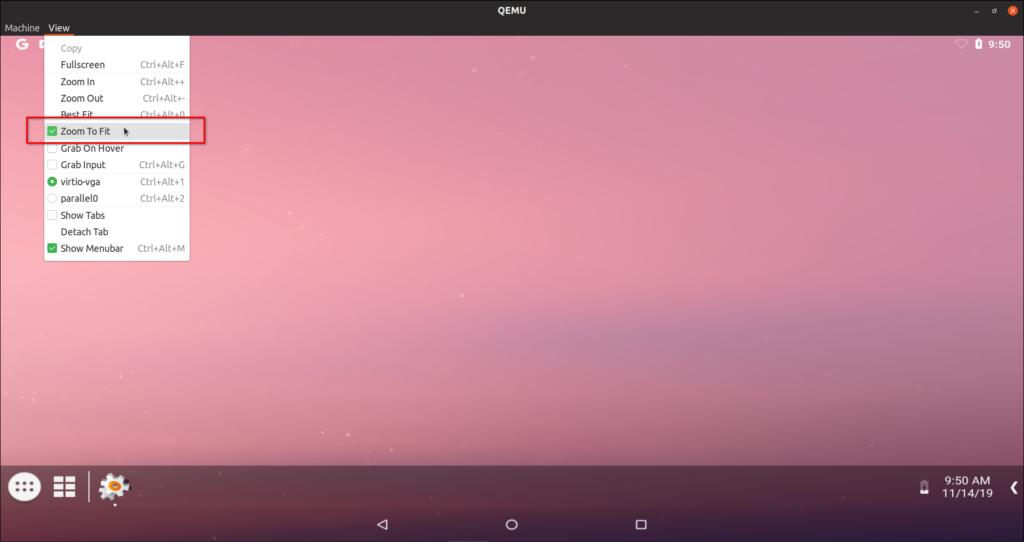
Reboot the Android VM. Your desired resolution is set now. You may see some clipping in windowed mode if your VM’s resolution is equal to your monitor’s resolution as window title bar and borders take some space. To fix this, you will have to enable “Zoom To Fit”, as shown in the screenshot below:
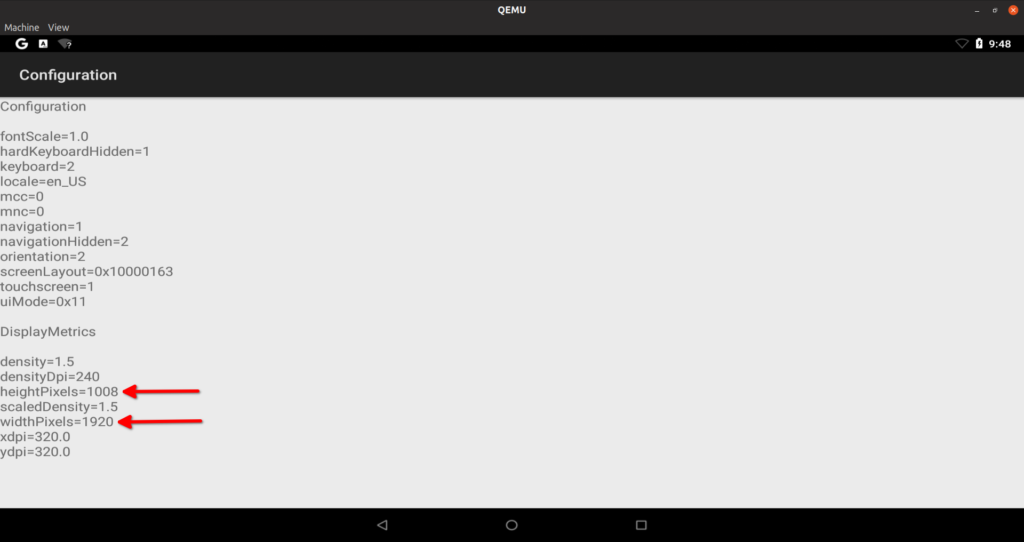
If you toggle fullscreen by pressing , there won’t be any clipping. To confirm correct resolution, go to “Dev Tools” app and then select “Configuration” option. Height will be slightly less as height of navigation bar at the bottom is deducted from resolution height.
Showcase
This article claims to run 3D Android games in Linux, it would be a crime to not include any footage. So here is some gameplay footage of SuperTuxKart running at full speed inside QEMU virtual machine with Ubuntu 19.04 as host. I am controlling the game with keyboard arrow keys, but the game itself is running in Android-x86 VM. GIF below is sped up and has lost quality during conversion:

This concludes the long post. If you like to run Android apps and games on desktop PC, this method is much better than using third party emulators having crazy privacy policies, plus it doesn’t require you to meddle with system partitions for a dual boot.
About the author
![]()
Nitesh Kumar
I am a freelancer software developer and content writer who loves Linux, open source software and the free software community.
Источник


