- Использование API Graph для Android
- Предварительные требования
- Класс GraphRequest
- Доступ к данным пользователя
- Обработка результатов
- Обработка ошибок
- Устранение неполадок
- Пакетные запросы
- Getting Started with the Facebook SDK for Android
- Quick Start
- Android Studio Setup
- Add Your Facebook App ID and Client Token
- Sending Images or Videos
- Running Sample Apps
- Create a Development Key Hash
- Create a Release Key Hash
- Use the Facebook SDK for Android with Maven
- Troubleshooting Sample Apps
- Component SDKs of the Facebook SDK for Android
- Download
- Integrating the Facebook API with Android
- Create Android Project
- Creating Facebook App ID
- Windows
- Setting up Facebook SDK
- Activities and Layouts
- MainActivity class
Использование API Graph для Android
Android SDK поддерживает интеграцию с Facebook API Graph. Классы GraphRequest и GraphResponse позволяют отправлять запросы и получать ответы в формате JSON в асинхронном режиме. Кроме того, класс GraphRequestBatch позволяет отправлять серверам Facebook пакетные запросы, которые обрабатываются за один цикл.
Подробнее об API Graph см. в разделах:
См. также справочные материалы по GraphRequest , GraphResponse и GraphRequestBatch . Вы узнаете, как использовать Facebook SDK для Android и создавать вызовы API Graph для дополнительных сценариев.
Предварительные требования
Класс GraphRequest
В классе GraphRequest есть метод newMeRequest . Он вызывает эндпойнт /user/me, чтобы извлечь данные пользователя для указанного маркера доступа.
Android SDK отправляет все разрешения, указанные в access_token , тем самым обеспечивая контроль доступа к данным. Если у приложения нет маркера доступа, API Graph возвращает только общедоступную информацию. Подробнее о свойствах и разрешениях User см. в разделе Справка по API Graph: User .
По умолчанию метод newMeRequest извлекает из объекта пользователя поля, заданные по умолчанию. Если вам нужны дополнительные поля или в целях повышения производительности нужно сократить полезную нагрузку ответа, добавьте параметр fields и запросите требуемые поля:
В методе обратного вызова данные ответа десериализуются в JSONObject , если запрос выполнен успешно. Поля, которые невозможно извлечь из-за отсутствия необходимых разрешений, будут исключены из результата.
Для пользователя, который выполнил вход, в SDK есть классы Profile и ProfileTracker . См. раздел Вход через Facebook для Android.
Доступ к данным пользователя
Доступ к данным зависит от того, какие разрешения предоставлены приложению и какие данные доступны приложениям. Вот пример необработанного отклика API Graph для user_location и user_birthday :
Обработка результатов
В зависимости от эндпойнта вызова вы получите JSONObject или JSONArray .
При вызовах одиночного объекта, например newMeRequest , возвращается JSONObject . Вызовы для получения списка результатов, например newMyFriendsRequest , возвращают JSONArray .
Обработка ошибок
Вы можете изучить поле ошибок в объекте GraphResponse , чтобы понять, удалось ли выполнить запрос. Поле ошибок относится к типу FacebookRequestError . Вы можете вызвать следующие методы:
В объекте ошибки есть поля, в которых приведена подробная информация об ошибке, в том числе:
Подробнее о возможных кодах ошибки см. в разделе Использование API Graph, Обработка ошибок.
Объект GraphResponse также содержит элемент enum , который присваивает категорию ошибкам. Есть три категории ошибок:
Устранение неполадок
Если проблема связана с извлечением данных пользователя, активируйте регистрацию HTTP-запросов. Для этого нужно добавить код перед разделом, в котором приложение запрашивает данные пользователя:
Это позволит зарегистрировать информацию о запросах и ответах HTTP в журнале консоли.
Пакетные запросы
Вы можете использовать пакетные запросы данных, если приложение обрабатывает следующие типы сценариев:
Пакетные запросы позволяют сократить число циклов запроса и ответа для сервера. Например, мы хотим извлечь данные о пользователе и его друзьях:
Источник
Getting Started with the Facebook SDK for Android
This documentation explains how to get started integrating your Android app with Facebook by using the Facebook SDK for Android. The current version of the Facebook SDK for Android is version 12.0.0 and requires the Android API 15. For more information about versions and features, see Facebook SDK for Android.
Beginning with SDK v13.0, set to release in early 2022, a Client Token will be required for all calls to the Graph API.
You can set up your app to use the Facebook SDK for Android in the following ways:
- By using the Quick Start.
- By setting up your project with the Facebook SDK for Android.
Quick Start
To get a Facebook App ID, configure your app’s settings, and import the Facebook SDK for Android, click on the button below and follow the instructions.
Android Studio Setup
To use the Facebook SDK in an Android Studio project, add the SDK as a build dependency and import the SDK.
- Go to Android Studio | New Project | Minimum SDK.
- Select API 15: Android 4.0.3 (IceCreamSandwich) or higher and create your new project.
- After you create a new project, open Gradle Scripts | build.gradle (Project: and do the following:
- Add the following to the buildscript < repositories <>> section of the build.gradle (Project) file:
- Save and close build.gradle (Project: ) .
- Open Gradle Scripts | build.gradle (Module: app) and do the following:
- Add the following to the dependencies <> section of your build.gradle (module: app) file to compile the latest version of the Facebook SDK for Android:
When you use the Facebook SDK, some events in your app are automatically logged and collected unless you disable automatic event logging. For details about what information is collected and how to disable automatic event logging, see Automatic App Event Logging.
Add Your Facebook App ID and Client Token
Add your Facebook App ID and Client Token to your project’s strings file and update your Android manifest:
1. Open your /app/res/values/strings.xml file.
2. Add a string element with the name attribute facebook_app_id and value as your Facebook App ID to the file. For example
3. Open /app/manifests/AndroidManifest.xml
4. Add a uses-permission element to the manifest:
5. Add a meta-data element to the application element:
Sending Images or Videos
If you’re sharing links, images or video via the Facebook for Android app, you also need to declare the FacebookContentProvider in the manifest.
Append your app id to the end of the authorities value. For example if your Facebook app id is 1234 , the declaration looks like:
Running Sample Apps
The following samples come with the Facebook SDK for Android:
- HelloFacebookSample — Demonstrates profile access, status updates and photo upload.
- RPSSample — Use Native Share Dialog, Open Graph publishing, pickers, invites, and deep linking.
- Scrumptious — Login, requests, pickers, picture uploads, and Open Graph publishing.
You can experiment with samples by importing the Facebook SDK into an Android Studio project. The samples have a project dependency rather than a central repository dependency via maven central or jcenter. This is so that when a local copy of the SDK gets updates, the samples reflect the changes.
To run samples apps quickly, you can generate key hashes for your development environments. Add these to your Facebook developer profile for the sample apps. Keytool, for generating the key hashes, is included with the Java SE Development Kit (JDK) that you installed as part of setting up your development environment. OpenSSL is available for download from OpenSSL.
On Windows, you need the following:
Run the following command in a command prompt in the Java SDK folder. This generates a 28 character string.
Go to the Facebook Developer site. Log into Facebook and, using the dropdown menu in the top-right, go to Developer Settings:

In your developer settings, select Sample App from the menu, and add and save your key hash into your profile:
You can add multiple key hashes if you develop with multiple machines.
You can now compile and run all of the samples — including those that use Facebook Login.
Create a Development Key Hash
Facebook uses the key hash to authenticate interactions between your app and the Facebook app. If you run apps that use Facebook Login, you need to add your Android development key hash to your Facebook developer profile.
For the version of your app that you release to you also need to generate and set a Release Key Hash.
On either OS X or Windows you can get a key hash by generating it or by using the value returned by Settings.getApplicationSignature(Context) . For instructions, see Running Sample Apps .
Create a Release Key Hash
To authenticate the exchange of information between your app and the Facebook, you need to generate a release key hash and add this to the Android settings within your Facebook App ID. Without this, your Facebook integration may not work properly when you release your app to the store.
In a previous step, you should have updated your Facebook Developer Settings with the key hashes for your development environments.
When publishing your app, it is typically signed with a different signature to your development environment. Therefore, you want to make sure you create a Release Key Hash and add this to the Android settings for Facebook App ID.
To generate a hash of your release key, run the following command on Mac or Windows substituting your release key alias and the path to your keystore.
On Windows, you need the following:
Run the following command in a command prompt in the Java SDK folder:
Make sure to use the password that you set when you first created the release key.
This command should generate a 28 characher string. Copy and paste this Release Key Hash into your Facebook App ID’s Android settings.
You should also check that your Facebook App ID’s Android setting also contain the correct package name and main activity class for your Android package.
Use the Facebook SDK for Android with Maven
You can declare the Maven dependency with the latest available version of the Facebook SDK for Android.
Troubleshooting Sample Apps
If you have a problem running a sample app, it may be related to the key hash. You may see one of the following scenarios:
- A native Login Dialog appears but after accepting the permissions you are still in a logged out state. The logcat also contains an exception:
- A non-native Login Dialog appears with an error message: »..App is Misconfigured for facebook login. ».
Check your key hash and you can make sure you use the correct key hash. I
You can also manually modify the sample code to use the right key hash. For example in HelloFacebookSampleActivity class make a temporary change to the onCreate() :
Save your changes and re-run the sample. Check your logcat output for a message similar to this:
Save the key hash in your developer profile. Re-run the samples and verify that you can log in successfully.
Источник
Component SDKs of the Facebook SDK for Android
The Facebook SDK for Android consists of the following component SDKs:
If you don’t need the functionality of the full Facebook SDK for Android, you can save space by using only the component SDKs that you need to support the Facebook products that you want to use in your app.
When you use the Facebook SDK, some events in your app are automatically logged and collected unless you disable automatic event logging. For details about what information is collected and how to disable automatic event logging, see Automatic App Event Logging.
To link with Maven to one of the component SDKs in your project, add one of the following implementation statements to your build script:
- implementation ‘com.facebook.android:facebook-applinks:latest.release’
- implementation ‘com.facebook.android:facebook-common:latest.release’
- implementation ‘com.facebook.android:facebook-core:latest.release’
- implementation ‘com.facebook.android:facebook-gamingservices:latest.release’
- implementation ‘com.facebook.android:facebook-login:latest.release’
- implementation ‘com.facebook.android:facebook-messenger:latest.release’
- implementation ‘com.facebook.android:facebook-share:latest.release’
To add an implementation statement:
- In your project, open your_app | Gradle Scripts | build.gradle (Project) and add the following repository to the buildscript < repositories <>> section to download the SDK from the Maven Central Repository:
Download
You can also download the entire Facebook SDK for Android.
Источник
Integrating the Facebook API with Android
This article was updated on 13th December, 2016.
In this tutorial, I will show how to connect your Android application to the Facebook API. Lots of mobile applications use the Facebook API v4.x for login, signup and posting data.
Create Android Project
Make sure you have an up to date version of Android Studio. I am using version 1.4.1
Open Android Studio and create a New Project, naming it as you wish. Click Next, choose Minimum API level 17 and click Next again. Choose Empty Activity as the first activity, name it LoginActivity and click Finish.
Next, we add another blank activity to the project. Right Click the package and select New -> Activity -> Blank Activity. Leave its name as default and click finish.
The final project for this article can be found on Github. Make sure you change the Facebook API details to match you own.
Creating Facebook App ID
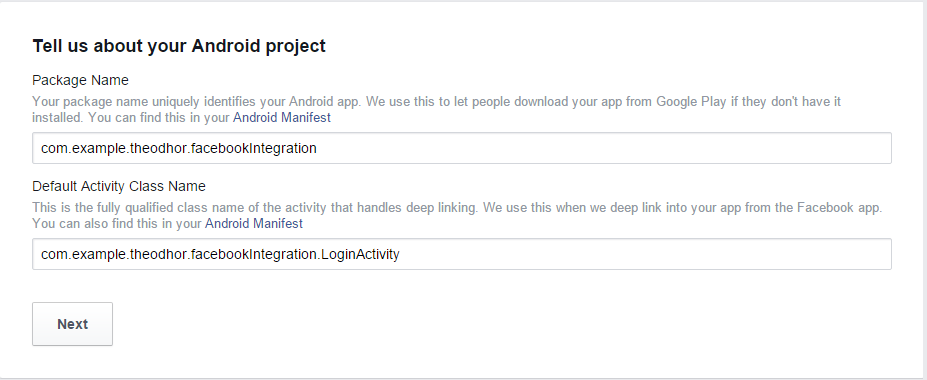
To use the Facebook API we have to add an app entry to our Facebook Developer Apps dashboard. You will need a Facebook developer account if you don’t have one already. Choose a random category and click Create App ID.
On the next page, scroll down to the bottom and complete both fields with the project packages names.
Now we need to add a Development Key Hash. There are two ways of generating one. The first option is using the command line.
Windows
Open Facebook’s My Apps section and copy the App ID:
Open strings.xml in your project and add this line of code:
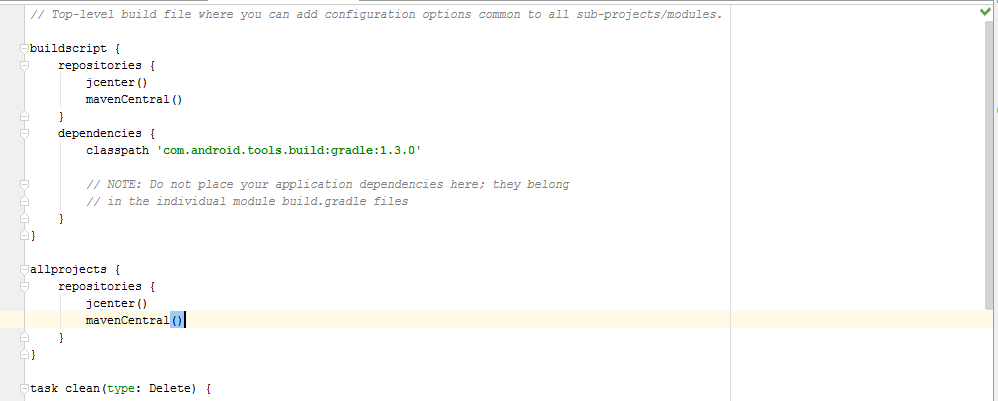
Setting up Facebook SDK
Open build.gradle (Project) and add mavenCentral() to both repository sections. Then open build.gradle (Module) and add the SDK library by adding this line to dependencies :
Now sync gradle.
Activities and Layouts
Open AndroidManifest.xml and make these changes.
Change the MainActivity label:
Now we are going to work with Java classes and layouts.
First, we are going to work with LoginActivity.java. This class opens an authenticated connection to the Facebook API and gets data from it.
Add these lines before the onCreate method inside the class:
Here we create a FacebookCallback called callback . This executes the next action after we get a response from the Facebook API and the method for that is onSuccess() .
Inside the onSuccess method we create a new Facebook Profile and get data for that profile. Later we will create a simple function called nextActivity() that will switch our activity.
We are going to initialize the Facebook SDK so we can use its functions and methods. Inside onCreate() add these lines:
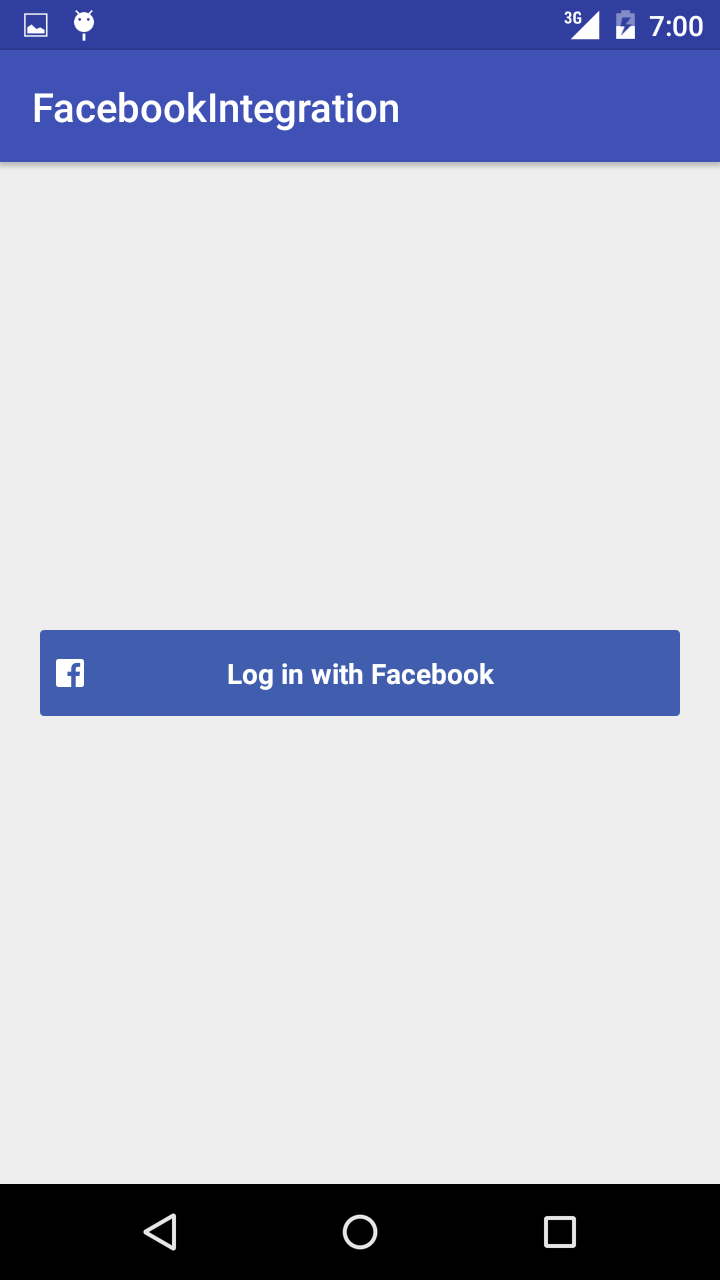
Next, we need to show the famous Facebook Log in button. We don’t need to make it from scratch as it exists inside the SDK’s libraries and can be called in our layout.
So we will edit our LoginActivity’s layout. It’s name should be content_login.xml . In fact, the latest version of Android Studio creates two default .xml files for every activity we create. The other layout file is called activity_login.xml .
In activity_login.xml delete the code for the floating button as we won’t need it.
In content_login.xml there is only a TextView element. We will remove it and create a new LinearLayout that is horizontally oriented. Inside that layout we will add the log in button. Paste the code below to replace the current contents of content_login.xml:
I added some padding at the top and bottom and centered the horizontal linear layout. Let’s return to the Login class and create the button.
Inside the onCreate() method before the closing bracket, add the code below:
Here we create a connection between the button in content_login.xml and the Facebook SDK libraries.
There are some @Overrided methods that we need inside LoginActivity.java. Add the lines below:
The last function in this class is nextActivity() which will switch activities and pass data to the next activity.
We need the first and last name of the profile and a 200 by 200-pixel profile picture. At this stage, we only get its Uri . These three strings will be used as extras in our next activity.
MainActivity class
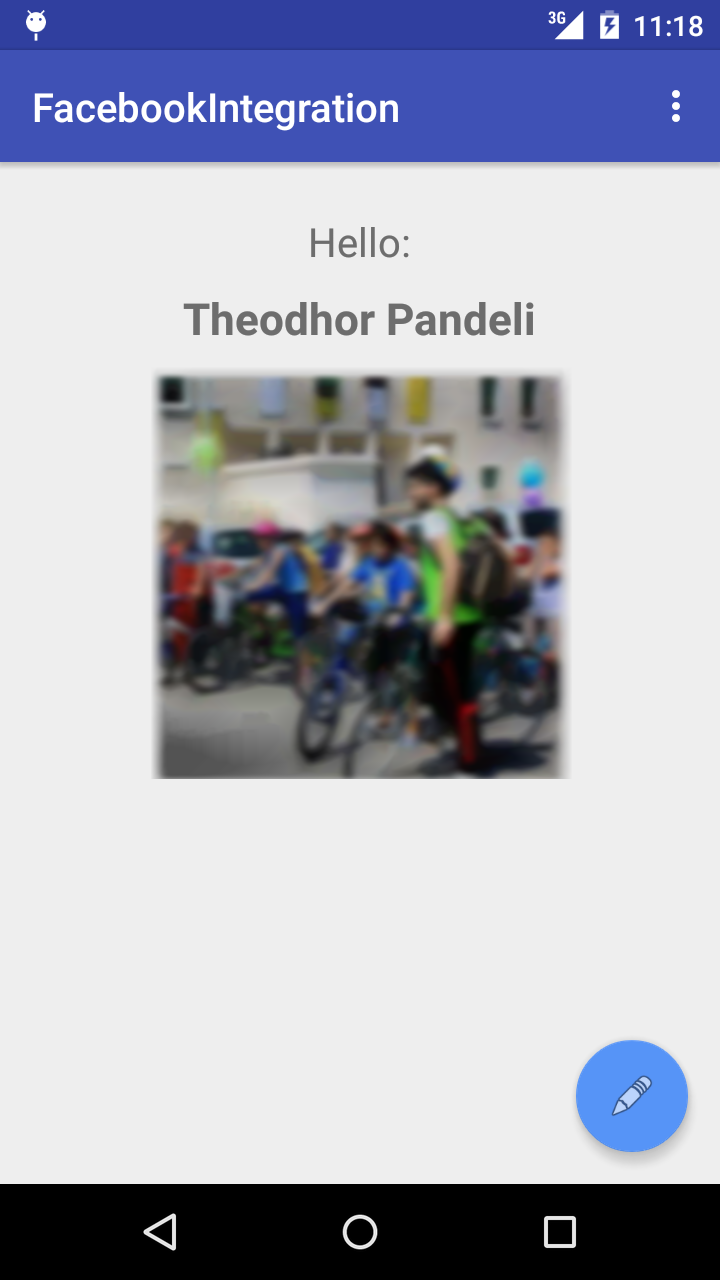
The nextActivity() function in the LoginActivity class passed some strings to our next activity. Now we use them by creating three other strings inside the onCreate() method of the MainActivity class and storing the passed data in them:
To display this data we need to change the content_main.xml layout. The code below adds the elements we need to display the data. Add this code inside the RelativeLayout tags:
To display the profile name add the code below to the onCreate() method of the MainActivity class:
Next, we want to display the profile picture. From the last activity, we have the picture Uri as a string. We can use this Uri to download the picture as a Bitmap file.
Create a new class, and add the code below:
To display the profile picture in our app, add the line below inside the onCreate() method of the MainActivity class, after the last line added.
It uses the imageUrl string, downloads the image and displays it inside the content_main.xml layout.
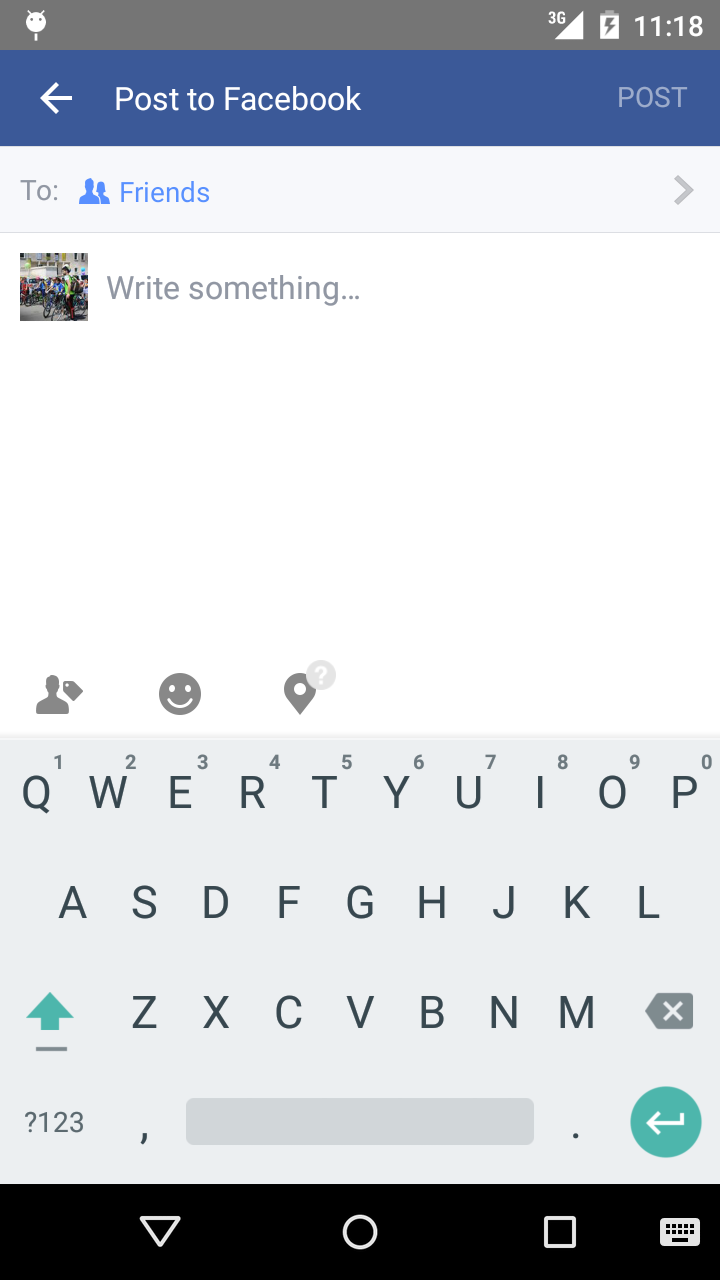
Now that displaying data is complete, we will add a share dialog to the floating action button so the app can post to Facebook.
Open activity_main.xml and change:
Change the button color by editing the color values in colors.xml. I used this color:
Next to make the button do something.
Declare a private ShareDialog variable in the MainActivity class:
Inside the onCreate() method create this dialog:
We want to show this dialog when we click the floating button. Replace the Snackbar code in the OnClick method with the code below:
Our app can now post to Facebook, but we are not finished yet, the Logout function is missing.
First the app needs to understand if it is logged in. Initialize the Facebook SDK as we did in LoginActivity by adding this line of code inside the onCreate() method:
Add the logout() function:
Now you can run your app and post to Facebook! Please let me know in the comments below if you have any problems or questions.
Источник
- Add the following to the dependencies <> section of your build.gradle (module: app) file to compile the latest version of the Facebook SDK for Android: