- How to Resolve App Crashes in Android Studio?
- Most Common Types of Error
- Solutions to fix App Crash
- 1. Observe the App Crash
- 2. Find the Stack Trace
- 3. Investigation Techniques
- Методы лечения различных ошибок в Android Studio при разработке проекта
- App Center Crashes (Android)
- Generate a test crash
- Get more information about a previous crash
- Did the app receive a low memory warning in the previous session?
- Did the app crash in the previous session?
- Details about the last crash
- Customize your usage of App Center Crashes
- Use your own CrashesListener
- Should the crash be processed?
- Ask for the user’s consent to send a crash log
- Get information about the sending status for a crash log
- The following callback will be invoked before the SDK sends a crash log
- The following callback will be invoked after the SDK sent a crash log successfully
- The following callback will be invoked if the SDK failed to send a crash log
- Add attachments to a crash report
- Enable or disable App Center Crashes at runtime
- Check if App Center Crashes is enabled
- Handled Errors
- Reporting NDK crashes
- Reporting crashes
- Building the breakpad library
- Attaching the exception handler
- Symbolication
How to Resolve App Crashes in Android Studio?
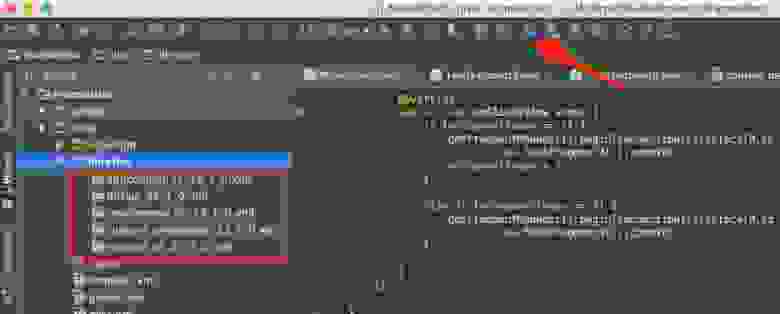
While developing applications in Android Studio we might encounter many errors while writing code in the editor. We know that there’s an error since the editor automatically detects in real-time and highlights it in red color like this
Well, in the above image we can see that the error occurs due to a closing bracket after orderLists in Line 58. We can say that because the editor detects that in real-time and warns us with red underlining at that line. Now we can write error-less code and our app should run, right? Well, NO. Because the editor only helps in detecting the syntax error in the code. Whereas we have many other kinds of errors that might cause our app not to work the way we want it to be. Runtime and Logical errors are the common ones and cannot be detected in the editor.
Now the question is – We have written 100’s and 1000’s lines of error less codes or I should syntax error free code that compiles and runs without any problem. But my app still stops working or some features don’t work the way I want it to?
In this situation, the Logcat acts as our best friend. Logcat Window is the place where various messages can be printed when an application runs. Suppose, you are running your application and the program crashes, unfortunately. Then, Logcat Window is going to help you to debug the output by collecting and viewing all the messages that your emulator throws. So, this is a very useful component for the app development because this Logcat dumps a lot of system messages and these messages are actually thrown by the emulator. In Android Studio one of the most used tools is Logcat. Logcat window in Android Studio is used to display real-time system messages and messages that are added in the Log class of the app. To open Logcat Click View > Tool Windows > Logcat (Alt + 6 or from the toolbar window).
Most Common Types of Error
- NullPointerException – When expecting from null variables, objects, or classes.
- IOException – Exceptions produced by failed or interrupted I/O operations.
- OutOfMemoryError – When an object cannot be allocated more memory by its garbage collector.
Solutions to fix App Crash
1. Observe the App Crash
Suppose you have built an application with multiple activities or fragments or both then you need to observe and see which action causes the application to crash. This might sometimes help you automatically remember or recall what mistake was made and which part of the app is causing that.
2. Find the Stack Trace
It is best to look at the logcat to find the exact point of error. You can open the logcat and in the error section start reading the log error messages. Scroll to the bottom of the screen and look for the line that says Caused by. You may find the file name and line number in the logcat messages, which will lead you directly to the cause of the error. Look for elements to resolve the error.
- File Name
- Line Number
- Exception Type
- Exception Message
3. Investigation Techniques
There are times when you might not find the exact line of code or file name that’s causing the error. So you should following techniques to investigate by yourself –
- Toast – Toast messages are used to display alerts messages and in this case, you can use them to display failure messages.
- Logging – Logging is used to print messages in the logcat.
- Breakpoints – It can be used to investigate values at the points where breaks are applied.
Источник
Методы лечения различных ошибок в Android Studio при разработке проекта
Сегодня хотел бы поделиться своим анализом и способами лечением разных ошибок при разработке своего продукта в Android Studio. Лично я, не раз сталкивался с различными проблемами и ошибками при компиляции и/или тестировании мобильного приложения. Данный процесс, всегда однообразный и в 99% случаев и всегда нужно тратить n-колличество времени на его устранение. Даже, когда ты уже сталкивался с данной проблемой, ты все равно идешь в поисковик и вспоминаешь, как же решить ту или иную ситуацию.
Я для себя завел файлик, в котором отметил самые частые ошибки — потратив на это несколько часов и перечислил самые популярные ошибки (в дальнейшем планирую просто их запомнить), чтоб сократить свое время в дальнейшем.
Итак, начну по порядку с самой распространенной проблемы и дальше буду перечислять их по мере появления:
1) Если подчеркивает красным код, где используются ресурсы: R. — попробовать (но вероятно не поможет): Build -> Clean Project.
В принципе на Build -> Clean Project можно не терять времени, а лучше всего — слева переключиться на Project, открыть каталог .idea, затем каталог libraries и из него удалить все содержимое. Затем нажать кнопку Sync Project. А затем (если все еще красное, но скорее всего уже будет все ок ) Build -> Clean Project.
2) После внезапного выключения компьютера, после перезапуска может быть во всех проектах весь код красным. Перед этим может быть ошибка: Unable to create Debug Bridge: Unable to start adb server: Unable to obtain result of ‘adb version’. Есть три решения — первое помогло, второе нет (но может быть для другого случая), а третье — не пробовал:
а) File — Invalidate Caches/Restart — Invalidate and Restart
б) Закрыть студию. В корне папки проекта удалить файл(ы) .iml и папку .idea. Вновь запустить студию и импортировать проект.
в) Нажать Ctrl-Alt-O и запустить оптимизацию импорта.
Кстати, adb сервер можно проверить на версию (и работоспособность) и затем перезапустить:
3) Если Android Studio выдает приблизительно такую ошибку: Error:Execution failed for task ‘:app:dexDebug’.
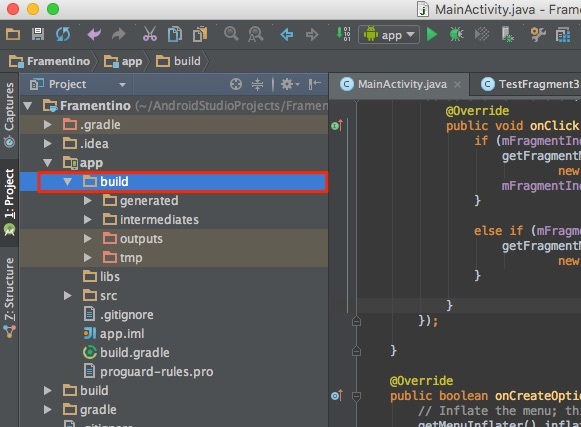
Надо слева переключиться на опцию Project, найти и удалить папку build которая лежит в папке app, т.е. по пути app/build. Затем перестроить весь проект заново: Build -> Rebuild Project.
Такое же решение если ошибка типа: «не могу удалить (создать) папку или файл» и указан путь, который в ведет в app/build. Тоже удаляем папку build и ребилдим проект.
4) В сообщении об ошибке упоминается heap — виртуальная память. А ошибка обычно вызвана ее нехваткой, т.е. невозможностью получить запрашиваемый объем. Поэтому этот запрашиваемый объем надо уменьшить, т.е. переписать дефолтное значение (обычно 2048 MB которое можно изменить в настройках), на меньшее 1024 MB.
В файле проекта gradle.properties пишем:

5) Android Studio пришет примерно такую ошибку: Plugin is too old, please update to a more recent version, or set ANDROID_DAILY_OVERRIDE environment variable to «83648b99316049d63656d7276cb19cc7e95d70a5»
Возможные причины (кроме необходимости регулярного обновления SDK):
а) Загруженный проект был скомпилирован с помощью уже несовместимого старого gradle плагина. В этом случае надо найти и подключить в своем build.gradle проекта этот более старый плагин. т.е. попробовать более старые версии, например: 1.1.3 (часто именно 1.1.x и подходит).
Найти все версии можно здесь.
б) Если в build.gradle проекта используется beta-версия плагина — это означает, что срок ее истек. Посмотреть последние релизы (продакшн и бета) можно также здесь:
6) Иногда при подключении сторонних библиотек могут дублироваться некоторые файлы (обычно связанные с лицензированием). В сообщении будет что-то содержащее слова: duplicate files. Решение — надо посмотреть в сообщении об ошибке или в документации подключенной сторонней библиотеки — какие именно файлы стали избыточными, и перечислить их в build.gradle модуля для исключения (exclude) из билда.
Это делается в директиве packagingOptions (которая, в свою очередь, находится в директиве android).
Источник
App Center Crashes (Android)
App Center Crashes will automatically generate a crash log every time your app crashes. The log is first written to the device’s storage and when the user starts the app again, the crash report will be sent to App Center. Collecting crashes works for both beta and live apps, i.e. those submitted to Google Play. Crash logs contain valuable information for you to help fix the crash.
Follow the Getting Started section if you haven’t set up the SDK in your application yet.
Generate a test crash
App Center Crashes provides you with an API to generate a test crash for easy testing of the SDK. This API can only be used in debug builds and won’t do anything in release builds.
Get more information about a previous crash
App Center Crashes has two APIs that give you more information in case your app has crashed.
Did the app receive a low memory warning in the previous session?
At any time after starting the SDK, you can check if the app received a memory warning in the previous session:
This API is asynchronous, you can read more about that in our App Center Asynchronous APIs guide.
This method must only be used after Crashes has been started, it will always return false before start.
In some cases, a device with low memory can’t send events.
Did the app crash in the previous session?
At any time after starting the SDK, you can check if the app crashed in the previous launch:
This API is asynchronous, you can read more about that in our App Center Asynchronous APIs guide.
This comes in handy in case you want to adjust the behavior or UI of your app after a crash has occurred. Some developers chose to show additional UI to apologize to their users, or want way to get in touch after a crash has occurred.
This method must only be used after Crashes has been started, it will always return false before start.
Details about the last crash
If your app crashed previously, you can get details about the last crash.
This API is asynchronous, you can read more about that in our App Center Asynchronous APIs guide.
There are numerous use cases for this API, the most common one is people who call this API and implement their custom CrashesListener.
This method must only be used after Crashes has been started, it will always return null before start.
Customize your usage of App Center Crashes
App Center Crashes provides callbacks for developers to perform additional actions before and when sending crash logs to App Center.
To handle the callbacks, either implement all methods in the CrashesListener interface, or override the AbstractCrashesListener class and pick only the ones you’re interested in.
Use your own CrashesListener
Create your own CrashesListener and assign it like this:
In case you’re only interested in customizing some of the callbacks, use the AbstractCrashesListener instead:
Set the listener before calling AppCenter.start() , since App Center starts processing crashes immediately after the start.
Should the crash be processed?
Implement this callback if you want to decide if a particular crash needs to be processed or not. For example, there could be a system level crash that you’d want to ignore and that you don’t want to send to App Center.
Ask for the user’s consent to send a crash log
If user privacy is important to you, you might want to get user confirmation before sending a crash report to App Center. The SDK exposes a callback that tells App Center Crashes to await user confirmation before sending any crash reports.
If you chose to do so, you’re responsible for obtaining the user’s confirmation, e.g. through a dialog prompt with one of the following options: Always Send, Send, and Don’t send. Based on the input, you’ll tell App Center Crashes what to do and the crash will then be handled accordingly.
The SDK doesn’t display a dialog for this, the app must provide its own UI to ask for user consent.
The following callback shows how to tell the SDK to wait for user confirmation before sending crashes:
If you return true , your app must obtain (using your own code) the user’s permission and message the SDK with the result using the following API:
As an example you can refer to our custom dialog example.
Get information about the sending status for a crash log
At times, you want to know the status of your app crash. A common use case is that you might want to show UI that tells the users that your app is submitting a crash report, or, in case your app is crashing quickly after the launch, you want to adjust the behavior of the app to make sure the crash logs can be submitted. App Center Crashes has three different callbacks that you can use in your app to be notified of what’s going on:
The following callback will be invoked before the SDK sends a crash log
In case we have network issues or an outage on the endpoint, and you restart the app, onBeforeSending is triggered again after process restart.
The following callback will be invoked after the SDK sent a crash log successfully
The following callback will be invoked if the SDK failed to send a crash log
Receiving onSendingFailed means a non-recoverable error such as a 4xx code occurred. For example, 401 means the appSecret is wrong.
This callback isn’t triggered if it’s a network issue. In this case, the SDK keeps retrying (and also pauses retries while the network connection is down).
Add attachments to a crash report
You can add binary and text attachments to a crash report. The SDK will send them along with the crash so that you can see them in App Center portal. The following callback will be invoked right before sending the stored crash from previous application launches. It won’t be invoked when the crash happens. Be sure the attachment file isn’t named minidump.dmp as that name is reserved for minidump files. Here’s an example of how to attach text and an image to a crash:
The size limit is currently 7 MB. Attempting to send a larger attachment will trigger an error.
Enable or disable App Center Crashes at runtime
You can enable and disable App Center Crashes at runtime. If you disable it, the SDK won’t do any crash reporting for the app.
To enable App Center Crashes again, use the same API but pass true as a parameter.
The state is persisted in the device’s storage across application launches.
This API is asynchronous, you can read more about that in our App Center Asynchronous APIs guide.
This method must only be used after Crashes has been started.
Check if App Center Crashes is enabled
You can also check if App Center Crashes is enabled or not:
This API is asynchronous, you can read more about that in our App Center Asynchronous APIs guide.
This method must only be used after Crashes has been started, it will always return false before start.
Handled Errors
App Center also allows you to track errors by using handled exceptions. To do so, use the trackError method:
An app can optionally attach properties to a handled error report to provide further context. Pass the properties as a map of key/value pairs (strings only) as shown in the example below.
You can also optionally add binary and text attachments to a handled error report. Pass the attachments as an Iterable as shown in the example below.
Reporting NDK crashes
Reporting crashes
To receive proper crash reports in App Center, first make sure you have the App Center Crashes SDK set up by following the instructions listed above.
Building the breakpad library
Next, include and compile Google Breakpad by following the instructions listed in the official Google Breakpad for Android README.
The App Center SDK doesn’t bundle Google Breakpad by default.
Attaching the exception handler
Once you have Google Breakpad included, attach the NDK Crash Handler after AppCenter.start :
The method setupNativeCrashesListener is a native method that you must implement in C/C++:
Where dumpCallback is used for troubleshooting:
Once these methods are properly set up, the app sends the minidump to App Center automatically upon restart. To troubleshoot, you can use verbose logs ( AppCenter.setLogLevel(Log.VERBOSE) before AppCenter.start ) to check if minidumps are sent after the app is restarted.
App Center uses the reserved name minidump.dmp for minidump attachments. Make sure to give your attachment a different name unless it’s a minidump file so we can handle it properly.
There’s a known bug in breakpad which makes it impossible to capture crashes on x86 emulators.
Symbolication
See the Diagnostics documentation for more information regarding the processing of crashes.
Источник


