- Авторизация через Google в Android и проверка токена на сервере
- Небольшая подготовка
- Добавляем действие на кнопку
- Необходимые области доступа
- Регистрация нашего приложения.
- Код получения токена
- Проверяем токен на сервере. (PHP)
- Android Simple Registration and Login Application Tutorial with Source Code
- Operating System
- Getting Started:
- Layout Design
- Android Manifest File
- Creating The Database
- Creating the Registration
- Creating the Login
- DEMO
- How to Create User Interface Login & Register with Android Studio
- Adjustment of several layouts :
- Connect fragments with viewpager
- Android Login and Register with SQLite Database Tutorial
- What is SQLite?
- Let’s Get it Working
- Step 1) Update build.gradle file.
- Step 2) Update strings.xml.
- Step 3) Update colors.xml.
- Step 4) Update styles.xml.
- Step 5) Add Logo Image.
- Step 6) Create a User model class.
- Step 7) Create a DatabaseHelper class.
- Step 8) Create activity_login.xml.
- Step 8) Create InputValidation class.
- Step 9) Create a LoginActivity class.
- Step 10) Create activity_register.xml.
- Step 11) Create RegisterActivity class.
- Step 12) Create activity_users_list.xml.
- Step 13) Writing the Adapter Class.
- Step 14) Create UsersListActivity class.
- Step 15) Update AndroidManifest.xml.
- To learn this tutorial using KOTLIN Language Click here.
Авторизация через Google в Android и проверка токена на сервере
Недавно мне захотелось создать личный проект на андроиде, и основной вопрос был такой: как однозначно идентифицировать пользователя заставляя его делать как можно меньше телодвижений? Конечно же это аккаунт Google. Я пытался пробовать множество примеров в сети — однако API несколько раз обновилось за время своего существования, многие методы не работали, мои вопросы в Google+ по этому поводу либо были вообще никак не восприняты окружением, либо были вроде «Никогда такое не делал».
В этой статье я постараюсь как можно более просто для новичков (вроде меня) описать мой метод авторизации в Google на андроид, получения токена и проверке этого самого токена на сервере.
Небольшая подготовка
Для начала — у вас должны быть установлены Google Play Services в SDK. После их установки можно будет импортировать все необходимые библиотеки. Статья пишется с расчетом на Android Studio — он сам подсказывает, что необходимо импортировать.
У вас должно быть создано активити с кнопкой.
Чтобы было привычнее пользователю можете создать стандартную кнопку Google+ Sing-In
Выглядеть она будет вот так: 
Просто добавьте в ваш Layout:
Добавляем действие на кнопку
Пишем в нашем активити:
Собственно присвоим кнопке действие — вызов интенда выбора аккаунта. Если вы работаете в Android Studio он сам вам подскажет, какие библиотеки нужно импортировать, так что это подробно тут я расписывать не буду.
startActivityForResult(intent, 123); — задает код с которым произойдет возврат. 123 это код возврата, он может быть каким угодно. Это необходимо, когда вы делаете несколько интендов, и вам надо обработать их по разному.
Необходимые области доступа
Обьявите эти переменные в классе. Это необходимые нам области доступа. Первый написано в google: «Позволяет определить аутентифицированного пользователя. Для этого при вызове API необходимо указать me вместо идентификатора пользователя Google+. » Второе разрешение нам необходимо для получения личных данных пользователя (Имя, Фамилия, адрес G+ страницы, аватар), и последнее для получения E-mail. Я посчитал это важным, ведь это вполне неизменный идентификатор для записи в бд.
Регистрация нашего приложения.
Изначально забыл этот пункт — исправляюсь.
Нам необходимо зайти на code.google.com/apis/console создать там проект, зайти в Credentials и создать новый Client ID для OAuth выбрав пункт Installed Application -> Android. Там нам необходимо ввести название нашего пакета и SHA1 сумму нашего ключа.
С этим у меня на самом деле было много проблем решил достаточно костыльным способом.
Нашел debug.keystore в %USERPROFILE%\.android\debug.keystore поместил в папку с проектом и прописал в build.grandle:
После чего нам нужно выполнить команду:
keytool -exportcert -alias androiddebugkey -keystore
/.android/debug.keystore -v -list
Сам keytool можно найти в SDK. Из вывода копируем SHA1 в нужное поле.
Как я понимаю метод временный, и для нормальной работы надо создать нормальный ключ. Но для тестирования этого достаточно.
Код получения токена
Где 123 — ваш код, который вы указали ранее, где AcrivityName — название вашего актитивити. Грубо говоря — мы скармливаем функции получения токена необходимые разрешения и имя аккаунта. И заметьте — это все происходит в фоновом режиме, после чего полученный токен передается в написанную мною функцию reg. Она уже отправляет токен и все необходимые данные на сервер.
Так как разрабатываю недавно, с исключениями пока что беда, если есть предложение — напишите в личку или в комментарии.
Проверяем токен на сервере. (PHP)
Хочу обратить внимание, полученный нами токен имеет тип Online. И действует он лишь 10 минут. Для получения offline токена (чтобы дольше работать с ним с сервера) обратитесь к этой инструкции developers.google.com/accounts/docs/CrossClientAuth
Собственно скармливаем токен в googleapis и забираем полученный JSON ответ.
Источник
Android Simple Registration and Login Application Tutorial with Source Code
Operating System

In this tutorial, we will try to create a Simple Registration and Login Application using Android. This simple application can be used in any system that needed a login verification. Android is a mobile operating system developed by Google. It used in several gadgets like smartphones, tablets, and even television. Android is open source to developers who has an interest in developing mobile apps. It also provides an adaptive framework that allows the developer to develop an app in a simpler way. So let’s now do the coding.
Getting Started:
First, you will have to download & install the Android Development IDE (Android Studio or Eclipse). Android Studio is an open source development feel free to develop your things.
Layout Design
We will now create the design for the application, first locate the layout file called activity_main.xml, this is the default name when create a new activity. Then write these codes inside your layout file.
Android Manifest File
The Android Manifest file provides essential information about your app to the Android system in which the system must required before running the code. It describe the overall information about the application. It contains some libraries that needed to access the several method within the app.
Creating The Database
This code contain the script for creating a database and a database connection. To create this first create a new java file called DatabaseHelper, open the newly created file then extend the class by adding SQLiteOpenHelper. After that write these block of codes inside the DatabaseHelper class.
Creating the Registration
This code contains the register function of the application. This will insert the data to the database by calling the DatabaseHelper when the button is clicked. To do that just write these block of codes inside the MainActivity class.
Creating the Login
This code contains the login function for the application. This code will read the entry field data then check the data if it exist in the DatabaseHelper class. To do that simply write these block of codes inside the Login class.
Try to run the app and see if it worked.
DEMO
There you have it we have created a Simple Registration and Login Application using Android. I hope that this tutorial help you to what you are looking for. For more updates and tutorials just kindly visit this site.
Enjoy Coding.
Note: Due to the size or complexity of this submission, the author has submitted it as a .zip file to shorten your download time. After downloading it, you will need a program like Winzip to decompress it.
Virus note: All files are scanned once-a-day by SourceCodester.com for viruses, but new viruses come out every day, so no prevention program can catch 100% of them.
FOR YOUR OWN SAFETY, PLEASE:
1. Re-scan downloaded files using your personal virus checker before using it.
2. NEVER, EVER run compiled files (.exe’s, .ocx’s, .dll’s etc.)—only run source code.
Источник
How to Create User Interface Login & Register with Android Studio
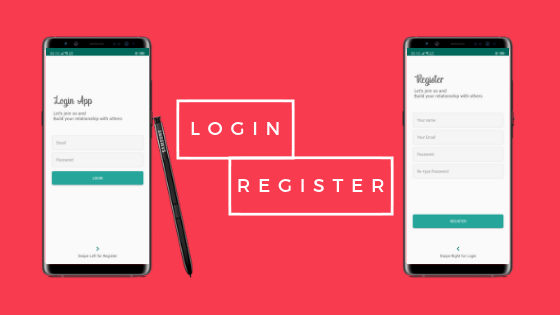
ok, this is my first article in Medium. In this section, I want to share with you about the User Interface on Android and we will create a Login page and a Register page. Some components that I will use:
1. Viewpager
2. Fragment
3. Edittext
4. Button
5. Textview
6. Imageview
What about the results? let’s coding (follow step by step)
- Of course we must already have an Android Studio. if not, you can download it first on the official Android Studio website. If you already have one, please open your Android studio.
2. We create a new project by clicking “Start a new Android Studio project”. Fill in the application name column with “LoginApp”, then click next.

3. Select the minimum SDK you need or want, then click next.


4. Select “Empty Activity” and click next. After that, the “Activity Name” and “Layout Name” columns will appear, in this section just leave it like that, then click finish.

After you click finish, Android Studio will make you an Application with the name “LoginApp”.
After the application is successfully built, you can simply make adjustments to the following sections:
Open the colors.xml file in app/res/values/colors.xml, and change it like this:
Create a folder with the name “font” in the res folder, by right clicking on the res directory, select new / directory and name it “font”. After that, copy this font into font directory. (download the font 1 and font 2).
Create some Drawable Resource File in the drawable directory, by right-clicking on the drawable directory, select new / Drawable Resource File.
After that open file styles.xml and change like this :
Add the theme property in the Main Activity in the manifest, in the app / manifests / AndroidManifest.xml folder
So the AndroidManifest.xml file will be as follows:
After all the steps above are done, then make 2 fragments with the name fragment_login and fragment_register in the layout directory, by right-clicking on the layout directory, New/Fragment/Fragment (Blank)

Uncheck:
include fragment factory methods? and include interface methods?

Adjustment of several layouts :
change the activity_main.xml layout, fragment_login.xml and fragment_register.xml so that it will be as below
Open the strings.xml file in the res / values / strings.xml directory and change it to something like the following :
So that the overall structure of the project will be as follows :

Connect fragments with viewpager
Create an inner class in the MainActivity.java class with the name AuthenticationPapterAdapter. This class is a derivative of the FragmentPagerAdapter class and serves to connect Fragments with ViewPager,
Then call the class in the onCreate() method in MainActivity.java and connect with viewpager
So the MainActivity.java class will be like this
The display of the final application will be like this
Источник
Android Login and Register with SQLite Database Tutorial
In software applications, it is mostly required to store users and app data locally. Android SDK provides several APIs for developers to save user and app data, So SQLite is one of the ways of storing data. For many applications, SQLite is the backbone of the app whether it’s used directly or via some third-party wrapper. In this tutorial, we will see how to use SQLite in our app directly.
What is SQLite?
SQLite is a lightweight database that comes with android. It is an Open-Source embedded SQL database engine. This provides a relational database management structure for storing user-defined records in the form of tables.
Key point to understand regarding SQLite :-
– SQLite is a RDBMS (Relational Database Management System)
– SQLite is written in C programming language
– SQLite is embedded within the Android operating system, so you don’t need anything external on Android to use SQLite
– To manipulate data (insert, update, delete) in SQLite database – we’ll use SQL (Structured Query Language)
Let’s Get it Working
In this tutorial we are going to learn how to use SQLite. To really understand the usage of SQLite we will create an app . The App contains simple Login form, Registration form and listing of registered user. This app shows how SQLite database operations are performed. I assume that you have created a new android project. Source Code is available on GitHub.


Step 1) Update build.gradle file.
Before you can use Material Design in your projects you need to add the following compile line to your Gradle dependencies block in your build.gradle file and rebuilt the project .
Step 2) Update strings.xml.
Add the below string values to the string.xml located in res => values => strings.xml.
Step 3) Update colors.xml.
Add the below color values to the colors.xml located in res => values => colors.xml.
Step 4) Update styles.xml.
Add the below style values to the styles.xml located in res => values => styles.xml.
Step 5) Add Logo Image.
Download the below logo image and add it to the drawable folder located in res => drawable.
Android Tutorials Hub Logo
Step 6) Create a User model class.
Create a new package named modal and create a User class with all getter and setter methods to maintain single contact as an object.
Step 7) Create a DatabaseHelper class.
Create a new package named SQL and create a DatabaseHelper class. Extend this class with SQLiteOpenHelper to manage database creation and version management. I have also written some methods to manipulate data in the database.
Methods and functionality
– addUser :- add a user to the database.
– getAllUser :- fetch users data from the database.
– updateUser :- update the user in the database on the basis of the user id.
– deleteUser :- delete user from the database on the basis of the user id.
– checkUser :- check whether the user exists in the database.
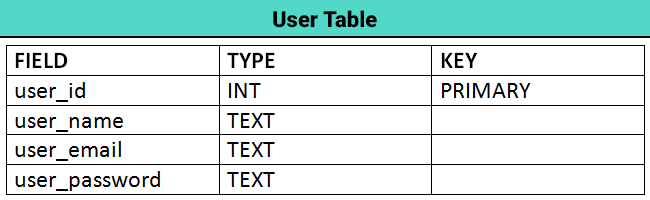
User Table Schema
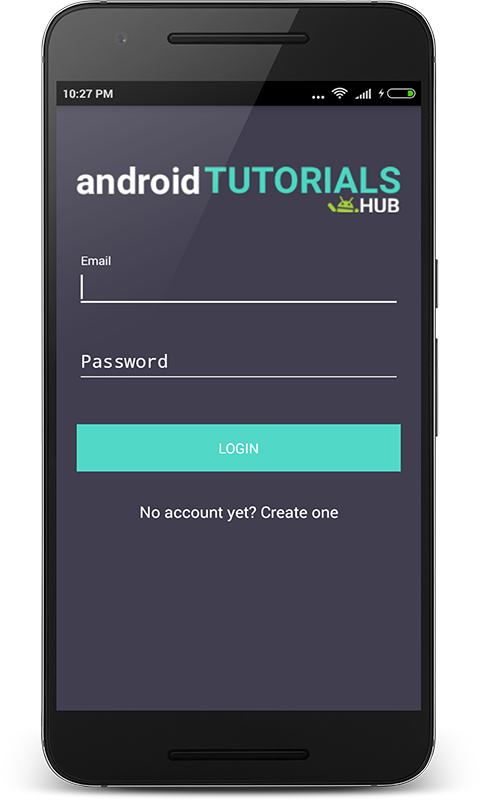
Step 8) Create activity_login.xml.
Now create a layout file for the LoginActivity.java i.e activity_login.xml and add the below code in your layout file. The code will create a simple login form containing logo on the top, 2 input fields email and password, login button, and registration screen navigation link.
activity_login.xml would result in a screen like this:
Step 8) Create InputValidation class.
Create a package named helpers and create a class in it named InputValidation.java and add below code in it. The code will create validation methods for the input field. Validation like empty input, valid email and etc.
Step 9) Create a LoginActivity class.
Now create a package named activities and create a class named LoginActivity and add below code. Here i have written the code to validate the input fields Email and Password using the InputValidation class which I described above. Also, code for navigation to registration screen on the click of registration link and to user list screen after clicking on the login button if credentials are valid.
The Screen below shows the login form with input validation display the error message if values entered in input fields are not valid.
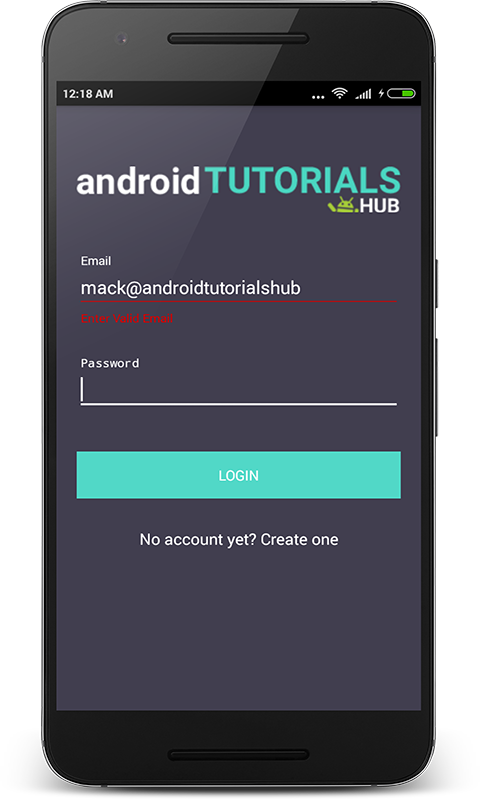
Login Screen with Input Validation
The Screen below shows the login form with input validation display the snack bar with a message if values entered in input fields are not validated from the SQLite database.
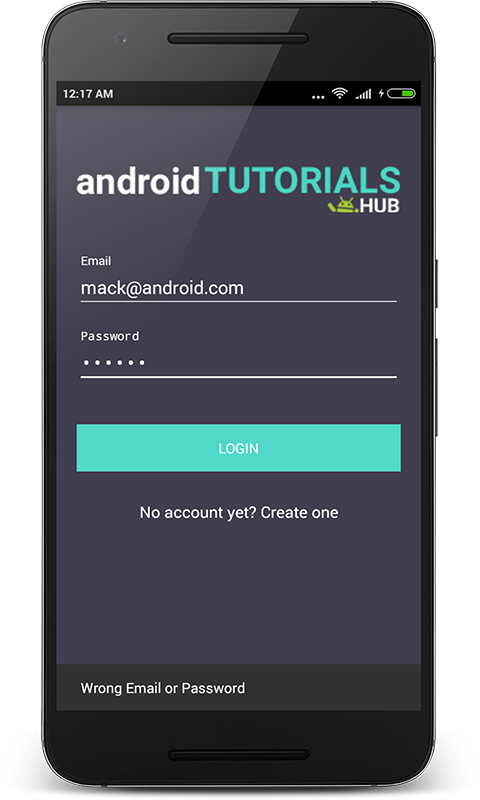
Login Screen With SQLite Validation
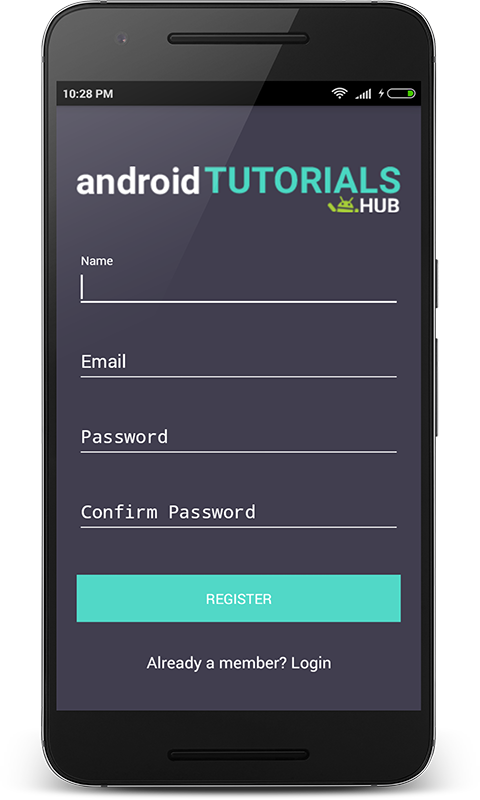
Step 10) Create activity_register.xml.
Now create a layout file for the RegisterActivity.java i.e activity_register.xml and add the below code in your layout file. The code will create a simple registration form containing a logo on the top, 4 input fields name, email, password, and confirm password, register button, and login screen navigation link.
activity_register.xml would result in a screen like this:
Step 11) Create RegisterActivity class.
Now create a package named activities and create a class named RegisterActivity and add below code. Here I have written the code to validate the input fields Name, Email, Password, and Confirm Password using the InputValidation class which I described above. Also, code for navigation to the login screen on the click of login link and shows snackbar with success message for registration.
The Screen below shows the registration form with input validation display the error message if values entered in input fields are not valid.
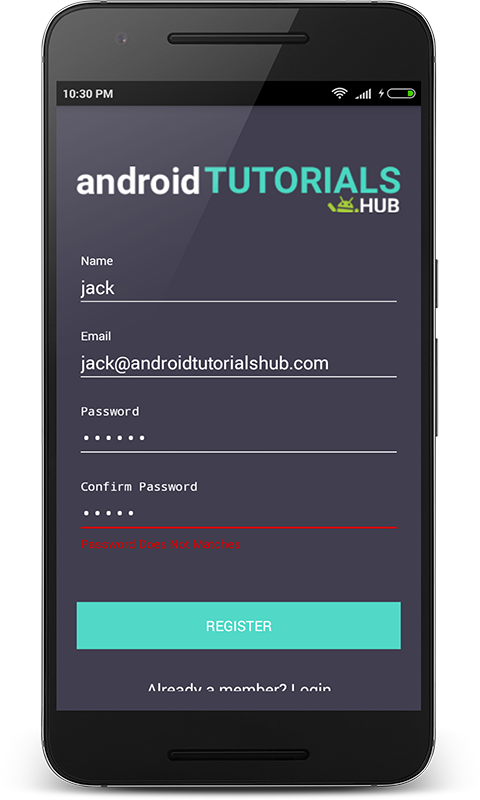
Register Screen with Input Validation
The Screen below shows the filled registration form with valid values.
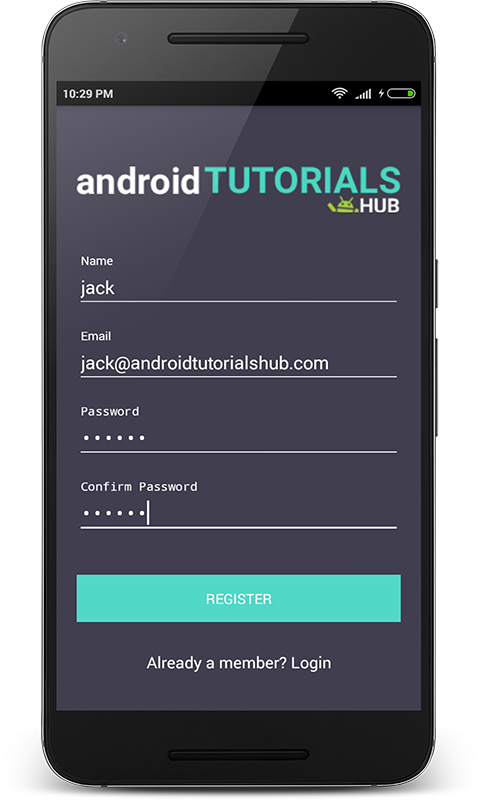
Register Screen with filled input fields
The Screen below shows the register form display the snackbar with the registration success message.
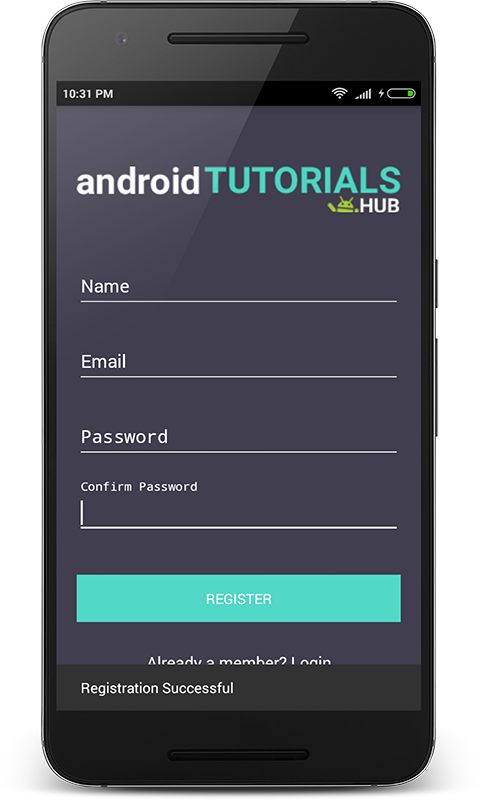
Register Screen with Registration Success Message
Step 12) Create activity_users_list.xml.
Now create a layout file for the UsersListActivity.java i.e activity_users_list.xml and add the below code in your layout file. The code will create a simple view containing two views one view i.e LinearLayout shows the welcome message with email id of the logged in user and another view i.e RecyclerView shows the list of registered users in the app.
activity_users_list.xml would result in a screen like this:
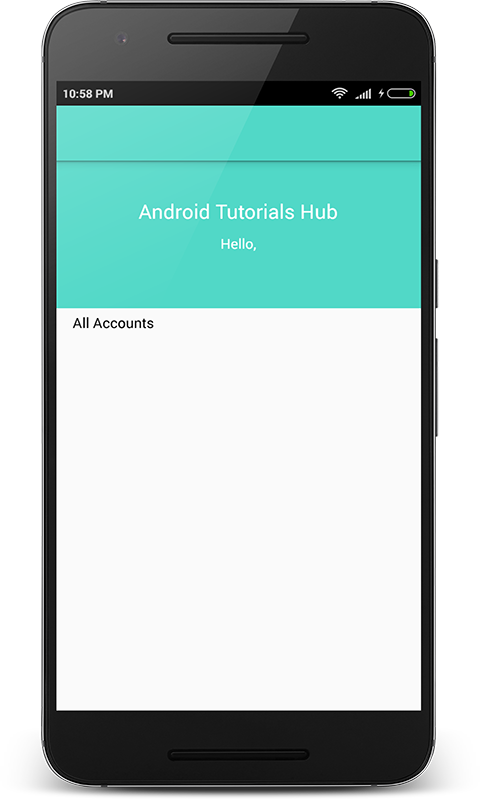
User List Screen
Step 13) Writing the Adapter Class.
Now create a package named adapters and create a class named UsersRecyclerAdapter and add below code. Here onCreateViewHolder() method inflates item_user_recycler.xml. In onBindViewHolder() method the appropriate User data (name, email, and password) set to each row.
item_user_recycler.xml
Step 14) Create UsersListActivity class.
Now create a package named activities and create a class named UsersListActivity and add below code. Here i have written the code to show the email id of the logged in user and the list of registered users.
The Screen below after user login shows the brand name, email id of logged in user, and registered users list.
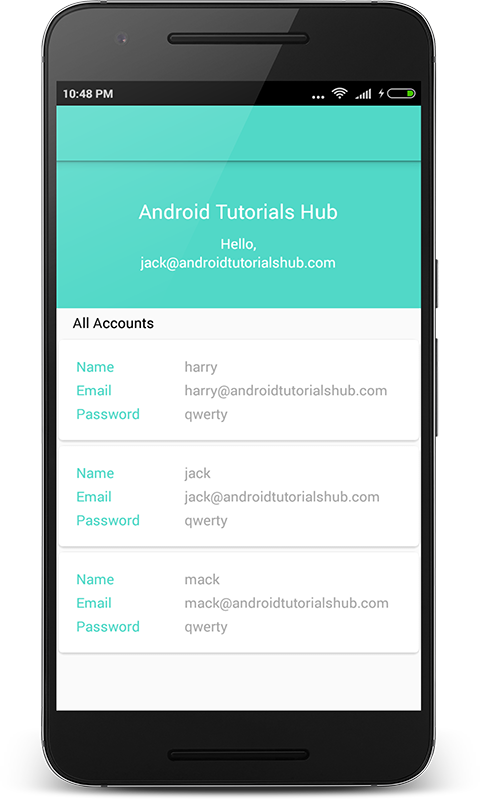
User List Screen After Login
Step 15) Update AndroidManifest.xml.
To learn this tutorial using KOTLIN Language Click here.
Please feel free to comment as well as ask questions. And, yeah! If this post helps you please do share!
Enjoy Coding and Share Knowledge
Источник


