- Use Apple Pencil with your iPad
- Before you begin
- Draw with Apple Pencil
- Write with Apple Pencil
- Write in any text field with Scribble
- Convert your handwritten notes to text
- Use handwritten phone numbers, dates, addresses, and more
- Draw perfect shapes
- Double-tap Apple Pencil (2nd generation)
- Annotate Your PowerPoint With Apple Pencil
- Apple Pencil
- Find the right Apple Pencil for your iPad.
- Apple Pencil 2nd generation
- Apple Pencil 2nd generation features
- Compatible with
- Magically pair. Wirelessly charge.
- Apple Pencil 1st generation
- Apple Pencil 1st generation features
- Compatible with
- Accessories that let you make iPad your own.
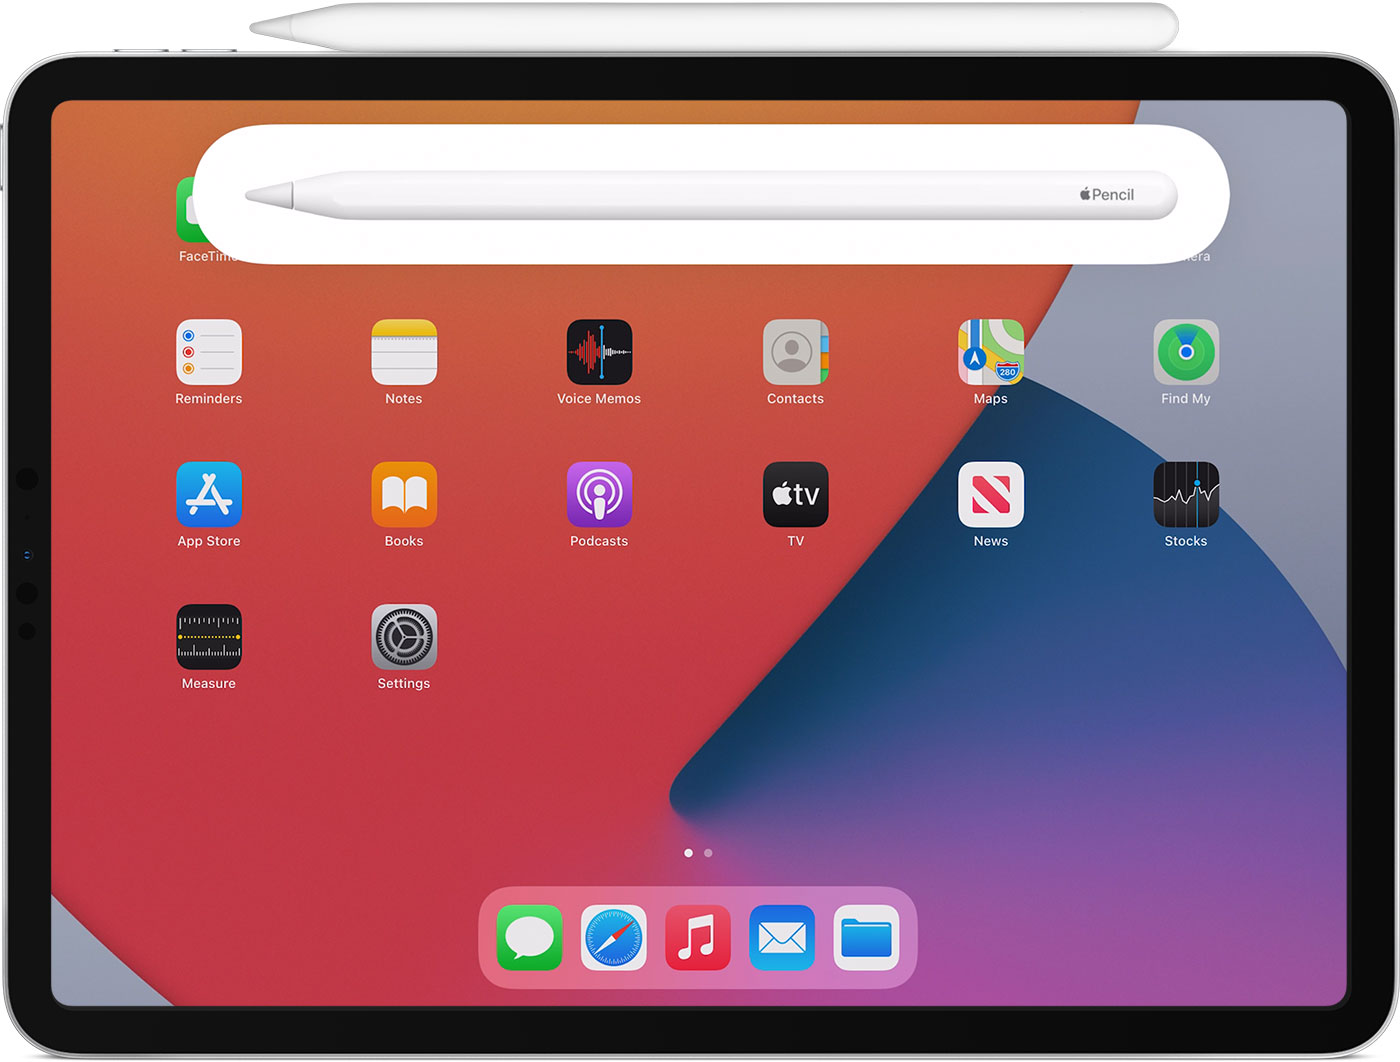
- Connect Apple Pencil with your iPad
- Before you begin
- Pair your Apple Pencil (2nd generation) with your iPad
- Pair your Apple Pencil (1st generation) with your iPad
- Использование Apple Pencil с приложением Pages на iPad
- Изменение режима использования Apple Pencil в Pages по умолчанию
- Преобразование рукописного текста в печатный
Use Apple Pencil with your iPad
You can use Apple Pencil to write, mark up, and draw.
Before you begin
- Make sure that your Apple Pencil is compatible with your iPad.
- If needed, charge your Apple Pencil.
- Pair your Apple Pencil before you try to use it.
Draw with Apple Pencil
Open an app, like the Notes app. With iPadOS, move the tool palette around the screen or minimize it so you have more space to draw and sketch. The tool palette has different tools, depending on the app you’re using. Use the ruler tool to create straight lines, then rotate them with your fingers. Made a mistake? You can erase by object or even by pixel.
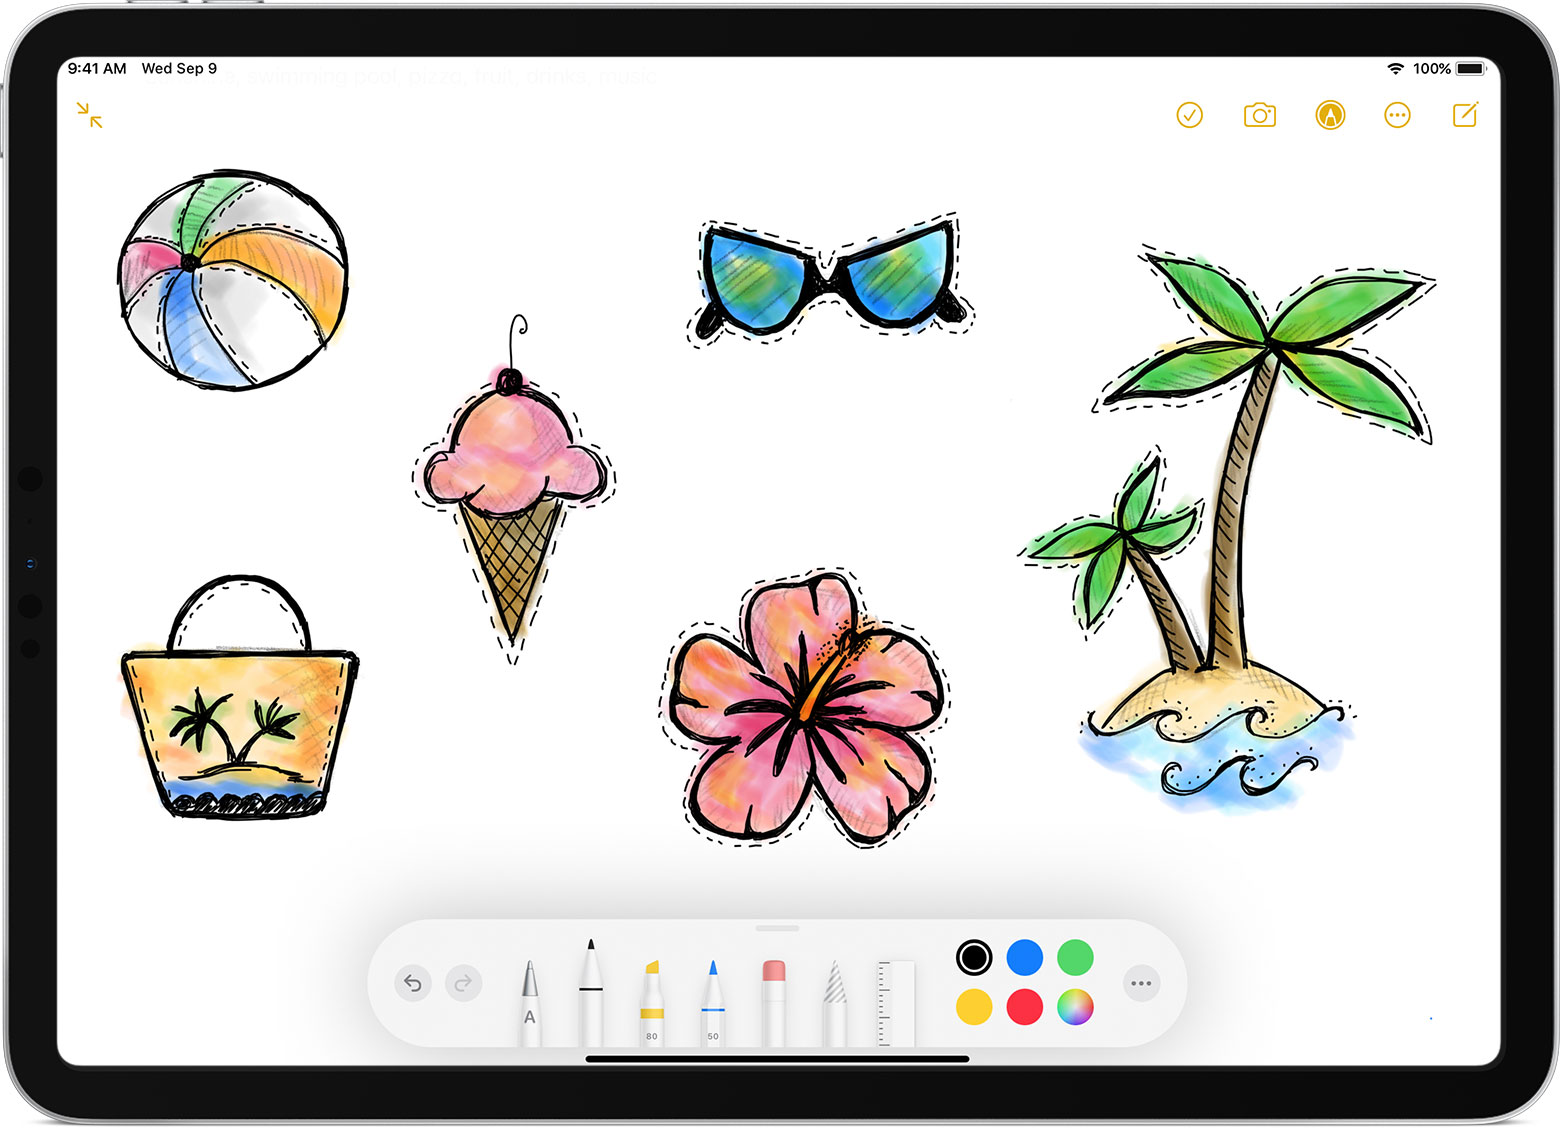
To draw in the Notes app:
- Open Notes.
- Tap to start a new note.
- Start drawing with your Apple Pencil.
You can also start by tapping to open the tool palette. Choose from several drawing tools and colors, and switch to the eraser if you make a mistake. Double-tap the eraser to view erasing options on your iPad. When you draw, you can tilt your Apple Pencil to shade a line and press more firmly to darken the line. You can drag the tool palette to a different edge of the screen. Tap to auto-minimize the tool palette and see more options.
Drawing near the edge of the screen with your Apple Pencil won’t activate Control Center, Notification Center, or Multitasking. You can draw anywhere on the screen without getting interrupted.

Write with Apple Pencil
You can write a note with your Apple Pencil in Notes and other apps. With iOS 14, you can write with your Apple Pencil in any text field.* You can convert your handwriting to text. And you can use a handwritten phone number, date, or address as if you had typed it.
Write in any text field with Scribble
You can use your iPad and Apple Pencil to write by hand in any text field, like the search field in Safari or a text field in Mail.* All handwriting and conversion to text happens on your iPad, keeping your writing private and secure.
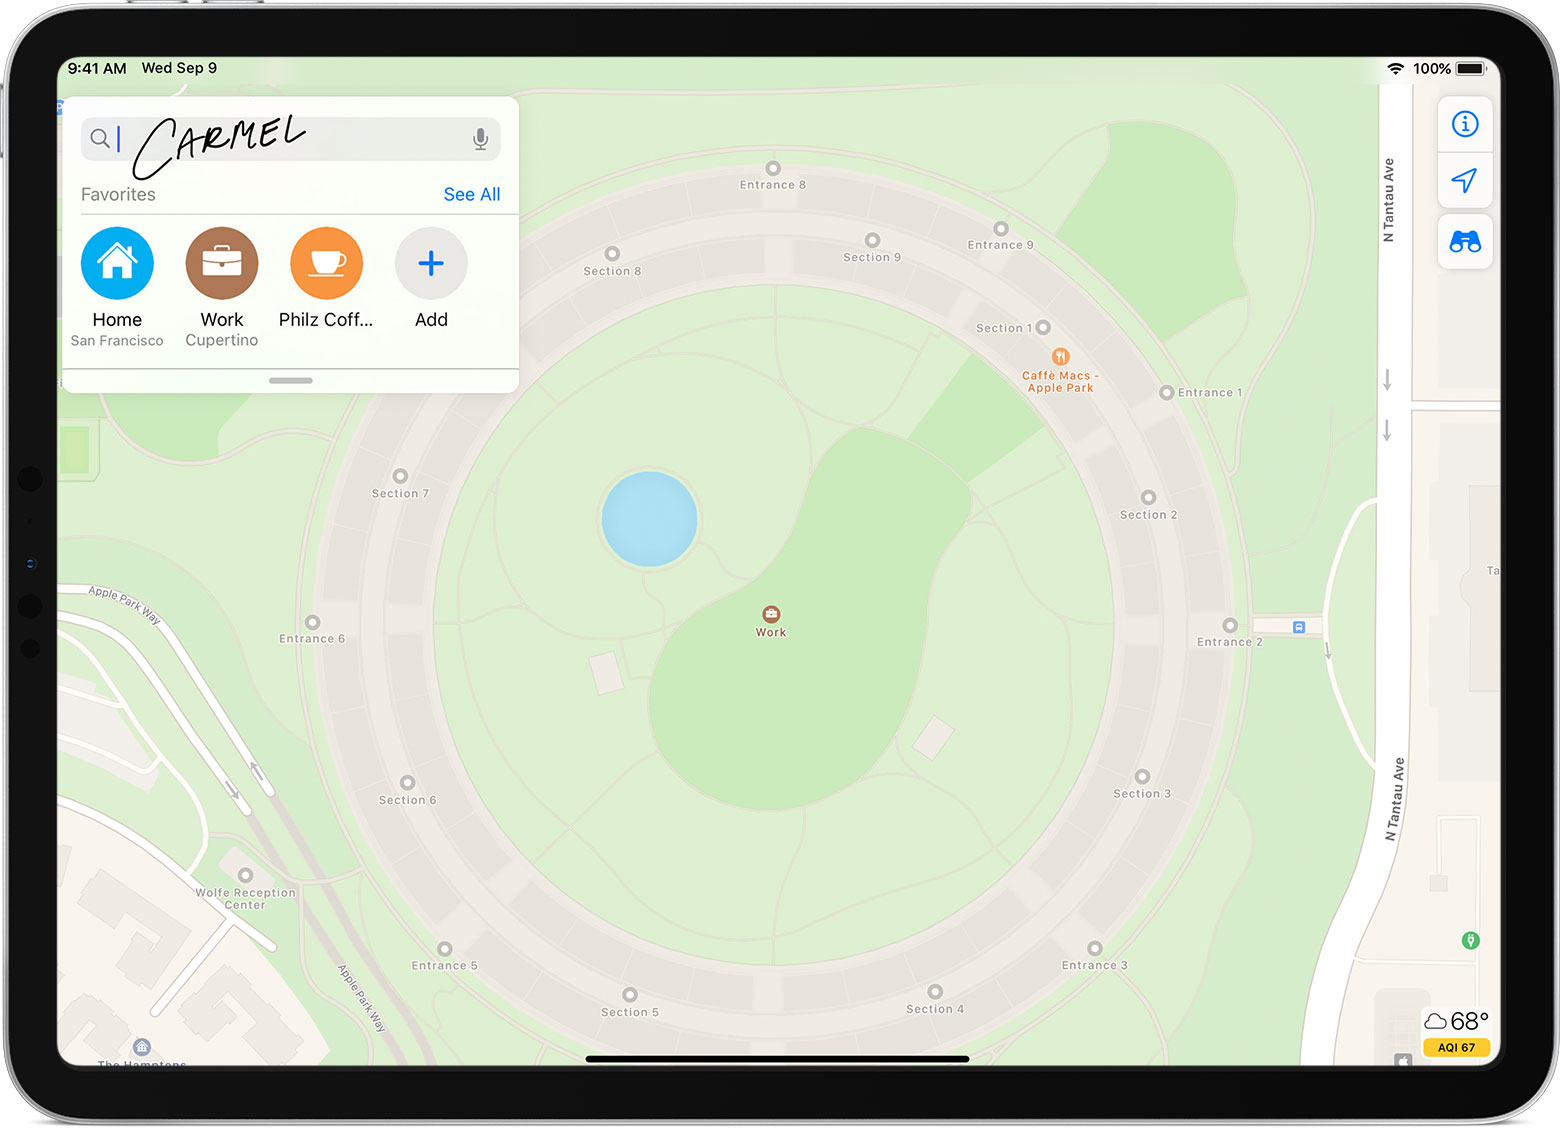
You can learn how to delete, select, insert, and join words using Scribble by going to Settings > Apple Pencil and tapping Try Scribble.
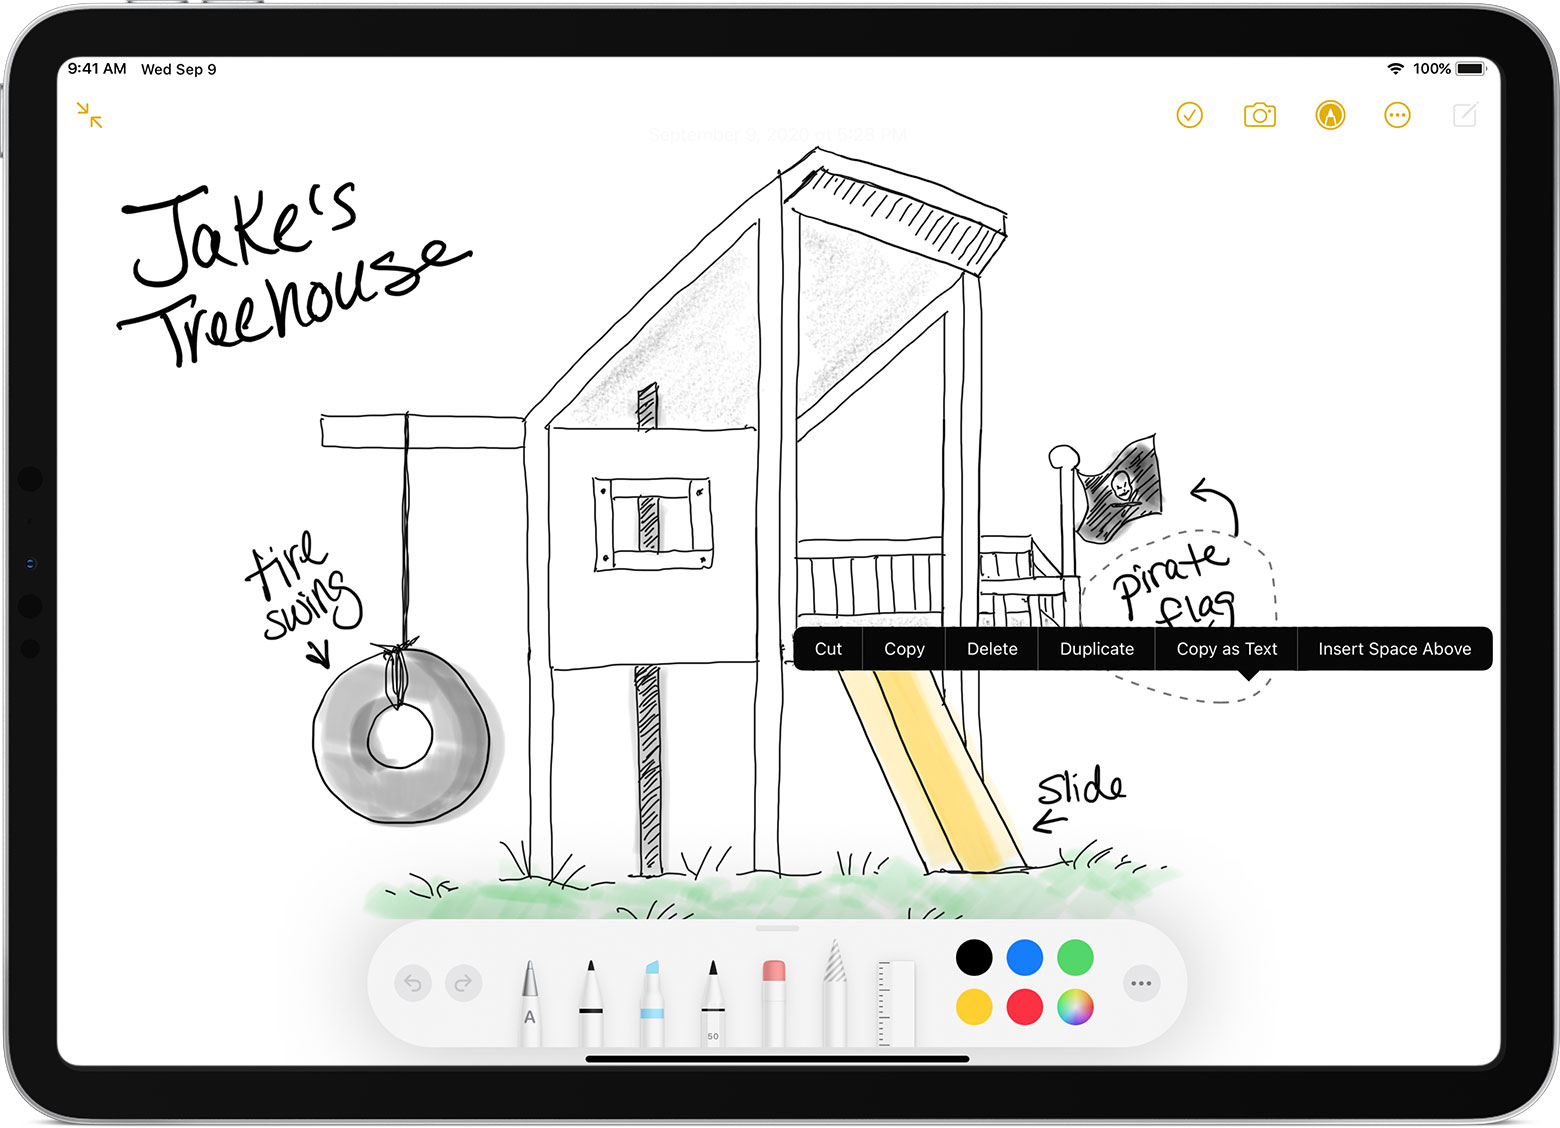
Convert your handwritten notes to text
You can convert your handwriting* in two ways:
- You can write with the pen farthest from the ruler, which has an «A» on it. Your handwriting will convert automatically to text as you write.
- If you already have some handwritten notes, you can select the notes and convert them to text:
- Double-tap or touch and hold a word you want to select. Select more words by sweeping your finger over them. You can triple-tap to select an entire line of words.
- Tap the selected words.
- In the menu that appears, tap Copy as Text.

- Paste the text elsewhere in the same document or in another app.
Use handwritten phone numbers, dates, addresses, and more
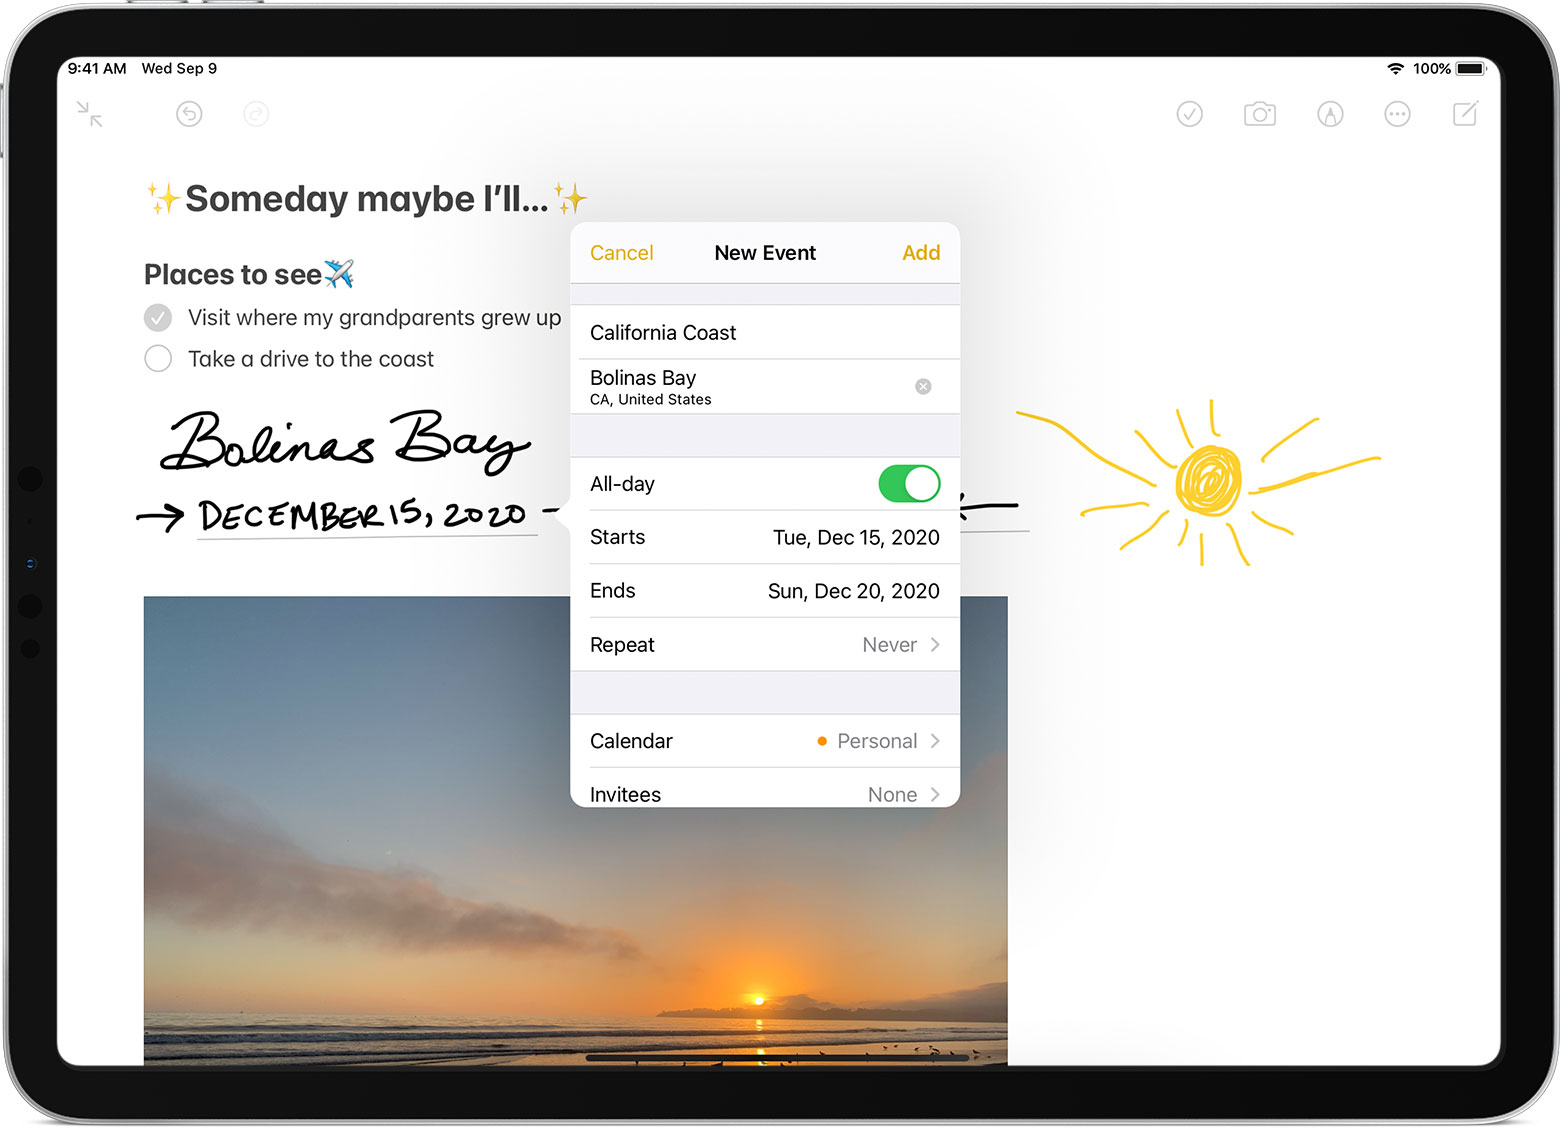
- Tap a number, date, address, or other recognized data that you’ve written. It will have an underline.*
- Choose what you want to do, like call the number or create an event.
Draw perfect shapes
You can perfect a lopsided circle or leaning square. Here’s how:
- Draw a shape by hand, like a circle, square, or star, using a single stroke.
- When you finish the shape, pause with the tip of your Apple Pencil on the screen. The shape you drew will be replaced by a perfect one.
Double-tap Apple Pencil (2nd generation)
On an Apple Pencil (2nd generation), you can double-tap near the tip of your Apple Pencil to quickly switch back to the tool you used last. To change your settings for double-tap, go to Settings > Apple Pencil, then choose:
- Switch between current tool and eraser
- Switch between current tool and last used
- Show color palette
- Off
Double-tap works only in supported apps, like Notes.
Источник
Annotate Your PowerPoint With Apple Pencil
Upgrade your notes, edit slides, and draw perfect circles (really).
![]()
Design Slideshow Presentations
Looking to annotate your slides in Microsoft PowerPoint? Your Apple Pencil is the easiest way.
It’ll smooth the process whether you need to scribble on class notes, update a sales pitch, or fix your boss’s spelling.
To try it out, connect your Apple Pencil to your compatible iPad or iPad Pro and tap on PowerPoint’s Draw tab. That’s where you’ll find tools to write, draw, edit, highlight, and doodle. Of course, you can also use your Apple Pencil to select objects and text boxes.
Read on to learn three cool ways to use your Apple Pencil with PowerPoint. And if you don’t have an Apple Pencil, just pretend this entire article is talking about your finger.
![]()
Master the basics
‣ The Draw tab is home to a number of features that’ll probably look familiar, including a variety of markers, pencils, and highlighters.
Tap one to select it, then tap again to reveal a menu that lets you adjust color and thickness.
To undo a note or a sketch you made, just tap the eraser, which makes your last change go away.
Dramatically improve your handwriting
‣ If you were born in the post-cursive age, there’s a good chance your handwriting is a hot mess. But that’s OK! PowerPoint has your back.
Write directly on a slide using your Apple Pencil, then tap the Ink to Text button in the top right corner. Select your scribble using the Lasso Select tool and the app will automatically convert your writing to readable type (or suggest a few options for doing so).
Get in perfect shape
‣ If you believe in yourself, nothing in life is impossible. Except drawing a geometrically perfect circle freehand.
PowerPoint and Apple Pencil can help here too.
Draw something approximating a circle (or square, triangle, or rhombus, theoretically, although we can’t imagine why you’d need a rhombus) and tap Ink to Shape in the top right corner.
Now select on your amorphous shape using the lasso tool and PowerPoint will convert it into a perfectly proportioned form that would make your geometry teacher weep with joy.
Источник
Apple Pencil
Dream it up.
Jot it down.
Apple Pencil sets the standard for how drawing, note‑taking, and marking up documents should feel — intuitive, precise, and magical. All with imperceptible lag, pixel‑perfect precision, tilt and pressure sensitivity, and support for palm rejection. Incredibly easy to use and ready when inspiration strikes.
Find the right Apple Pencil
for your iPad.
Apple Pencil 2nd generation
Apple Pencil 2nd generation features
- Wireless pairing and charging
- Attaches magnetically
- Double-tap to change tools
- Pixel-perfect precision
- Tilt and pressure sensitivity
- Imperceptible lag
- Free engraving
Compatible with
- iPad mini (6th generation)
- iPad Pro 12.9-inch
(3rd, 4th, and 5th generation) - iPad Pro 11-inch
(1st, 2nd, and 3rd generation) - iPad Air
(4th generation)
Magically pair.
Wirelessly charge.
Apple Pencil attaches magnetically to the side of your compatible iPad and automatically pairs and charges on the go.
Apple Pencil 1st generation
Apple Pencil 1st generation features
- Pairing and charging via Lightning
- Pixel-perfect precision
- Tilt and pressure sensitivity
- Imperceptible lag
Compatible with
- iPad
(6th, 7th, 8th, and 9th generation) - iPad Air
(3rd generation) - iPad mini
(5th generation) - iPad Pro 12.9-inch
(1st and 2nd generation) - iPad Pro 10.5-inch
- iPad Pro 9.7-inch
Accessories that let you make iPad your own.
Explore keyboards, cases, covers, Apple Pencil, AirPods, and more.
Источник
Connect Apple Pencil with your iPad
Learn how to pair your Apple Pencil.
Before you begin
- Make sure that you have the Apple Pencil model that works with your iPad.
- You might need to charge your Apple Pencil before you can use it.
Pair your Apple Pencil (2nd generation) with your iPad
Attach your Apple Pencil to the magnetic connector on the side of your iPad, like this:
Pair your Apple Pencil (1st generation) with your iPad
Remove the cap and plug your Apple Pencil into the Lightning connector on your iPad.

When you see the Pair button, tap it.
After you pair your Apple Pencil, it will stay paired until you restart your iPad, turn on Airplane Mode, or pair with another iPad. Just pair your Apple Pencil again when you’re ready to use it.
Источник
Использование Apple Pencil с приложением Pages на iPad
В документе Pages на iPad писать рисовать, добавлять аннотации, выбирать элементы и прокручивать документ с помощью Apple Pencil так же, как Вы делаете это пальцем. По умолчанию при использовании Apple Pencil в Pages включается режим письма, рисования или аннотирования. Если вместо этого Вы хотите использовать Apple Pencil для прокрутки и выбора объектов, можно изменить настройки по умолчанию.
Примечание. Для преобразования рукописного текста в печатный с помощью функции «От руки» требуется совместимая модель iPad под управлением iPadOS 14. Функция «От руки» доступна не на всех языках. Подробнее см. в статье службы поддержки Apple.
Изменение режима использования Apple Pencil в Pages по умолчанию
Если Вы хотите использовать Apple Pencil для прокрутки и выбора элементов вместо рисования, письма или аннотирования, измените настройки по умолчанию. Настройка Apple Pencil, заданная в Pages, действует только в Pages. Если Вы изменили эту настройку в одном документе, она применяется ко всем документам Pages, но не влияет на другие приложения, например Keynote и Numbers.
Откройте документ Pages, затем коснитесь  .
.
Коснитесь пункта «Apple Pencil» (возможно, потребуется прокрутить вниз для его отображения), затем включите параметр «Выбор и прокрутка».
Если Ваш Apple Pencil это поддерживает, можно включить параметр «Переключение двойным касанием», а затем включать и отключать режим «Выбор и прокрутка» двойным касанием нижней части Apple Pencil.
Когда по умолчанию включен режим «Выбор и прокрутка», можно по-прежнему использовать Apple Pencil для рисования и аннотирования в Pages. Для рисования коснитесь  , коснитесь
  , затем — «Рисунок». Для добавления аннотации коснитесь , затем коснитесь «Смарт-аннотация».
Преобразование рукописного текста в печатный
Функция «От руки» на iPad преобразует рукописный текст в печатный. Когда создана пара между Apple Pencil и поддерживаемым iPad под управлением iPadOS 14, функция «От руки» включена по умолчанию. Чтобы проверить настройку функции «От руки», включить или выключить ее, откройте «Настройки»  > «Apple Pencil».
В Pages коснитесь значка Apple Pencil в основном тексте документа, в текстовом блоке, фигуре или ячейке таблицы, где Вы хотите ввести рукописный текст.
Примечание. В таблице коснитесь ячейки, если Вы хотите заменить все ее содержимое. Для редактирования ячейки коснитесь ее еще раз, чтобы поместить точку вставки там, где Вы хотите начать писать.
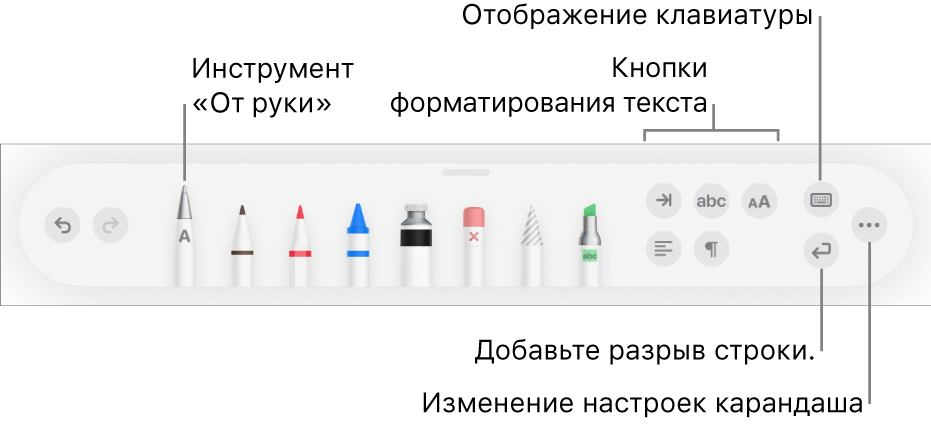
Коснитесь инструмента «От руки» и начните писать.
Функция «От руки» работает даже в тех случаях, когда написанный от руки текст выходит за края текстовой области.
Примечание. Если Вы отключили функцию «От руки» в Настройках или ни один из языков в Вашем списке языков не поддерживает эту функцию, инструмент «От руки» не отображается в панели инструментов.
При вводе текста с помощью Apple Pencil можно выполнять следующие действия.
Удаление слова. Сотрите его.
Вставка текста. Коснитесь и удерживайте внутри текстовой области, затем при появлении пустого пространства начните писать.
Объединение или разделение символов. Нарисуйте между ними вертикальную линию.
Выбор текста. Обведите текст или проведите через него линию. Чтобы изменить выбранную область, перетяните манипуляторы выбора пальцами.
Создание нового абзаца. Коснитесь  в панели инструментов внизу экрана.
Отображение клавиатуры. Коснитесь  в панели инструментов, затем касайтесь клавиш на клавиатуре, чтобы изменить текст, удалить символы, добавить пробелы и выполнить другие действия.
Переключение на другой поддерживаемый язык. В панели инструментов коснитесь и удерживайте ее, затем коснитесь языка, который хотите использовать (клавиатура уже должна быть добавлена в разделе «Настройки» > «Основные» > «Клавиатура» > «Клавиатуры»). На кнопке кратко отображается код выбранного языка (например, EN для английского языка).
Отмена последнего действия. Нажмите  в панели инструментов. Коснитесь несколько раз, чтобы отменить все недавно выполненные действия.
Добавление нового текстового блока. В документе с макетом страницы начните писать на удалении от других текстовых областей (таких как другие текстовые блоки, выбранные таблицы или ячейки). Будет создан новый текстовый блок для Вашего текста.
Если выбран инструмент «От руки», другие кнопки в этой панели инструментов позволяют добавить отступ к тексту, изменить шрифт, применить жирный шрифт, курсив или подчеркивание, изменить размер шрифта, выровнять текст, вставить разрывы страниц, сноски и другие элементы форматирования.
Чтобы освободить больше пространства для письма, перетяните манипулятор панели инструментов вниз и сверните ее. Чтобы вернуть ее исходный размер, коснитесь ее свернутой версии. Чтобы настроить автоматическое сворачивание панели инструментов при вводе текста, коснитесь  , затем включите параметр «Автоматически убирать в Dock».
Источник


