- ARKit Prerequisites
- Apple’s ARKit prerequisites and setup for augmented reality.
- General Prerequisites
- Getting Started with UE4 and ARKit
- Project Setup
- Using ARKit in Your Project
- Testing on Device
- AR Sample Project
- Apple ARKit
- Information for creating immersive experiences with Apple ARKit
- ARKitВ 4.0
- Supported Handheld Platforms
- Getting Started with ARKit in Unreal
- ARKit Prerequisites
- Apple’s ARKit prerequisites and setup for augmented reality.
- General Prerequisites
- Recording Facial Animation from an iPhone X
- Use the Live Link Face app, ARKit, and Live Link to capture facial animations and apply them to characters in Unreal Engine.
- Getting Started
- Setting Up Head Rotation
- Head Rotation Blueprint — Event Graph
- Head Rotation Blueprint — Anim Graph
- Live Link Face App Controls
- Live Link Face App Settings
- Raw Facial Recordings
- Recording Modes and Results
- Working with Multiple Users
- Timecode Sources
- Controlling Live Link Face through OSC
ARKit Prerequisites
Apple’s ARKit prerequisites and setup for augmented reality.
Support for iOS devices is not new to the Unreal Engine.В If you are already working with Unreal Engine andВ iOS devices, you may notВ require anyВ additional configurationВ to start working with augmented reality and Unreal Engine.
General Prerequisites
The basic configuration of Unreal Engine and iOS devices is covered in detail in theВ iOSВ Game Development В section of the Unreal EngineВ documentation.
Starting with Unreal Engine 4.23.1, all ARKit versions require Xcode 11 or greater.
ARKit 1.5В Prerequisites
A development machine that meets our Recommended Specifications .
Unreal Engine 4.20 or greater installed.
Xcode 9 or greater installed.
A supported, configured, and connected handheld iOS device.
ARKit 2.0 Prerequisites
A development machine that meets our Recommended Specifications .
Unreal Engine 4.20 or greater installed.
Xcode 10 or greater installed.
A supported, configured, and connected handheld iOS device.
ARKit 3.0 Prerequisites
A development machine that meets our Recommended Specifications .
Unreal Engine 4.23.1 or greater installed.
Xcode 11 or greater installed.
A supported, configured, and connected handheld iOS device.
ARKit 3.0 is only supported on devices with iOS 13, A12/A12X Bionic chips (or later), the Apple Neural Engine (ANE), and a TrueDepth Camera, such as the iPhone XS, iPhone XS Max, iPhone XR, and the 11-inch and 12.9-inch 2018 iPad Pros.
Источник
Getting Started with UE4 and ARKit
On June 5th, Apple, with its revolutionary ARKit, showed us how you can tell your own stories in a whole new way with iOS devices. As we continue to integrate ARKit into Unreal Engine, we’re inspired by the Wingnut AR demo at WWDC, and we’re truly excited about the AR experiences so many Unreal developers are already creating for iOS devices.
Will you use ARKit for architectural design, to make a game that changes how players interact with their environment, or something entirely different?
Bring your ideas to life with ARKit using this Quick Start Guide for Unreal Engine 4.17!

Project Setup
To use a project with the experimental Apple ARKit plugin, you must first have the following prerequisites:
- Unreal Engine 4.17, with ARKit Support
- XCode 9 Beta 3 or 4
- iPhone or iPad with iOS 11 Beta
Both XCode 9 Beta 3 or 4 and iPhone or iPad with iOS 11 Beta can be downloaded from http://developer.apple.com.
To ensure that the correct version of XCode is used, run the following command from a terminal window:
sudo xcode-select -s /Applications/Xcode-beta.app/Contents/Developer
Now, open Unreal Engine 4.17 and create a new project targeted for mobile. Open the project and enable the experimental Apple ARKit plugin from the plugins menu. You may need to build the plugin in order to enable support if you’re working from GitHub source, if prompted.
If you haven’t already, configure the certificates for your device in order to make a signed application by following the instructions in our documentation.
Enable the ARKit plugin under Edit > Plugins and restart the editor.
Once the ARKit plugin is enabled, go to Project Settings > iOS. You’ll need to set the following in order to use ARKit:
- Minimum iOS Version: 11 Beta
- Additional Plist Data:
NSCameraUsageDescription \n UE4 needs permission to use the camera in order to use ARKit. \n
- Max Metal Shader Standard to Target: Metal v1.2
Using ARKit in Your Project
There are three major areas of an ARKit project: the camera, the pass-through, and plane detection. We’ll give you a quick intro to each of them to help you get started!
CAMERA SETUP
Fortunately, the camera behaves very similar to our VR camera setup, and should be familiar to those that have set that up. All we need is a new Pawn class that has a special Apple ARKit Camera Component in it. When we run on the device, that Camera Component will move around the virtual world in the same way you’re moving around the real world.

PASS-THROUGH SETUP
The pass-through lets us take the feed from the camera on the back of your iPhone or iPad, and then use that as a background for your virtual content. This gives the illusion of your content “augmenting” the real world. Here are a few steps that outline the basics of setting up the pass through camera. For a more complete example, refer to the Material setup in the ARSample project linked at the end of this blog.
- Add an ARKit Texture to your project.

- Create a new Material. Change the shading model to Unlit and check the Two-Sided checkbox.

- Add a Texture Sample node, reference the ARKit Texture you created and plug it into the Emissive channel of the Material. Add a ScreenPosition coordinates node and plug it into the UV input of your ARKit Texture. Note: You’ll want to scale the UVs for the ARKit Texture relative to your screen ratio. For an example of this in action, please refer to the ARSample linked near the end of this blog.

- Add a sphere mesh to your scene and scale it up to something that encompasses your content, then apply your newly made Material. This will act as your skybox and will render what the camera sees to the sphere.
PLANE DETECTION
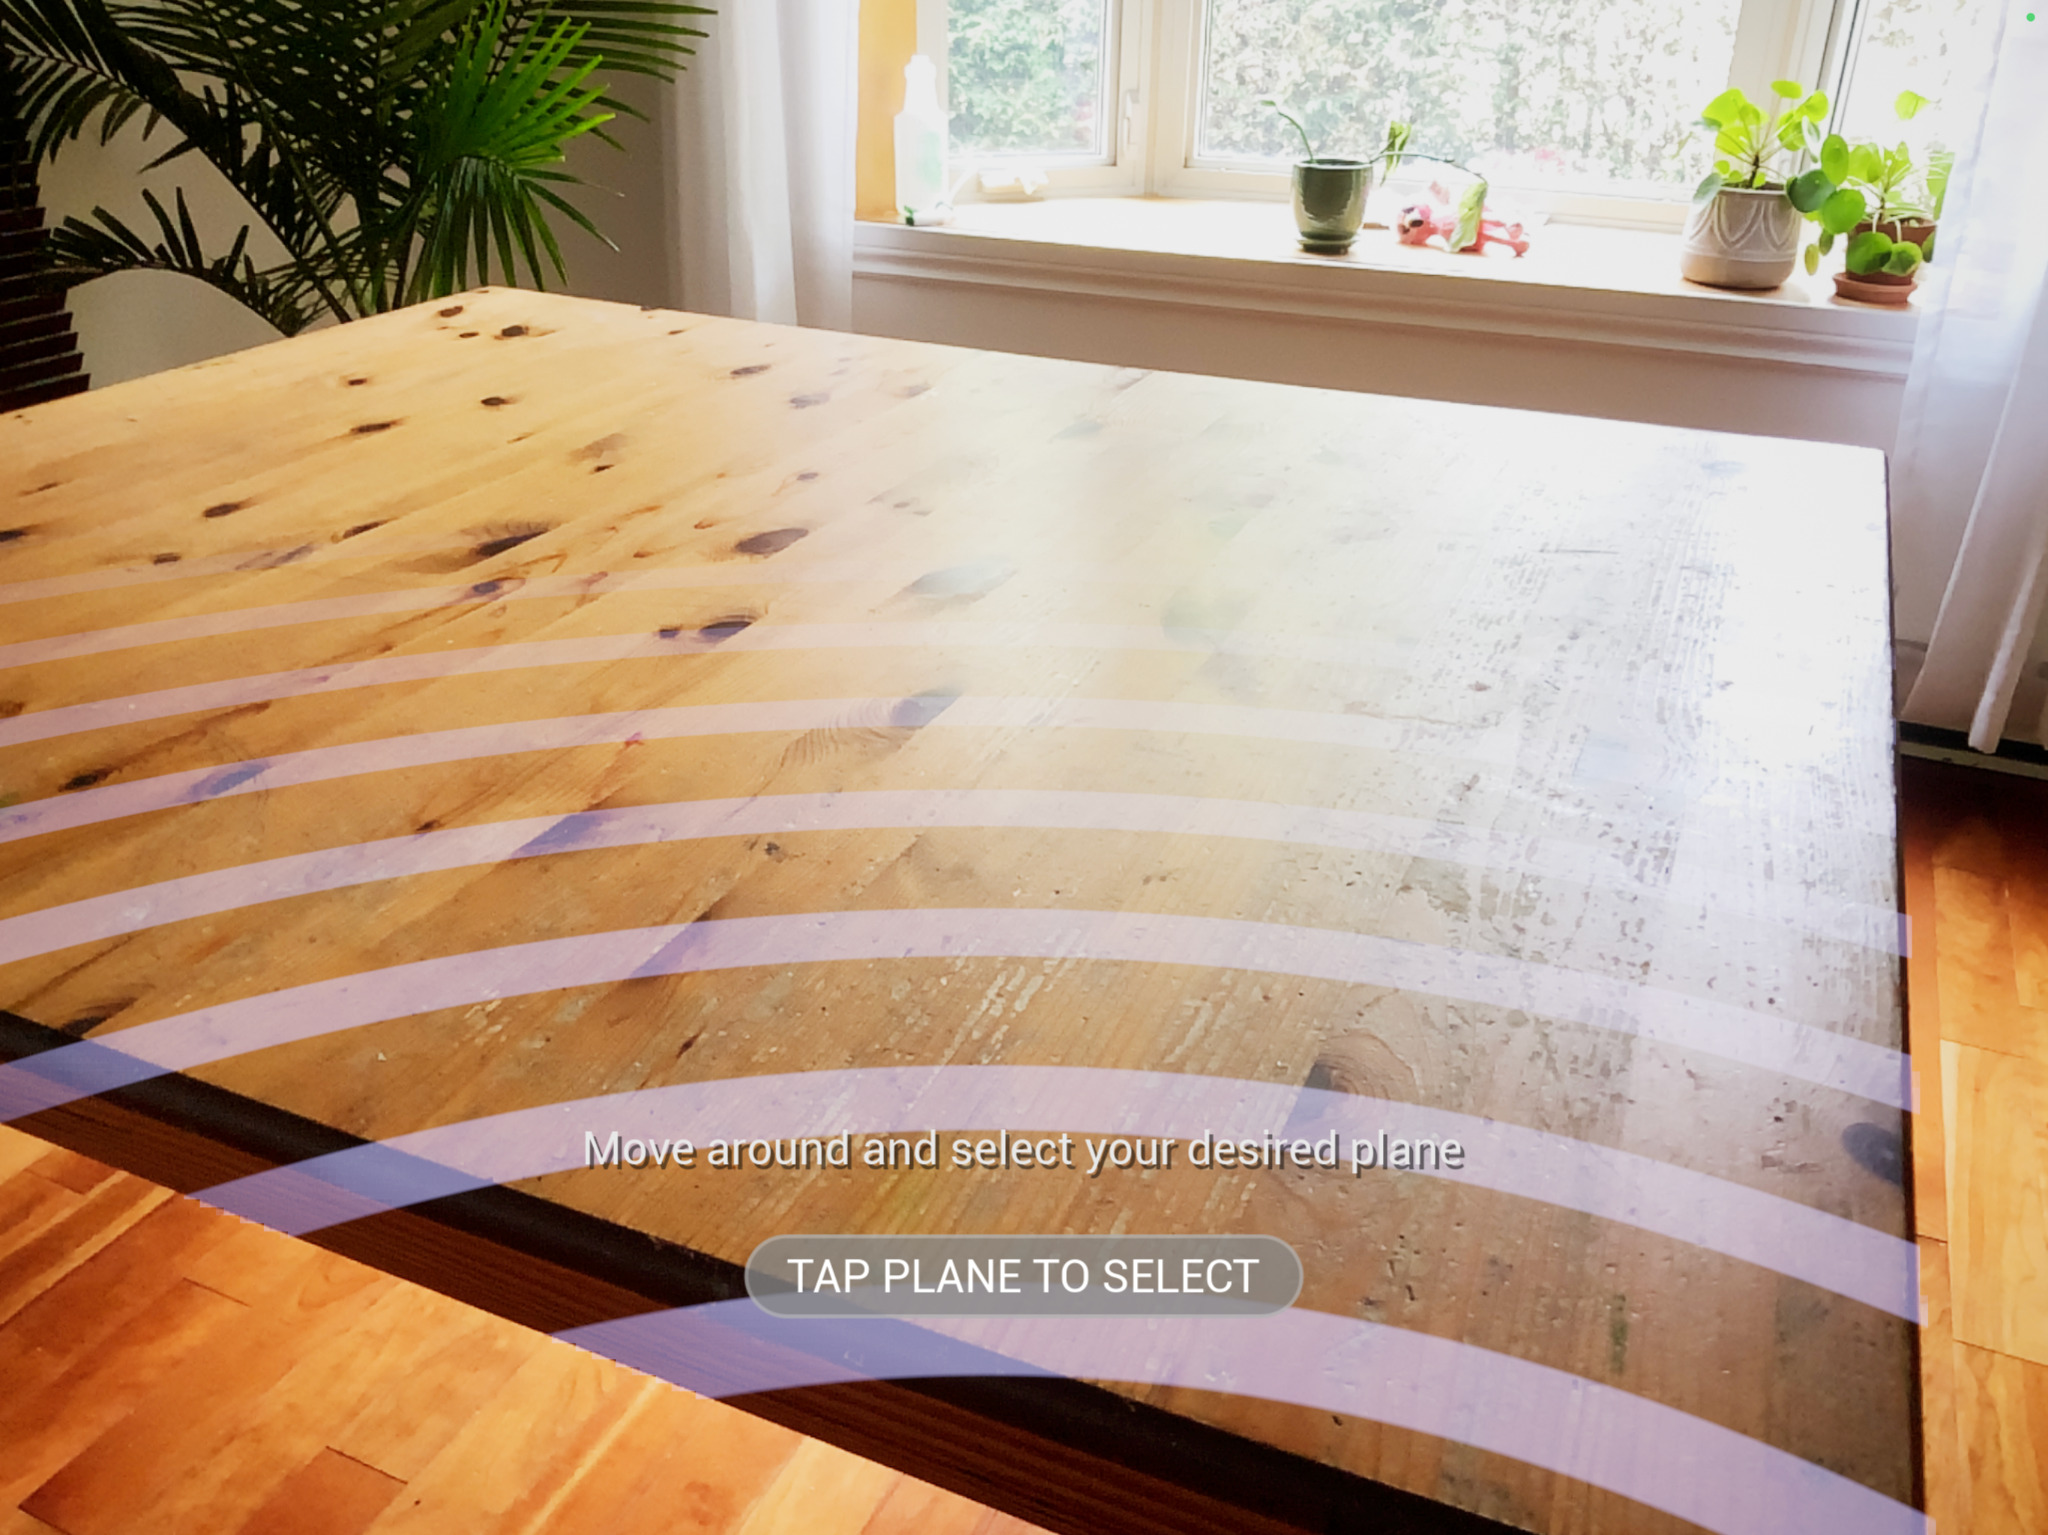
When placing your virtual content in the real world, it’s often useful to find flat surfaces, such as walls, the floor, or table tops. That’s where plane detection comes in. Plane detection lets you ask ARKit to find you flat surfaces around the world and then use those to position your virtual content on. For example, if you were making a virtual cat, plane detection could help you find the floor for it to run around on.
Plane detection happens automatically as you move the device around, and using detected planes with touch input is as simple as calling “Hit Test at Screen Position” function on the ARKit Camera Component. If a plane is found, you’ll be able to access the transform information found in the Apple ARKit Hit Test Result to handle interaction logic with that point in the real world.

Testing on Device
Once the project is set up, click Launch > (Your iPad or iPhone), which will build the project and deploy it to the device as you would with any other mobile project.
AR Sample Project

To help you get started, we’ve put together a sample project with everything already set up in order to get moving with ARKit and UE4. Download the ARSample project for 4.17.1 here.
Keep in mind that the experimental plugin will change as the technology evolves in these early days. When we officially release the ARKit plugin as part of the engine in 4.18, supporting documentation will be updated to reflect the final architecture.
We can’t wait to see what you create with this revolutionary technology, so please share your experiences with ARKit on social media and tag us using @UnrealEngine and #UE4 on Twitter, Facebook or Instagram!
Источник
Apple ARKit
Information for creating immersive experiences with Apple ARKit
The unified AR framework includes support for basic AR functionality like Alignment, Light Estimation, Pinning, Session State, Trace Results, and Tracking. In addition to these, you can also use the latest features available in ARKit on your iOS devices
ARKitВ 4.0
The engine supports ARKit 4.0, which includes the following immersive features:
2D Image Detection
3D Object Detection
Face Tracking, including support for devices without the TrueDepth Camera
Motion Capture (2D, 3D, LiveLink)
Scene Depth API for Object Occlusion
Candidate images for image detection must have unique friendly names. If multiple candidate images share the same friendly name, only the image with the first instance of the friendly name will be recognized.
Epic Games developer Joe Graf has written several informative blogs discussing ARKit functionality in UE4.
Supported Handheld Platforms
Check what devices support ARKit in Apple’s documentation on iOSВ Device Compatibility Reference . If you’re already working with Unreal Engine and iOS devices, you’ll only need a minimal amount of additional configuration to get started with augmented reality in Unreal Engine. For detailed iOS augmented realityВ prerequisite information, see the
Getting Started with ARKit in Unreal
A guide to setting up a project with the Handheld AR Template and preparing your mobile device to test it

A reference page for where key features of the Handheld AR Template are implemented and how they function
Источник
ARKit Prerequisites
Apple’s ARKit prerequisites and setup for augmented reality.
Support for iOS devices is not new to the Unreal Engine.В If you are already working with Unreal Engine andВ iOS devices, you may notВ require anyВ additional configurationВ to start working with augmented reality and Unreal Engine.
General Prerequisites
The basic configuration of Unreal Engine and iOS devices is covered in detail in theВ iOSВ Game Development В section of the Unreal EngineВ documentation.
Starting with Unreal Engine 4.23.1, all ARKit versions require Xcode 11 or greater.
ARKit 1.5В Prerequisites
A development machine that meets our Recommended Specifications .
Unreal Engine 4.20 or greater installed.
Xcode 9 or greater installed.
A supported, configured, and connected handheld iOS device.
ARKit 2.0 Prerequisites
A development machine that meets our Recommended Specifications .
Unreal Engine 4.20 or greater installed.
Xcode 10 or greater installed.
A supported, configured, and connected handheld iOS device.
ARKit 3.0 Prerequisites
A development machine that meets our Recommended Specifications .
Unreal Engine 4.23.1 or greater installed.
Xcode 11 or greater installed.
iOS 13 or greater installed
A supported, configured, and connected handheld iOS device with an A12 Bionic chip or greater.
ARKit 4.0 Prerequisites
A development machine that meets our Recommended Specifications .
Unreal Engine 4.26 or greater installed.
Xcode 12 or greater installed.
iOS 14 or greater installed.
A supported, configured, and connected handheld iOS device with an A12 Bionic chip or greater.
Источник
Recording Facial Animation from an iPhone X
Use the Live Link Face app, ARKit, and Live Link to capture facial animations and apply them to characters in Unreal Engine.
Recent models of the Apple iPhone offer sophisticated facial recognition and motion tracking capabilities that distinguish the position, topology, and movements of over 50 specific muscles in a user’s face. If your iPhone contains a depth camera and ARKit capabilities, you can use the free Live Link Face app from Epic Games to drive complex facial animations on 3D characters inside Unreal Engine, recording them live on your phone and in the engine.
This page explains how to use the Live Link Face app to apply live performances on to the face of a 3D character, and how to make the resulting facial capture system work in the context of a full-scale production shoot.
Live Link Face relies on the same ARKit features used by the Face AR Sample that you’ll find on the Learn tab of the Epic Games Launcher. However, the Face AR Sample needs to be compiled for iOS, which requires a Mac and an Apple developer account. With the Live Link Face app, you can immediately get started applying facial animation to any properly set up character in any Unreal Engine Project.
Prerequisites:
The material on this page refers to several different tools and functional areas of Unreal Engine. You’ll have best results if you’re already familiar with the following material:
You’ll need to have a model of iPhone that has both a depth camera and ARKit. These capabilities are typically included in iPhone X and later.
Getting Started
Follow the instructions in this section to set up your Unreal Engine Project, connect the Live Link Face app, and apply the data being recorded by the app to a 3D character.
Enable the following Plugins for your Project:
Live Link
ARKit
ARKit Face Support
You need to have a character set up with a set of blend shapes that match the facial blend shapes produced by ARKit’s facial recognition. You’ll typically need to do this in a third-party rigging and animation tool, such as Autodesk Maya, then import the character into Unreal Engine.
For a list of the blend shapes your character will need to support, see the Apple ARKit documentation .
If you don’t have a character of your own ready, you can use the boy that you’ll find in the Face AR Sample on the Learn tab of the Epic Games Launcher.
Your character’s blend shapes don’t have to use exactly the same names as the ARKit blend shapes. You can create a custom Blueprint function in a LiveLinkRemap Asset to translate the ARKit blend shape names into the ones used by your character. For instructions, see the Face AR Sample documentation . However, for best results, you should make sure that your character’s facial blend shapes cover the same facial areas as the ARKit blend shapes.
Set up your character in Unreal Engine with an animation Blueprint that includes a Live Link Pose node. For example, in the animation Blueprint for the boy in the Face AR Sample:

Later, you’ll use this node to apply the animation data being sent from the phone to your character.
Get the IP address of your computer. You’ll need this to connect your Live Link Face app.
You can typically find the IP address in your computer’s control panel or settings. Alternatively, on most Windows platforms you can use the ipconfig command-line utility.
If your computer is connected to the Internet, you may have both a local IP address that is visible only within your network and a public IP address that identifies you on the open Internet. If so, choose the local IP address. Local IP addresses typically start with either 10. or 192.168. .
Your computer may also have multiple IP addresses configured for different adapters. For example, you may have a wired Ethernet adapter and a wireless adapter, each with its own address. Make sure you choose the IP address of whichever adapter your computer is using to connect to the same network as your iPhone.
Find the free Live Link Face app from Epic Games on the Apple App Store, and install it on your phone.
Connect your phone to the same wireless network as your computer, or use an Ethernet cable to connect the phone directly to the computer using a Lightning Ethernet adapter.
Live Link requires a network data source, so it’s not enough to connect the phone to your computer by USB.
Run the Live Link Face app on the iPhone. You’ll start on the home screen, where you can initiate new recordings.

Click for full image.
Preview Mesh setting. See the Live Link Face App Controls
Tap the icon at the top left to open the app settings. At a minimum, you’ll need to go into the LiveLink settings to be able to connect to your computer.

Click for full image.
On the LiveLink settings page, tap Add Target and enter your computer’s IP address.
If you need to broadcast your animations to multiple Unreal Editor instances, you can enter multiple IP addresses here. See also the Working with Multiple Users section below.
For details on all the other settings available for the Live Link Face app, see the sections below.
In the Unreal Editor, open the Live Link panel by selecting Window > Live Link from the main menu. You should now see your iPhone listed as a subject.

In your character’s animation graph, find the Live Link Pose node and set its subject to the one that represents your iPhone.

Compile and Save the animation Blueprint.
Select your character. In the Details panel, ensure that the Update Animation in Editor setting in the Skeletal Mesh category is enabled.

Back in Live Link Face, point your phone’s camera at your face until the app recognizes your face and begins tracking your facial movements.
At this point, you should see the character in the Unreal Editor begin to move its face to match yours in real time.
When you’re ready to record a performance, tap the red Record button in the Live Link Face app. This begins recording the performance on the iPhone, and also launches Take Recorder in the Unreal Editor to begin recording the animation data on the character in the engine.
Tap the Record button again to stop the take.
Setting Up Head Rotation
To apply head rotation to the Actor using data from the Live Link Face App, you first need to set up Blueprints in the Event Graph and Anim Graph to drive the joints in the head.
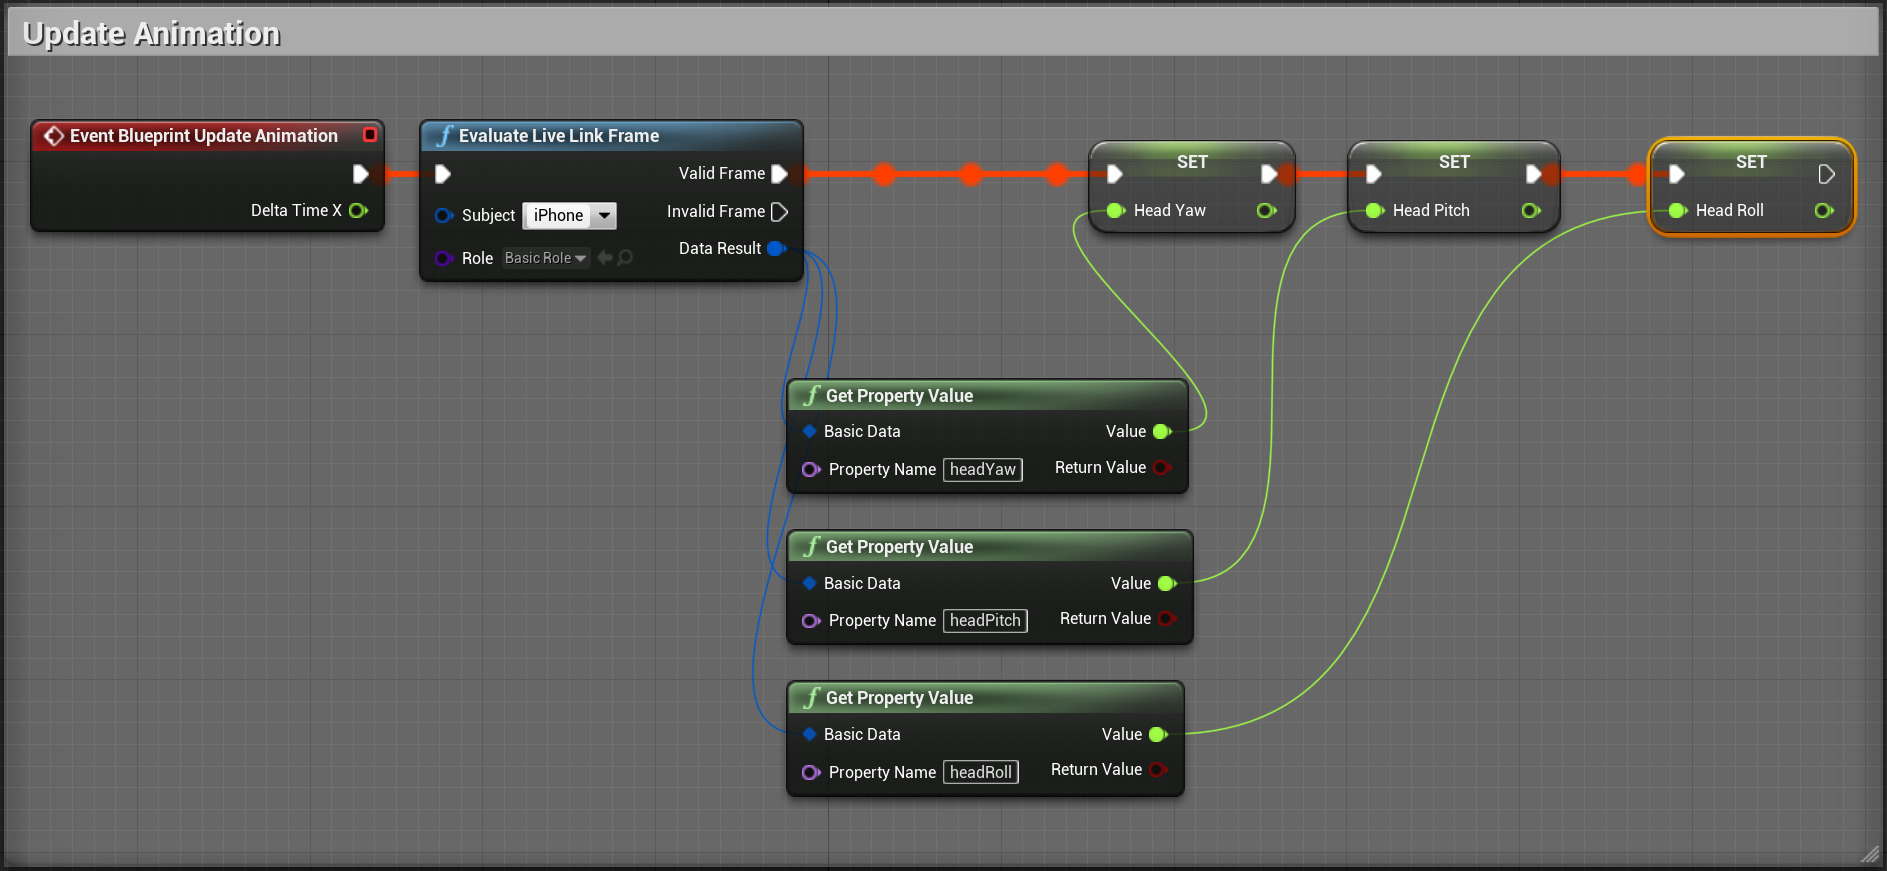
Head Rotation Blueprint — Event Graph
This Blueprint is placed in the Event Graph of your character’s Anim Blueprint. It takes in yaw, roll, and pitch data from your Live Link performance and applies it to the appropriate bones in your character’s rig.
Click for full image.
Right click in the Blueprint and add an Event Blueprint Update Animation node. This ensures the head position updates each frame there is movement.
Next, in the My Blueprint panel create 3 float variables named HeadRoll, HeadYaw, and HeadPitch. Drag each into the Blueprint and choose the Set option from the menu.
Drag off from the Event Blueprint Update Animation node and create an Evaluate Live Link Frame node. This will provide the data from the Live Link source that will be stored in your float variables.
Using the Subject dropdown menu, choose the subject that represents your iPhone.
Open the Role dropdown menu and choose the LiveLinkBasicRole.
Right click near Evaluate Live Link Frame and create three Get Property Value nodes. These will be used to get the yaw, roll, and pitch from the Live Link app. Using the Property Name box on each node, set one to headYaw, another to headRoll, and the last to headPitch.
Connect the Valid Frame output of Evaluate Live Link Frame to the Set variables as seen in the image above.
Finally, connect the Value outputs of each of the Get Property Value nodes to the float input on its corresponding Set variable node.
Head Rotation Blueprint — Anim Graph
With the head and neck rotation data coming in from the app, it can now be applied to the character’s rig in the Anim Graph:

Click for full image.
The section shown above is added to the end of the Anim Graph, right before the Output Pose node.
Starting from Output Pose, drag off from the Result and create a Component To Local node.
Next, you will need a Transform (Modify) Bone node for each head and neck bone in your character’s skeleton that will be influenced by the rotation data. If you are using the Kite Boy from the Face AR Sample project, you will need two.
For each node, click on it in the Blueprint and set the Bone to Modify setting in the Details panel to the correct bone name. For the Kite Boy, this is the neckRoot and head.
Connect the output of the first node to the Component Pose input of the next, similar to what you see in the image above.
In each of the Transform (Modify) Bone nodes, click on the dropdown for the Translation Space option and change it to Bone Space.
In the Details panel for the Transform (Modify) Bone nodes, find the Rotation section and change the Rotation Mode to Add to Existing, and change the Rotation Space option to Bone Space.
Now take the yaw, pitch, and roll data that you are gathering in the Event Graph and create a Rotator to update the rotation of the head and neck bones. Drag in a copy of each of your float variables created earlier and choose Get from the menu.
For each variable, drag from the output and create a Float x Float node. Multiply the Pitch by 15 and the Yaw and the Roll by -15. The yaw, pitch, and roll multiplier may need to be adjusted to achieve the desired result. You may need to try positive and negative values to get the correct rotation.
With the multipliers set up, it is time to create the rotator. Right click in the Blueprint panel and create a Make Rotator node.
Connect the output from the yaw multiplier into the X (Roll) input on the Make Rotator.
Connect the pitch multiplier to the Z (Yaw).
Finally, connect the roll multiplier to the Y (Pitch).
Connect the output of Make Rotator to the Rotation input on each of the Transform (Modify) Bone nodes.
Finish the sequence by creating a Live Link Pose node and setting Live Link Subject Name to your iPhone. Drag off from the output and create a Local to Component node.
Connect its output to the Component Pose input on the first of the Transform (Modify) Bone nodes.
The yaw, pitch, and roll connections may need to be adjusted to achieve the correct rotation. The best way to check your rotations is with a live test once the sequence is complete. Your character should move with you. If you tilt your head to the left, your character should do the same to their left.
Press Play in Editor and test your head rotation setup. Your character’s head should now rotate to match what is being recorded by the Live Link app.
Live Link Face App Controls
The home screen of the Live Link Face app offers the following controls.

Click for full image.
Opens the Settings dialog.
Toggles sending facial animation data to all LiveLink targets. When highlighted in green, the app is sending the animation data.
When live, also lists the current timecode value being read from the timecode source configured in the app settings.
Toggles video display and facial tracking on and off.
Starts and stops recording a new take.
Opens the list of takes previously recorded by the app.
Shows the current slate and take, and the LiveLink subject name. Tap to rename the current slate or change the take number.
When highlighted in green, indicates that the ARKit facial capture system is able to successfully detect a face in the current camera view.
Live Link Face App Settings
Tap the icon at the top left of the home screen to enter the Settings page, where you can configure the behavior of the app.
Configures the app to connect to computers running Unreal Engine, so that it can send animation data and control recordings through Live Link.
Configures the timecode source for the Live Link Face app. For details, see Timecode Sources below.
Configures connections between the Live Link Face app and external OSC controllers and devices. For details, see Controlling Live Link Face through OSC below.
Stream Head Rotation
Determines whether the app sends head rotation (yaw/pitch/roll) data from ARKit through the Live Link connection.
This option can be useful if you set up your phone on a static tripod stand, and you want to use the Live Link Face app to drive the movements of a virtual head as you move your head up and down and side to side relative to the phone.
If you use the Live Link Face app in conjunction with a body motion capture setup, you probably will not need this setting. Instead, you would typically mount your iPhone to your head using a custom helmet so that it is always directly in front of your face, and let the body motion capture system record the up and down and side-to-side movements of your head.
Determines whether the home screen overlays the camera picture with the triangular mesh generated by the ARKit facial recognition system.
Determines whether the red Record button is visible on the home screen.
You may want to disable this option if you are toggling recordings from an external OSC device, to avoid the possibility of actors accidentally hitting the button on the phone.
Determines whether the home screen shows the data values being produced by the ARKit facial recognition system for all facial blend shapes. This information is typically useful only for debugging purposes.
Determines whether the home screen should show the current slate name and take number, or the filename that will be used for the current recording.
Determines whether the main screen of the Live Link Face app remains visible at all times, or whether it fades out until you interact with the touchscreen.
Fading out the overlay may prevent actors being distracted by seeing the captured video during their performances.
Determines the quality of the JPEG compression used to encode the reference video. Higher quality produces sharper images, but takes correspondingly more storage space on your iPhone.
Shows the amount of free space on your device, and the amount of space being used by Live Link Face. You can also use this screen to delete takes that you’ve recorded previously.
Allows you to reset the Live Link Face app to its factory settings, undoing any changes you made to the settings above since you installed the app.
Displays legal information about the app.
Raw Facial Recordings
Whenever you initiate a new recording from the Live Link Face app, the capture is recorded to the iPhone in two files:
A .mov file that contains a reference video recorded by the camera.
The video frames are compressed using the JPEG codec, but it is frame-accurate with no temporal compression. The file contains audio and timecode, and is intended to act as a reference for animators who may need to work with the animation performance after the recording.
A .csv file that contains the raw animation data captured by ARKit during the recording.
This data file is not currently used by Unreal Engine or by the Live Link Face app. However, the raw data in this file may be useful for developers who want to build additional tools around the facial capture.
Recording Modes and Results
Anytime you initiate recording from the Live Link Face app on your iPhone, or through the OSC interface of the Live Link Face app, your performance will be recorded to the phone as described in the previous section. You don’t have to be connected to any instances of Unreal Engine to record in this way.
If you are connected through Live Link to any instances of Unreal Engine at the time you start recording from the Live Link Face app or through the OSC interface, you will also launch the Take Recorder on all connected instances of Unreal Engine. Your animation performances will be recorded both on your iPhone and in the Take Recorder on your computer.
If you are connected through Live Link to one or more instances of Unreal Engine, and you initiate recording from the Take Recorder in the Unreal Editor interface instead of initiating the recording from your iPhone or the OSC interface, your performance will not be saved to the iPhone. It will only be recorded in the Take Recorder on your computer.
Working with Multiple Users
In the context of more complex, real-world productions, you may have multiple operators working in Unreal Engine at the same time, using Multi-User Editing to collaborate live in the same virtual world. In this case, we recommend that you configure the Live Link Face app to connect to all Unreal Engine instances run by all operators. The app will multicast the performance capture to all engine instances. This ensures that all operators see the incoming animation data in context with a minimum of latency.
Timecode Sources
It’s likely that in a real production Live Link Face will only be part of a much larger performance capture setup. You will likely need to record other things at the same time: audio, live video, other body capture data, camera tracking data, and so on. In order to be able to synchronize these separate recordings with perfect accuracy, you need to ensure that all recordings embed consistent timecode values.
Live Link Face offers three options for timecode sources, which you can configure in the Settings panel.
System Timer
By default, Live Link Face bases its timecode values on the iPhone’s System Timer. This timer is based on the elapsed time since the last system reboot. This provides a base option that is accurate in itself, but it can be hard to link this timecode up with recordings made on other devices.
NTP Server
One way to get consistent timecode based on the time of day is to rely on a server that provides time values through Network Time Protocol (NTP). If you choose this option, the default server is time.apple.com, which is the same server that Apple uses to synchronize the iPhone’s time of day. However, if you use a custom NTP server, as many productions do to synchronize timecode for devices on stage, you can enter the server name and IP address.
Tentacle Sync
The Tentacle Sync is a third-party hardware device that allows devices to synchronize via Bluetooth to a master clock on stage. This is likely the most professional timecode option; high-end productions typically rely on a master clock for timecode synchronization during a shoot. For details, see Tentacle Sync .
Controlling Live Link Face through OSC
The Live Link Face app supports two-way communication through the Open Sound Control (OSC) protocol.
You can use OSC devices to control Live Link Face remotely. For example, you could use an external device to start the app recording remotely.
You can also configure Live Link Face to send notifications of its activity to other OSC devices. For example, you could trigger actions on other devices whenever the app begins a new recording.
To set up OSC, open the app settings:
In the Listener section, you’ll see the current IP address of your iPhone, and the port that the Live Link Face app is listening to for incoming OSC messages. You’ll need to make your OSC remote control device send commands to this IP address and port.
If you want Live Link Face to send OSC commands to control another device, enter the IP address and port of that device in the Target section.
The Live Link Face app supports the following OSC commands:
Sets the OSC send target to the given IP address and port. The app replies to the new OSC send target with the command /OSCSetSendTargetConfirm .
Adds a new Live Link target for the app to broadcast blend shape data.
Removes all Live Link targets.
Sets the Live Link subject name.
Starts streaming data to all Live Link targets.
Stops streaming data to Live Link targets.
Requests the battery level of the device. The app replies to the OSC send target with /Battery .
Requests the thermal state of the device. The app replies to the OSC send target with /Thermals .
Sets the slate to the given name.
Sets the take number to the given value.
Turns on video and AR tracking. The app replies to the OSC send target with /ARSessionStartConfirm .
Turns off video and AR tracking. The app replies to the OSC send target with /ARSessionStopConfirm .
Starts recording with the given slate and take number. The app replies to the OSC send target with /RecordStartConfirm . Note that at this time the timecode is always 00:00:00.000 .
Stops recording. The app replies to the OSC send target with /RecordStopConfirm . You can use the two strings in the /Transport command below to copy data from the device.
Using a path returned by the /RecordStopConfirm command (above), requests the app to transport the contents of the file to the specified IP address and port. The app will open a TCP connection to that address and port. It first sends an int32 that contains the total size of the file, in big-endian format. It then sends the contents of the file.
Turns the display of the video on.
Turns the display of the video off. Tracking and recording can and will still occur.
The app sends this to the OSC send target when the it becomes active on the phone. That is, when it is first started, brought to foreground, and so on.
The app sends this to the OSC send target when the it becomes inactive on the phone. That is, when it is killed, sent to background, and so on.
Источник


