- 20 Apple Cider Vinegar Recipes
- Apple Cider Vinegar and Natural Sweeteners
- Apple Cider Vinegar Ice Cubes
- Karen’s ACV Recipe
- Oxymel
- Recipes
- How to Make Raw Apple Cider Vinegar
- Free Weekly Newsletter + Report on Secrets of Strong Immunity
- Which Apples Make the Best Raw Apple Cider Vinegar?
- Uses and Benefits
- How to Make Raw Apple Cider Vinegar
- 3 Medicinal Uses
- How to Use the ACV Mother
- How To Make Apple Cider Vinegar
- I didn’t know it at the time . .
- What is fermentation?
- The Transformation from Apples to Apple Cider Vinegar
- How to Make Apple Cider Vinegar
- About Carly Daley
20 Apple Cider Vinegar Recipes
Apple Cider Vinegar and Natural Sweeteners
May I know is it ok to take apple cider vinegar with jaggery powder ( brown sugar) instead of honey? I have taken apple cider 1 Tbspoon with 2 teaspoons of jaggery powder with 1 glass of plain water, one time in early morning for the past 2 days. Thank you, Sharon C
Without a problem, you can take ACV with jaggery, it is more healthy. Chromium in Jaggery will regulate sugar as well. If you could find jaggery powder without sulphites it is even great. Good Health
Apple Cider Vinegar Ice Cubes
1 User Review
Apple Cider Vinegar Ice Blocks – YUM! 2 tbs. ACV, about 2 cm h20, a dash of honey, top up with apple juice, pour it into the plastic ice block thing, put in the freezer. Yum again.
You invented ACV popsicles!! 8D
Karen’s ACV Recipe
 I have been drinking ACV for about 5 months now and will never go without it again. It has done so much for my energy levels, I can’t even believe it!
I cannot stand the flavour, however, so every morning I make my «Health Drink» — which is 1 tbsp ACV; 1 tbsp organic coconut oil; 1 tbsp manuka honey; 1 tsp turmeric; and 4 drops oil of wild oregano». I live in a northern climate, so I have to very extremely gently melt the coconut oil, turmeric and manuka honey in a pot on the stove (no microwaving) and then add the ACV and oil of wild oregano. To this I add my fave fruit juice (currently it is pear/pineapple) and drink it like really fast like a shooter! . This is the only way I can get it down and it really works for me, I don’t taste any of it but the fruit juice.
I have not had colds, flus or even a simple runny nose since. My allergies are pretty much in check, flatulence and digestive upset are a thing of the past and I never even get headaches anymore.
This site has given me a quality of life I haven’t seen in 20+ years. Thank you Earth Clinic and all it’s lovely posters!! Thank you!
Oxymel
1 User Review
My Oxymel recipe, half local organic honey, half raw ACV, leave for at least 2 weeks, turning over each day, the thickness of the honey disperses into the vinegar until it is fluid. I add rosehips for vitamin C, you could use Hibiscus, Hawthorn, thyme, oregano, etc.
Dose is one tablespoon, for colds etc. I plan to take every 4 hours but recovery is usually quick and we don’t get past two doses. It is delicious, neat or added to herb tea. So kids don’t mind it. You can strain out the rosehips, I choose not to, when one gets uncovered I simply add to tea.
I had learnt a while back that the ancient Greeks used to make a drink from vinegar or old wine (vinegar :D), honey and water; it was called Oxymel.
I used to make this drink and with some ice cubes, it’s a refreshing and delicious drink. One must experiment to get the taste right and I don’t remember the exact recipe I used. Still this may be a good way of getting both ACV and (local) honey in together.
Another way I found to take it was to add ACV to «organic» apple juice; you don’t taste the ACV this way; it tastes only like apple juice.
I drink this concoction in the mornings before I head out. ACV with Mother and Local honey, and some water. I usually only do about a tbsp of each and do a «shot» of it. Do you make a large glass and sip? Thanks for the link also, I’m excited to read it.
Recipes
86 User Reviews
I’m not sure where this should be added but. normally I have awful stomach pain from ACV or apples in general. I have IBS and I really don’t know what it is that does it as I seem to be able to have both malic and acetic acid with no issues.
Anyway. for some reason when I mix the ACV into (diluted) orange squash as opposed to water, I get no discomfort at all. Isn’t that bizarre? It’s like a miracle!
I’ve tried I think 3 different oranges squashes now (Asda, Kia-Ora and Robinson’s) and all three work. Maybe it’s the orange juice in them. so I want to try that next.
Anyway. it just works so well that I wanted to let other people know, in case anyone else has a digestive reaction to ACV.
All the best, everyone! 🙂
I do have a slight arthritic knee and have taken ACV over a number of years, and it does seem as though it has kept symptoms from worsening. However, I’ve never enjoyed taking the ACV until quite recently. This is how I make it more acceptable. I cut up a small sweet apple such as Gala (complete with pips and core), two tablespoonsful of ACV with the mother, 1/4 teaspoonful of Bicarbonate of Soda, and approximately 80 — 100 ml of water, and blitz the lot in my smoothie maker. The result is a lovely apple juice drink, sweet yet slightly tart.
I know look forward to having the ACV instead of thinking of it as a chore to be gone through.
The recipe that I like using ACV is 2 TBSP ACV, 1 TBSP organic lemon juice. 1 TBSP raw unfiltered honey, 1/4 tsp. Ceylon cinnamon and a pinch of baking soda in 1 cup filtered water. Put in a blender give it a whirl to blend all ingredients and pour it on ice. ENJOY!
*One to two bags of Instant Korean Ginseng Tea (preferably certified as made in Korea)
*1 to 2 tsps of organic ACV
*1 to 2 tsps of Manuka (UMF 20+) Honey
Mix all in an eight to ten oz of hot water. Serves as a great and invigorating cup of tea. Because I my body does not process oxalate well and because I love what Korean Ginseng does to my skin and energy level, I researched only to find that ACV reduces the oxalate potency and therefore, it’s easy on my kidneys. Plus, there are tons of benefits from the Manuka Honey. Enjoy!
I add ACV (1 tbsp) to Lemon and Ginger Herbal tea + 1 tsp clear honey. It is a lovely drink and the only way I can take ACV.
Источник
How to Make Raw Apple Cider Vinegar
How and why to make apple cider vinegar that is raw, enzyme and probiotic-rich for all your detoxification, cooking, and medicinal needs. This recipe uses raw honey, which makes the final result even more healthful and potent.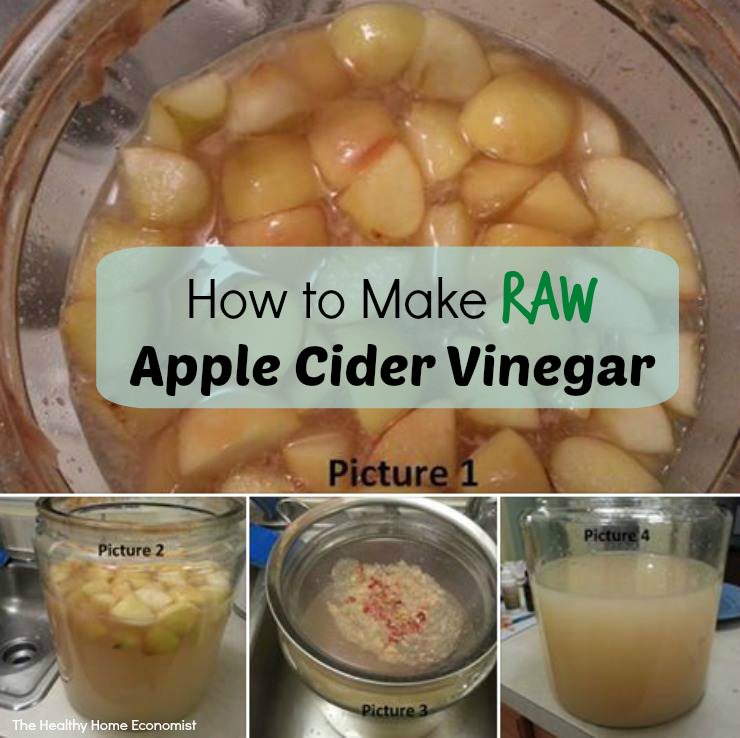
It’s apple season in many parts of North America which will continue through the Fall. Time to take advantage of the seasonal bounty and make some raw apple cider vinegar! If you don’t have locally grown apples available in your community, a bag of organic apples from the health food store or veggie co-op will work just fine.
Unpasteurized, or raw apple cider vinegar is expensive, so making your own is very thrifty. A typical quart of organic, raw apple cider vinegar will run you $5 or more at most health food stores. You can make a whole gallon, four times that amount, yourself for about the same price or even less if you use apple scraps that you were going to throw out or use for composting anyway.
Free Weekly Newsletter + Report on Secrets of Strong Immunity
Which Apples Make the Best Raw Apple Cider Vinegar?
A mixture of apples produces the best tasting and most healthful raw apple cider vinegar. Making it is very similar to kombucha. If you’ve made this or other fermented beverages before, you will find the process simple.
If homebrewing is new to you, try these approximate ratios for your first batch or two and then change it up from there to your own personal liking:
- 50% sweet apples (Golden Delicious, Fuji (my fave), Gala, Red Delicious)
- 35% sharp tasting apples (McIntosh, Liberty, Winesap, Northern Spy, Gravenstein)
- 15% bitter tasting apples (Dolgo crabapples, Newtown, Foxwhelp, Porter’s Perfection, Cortland)
In my neck of the woods, bitter-tasting apples are hard to find. If this is your predicament as well, simply increase the proportion of sweet apples to 60% and the sharp-tasting apples to 40%. While the flavor of this mixture won’t be as complex as with the inclusion of some bitter apples, it will still taste fine.
If all you have is a single apple tree in the backyard, however, feel free to use just that one variety to make your raw apple cider vinegar!
Uses and Benefits
The uses for raw apple cider vinegar are seemingly endless. It’s widely used in homemade tonics, recipes and even for cleaning. I like to use it for detox bathing (1 quart to a tubful of warm water). Friends of mine use raw apple cider vinegar as a hair rinse or for a natural, at-home hair detox.
The well known Master Tonic, a natural flu anti-viral, uses raw apple cider vinegar as the fermenting medium. It’s also an essential ingredient in all types of bone broth made at home.
Pasteurized apple cider vinegar doesn’t have the same benefits as raw apple cider vinegar. Valuable vitamins, probiotics, and enzymes are destroyed by the heating process. If you are going to go to the trouble of making apple cider vinegar, always make it raw for maximum benefits. Another problem with pasteurized ACV in the store is that it is frequently packed in plastic. The acidic ACV leaches chemicals into the vinegar! If you must buy apple cider vinegar, always buy it packed in glass.
How to Make Raw Apple Cider Vinegar
The recipe below outlines step by step instructions on how to make apple cider vinegar that is potent enough to use for all your medicinal, detoxification, cleaning and cooking needs. It is no doubt the most beneficial vinegar to have in your home followed by traditional balsamic vinegar.
Please always store any type of vinegar in glass containers. Storing in plastic risks leeching contaminants into your cider vinegar.
3 Medicinal Uses
Your homemade apple cider vinegar can be used not only in the kitchen and for cleaning. Try it in a vinegar bath (2 cups per tubful) to greatly aid detoxification.
To ease acid reflux symptoms and for a natural cal/mag supplement, soak crushed eggshells in your homemade ACV to make a simple eggshell and apple cider vinegar remedy. 1 teaspoon in 8 oz of water up to 3 times a day works wonders.
DIY ACV can also be used to make a vinegar compress for sprains and bruises. This is what people used before ice was readily available, and believe it or not, raw vinegar works extremely well!
How to Use the ACV Mother
After you’ve made a few batches of ACV at home, you may notice that you have a number of vinegar mothers stacking up! What to do with them?
First of all, know that these are living cultures that have a number of beneficial uses around the home. Here are some suggested ideas instead of just throwing them out:
- Share them with friends so that they can make their own apple cider vinegar too!
- Use them as a gentle, rejuvenating face mask.
- Add them to the compost bin for fertilizing the garden.
- Dry them out at a low temperature (less than 150 F/ 65 C) in a food dehydrator or a warm oven. The low temperature will preserve any food enzymes as well as the probiotics. After drying, cut them into strips and eat them like fruit leather. Store in an airtight container in a cool pantry or the refrigerator.
Источник
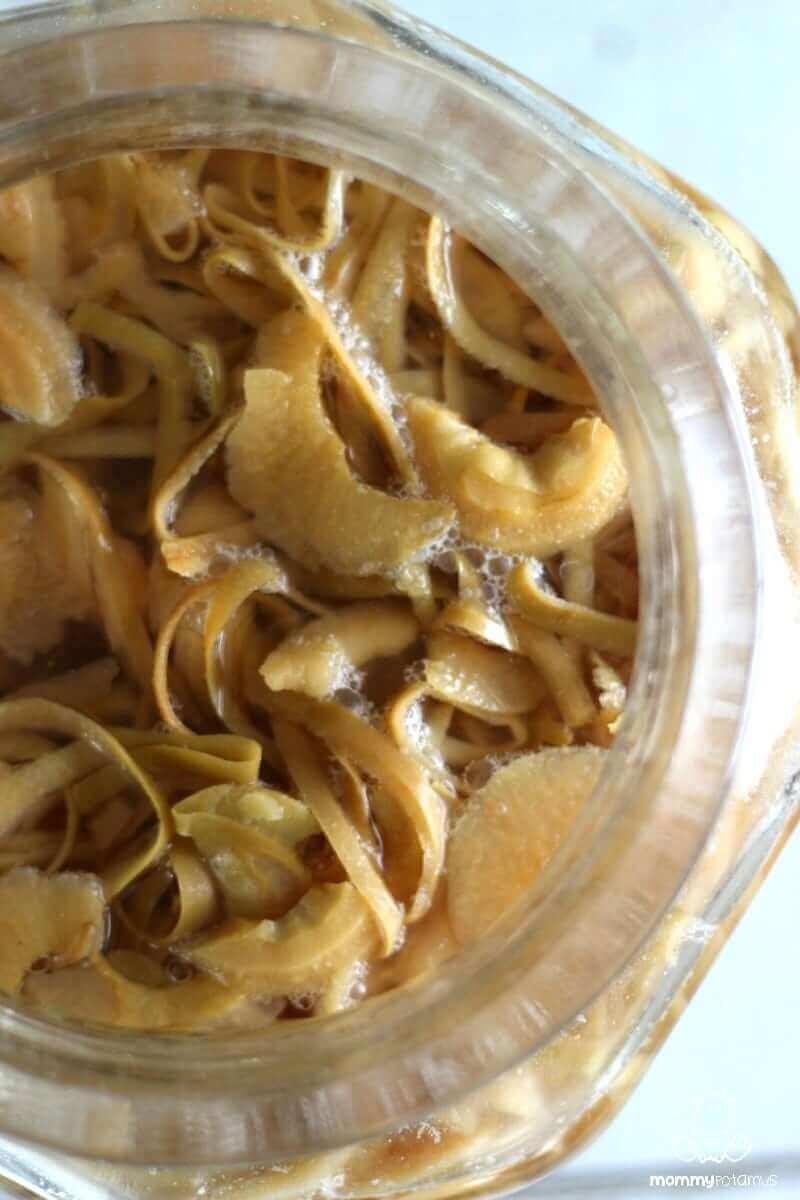
How To Make Apple Cider Vinegar
Note from Mommypotamus: What do scented jelly jars and a tutorial on how to make apple cider vinegar have in common? They’re both the subjects of half-written posts sitting in my drafts folder, of course! The jelly jars, which sprouted alien mold and sent colonies to mars, will never see the light of day.
Lucky for you, though, Carly of Modern Hippie Housewife has an amazing tutorial for making apple cider vinegar that she’s sharing with us today. I can’t wait to make up a batch for fire cider, hair detangler, and homemade cough syrup!
I didn’t know it at the time . .
But I was actually aware of fermentation before I knew exactly what it was. When I was a kid, I remember my Nana telling us stories about making sauerkraut and pickles in large crocks – “Like that one,” she’d say, as she pointed to an old crock that, at the time, my mom had filled with dried flowers.
Its been a few years now since I started my own fermentation journey. One rainy afternoon, I decided to give homemade sauerkraut a try. It seemed like the appropriate, stereotypical place to start.
Initially, I was a little intimidated. As I read through the steps in my mom’s fermentation book, I felt like I was missing something. Could it really be so simple? Just shred cabbage, add salt, pound with a potato masher, and wait?
Sure enough, it really was that simple. And then I was hooked…
Since then, my little curiosity has evolved in to a full-fledged obsession, and I’ve fermented everything from condiments to wine. Fermenting food and beverages truly is one of the most practical, beneficial and rewarding skills that I’ve learned on my journey toward self-sufficiency.
Last September, I decided to give apple cider vinegar a try. It was an obvious choice since friends of ours had an over-abundance of apples and I had already fermented apple sauce. We also use a TON of ACV in our household – I’m sure more then the average.
But before I go any further, let’s talk a little bit about the basics of fermentation. Perhaps you’re reading this and thinking, “Who is this crazy, fermentation lady, and what the heck is fermented food?” Ok, let me very briefly explain – a little fermentation 101 will also make the process easier and help with any trouble-shooting along the way.
What is fermentation?
Fermentation takes place in the absence of oxygen (an anaerobic environment), and in the presence of beneficial microorganisms (yeasts, molds and bacteria) which obtain their energy through fermentation. During the fermentation process, these microorganisms break down sugars and starches into alcohols and acids – lactic acid and acetic acid (a.k.a vinegar!) What you’re left with is a food that has been transformed into a more nutritious version of itself, which can be stored for much longer without spoiling.
In sum, by fermenting food, you’re giving it nutritional superpowers, and a longer life. Superfood, if you will.
Fermented food goes far beyond sauerkraut–you can actually ferment almost every food group! Fermenting grains gives you sourdough bread and beer, fermenting meat gives you salami, fermenting dairy gives you yogurt and cheese, fermenting veggies gives you pickles, and fermenting fruit gives you cider and vinegar! The possibilities are really endless.
You can read my full article on Fermentation 101: The Very Basics on Fermenting Food HERE.
The Transformation from Apples to Apple Cider Vinegar
There are three types of fermentation: lactic acid fermentation, ethyl alcohol fermentation, and acetic acid fermentation. To make apple cider vinegar, we’ll be utilizing acetic acid fermentation.
Acetic fermentation takes place when alcohol is exposed to air and is converted to acetic acid, which, like I mentioned before, is another word for vinegar! Yes, your apple cider vinegar was once good ol’ apple cider.
You’ve probably noticed that if you leave a bottle of wine out, uncovered, for too long, it starts to smell and taste a bit vinegar-y…well, now you know why!

How to Make Apple Cider Vinegar
Learning how to make apple cider vinegar is a pretty forgiving and simple process. No real skill is required, and all you need is apples, some raw cane sugar, water and patience.
I don’t use exact ratios for this recipe because the amounts vary depending on the size of your jar and the amount of apples or apple scraps you use.
You’ll need:
- A large, glass jar (half gallon mason jars work well)
- Cheese cloth + an elastic band to secure over the jar
- A glass weight (used to hold the apples below the surface of the water)
- Organic apples
- Filtered water
- Raw cane sugar (about 2-3 tbsp. for each half-gallon jar )
Step 1 – Prep
Prep your area – The only real thing that you’ll want to be cautious about is that the apples, utensils, jar and surface area that you’re working on is very clean – you don’t want to introduce any bad bacteria into the fermenting process, as it will spoil your ACV. Clean everything in warm, soapy water and leave to air-dry.
Prep your apples – Clean your apples in a sink full of cold water and wipe them down with a cloth to remove any residue or dirt. Make sure to cut off any yucky bits, bruises and blemishes before-hand – if you wouldn’t eat it, don’t use it for your ACV.
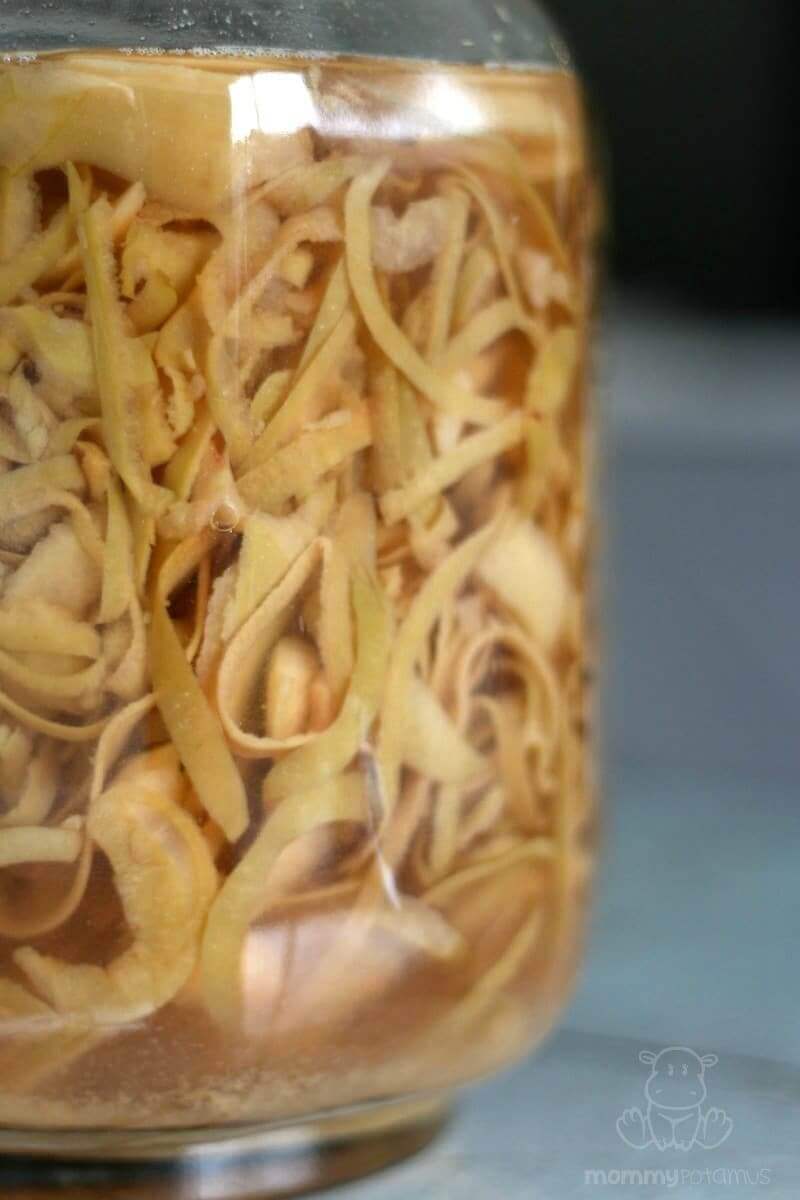
For this batch of ACV I used only the peels, and some of the core pieces, which I had left over from making apple sauce – very little apple made it to the compost!
If you’re using the whole apple, dice it in to small, half-inch pieces.
Step 2 – Assemble
Fill you jar 3/4 full of clean, diced apples.
Cover the apples with water and sprinkle with the sugar. The sugar will act as food for the beneficial bacteria which will help move the fermentation process along. (I’ve also made it without sugar, and instead used a 1/2 cup of ACV as a “starter” which worked well, too!)
Submerge the apples below the surface of the water. You’ll need to use a weight to prevent the apples from floating to the surface. I use special, glass fermentation weights, but you may have to get creative. Many people use a clean zip-lock bag filled with water, or a plastic lid, perhaps left-over from a yogurt or sour cream container, cut to size and then held down with a sterilized rock. Again, you may have to get creative. If there are pieces of apples left exposed to the surface air, they may mold which will spoil your ACV.
Cover the jar with a doubled-up piece of cheese cloth, and secure it with an elastic band to prevent fruit flies and critters from getting in.
Step 3 – Wait
Store your soon-to-be ACV in a room-temperature environment, away from direct sunlight (like in your pantry, or tucked away in an undisturbed corner of your kitchen) and leave it to ferment for 4 weeks. If the room is cooler then “room temperature” (about 70°F) then your ACV will take longer to ferment.
In about 3 days you should see little bubbles forming – this means it’s working! The beneficial bacteria are breaking down the sugars into CO2!
Check on the ACV every few days to ensure that the apples are still submerged. It should smell sweet in the beginning, and then eventually start to smell more and more sour.
Step 4 – Strain & Store
Something similar to a kombucha “mother” may form on the top, which is great – you can use it as a starter culture for your next batch of ACV, if you like. Simply store it in a small jar with some ACV, like you would your kombucha mother.
After about 4 weeks, it should be ready to strain. Use a cheese cloth to squeeze out, and break down, as much of the apple as you can.
Pour the liquid back into the jar, cover again with the cheese cloth, and leave it to ferment for another 2-3 weeks, stirring every few days.
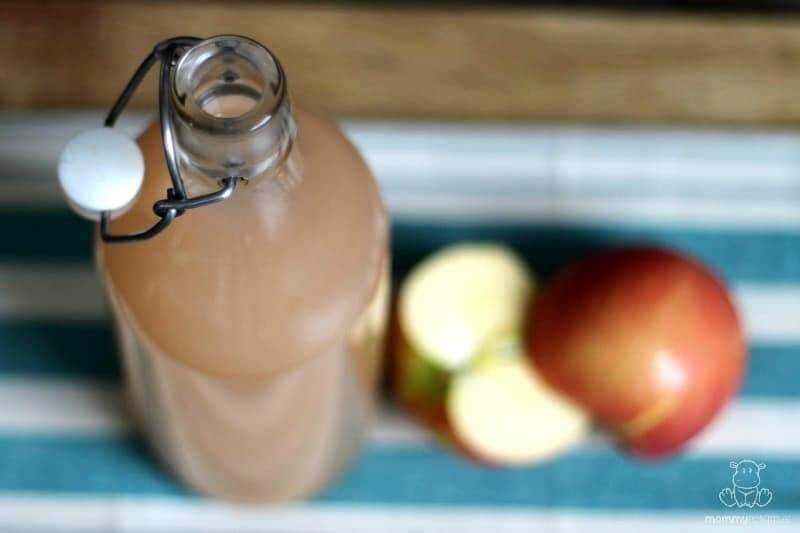
Once it has developed the taste that you desire, you can now bottle it, seal it with a lid and start to use it.
About Carly Daley
Carly is passionate about the environment, sustainable living, and cooking healthy (yet delicious!) meals for her family. She’s a proud “modern hippie housewife” and mama of two!
Her hobbies include traveling, fermenting food and beverages, cooking from-scratch, gardening, dancing, DIY-ing almost everything, and relaxing after a long day by tuning in to whatever Netflix show she’s currently addicted to with her husband.
Источник


