- How to Create a Free Apple Developer Account
- Create an Apple Developer Account
- Sign into Xcode with Your Dev Account
- Sideload/Run Apps on Your iPhone
- Enroll in the Apple Developer Program
- Further Reading
- How-To: Create a free Apple developer account for sideloading apps
- Creating an Apple developer account
- Video walkthrough
- Signing in with Xcode
- From Code to Customer
- Get the latest betas.
- Access comprehensive services.
- Test your apps.
- Distribute apps worldwide.
- Dive deep into analytics.
- Get help from Apple experts.
- Как зарегистрировать аккаунт разработчика Apple Developer
How to Create a Free Apple Developer Account
Written by LearnAppMaking on January 30 2020 in App Development

If you want to run your iOS apps on your iPhone or iPad, you’ll need a free Apple Developer Account. Since Xcode 7, you can use your Apple ID to run and install your own apps on iPhone and iPad. You’ll still need a paid Developer Program membership to publish apps in the App Store, and to use App Store Connect.
In this tutorial, we’ll discuss:
- How to get a free Developer Account with your Apple ID
- Connecting Xcode on your Mac to your new Developer Account
- Running (“sideloading”) your apps on your iPhone or iPad
- How to enroll in the paid Apple Developer Program
Create an Apple Developer Account
Let’s get you set up with a free account, which will allow you to run your own iOS apps on iPhone and iPad – with zero costs.

You’re now asked to log into the Member Center. You have two options:
- Log in with an existing Apple ID
- Create a new Apple ID
If you’re already using Apple’s services, chances are you already have an Apple ID. It’s OK to use this Apple ID to sign up for a Developer Account. If you want to keep things separated, then opt to create a new Apple ID.

Once you’ve successfully logged in, you’re asked to accept the Apple Developer Agreement. Simply check the boxes and continue to the next page.
That’s it! Your Apple ID now gives you access to the free Apple Developer Account. With it, you can run your own iPhone and iPad apps on your devices. This is done in Xcode, which we’ll cover in the next step.
Keep in mind that, to publish apps in the App Store, you still need that $99/year paid Apple Developer account. You also can’t download iOS, macOS, etc. betas with the free account, which is a bummer.
Apple’s Developer portal, at developer.apple.com, is a pretty cool place to hang out! You’ve got access to WWDC videos, the Human Interface Guidelines, documentation, helpful tips for app promotion, and much more. I wrote an in-depth guide about making the most of Apple’s docs, here: How To Use Apple’s Developer Documentation For Fun And Profit
Sign into Xcode with Your Dev Account
Alright, the next step is enabling your developer account in Xcode. Here’s how:
- Start Xcode on your Mac
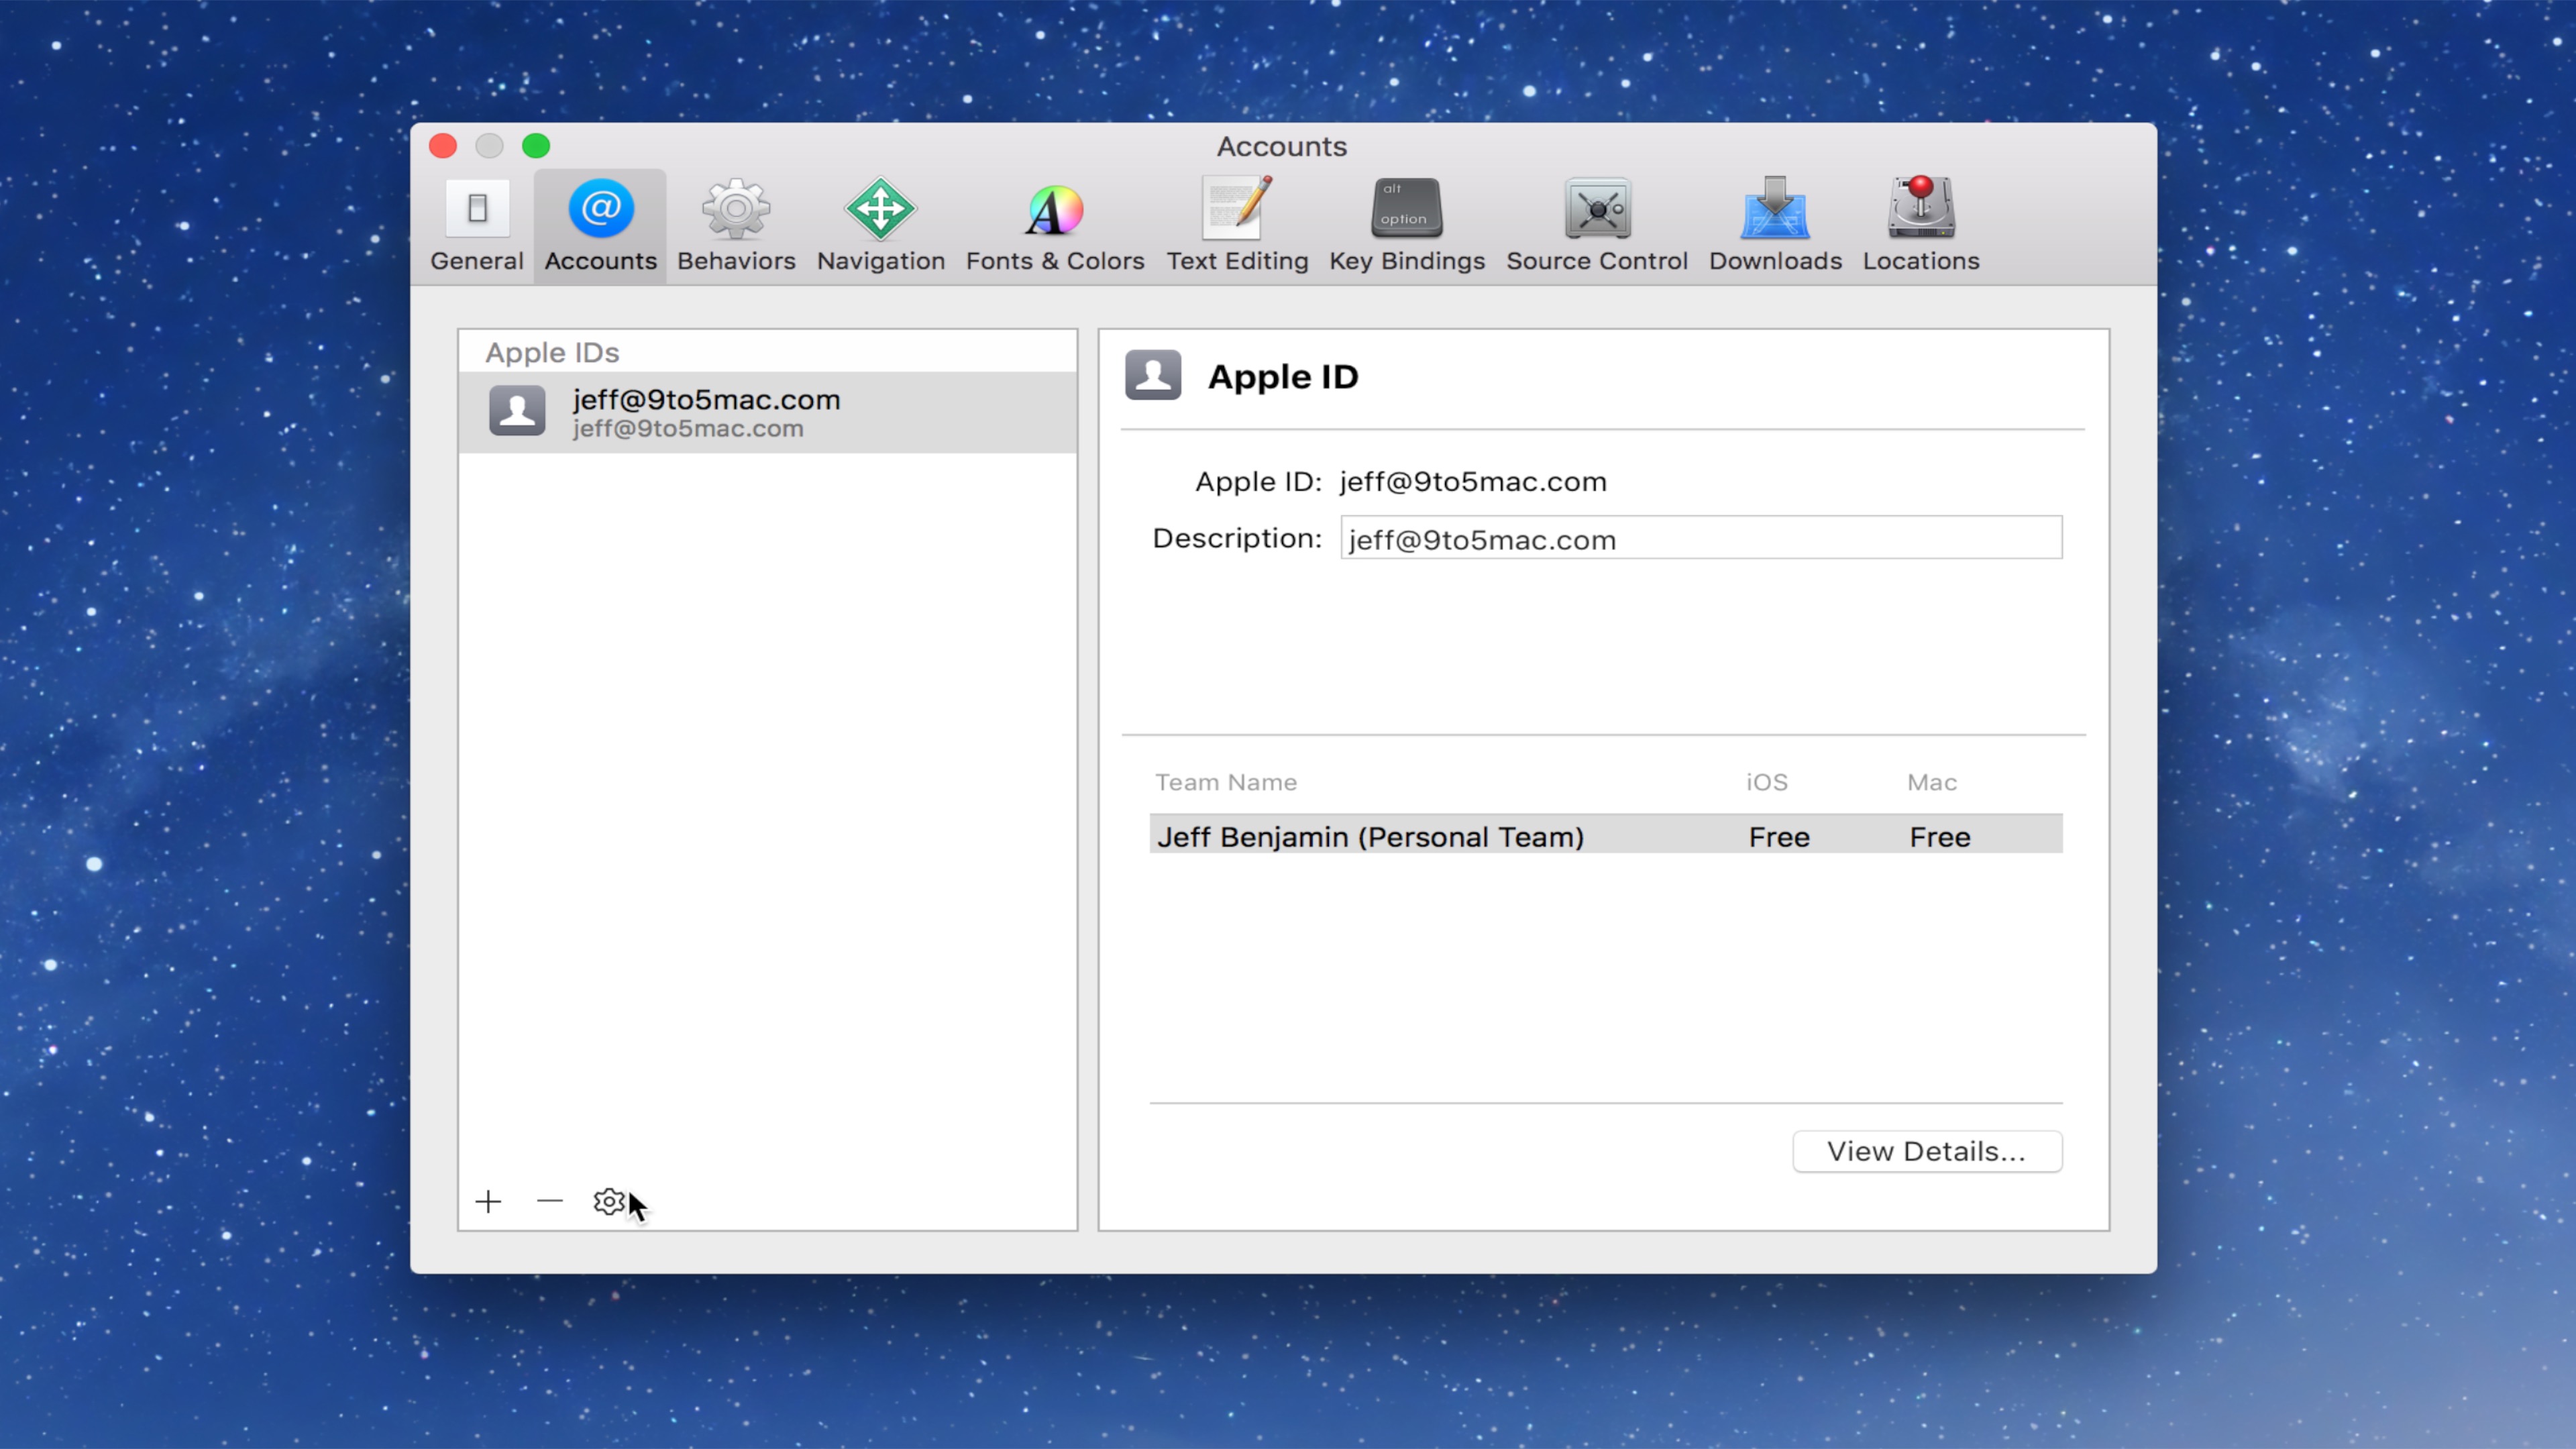
- Choose the Xcode → Preferences menu and navigate to the Account pane
- Click the + -button in the bottom-left corner and choose Apple ID
- Log in with your Apple ID email address and password (Keep a 2FA device handy! You do use 2FA, right?)
You now have access to your Developer Account in Xcode! Easy, right? The developer account you added is called “Personal Team”, which should show up in the list on the right.

A few interesting notes:
- You can add multiple Developer Accounts under one Apple ID. For example, if you choose to add a client’s or employer’s paid developer account, you can do so. (You can also add multiple Apple IDs to Xcode.)
- If you’ve signed into iCloud prior to starting Xcode, and added the free dev account to your iCloud Apple ID, it should automatically show up under Accounts. (This isn’t always the case though!)
Sideload/Run Apps on Your iPhone
The next step is running your own iOS app on your iPhone and iPad! First, make sure your iPhone (or iPad) is connected to your Mac via USB. When your iPhone prompts you to confirm connecting to your Mac, tap Trust.
Then, in Xcode, choose the Window → Devices and Simulators menu. Select your iPhone from the list, and then click the Enable Device for Development button. (Depending on the context, this may not be a necessary step.) It’s also smart to enable the Connect via network option, which lets you debug apps on your iPhone without connecting via USB.

The next step, which isn’t always required, is changing the Signing & Capabilities setting of the project you’re about to run. You can do this by navigating to the project settings, then select the project name below Targets, and go to the Signing & Capabilities tab. Click the checkbox for Automatically manage signing, and then select your Personal Team from the dropdown list.

If everything went according to plan (does it ever!?), you should now be able to select your iPhone in the top-left corner of Xcode. This is the Build Target setting, and with it you can select the device (or simulator) your app needs to run on.
You can now click the Play button or hit Command + R to install and run the app on your iPhone!

Running your app on your iPhone is finicky at times. Did you get an error? Copy-and-paste it into Google, and check out some of the first StackOverflow questions and answers. Miraculously, restarting Xcode helps 8 out 10 times… Have you tried turning it off and on again!?
Enroll in the Apple Developer Program
If you’re serious about publishing an app in the App Store, you’ll need to get a paid Apple Developer account. The standard Apple Developer Program license costs $99 a year, which renews annually. You’ll need the license to keep your app in the App Store, too.
With this account, you’re allowed to publish live apps in the App Store, access members-only resources, SDKs and betas, and beta test your app via TestFlight. It’ll also give you access to App Store Connect (formerly called iTunes Connect), with which you can manage your production apps.
You’ve got a few options to choose from:
- You can choose between a Personal or Organization account. The biggest difference is how your app appears in the App Store. A Personal account will show your personal name, whereas a Organization account shows your company name. You can only sign up for a company account if you’ve registered as a company, i.e. incorporated, a joint venture or sole proprietorship.
- You can also sign up for the Enterprise Program, which allows you to distribute private apps within your company. You’ll need at least 100 employees to be eligible; the rules are quite strict. However, it’s an option to keep in mind if you’re going to build an in-house app for a client or employer. Similarly, the Apple Volume Purchase Program and the B2B App Store are options to keep in mind for later.
If you want to register as a company, you’ll need a DUNS number. This is essentially an outside verification that you’ve registered as a company. Acquiring a DUNS number is often free and reasonably quick.
You can get started with enrolling in the Developer account here.
Further Reading
Awesome! You now have everything you need to build and run your own apps on your iPhone or iPad. And it’s (almost) all free! Here’s the gist of what we discussed:
- You can run your own iOS apps on your iPhone if you’ve got an Apple ID, and enable it in Xcode
- You’ll need a $99/year Apple Developer Program license if you want to publish your apps in the App Store, and get a bunch of resources
Want to learn more? Check out these resources:
Источник
How-To: Create a free Apple developer account for sideloading apps
— Mar. 27th 2016 4:51 pm PT
Starting with Xcode 7, Apple made it possible to sideload apps on the iPhone, iPad, and Apple TV using a free Apple ID. Although a paid developer account is still required to deploy apps to the App Store, users wishing to sideload open source apps on a personal device can do so with relative ease. In this post, we’ll show you how easy it is to create a free Apple developer account for sideloading apps using Xcode.
Creating an Apple developer account
Step 1: Visit developer.apple.com
Step 2: Click Member Center.
Step 3: Sign in with your Apple ID.
- If you already have an Apple ID, you’ll just need to agree to Apple’s Developer Agreement to turn it into a free developer account. Type in your Apple ID and click Sign In.
- If you don’t already have an Apple ID, you’ll need to create one first. Click Create Apple ID, and fill out the required information and click Continue. You’ll then need to sign in with the Apple ID that you just created, and go back to the Member Center.
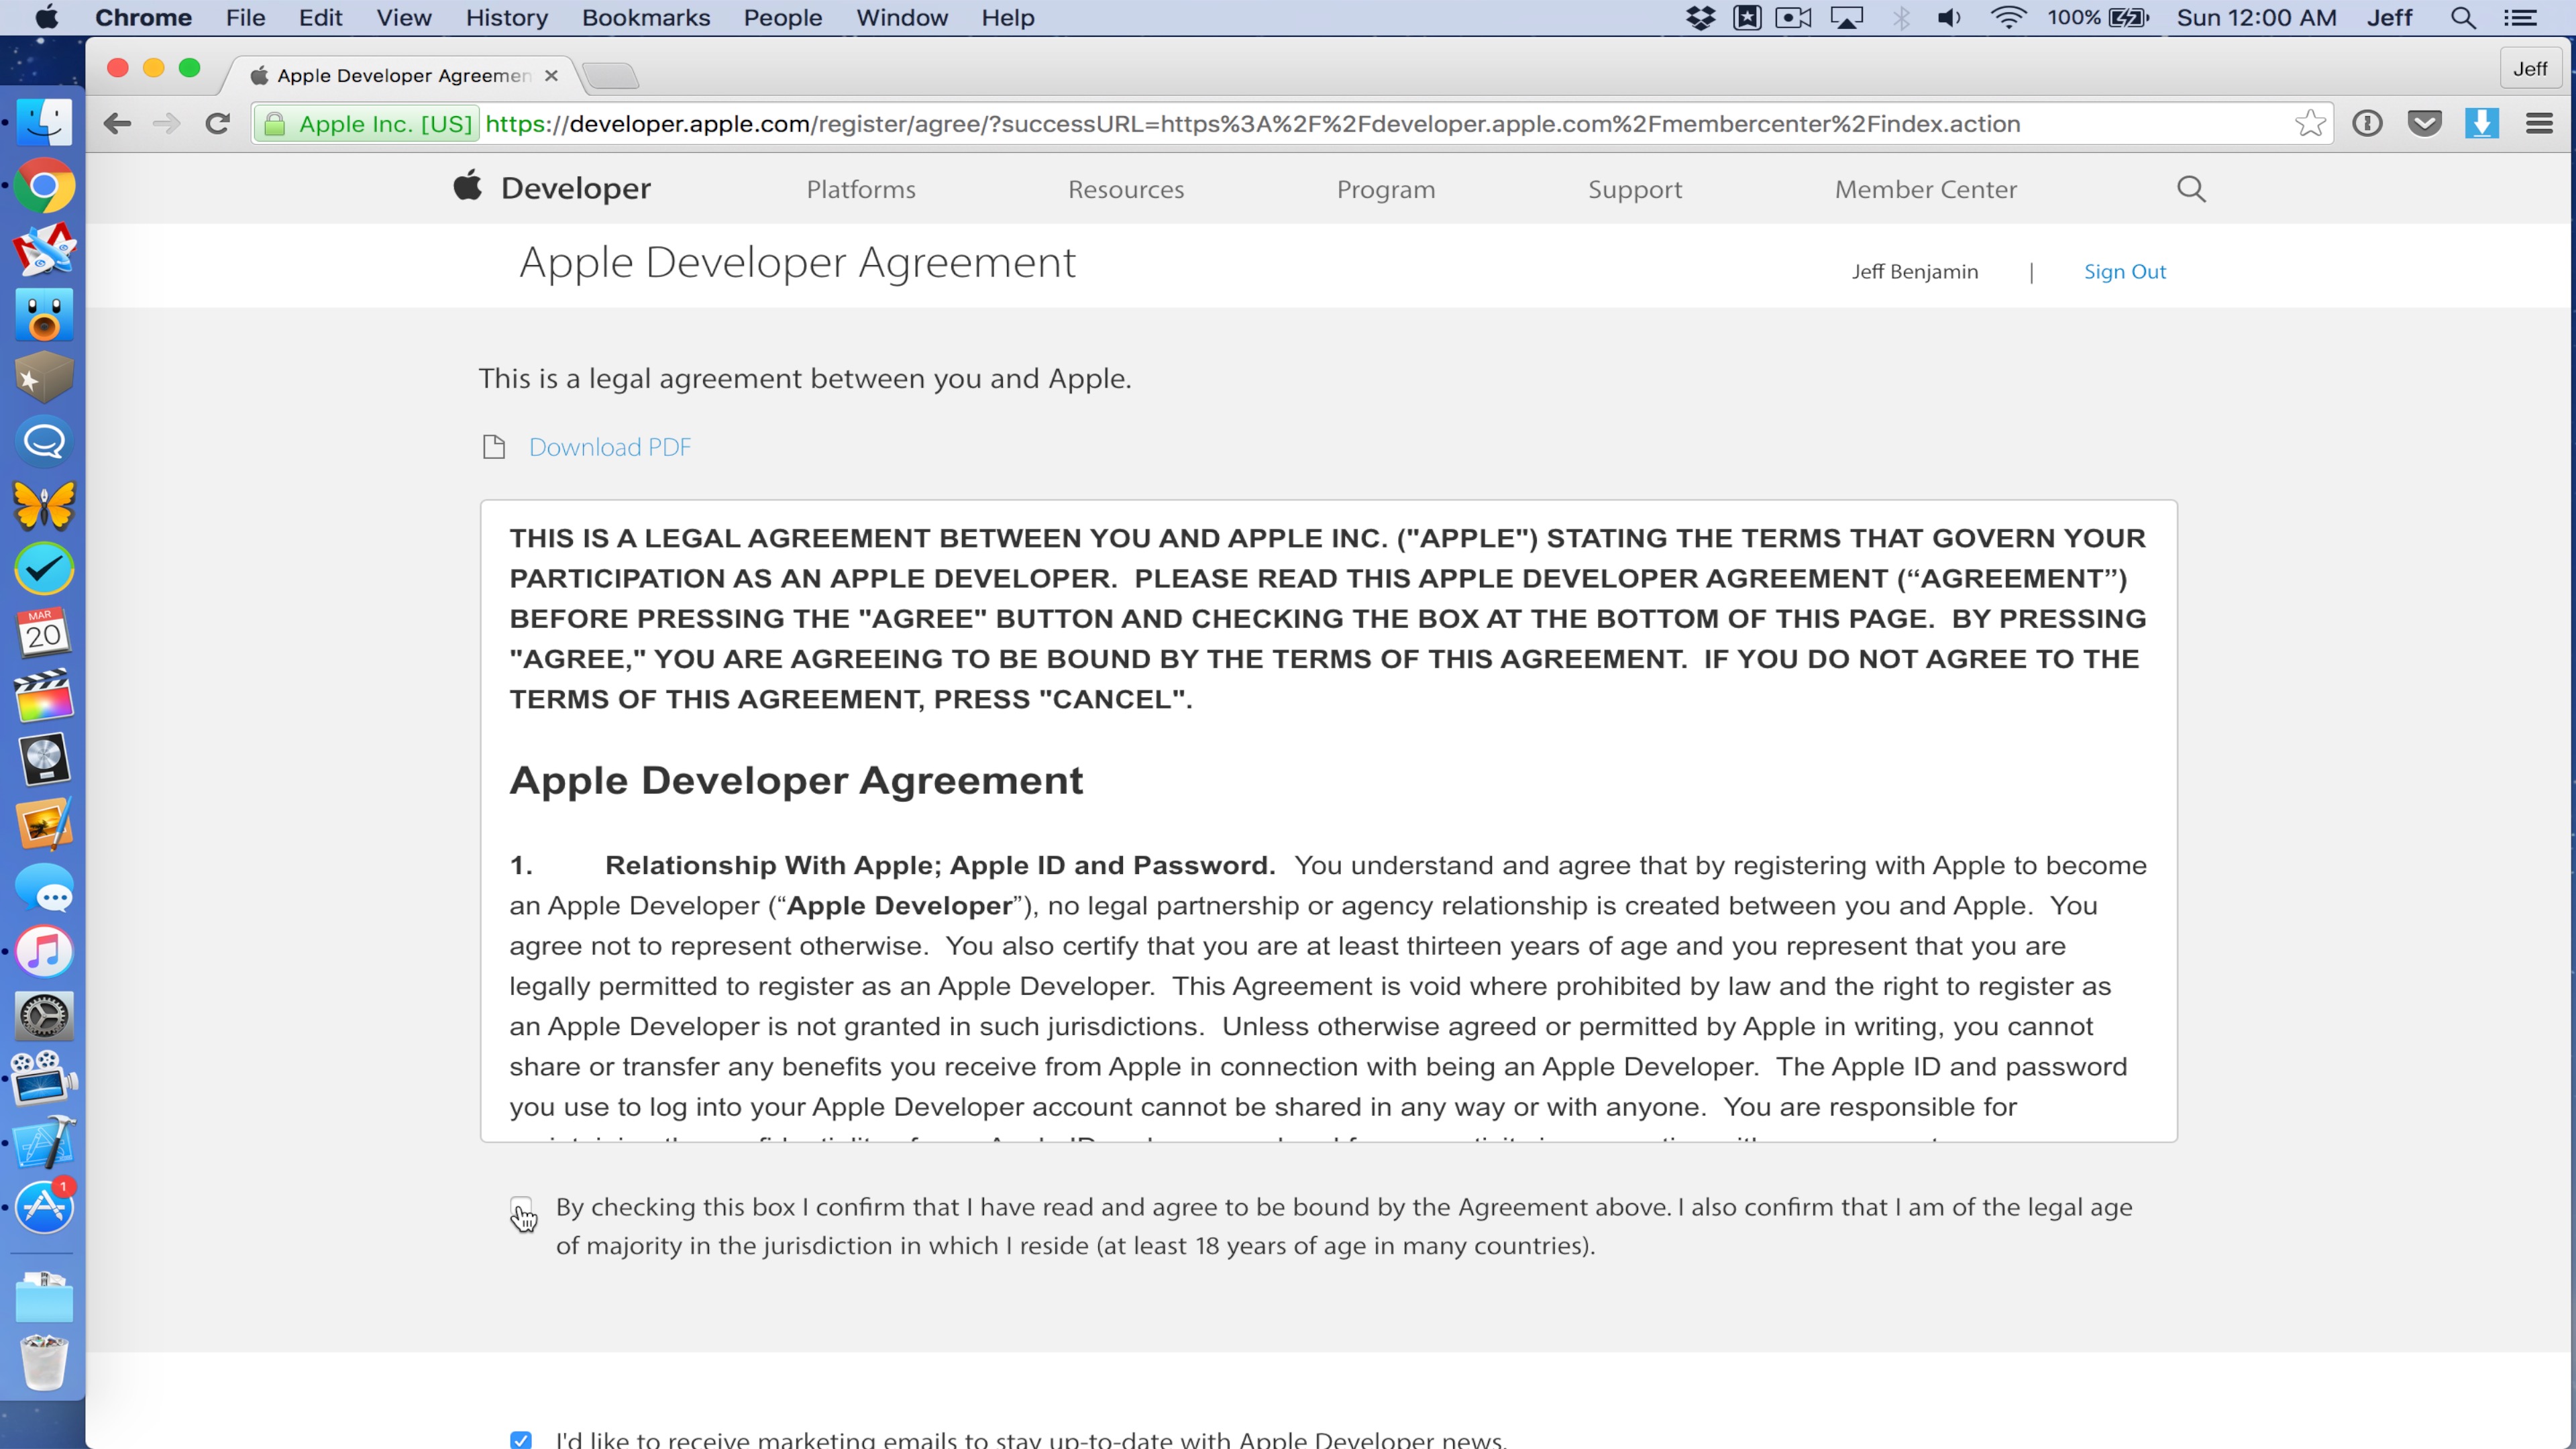
Step 4: On the Apple Developer Agreement page, click the first check box to accept the agreement and click the Submit button.
Your Apple ID now works as a free developer account. As stated at the outset, this account can be used for sideloading apps via Xcode. You will not be able to submit apps to the App Store, or download iOS, OS X, watchOS, or tvOS developer betas. A $99/year paid developer account is still required to enjoy those privileges.
Video walkthrough
Signing in with Xcode
Step 1: Download Xcode from the Mac App Store.
Step 2: Launch Xcode.
Step 3: Click Xcode → Preferences → Accounts and click the ‘+’ sign and choose Add Apple ID.
Step 4: Login with the Apple ID that you just enabled with free developer privileges.
You can now use Xcode to sideload apps on your favorite platforms. This tutorial can also be used in concert with our Apple TV 4 jailbreak tutorial.
This is a basic tutorial that will be referenced in future tutorials involving sideloading on the Apple TV, iPhone, and iPad. Stay tuned for additional discussion regarding sideloading apps.
FTC: We use income earning auto affiliate links. More.
Источник
From Code to Customer
Join the Apple Developer Program to reach customers around the world on the App Store for iPhone, iPad, Mac, Apple Watch, Apple TV, and iMessage. Membership includes all the tools, resources, and support you need to develop and distribute apps, including access to beta software, app services, testing tools, app analytics, and more.
Get the latest betas.
The incredibly rapid adoption rate of new software by Apple customers means you’ll want to integrate the latest innovative Apple technologies into your apps quickly, so they’ll seamlessly integrate with the latest advances in iOS, iPadOS, macOS, watchOS, and tvOS as soon as they’re released. You’ll always be ready for what’s coming next as you create your most innovative apps ever.
Access comprehensive services.
Leverage Apple’s tightly integrated hardware, software, services, and capabilities to create useful and engaging experiences. Allow your users to subscribe to special content, experience your app in new ways using augmented reality, create intelligent features with on-device machine learning, and quickly purchase items within your app with Apple Pay, sign in to your app and website with their Apple ID, get things done with just their voice using Siri, and much more.
Test your apps.
Collect valuable feedback before releasing your apps and App Clips. With TestFlight, you can invite up to 10,000 external users to try out your beta builds using just their email address or by sharing a public link.
Distribute apps worldwide.
The App Store makes it easy for users in 175 regions to discover and download your apps, games, and extensions across Apple platforms. Apple handles worldwide payment processing, offers unlimited hosting and bandwidth — even for free apps, verifies user accounts, and much more to empower you to scale your app distribution. With Apple Business Manager and Apple School Manager, you can offer your app in volume or custom apps only to organizations you specify. You can even choose to distribute your Mac apps outside the Mac App Store using your Developer ID certificate and Apple’s notarization process, which reassures users that you’re a trusted developer.
Dive deep into analytics.
Measure user engagement, marketing campaign performance, and monetization with App Store Connect, which includes information you won’t find anywhere else and requires no technical implementation.
Get help from Apple experts.
Learn how to take your apps to the next level at special events for program members. And request code-level support from technical support engineers, so you can fix a bug, implement a specific technology, and get your questions answered.
Источник
Как зарегистрировать аккаунт разработчика Apple Developer
Пошаговое руководство по созданию учетной записи Apple Developer для ваших iOS приложений.
ВАЖНО: Apple теперь требует, чтобы все, участвующие в их программе для разработчиков, владели устройством iOS, поэтому, если у вас его еще нет, вам нужно будет его купить.
Важное примечание. Имя разработчика, указанное в iTunes App Store, зависит от типа учетной записи, выбранной из указанных ниже параметров.
В приложениях, опубликованных в индивидуальных учетных записях разработчиков, будет отображаться имя, указанное в учетной записи разработчика iOS. В приложениях, опубликованных в учетных записях разработчиков компании/организации, будет отображаться название компании, введенное в учетной записи разработчика iOS. Если ваше приложение зарегистрировано в вашей компании, вам необходимо зарегистрировать учетную запись разработчика компании/организации под названием вашей компании. Если ваше приложение является личным, вы можете зарегистрироваться в индивидуальной учетной записи разработчика. Регистрация в правильном типе учетной записи разработчика поможет поддерживать ваше приложение и учетную запись в соответствии с рекомендациями Apple и поможет в процессе модерации.
Частные лица или компании без официально признанного бизнеса (компания без номера D.U.N.S. и Bradstreet). Эта учетная запись допускает создание только одной основной учетной записи для учетной записи разработчика iOS. Кроме того, имя разработчика, которое будет опубликовано (в App Store), будет вашим именем и фамилией. Если вы предпочитаете, чтобы название компании отображалось в качестве имени разработчика, вам необходимо настроить свою учетную запись как компанию/организацию.
Юридически признанные компании с номерами D.U.N.S. и Bradstreet могут выбрать эту опцию. Это позволит создавать и управлять несколькими именами пользователей с различными возможностями для каждого входа. Также, такой тип аккаунта необходим, если разрабатывается приложение webview, такое, как делает Appverter.
Если ваше приложение зарегистрировано в вашей компании (в отличие от отдельного лица), вам нужно будет зарегистрироваться в качестве компании/организации, и для этого вам нужно будет указать номер D.U.N.S. Если вы не уверены, есть ли в вашей компании номер D.U.N.S., вы можете посмотреть здесь.
Если у вас еще нет номера DUNS, его можно получить бесплатно, и вы можете получить его на этой странице. Если вам нужна помощь в получении номера DUNS, вы можете выполнить действия, описанные здесь или тут.
Получив номер DUNS, вы можете предоставить его Apple во время регистрации в Apple:
Источник


