- What to do before you sell, give away or trade in your iPhone, iPad or iPod touch
- If you still have your iPhone, iPad or iPod touch
- Transfer information to your new device
- Remove your personal information from your old device
- If you no longer have your iPhone, iPad or iPod touch
- If you’re trading in an Android device to Apple
- Learn more
- Get your iPhone, iPad, or iPod touch ready for service
- Before you bring in your device
- Before you send your device
- Set up your iPhone, iPad, or iPod touch
- If you’re switching to a new device
- If you’re setting up your first iOS device
- Turn on your device
- If you have another device, use Quick Start
- Activate your device
- Set up Face ID or Touch ID and create a passcode
- Restore or transfer your information and data
- Sign in with your Apple ID
- Turn on automatic updates and set up other features
- Set up Siri and other services
- Set up Screen Time and more display options
- Finish up
- How your Apple Card application is evaluated
- Requirements to get Apple Card
- Conditions that might cause your application to be declined
What to do before you sell, give away or trade in your iPhone, iPad or iPod touch
Follow these steps to transfer information to your new device, then remove your personal information from your old device.
Before you sell, give away or trade in your device, you should first transfer information to your new device, then remove your personal information from your old device.
You shouldn’t manually delete your contacts, calendars, reminders, documents, photos or any other iCloud information while you’re signed in to iCloud with your Apple ID. This would delete your content from the iCloud servers and any of your devices signed in to iCloud.
If you still have your iPhone, iPad or iPod touch
Follow these steps to transfer information to your new device, then remove your personal information from your old device.
Transfer information to your new device
If you have a new iPhone, iPad or iPod touch, you can use Quick Start to transfer information automatically from your old device to your new device if you’re using iOS 11 or later. Use iCloud, iTunes or the Finder to transfer information to your new device if you’re using iOS 10 or earlier.
If your phone number will change with your new device, add additional trusted phone numbers to your account to ensure you don’t lose access. If you no longer have access to your old phone number, you can generate a two-factor authentication code on your old device if needed.
Remove your personal information from your old device
- If you’ve paired an Apple Watch with your iPhone, unpair your Apple Watch.
- Back up your device.
- Sign out of iCloud and the iTunes & App Store.
- If you’re using iOS 10.3 or later, tap Settings > [your name]. Scroll down and tap Sign Out. Enter your Apple ID password and tap Turn Off.
- If you’re using iOS 10.2 or earlier, tap Settings > iCloud > Sign Out. Tap Sign Out again, then tap Delete from My [device] and enter your Apple ID password. Then go to Settings > iTunes & App Store > Apple ID > Sign Out.
- If you’re switching to a non-Apple phone, deregister iMessage.
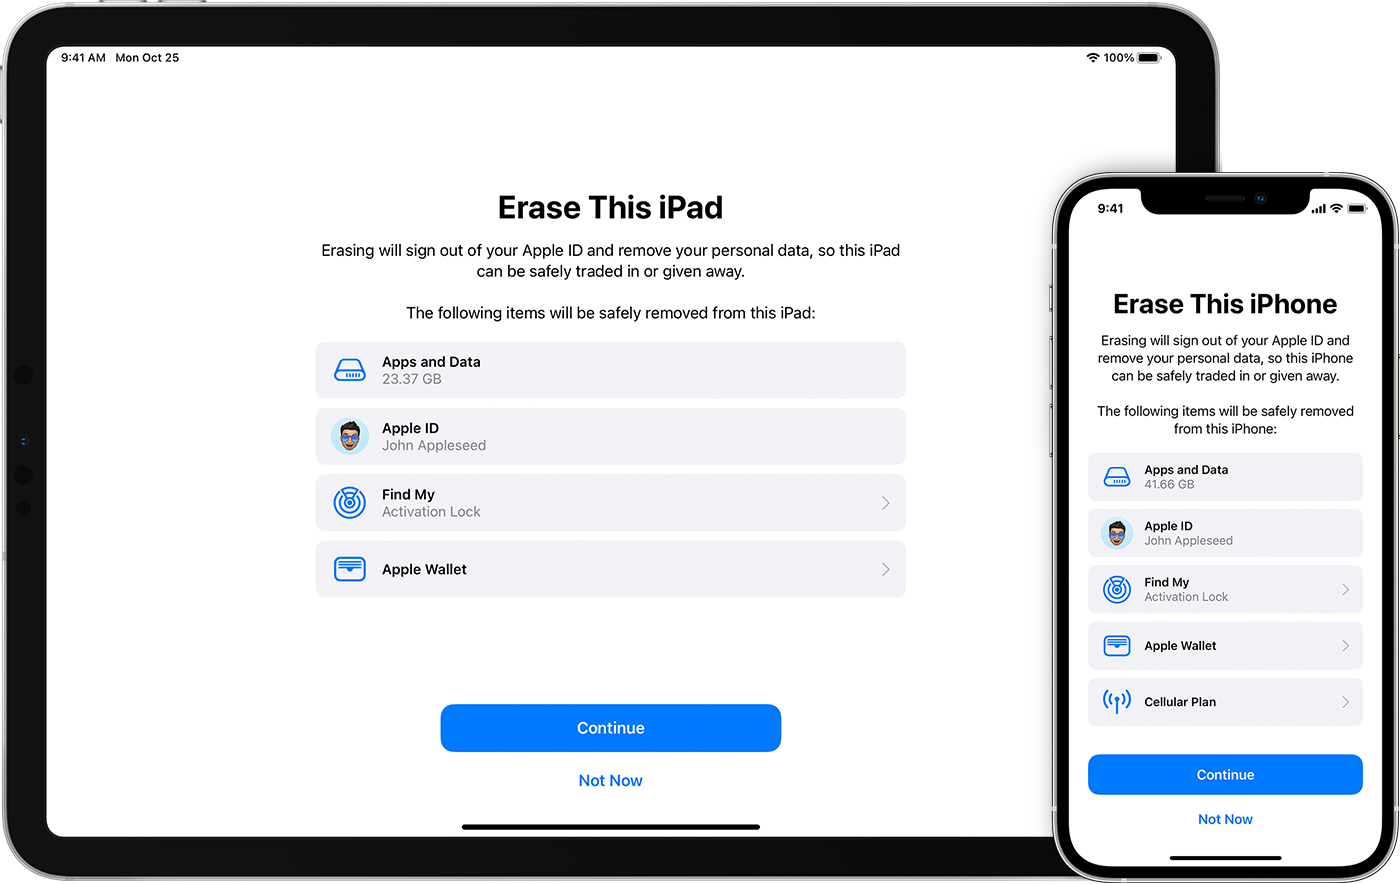
- Go back to Settings and tap General > Transfer or Reset [device] > Erase All Content and Settings. If you’ve turned on Find My [device], you may need to enter your Apple ID and password. If your device uses eSIM, choose the option to erase your device and the eSIM profile when asked.
- If asked for your device passcode or Restrictions passcode, enter it. Then tap Erase [device].
- Contact your network provider for help transferring service to a new owner. If you’re not using a SIM card with your device, you can contact them to get help transferring service to the new owner.
- Remove your old device from your list of trusted devices.
When you erase your iPhone, iPad or iPod touch, Find My [device] and Activation Lock will be turned off.

If you no longer have your iPhone, iPad or iPod touch
If the steps above weren’t completed and you no longer have your device, follow these steps:
- Ask the new owner to erase all content and settings using the above steps.
- If you’re using iCloud and Find My [device] on the device, sign in to iCloud.com/find or the Find My app on another device, select the device, and click Erase. After the device has been erased, click Remove from Account.
- If you can’t follow either of the above steps, change your Apple ID password. This won’t remove personal information that’s stored on your old device, but it will prevent the new owner from deleting your information from iCloud.
- If you’re switching to a non-Apple phone, deregister iMessage.
- If you’re using Apple Pay, you can remove your credit or debit cards on iCloud.com. Choose Account Settings to see which devices are using Apple Pay, then click the device. Next to Apple Pay, click Remove.
- Remove your old device from your list of trusted devices.
If you’re trading in an Android device to Apple
Before sending in an Android device to Apple as a trade-in, make sure you do the following:
- Back up your data.
- Erase the device.
- Remove any SIM cards, memory cards, cases and screen protectors.
Contact your device’s manufacturer if you need help.
Learn more
- Make a backup of your iPhone, iPad or iPod touch or restore from a backup.
- Remove all of your cards from Apple Pay.
- Get help if your iPhone, iPad or iPod touch is lost or stolen.
- Find out about Activation Lock.
- No matter the model or condition, we can turn your device into something good for you and good for the planet. Find out how to trade in or recycle your iPhone, iPad or iPod touch with Apple Trade In.
When you tap Erase All Content and Settings, it will erase your device completely, including any credit or debit cards you’ve added for Apple Pay and any photos, contacts, music or apps. It will also turn off iCloud, iMessage, FaceTime, Game Center and other services. Your content won’t be deleted from iCloud when you erase your device.
Источник
Get your iPhone, iPad, or iPod touch ready for service
To protect your information and save time, follow these steps before you get service for your device.
Before you bring in your device
Follow these steps before you take your device to an Apple Store, Apple Authorized Service Provider, or carrier. If your device won’t turn on or respond, finish as many steps as possible:
- Back up your iOS device.
- Have your Apple ID password ready. For some repairs, you’ll need your Apple ID password to erase your device and turn off Find My iPhone.*
- If your iPhone needs battery service, have the battery percentage at 30% or less when you bring it in, if possible.
If you haven’t already, call to check whether you need an appointment before you go to a service location. For example, schedule a Genius Bar reservation before you go to an Apple Store. When you go, remember to bring these items:
- Your sales receipt (if possible), in case your service requires proof of purchase
- Your device and any accessories that you need help with
- A form of personal identification, such as a driver’s license, passport, or other government-issued ID
* If you’re unable to turn off Find My iPhone, Apple might not be able to service your device. This policy is in force to prevent unauthorized persons from servicing your device without your knowledge. If you don’t remember your Apple ID and Password, please go to iForgot.
Before you send your device
Follow these steps before you send your device in for repair or replacement. If it won’t turn on or respond, finish as many steps as possible:
- Back up your iOS device. To protect your data, erase your iOS device.
- Remove your iOS device from your Apple ID device list.
- Remove the SIM card from your iOS device or iPadOS device if it uses one, and keep it in a safe place. If your iOS device doesn’t use a SIM card, contact your wireless service provider to suspend service if necessary.
Now your device is ready to send. If you arranged a repair request, you should have received instructions for mailing your device. If you didn’t get instructions, contact Apple Support.
If you haven’t set up a repair request, choose from these options:
Источник
Set up your iPhone, iPad, or iPod touch
Learn how to set up your iPhone, iPad, or iPod touch.
If you’re switching to a new device
If you want to transfer your information from another device to your new iPhone, iPad, or iPod touch, follow these steps:
Make sure that you back up your previous iOS device so that you can transfer the content to the new device.
If you’re setting up your first iOS device
If you already set up your new device but want to start over, learn how to erase your iPhone, iPad, or iPod touch.
Otherwise, follow these steps:
Turn on your device
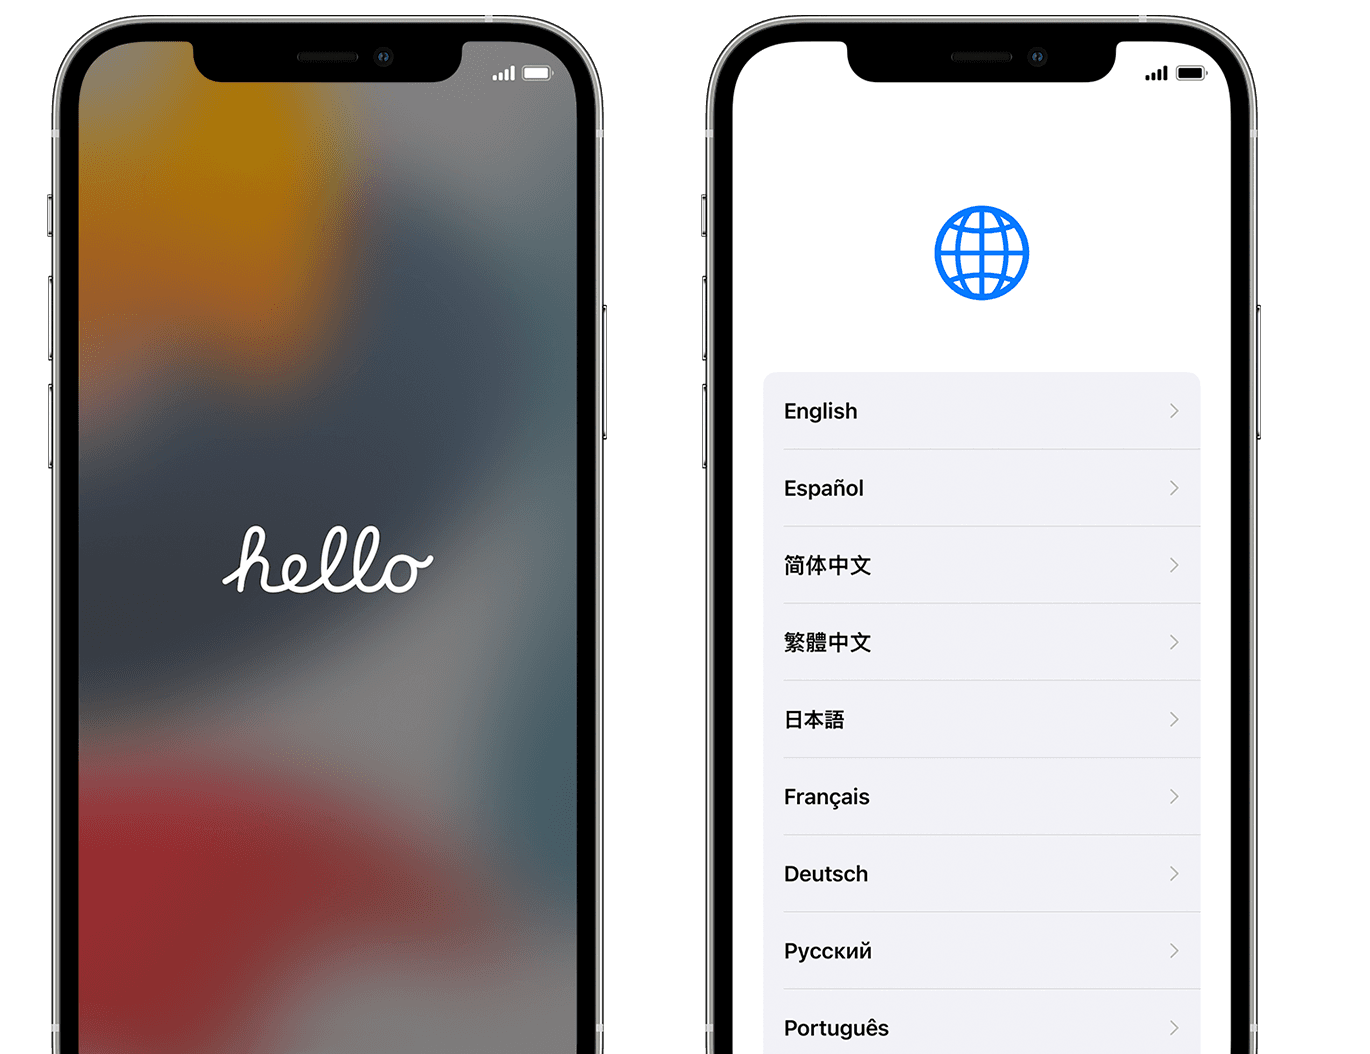
Press and hold the device’s power button until you see the Apple logo. You’ll then see «Hello» in many languages. Follow the steps to get started. If you’re blind or have low vision, you can turn on VoiceOver or Zoom from the Hello screen.
When asked, choose your language. Then tap your country or region. This affects how information looks on your device, including date, time, contacts, and more. At this point, you can tap the blue accessibility button to set up Accessibility Options that can optimize your setup experience and the use of your new device.
If you have another device, use Quick Start
If you have another device, you can use it to automatically set up your new device with Quick Start. Bring the two devices close together, and then follow the instructions.
If you don’t have another device, tap «Set Up Manually» to continue.

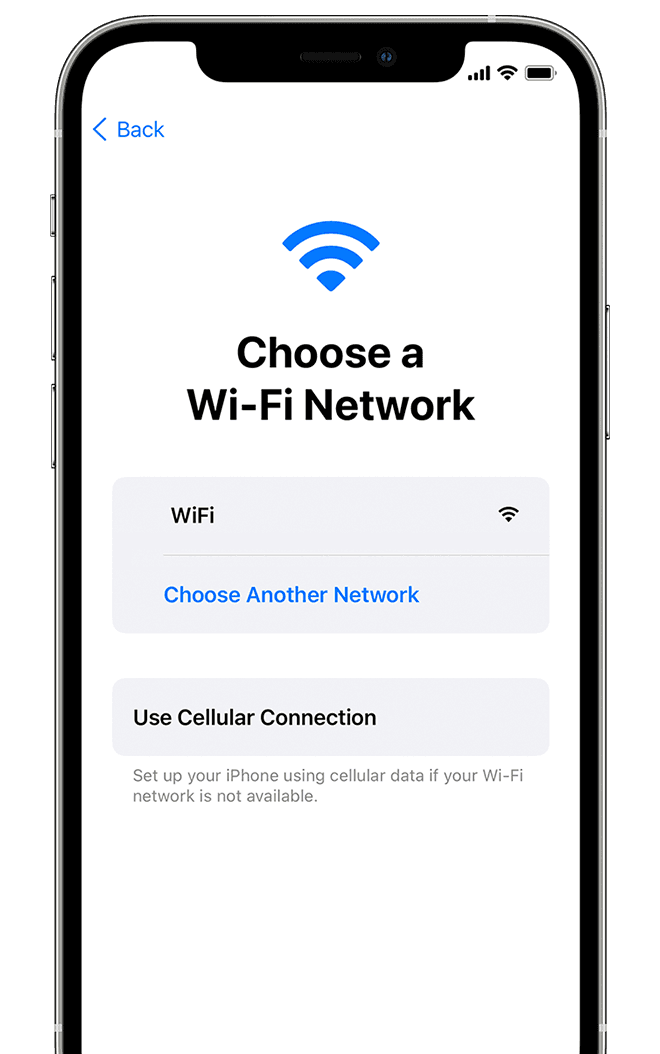
Activate your device
You need to connect to a Wi-Fi network, a cellular network, or iTunes to activate and continue setting up your device.
Tap the Wi-Fi network that you want to use or select a different option. If you’re setting up an iPhone or iPad (Wi-Fi + Cellular), you might need to insert your iPhone SIM card or iPad SIM card first.
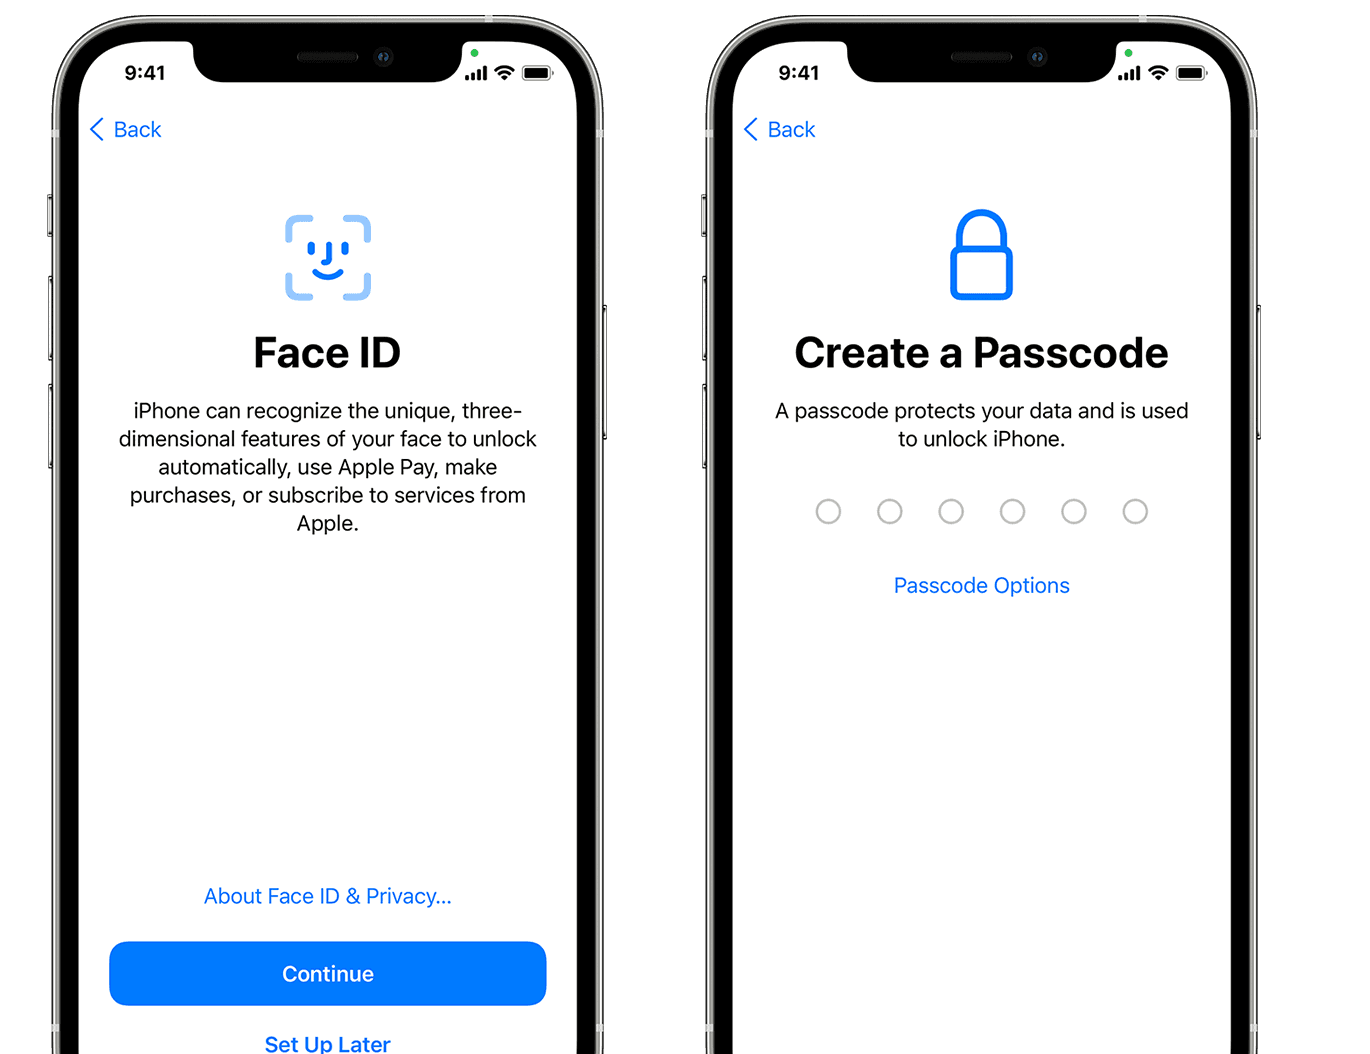
Set up Face ID or Touch ID and create a passcode
On some devices, you can set up Face ID or Touch ID. With these features, you can use face recognition or your fingerprint to unlock your device and make purchases. Tap Continue and follow the instructions, or tap «Set Up Later in Settings.»
Next, set a six-digit passcode to help protect your data. You need a passcode to use features like Face ID, Touch ID, and Apple Pay. If you’d like a four-digit passcode, custom passcode, or no passcode, tap «Passcode Options.»
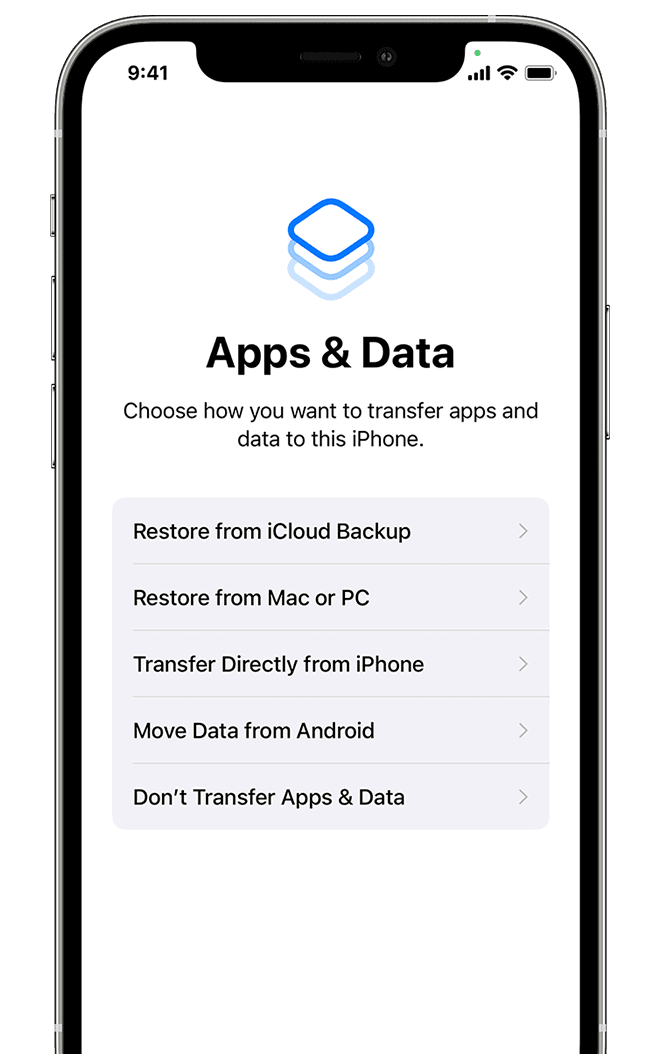
Restore or transfer your information and data
If you have an iCloud backup or a backup made from your computer or an Android device, you can restore or transfer your data from your old device to your new device.
If you don’t have a backup or another device, select Don’t Transfer Apps & Data.
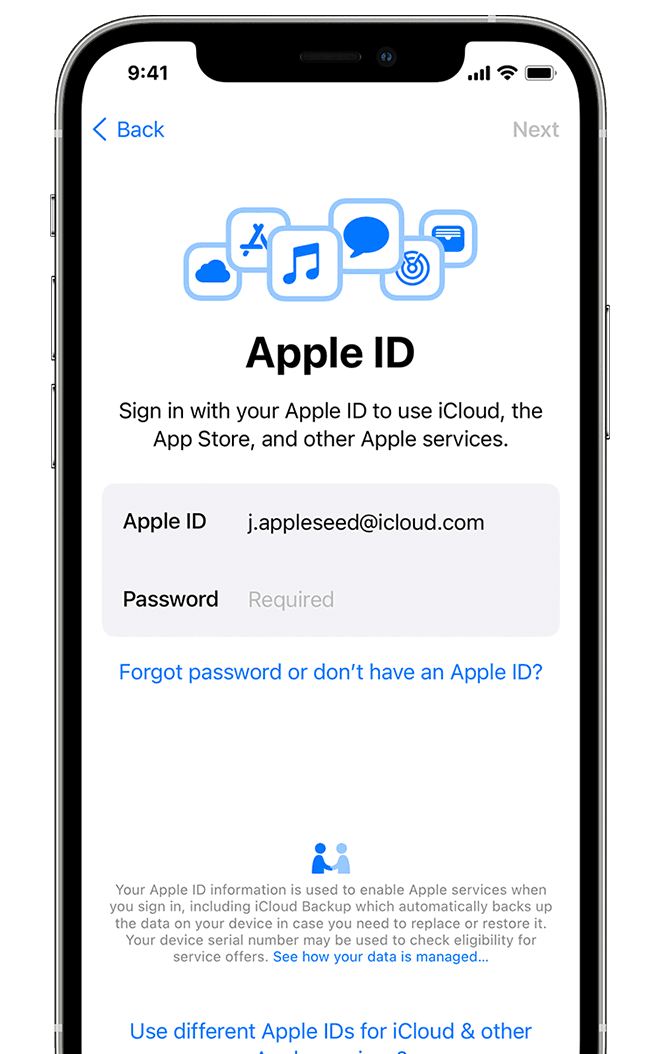
Sign in with your Apple ID
Enter your Apple ID and password, or tap «Forgot password or don’t have an Apple ID?» From there, you can recover your Apple ID or password, create an Apple ID, or set it up later. If you use more than one Apple ID, tap «Use different Apple IDs for iCloud and iTunes?»
When you sign in with your Apple ID, you might be prompted for a verification code from your previous device.
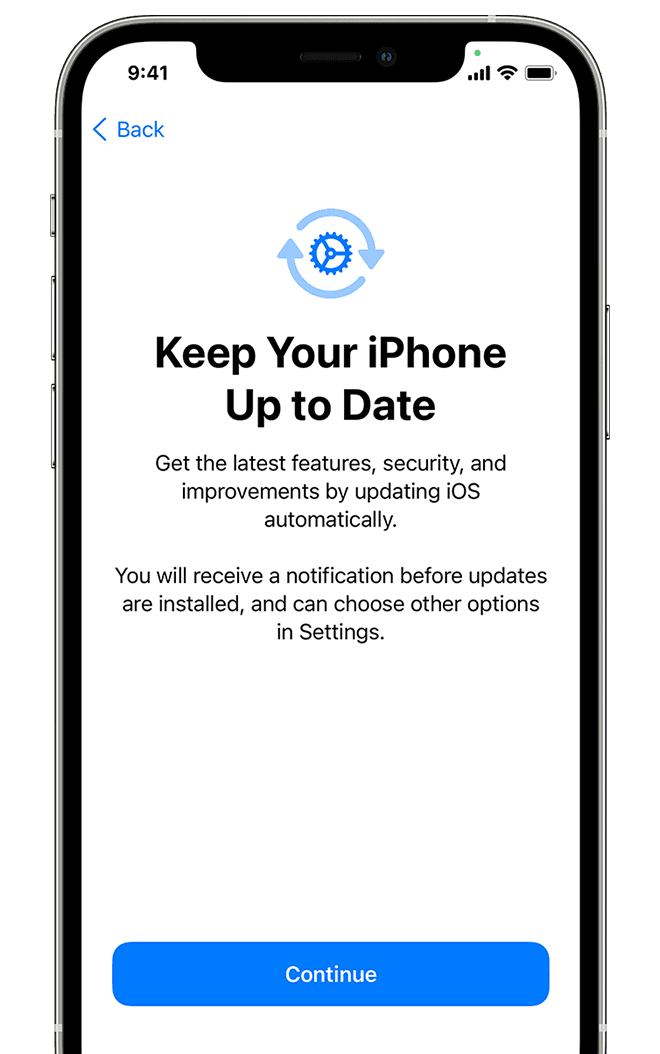
Turn on automatic updates and set up other features
On the next screens, you can decide whether to share information with app developers and allow iOS to update automatically.
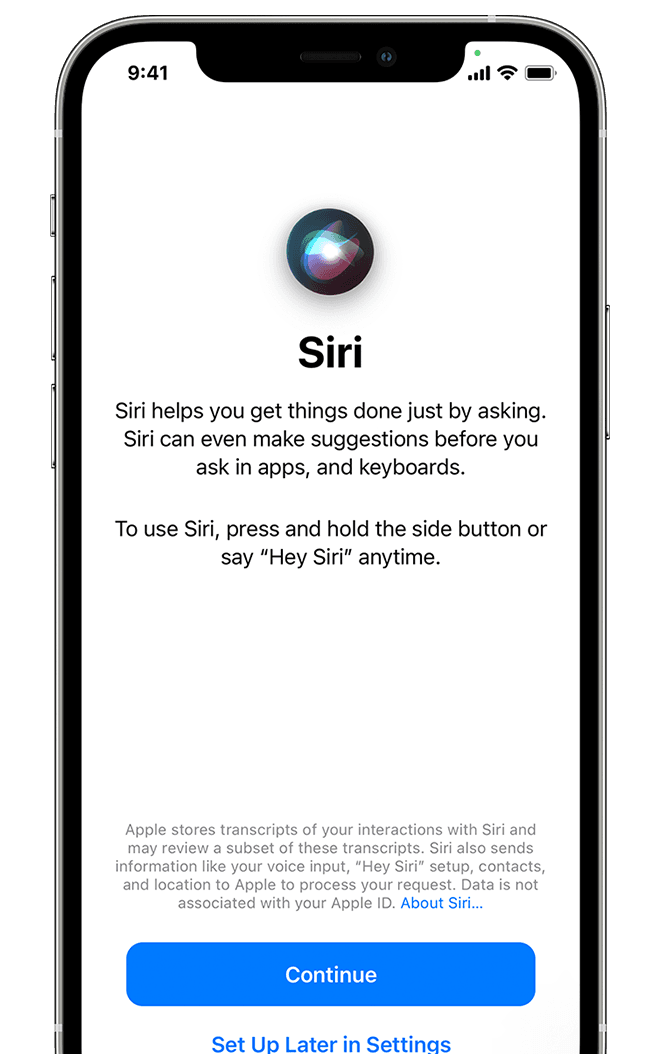
Set up Siri and other services
Next, you’ll be asked to set up or enable services and features, like Siri. On some devices, you’ll be asked to speak a few phrases so that Siri can get to know your voice.
If you signed in with your Apple ID, follow the steps to set up Apple Pay and iCloud Keychain.
Set up Screen Time and more display options
Screen Time gives you insight into how much time you and your kids spend on your devices. It also lets you set time limits for daily app use. After you set up Screen Time, you can turn on True Tone if your device supports it, and use Display Zoom to adjust the size of icons and text on your Home screen.
If you have an iPhone X or later, learn more about using gestures to navigate your device. If you have an iPhone with a Home button, you can adjust the click for your Home button.

Finish up
Tap «Get Started» to begin using your device. Make a safe copy of your data by backing up, and learn about more features in the user guide for your iPhone, iPad, or iPod touch.
Information about products not manufactured by Apple, or independent websites not controlled or tested by Apple, is provided without recommendation or endorsement. Apple assumes no responsibility with regard to the selection, performance, or use of third-party websites or products. Apple makes no representations regarding third-party website accuracy or reliability. Contact the vendor for additional information.
Источник
How your Apple Card application is evaluated
Learn about the key criteria used to determine whether your Apple Card application is approved or declined.
Goldman Sachs 1 uses your credit score, your credit report (including your current debt obligations), and the income you report on your application when reviewing your Apple Card application. This article highlights a number of factors that Goldman Sachs uses, in combination, to make credit decisions but doesn’t include all of the details, factors, scores or other information used to make those decisions.
If you apply for Apple Card and your application is approved, there’s no impact to your credit score until you accept your offer. If you accept your offer, a hard inquiry is made. This may impact your credit score. If your application is declined or you reject your offer, your credit score isn’t impacted by the soft inquiry associated with your application.
If your application was declined, learn what you can do to try and improve your next application.
If you’re combining accounts for Apple Card Family, some of the credit factors mentioned above may be considered for both co-owners when evaluating a combined credit limit for a co-owned Apple Card. 2
Personal finance companies, like Credit Karma, might display various credit scores, like TransUnion VantageScore. While these scores can be informative, if they’re not the FICO score that’s used for your Apple Card application, they may not be as predictive of your approval.
You can also contact Apple Support if you have questions about applying for Apple Card.
Requirements to get Apple Card
To get Apple Card, you must meet these requirements:
- Be 18 years or older, depending on where you live.
- Be a U.S. citizen or a lawful U.S. resident with a U.S. residential address that isn’t a P.O. Box. You can also use a military address.
- Use two-factor authentication with your Apple ID.
- Sign in to iCloud with your Apple ID. 3
- If you have a freeze on your credit report, you need to temporarily lift the freeze before you apply for Apple Card. Learn how to lift your credit freeze with TransUnion.
- You might need to verify your identity with a Driver license or State-issued Photo ID.
Conditions that might cause your application to be declined
When assessing your ability to pay back debt, Goldman Sachs 1 looks at multiple conditions before making a decision on your Apple Card application.
If any of the following conditions apply, Goldman Sachs might not be able to approve your Apple Card application.
If you’re behind on debt obligations 4 or have previously been behind
- You are currently past due or have recently been past due on a debt obligation.
- Your checking account was closed by a bank (for example, due to repeatedly spending more than your available account balance).
- You have two or more non-medical debt obligations that are recently past due.
If you have negative public records
- A tax lien was placed on your assets (for example, due to a failure to pay sufficient taxes on time).
- A judgement was passed against you (for example, as a result of litigation).
- You have had a recent bankruptcy.
- Your property has been recently repossessed.
If you’re heavily in debt or your income is insufficient to make debt payments
- You don’t have sufficient disposable income after you pay existing debt obligations.
- Your debt obligations represent a high percentage of your monthly income (for example, your unsecured debt obligations, such as loans that aren’t backed by collateral, are 50% or more of your total income).
- You have fully utilized all of your credit card lines in the last three months and have recently opened a significant amount of new credit accounts.
If you frequently apply for credit cards or loans
- You have a high number of recent applications for credit.
If your credit score is low
Goldman Sachs uses TransUnion and other credit bureaus to evaluate your Apple Card application. If your credit score is low (for example, if your FICO9 score is lower than 600), 4 Goldman Sachs might not be able to approve your Apple Card application.
Источник


