- Sign in with your Apple ID
- Sign in on your iPhone, iPad or iPod touch
- Sign in on your Mac
- Sign in on Apple TV
- Sign in on apps and other devices
- Sign in to use Apple Music, the Apple TV app and more on your other devices
- Sign in to use iCloud on your other devices
- Use Sign in with Apple on third-party apps and websites
- Learn more
- Использование приложений iMessage на устройствах iPhone, iPad и iPod touch
- Начало работы
- Поиск приложений iMessage на панели приложений
- Загрузка приложений iMessage
- Управление приложениями iMessage
- Удаление приложений iMessage
- Дополнительные возможности приложения iMessage
- Add or remove your phone number in Messages or FaceTime
- Set up your phone number
- Remove your phone number
- Turn your phone number on or off for your Mac
- Turn your phone number on or off for your iPad or iPod touch
- If you can’t see or select your number in Messages or FaceTime
Sign in with your Apple ID
Your Apple ID is the account that you use to access all Apple services and make all of your devices work together seamlessly. After you log in, you can use the App Store, iCloud, iMessage, Apple Music, Apple TV+ and more.
Want to use Sign in with Apple on third-party apps or websites? Find out how to use Sign in with Apple.
Sign in on your iPhone, iPad or iPod touch
Sign in on your Mac
Sign in on your Apple TV
Sign in on apps and other devices
Sign in on your iPhone, iPad or iPod touch
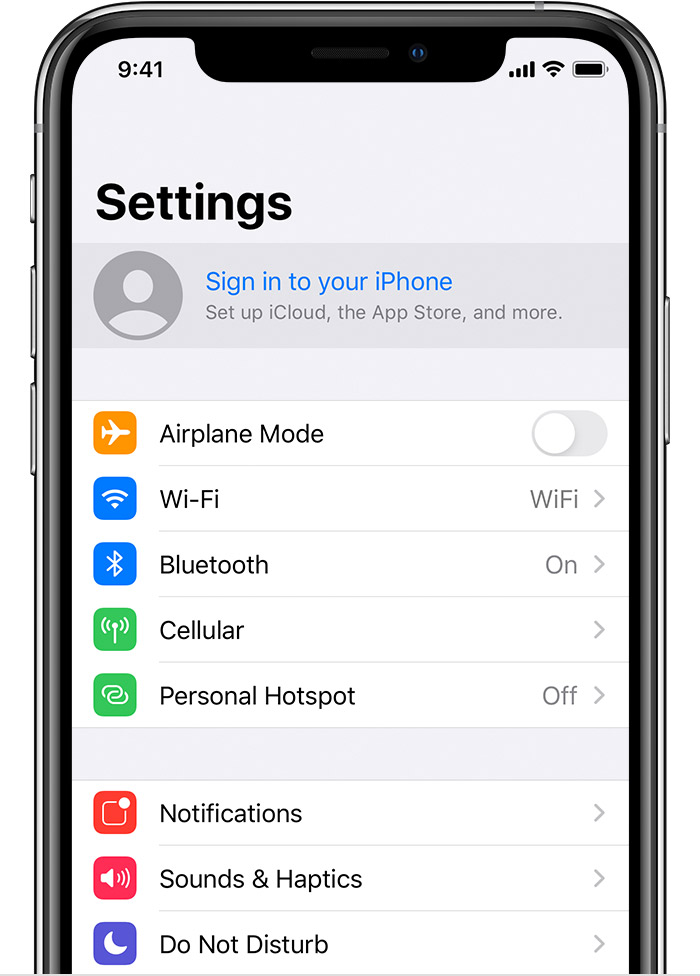
- Open the Settings app.
- Tap Sign in to your [device].

- Enter your Apple ID and password.
- If prompted, enter the six-digit verification code sent to your trusted device or phone number and complete sign in.
If you’re already signed in to iCloud on the iPhone paired with your Apple Watch, you will automatically be signed in to that Apple ID. Find out more about how to set up and sign in to your Apple Watch.
Sign in on your Mac
- Choose Apple menu > System Preferences.
- Click Sign In.
- Enter your Apple ID and password.
- If prompted, enter the six-digit verification code sent to your trusted device or phone number and complete sign in.
Sign in on Apple TV
- From the Home screen, choose Settings.
- Then choose Users and Accounts and select Add New User…
- Select Enter New…, then follow the on-screen instructions.
If you use two-factor authentication on an Apple TV (2nd or 3rd generation), you might need to enter a verification code with your password. Find out how to get a verification code on your trusted device or sent to your trusted phone number.
Sign in on apps and other devices
You can use your Apple ID on some third-party devices to sign in to Apple services, such as Apple Music, the Apple TV app and more.
Depending on your device, you may need to use an app-specific password.
Sign in to use Apple Music, the Apple TV app and more on your other devices
You can sign in to Apple Music on Android, or sign in to the Apple TV app on your smart TV or streaming device.
On your Windows PC, you can sign in to iTunes for Windows to buy films and TV shows, or listen to songs on Apple Music.
Sign in to use iCloud on your other devices
On your Windows PC, you can set up and sign in to iCloud for Windows to access photos, documents and more.
You can also sign in to iCloud.com from your browser. Find out which iCloud.com features are available on your device.
Use Sign in with Apple on third-party apps and websites
If you see a Sign in with Apple button on a participating third-party app or website, you can use your existing Apple ID to quickly set up an account and sign in. Learn how to use Sign in with Apple.
When you sign in to the App Store and other media services for the first time, you might need to add a credit card or other payment information. You can’t sign in to the App Store and other media services with more than one Apple ID at the same time, or update the content you buy with a different Apple ID. Depending on how you created your Apple ID, you might be prompted to upgrade to two-factor authentication on an eligible device.
Learn more
- To view and manage your Apple ID account details on the web, sign in to appleid.apple.com.
- Find out more about where you can use your Apple ID.
- Find out how to manage your subscriptions to services, such as Apple Music or Apple TV+.
- If you have multiple Apple IDs, you can’t merge them.
Information about products not manufactured by Apple, or independent websites not controlled or tested by Apple, is provided without recommendation or endorsement. Apple assumes no responsibility with regard to the selection, performance or use of third-party websites or products. Apple makes no representations regarding third-party website accuracy or reliability. Contact the vendor for additional information.
Источник
Использование приложений iMessage на устройствах iPhone, iPad и iPod touch
В этой статье описывается, как использовать приложения iMessage для совместной работы с другими пользователями, добавления стикеров в сообщения, обмена песнями и многого другого, не выходя из приложения «Сообщения».
Начало работы
- Загрузите последнюю версию iOS или iPadOS для iPhone, iPad или iPod touch.
- Убедитесь, что на устройстве выполнен вход в iTunes Store и App Store с помощью идентификатора Apple ID.

Поиск приложений iMessage на панели приложений
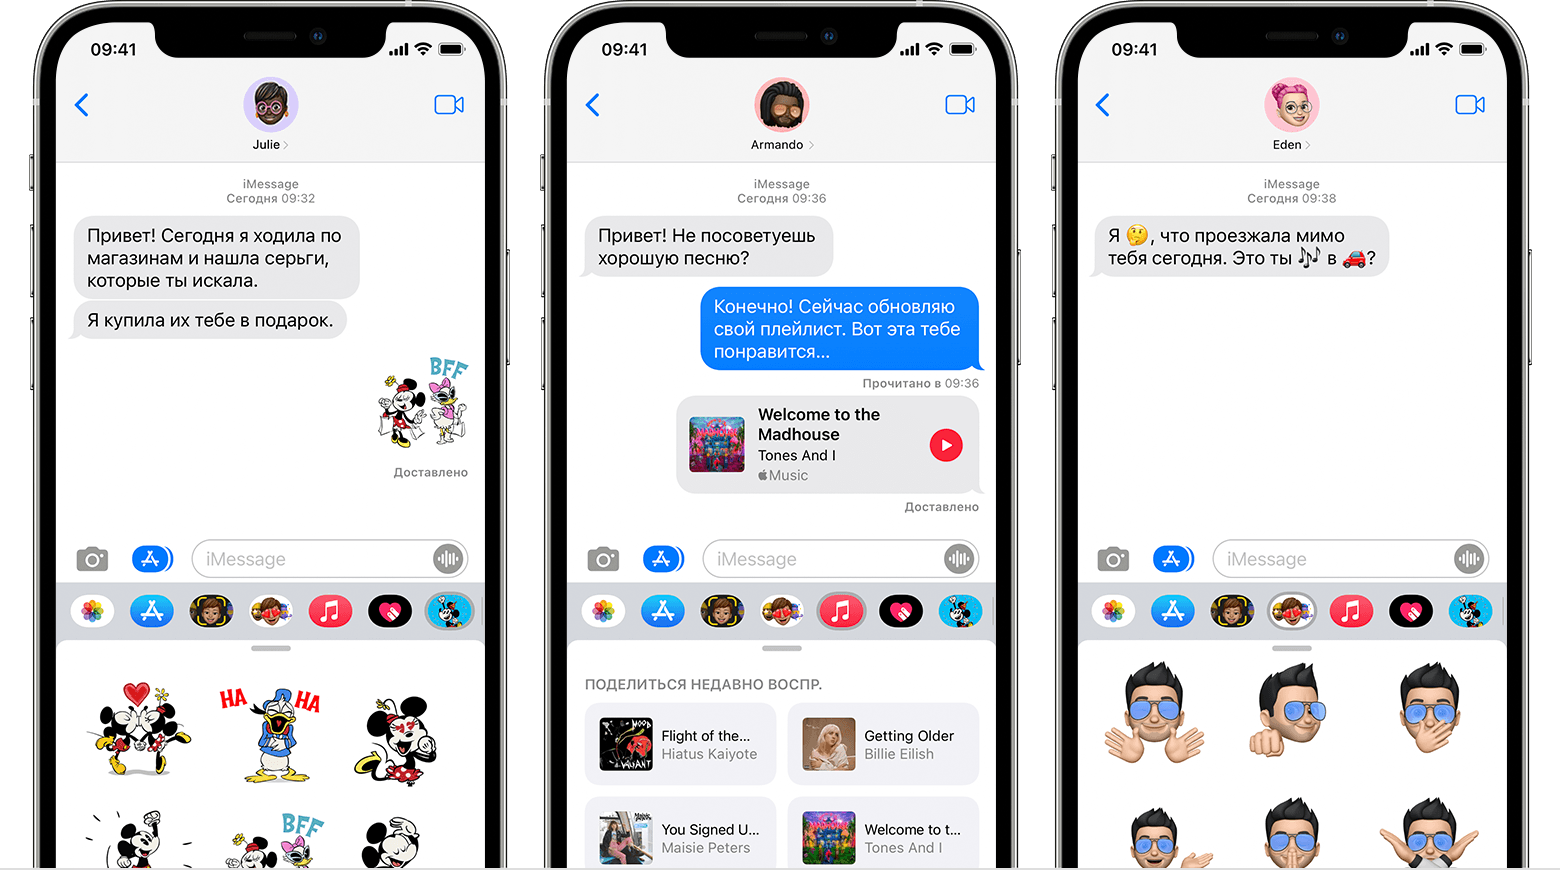
Панель приложений обеспечивает быстрый доступ к приложениям, которые можно использовать в ваших сообщениях. Чтобы открыть панель приложений, выполните следующие действия.
- Откройте Сообщения.
- Нажмите кнопку «Написать» , чтобы начать новое сообщение. Или выберите существующий разговор.
- Смахивайте на панели приложений влево или вправо, чтобы найти нужное приложение.
Ниже перечислены приложения, которые автоматически добавляются на панель приложений:
Магазин: загружайте приложения iMessage для использования с приложением «Сообщения».

Фото: быстро добавляйте фото в ваши сообщения прямо из приложения.
Музыка: делитесь недавно прослушанными песнями из Apple Music.
Digital Touch: используйте Digital Touch для отправки зарисовок, прикосновений, поцелуев, пульса и прочего.

#images * : находите сотни новых изображений в формате GIF, которые можно добавлять в сообщения.

Apple Pay: переводите и получайте деньги через Apple Pay * .
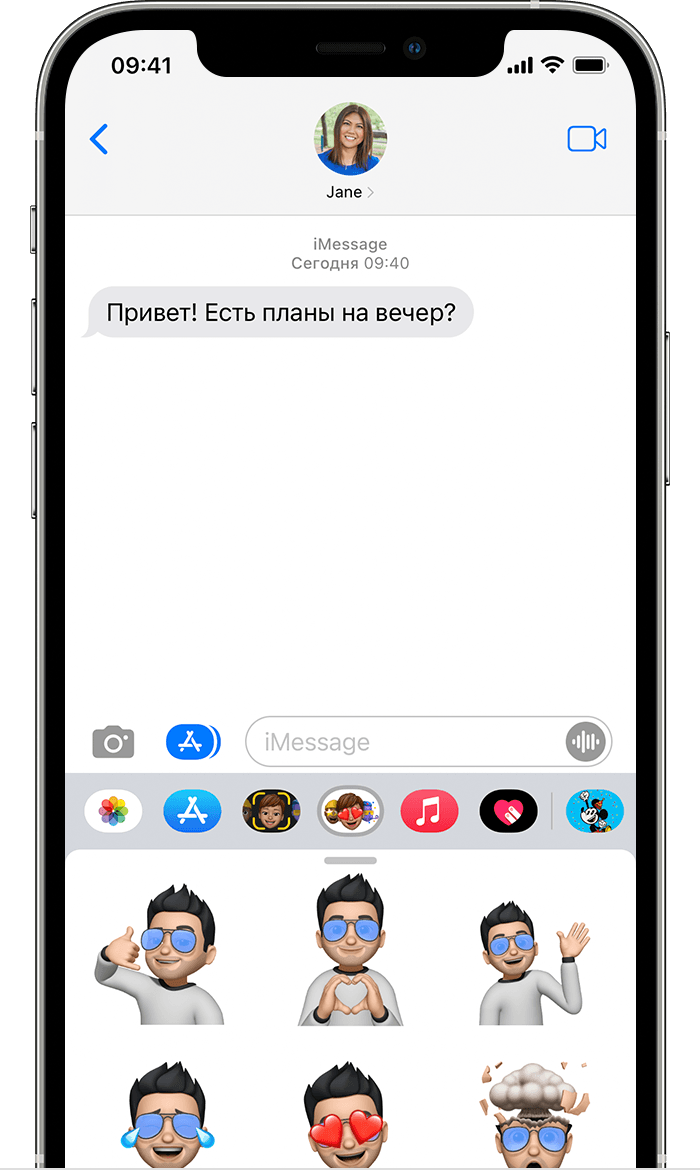
Memoji: создавайте анимированные Memoji, которые используют ваш голос и отражают выражение вашего лица, и делитесь ими с другими пользователями * .
Стикеры Memoji: создавайте собственные стикеры Memoji, соответствующие вашей личности и настроению.
* Приложения #images и Apple Pay доступны не во всех странах и регионах. Если у вас возникнут проблемы или вопросы по поводу содержимого в приложении #images, вы можете сообщить об этом или удалить приложение #images. Для использования Memoji требуется совместимый iPhone или iPad.
Загрузка приложений iMessage
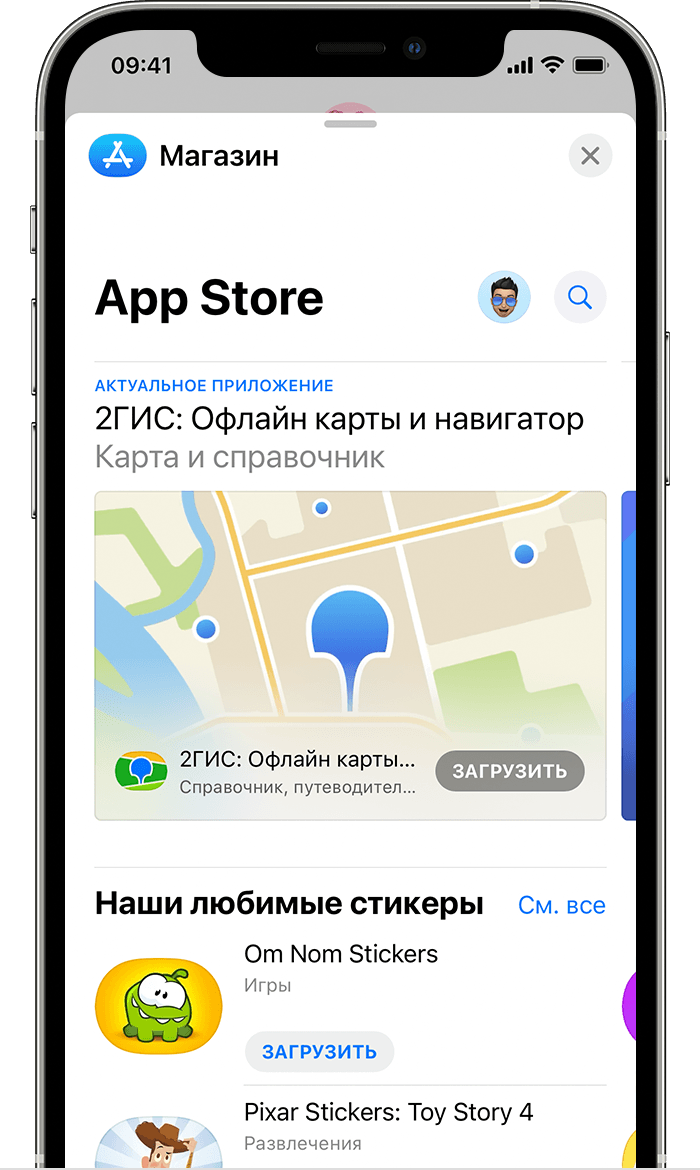
Найти и загрузить приложения для iMessage можно в магазине App Store для iMessage. Вот как это сделать:
- Чтобы перейти в App Store для iMessage, нажмите значок «Магазин» .
- Нажмите значок или значок цены рядом с приложением, затем нажмите «Установить». Для завершения покупки может потребоваться ввести пароль идентификатора Apple ID.
- Нажмите на серую линию или кнопку «Закрыть» для возврата к сообщению.
После загрузки приложения оно появится на панели приложений.
В некоторых приложениях можно совершать дополнительные покупки. Если вы настраиваете Семейный доступ, то можете использовать функцию Попросить купить для управления загрузками приложений и встроенными покупками. Узнайте больше о встроенных покупках.
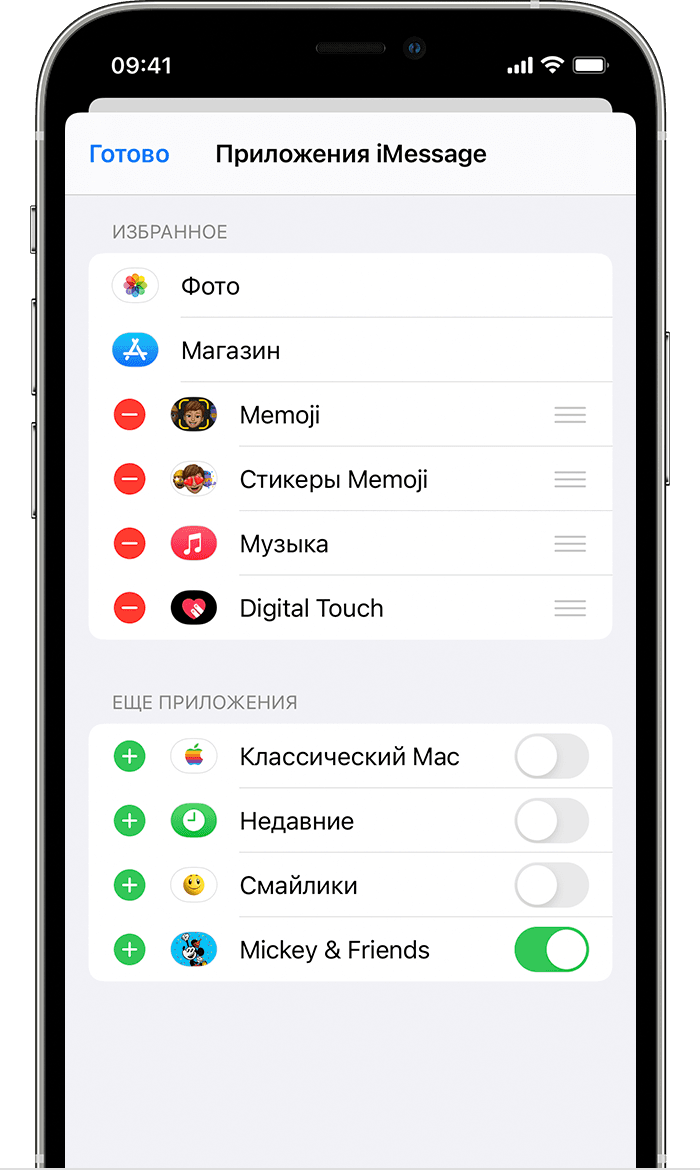
Управление приложениями iMessage
Можно добавить приложения в категорию «Избранное», чтобы обеспечить быстрый доступ к ним на панели приложений. Можно также изменять порядок приложений на панели, удалять ненужные приложения и т. д. Вот как это сделать.
- На панели приложений проведите пальцем влево и нажмите кнопку «Еще» .
- Нажмите «Править» в левом верхнем углу, чтобы выполнить следующие действия:
- Чтобы добавить приложение в избранное, нажмите кнопку «Добавить» .
- Чтобы удалить приложение из избранного, нажмите кнопку «Удалить» , затем нажмите «Удалить из Избранного».
- Чтобы изменить порядок приложений на панели, нажмите и удерживайте значок , затем разместите приложения в нужном порядке.
- Чтобы скрыть приложение, отключите его.
- Нажмите «Готово».
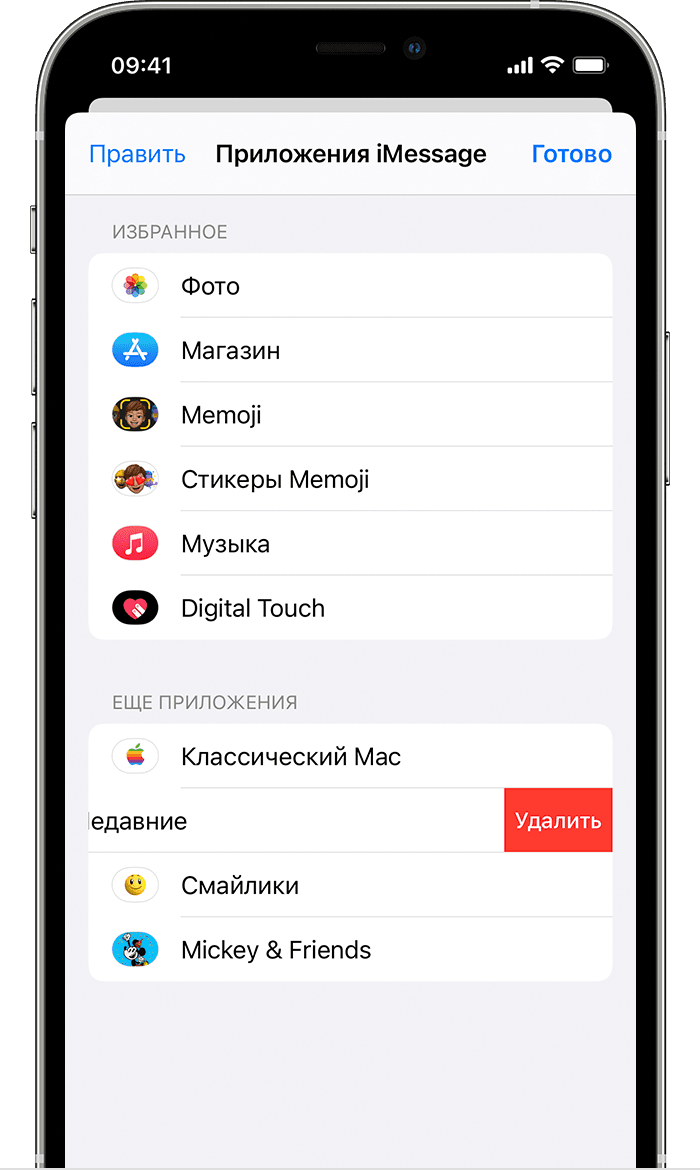
Удаление приложений iMessage
- Откройте Сообщения.
- Нажмите кнопку «Написать» , чтобы начать новое сообщение. Или выберите существующий разговор.
- Смахните влево на панели приложений и нажмите значок «Еще» .
- Смахните приложение влево и нажмите «Удалить».
- Нажмите «Готово».
Дополнительные возможности приложения iMessage
Чтобы загрузить приложения, используйте App Store на iPhone, iPad, iPod touch, Apple TV или компьютере.
Источник
Add or remove your phone number in Messages or FaceTime
You can use the phone number of your iPhone with Messages and FaceTime on your Mac, iPad, or iPod touch.
Set up or remove your phone number
Turn your number on or off for Mac
Turn your number on or off for iPad or iPod touch
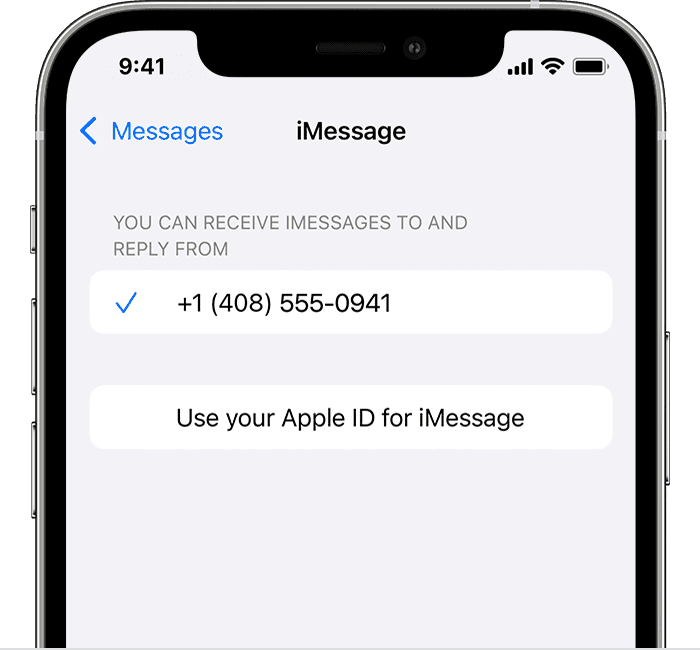
Set up your phone number
- Go to Settings > Messages and make sure that iMessage is on. You might need to wait a moment for it to activate.
- Tap Send & Receive. If you see “Use your Apple ID for iMessage,” tap it and sign in with the same Apple ID that you use on your Mac, iPad, and iPod touch.
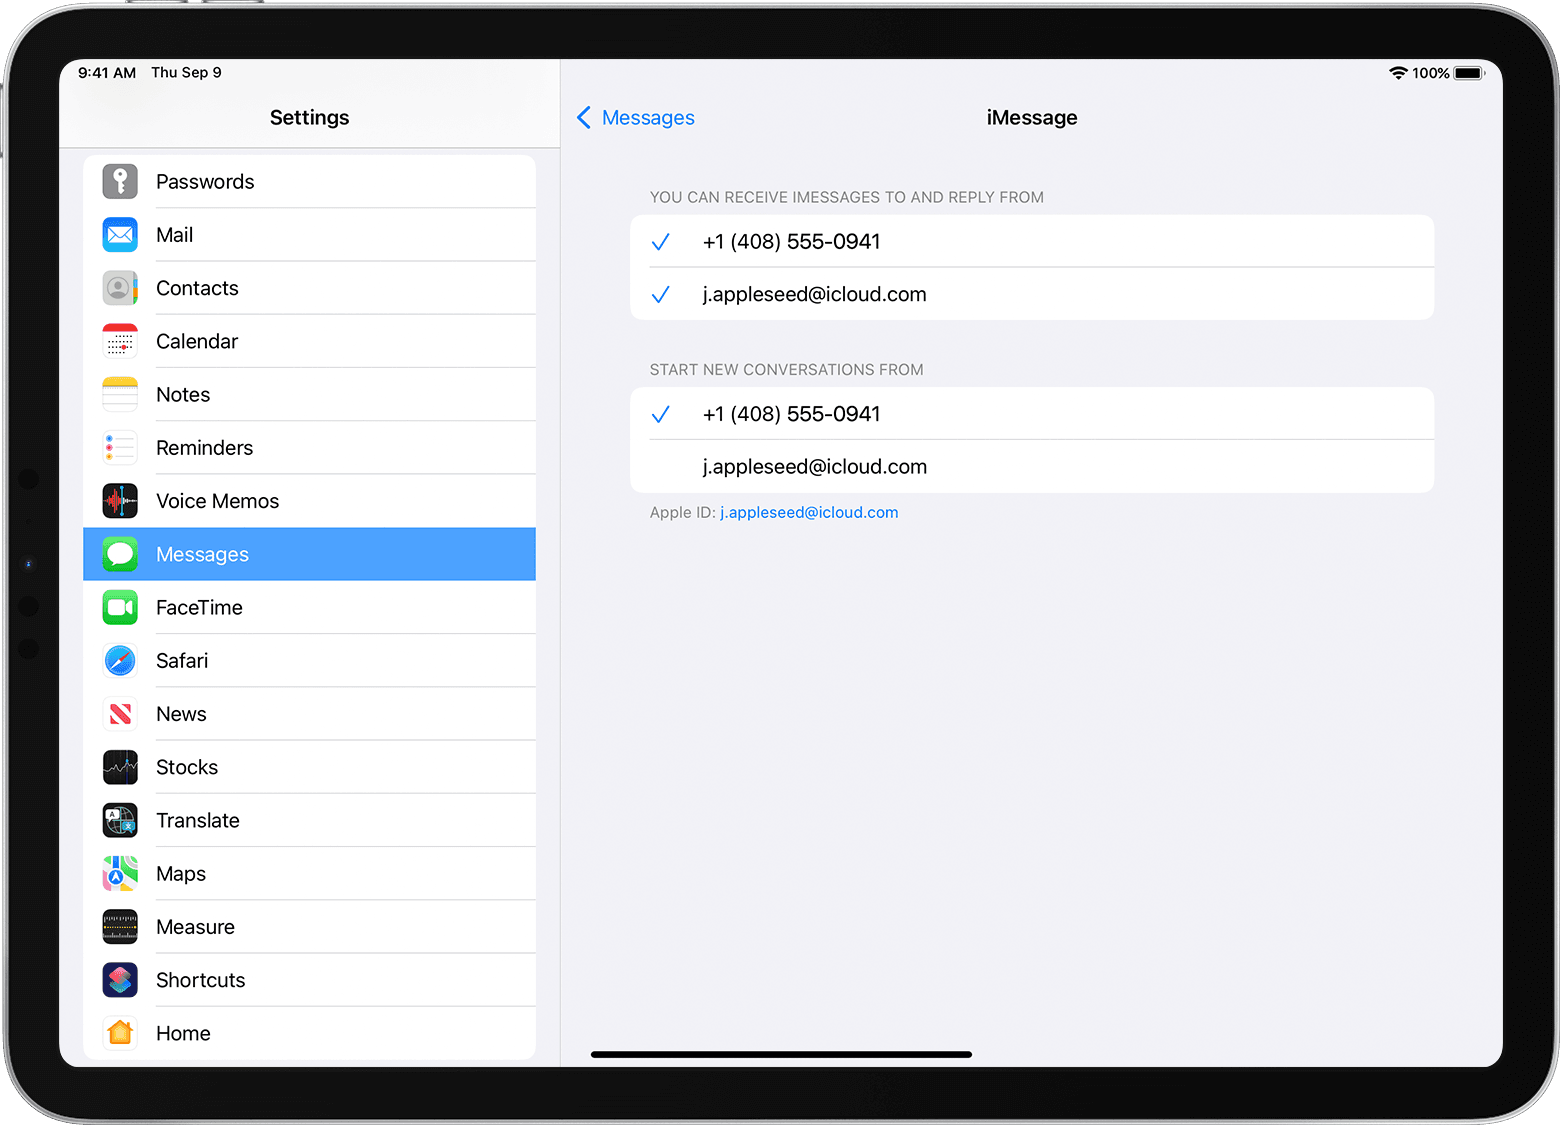
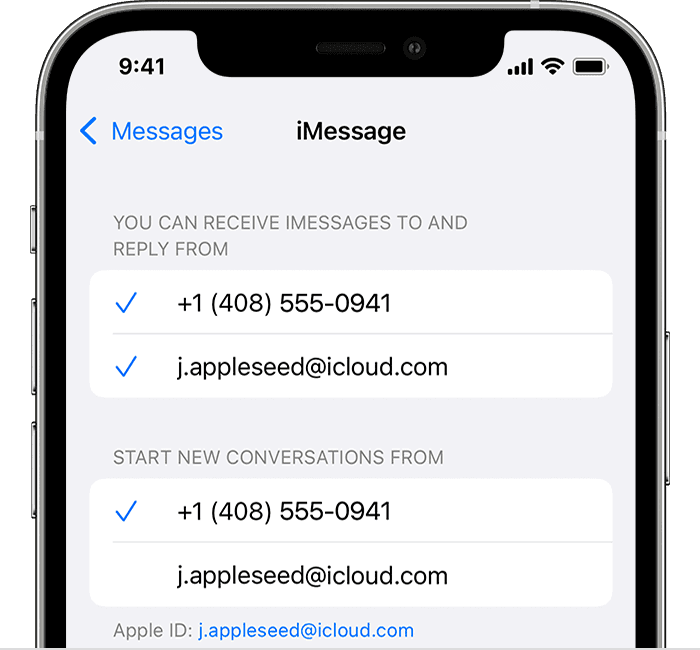
- In the «You can receive iMessages to and Reply From» section, make sure that your phone number and Apple ID are selected.
- Go to Settings > FaceTime and make sure that your phone number and Apple ID are selected in the «You can be reached by FaceTime at» section.
On your other devices, you can now turn on the phone number that you just set up:
If you use this feature and share your Apple ID with someone, you can’t prevent them from seeing your conversations. Instead of using the same Apple ID as someone else, set up Family Sharing.
Remove your phone number
If you don’t want calls or messages for your iPhone on your iPad, iPod touch, or Mac, you can remove your phone number. There are two ways to do this:
- On your iPhone, go to Settings > Messages > Send & Receive. Select your Apple ID at the bottom of the screen and tap Sign Out. Then go to Settings > FaceTime, select your Apple ID and tap Sign Out.
- If the phone number that you want to remove belongs to an iPhone that you can’t access, change your Apple ID password. This removes all phone numbers from your iPad, iPod touch, and Mac. Calls or messages for the removed numbers won’t appear on those devices anymore.
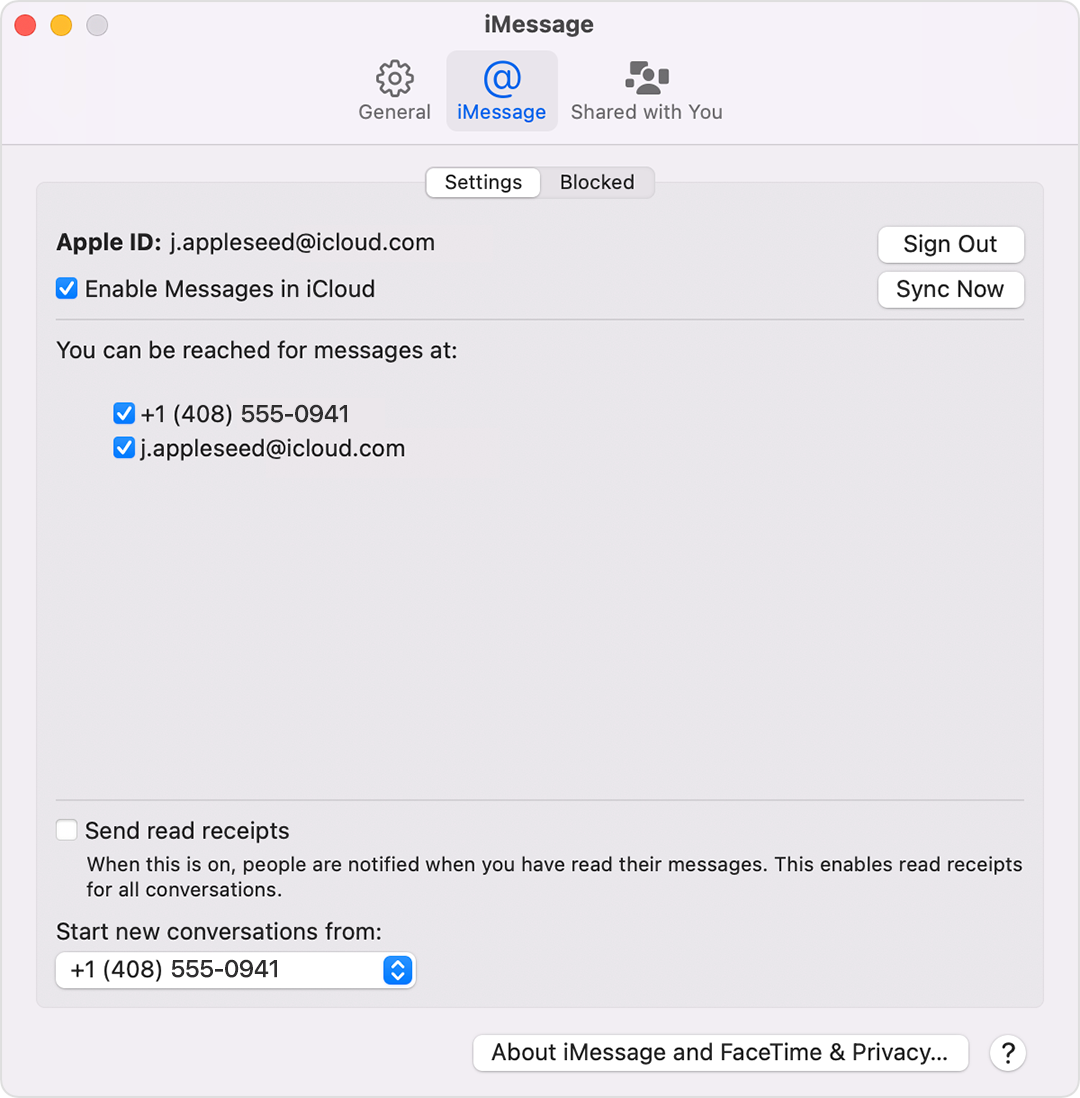
Turn your phone number on or off for your Mac
After you set up your phone number, you can turn it on or off for Messages and FaceTime on your Mac.
- Open Messages or FaceTime. If asked, sign in with the Apple ID that you’re using with Messages and FaceTime on your iPhone.
- For Messages, choose Messages > Preferences, then click iMessage. For FaceTime, choose FaceTime > Preferences, then click Settings.
- Turn your phone number on or off:
- To turn on your phone number, select it and your Apple ID in the list. If you don’t see your phone number, get help with your settings or contact Apple Support. If you see a number that isn’t yours, change your Apple ID password.
- To turn off your phone number, deselect it in the list.
- If you want recipients to see your phone number and not your Apple ID, select your phone number from the “Start new conversations from” or ”Start new calls from” pop-up menu.
Turn your phone number on or off for your iPad or iPod touch
After you set up your phone number, you can turn it on or off for Messages and FaceTime on your iPad or iPod touch.
- For Messages, go to Settings > Messages and make sure that iMessage is on. If asked, sign in with the Apple ID you’re using with Messages and FaceTime on your iPhone. Then tap Send & Receive.
- For FaceTime, go to Settings > FaceTime. If asked, sign in with the Apple ID that you’re using with Messages and FaceTime on your iPhone.
- Turn your phone number on or off:
- To turn on your phone number, select it and your Apple ID in the “You can be reached” section. If you don’t see your phone number, get help with your settings or contact Apple Support. If you see a number that isn’t yours, change your Apple ID password.
- To turn off your phone number, uncheck it.
If you can’t see or select your number in Messages or FaceTime
- Make sure that you’re using the latest software for your Mac or iOS device.
- Make sure that you correctly followed the iPhone steps to set up your phone number. You should be using the same Apple ID on all of your devices.
- In the “You can be reached” section of Messages and FaceTime settings, make sure that there are checkmarks beside your phone number and Apple ID:
If your phone number is unchecked and you can’t select it, or you have some other issue, follow these steps:
- On your Mac:
- In Messages, choose Messages > Preferences, then click iMessage. Click Sign Out.
- In FaceTime, choose FaceTime > Preferences, then click Sign Out.
- On your iPhone, iPad, and iPod touch:
- Go to Settings > Messages > Send & Receive. Tap your Apple ID, then tap Sign Out.
- Go to Settings > FaceTime. Tap your Apple ID, then tap Sign Out.
- On your iPhone:
- Go back to Settings > Messages and make sure that iMessage is turned on.
- Tap Send & Receive, then choose “Use your Apple ID for iMessage” and sign in with your Apple ID.
- Using the same Apple ID, sign back in to Messages and FaceTime on your other devices.
If you still need help, change your Apple ID password and repeat the setup steps. If that doesn’t work, contact Apple Support.
Источник


