- If you forgot your Apple ID
- Check your inbox for emails from Apple
- See if you’re already signed in with your Apple ID
- On your iPhone, iPad, or iPod touch
- On your Mac
- On your PC
- Other ways to find your Apple ID
- Applied Energistics 2 (AE2) [1.18] [1.17.1] [1.16.5] [1.15.2] [1.12.2] [1.7.10] [rus]
- Аддоны и дополнения:
- Citadel: Found Forged ID
- Contents
- Acquisition
- Walkthrough
- Как зарегистрировать аккаунт NCSOFT и исправить ошибку при регистрации аккаунта plaync
- Two-Factor Authentication
- About two-factor authentication
- What is it?
- Who is required to enable it?
- Why is it required?
- Will I need to enter a verification code every time I sign in to my Apple Developer account?
- What is a trusted device and a trusted phone number?
- How is two-factor authentication different than two-step verification?
- Enabling two-factor authentication
- What are the system requirements?
- How do I set up two-factor authentication?
- Will I need a trusted device dedicated to my Apple Developer account if I enable two-factor authentication?
- How can I find out if I already have it enabled?
- More information
- How can I use different Apple IDs for iCloud and my Apple Developer account?
- What if I’ve enabled two-step verification?
- Can I have multiple trusted devices associated with one Apple ID?
- Can I have multiple trusted phone numbers associated with one Apple ID?
- Can I use the same trusted phone number for multiple Apple IDs?
- What if I lose access to my trusted devices and trusted phone number?
- Can I still use a recovery key with my two-factor authentication enabled account?
- How do I reset or change my password on my two-factor authentication enabled account?
- Can I reset or change my password from a non-trusted device?
- What if two-factor authentication is not yet available in my region?
- What if I can’t enable two-factor authentication for some other reason?
If you forgot your Apple ID
Your Apple ID is the account you use to sign in to all Apple services. If you forgot your Apple ID or aren’t sure if you have one, you can look it up or check if you’re already signed in to an app or service.
Check your inbox for emails from Apple
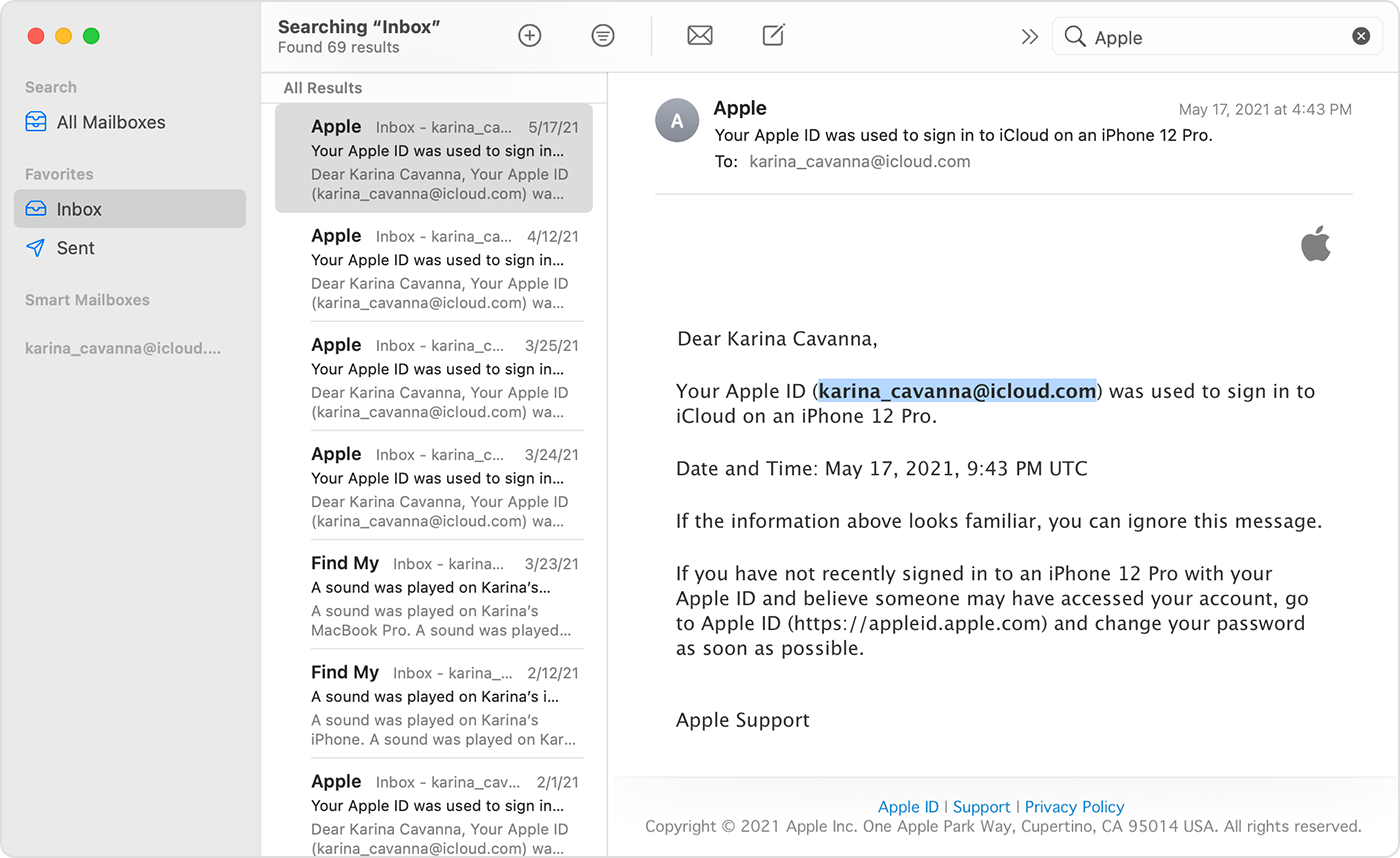
Your Apple ID might be included in some emails from Apple. Search your inbox for receipts as well as repair, support, or billing emails from Apple.
If your email address is masked (k*****@icloud.com), the number of asterisks might not match the number of characters in your email address.
See if you’re already signed in with your Apple ID
Check to see if you’re signed in on your device, or check if you’re signed in to Apple apps or services.
On your iPhone, iPad, or iPod touch
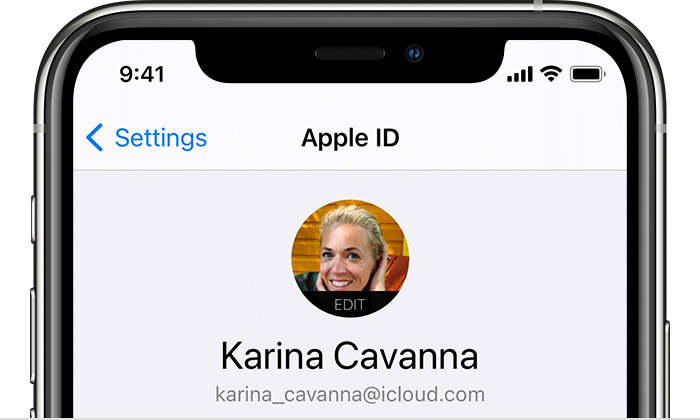
Tap Settings, then tap [your name].
On your Mac
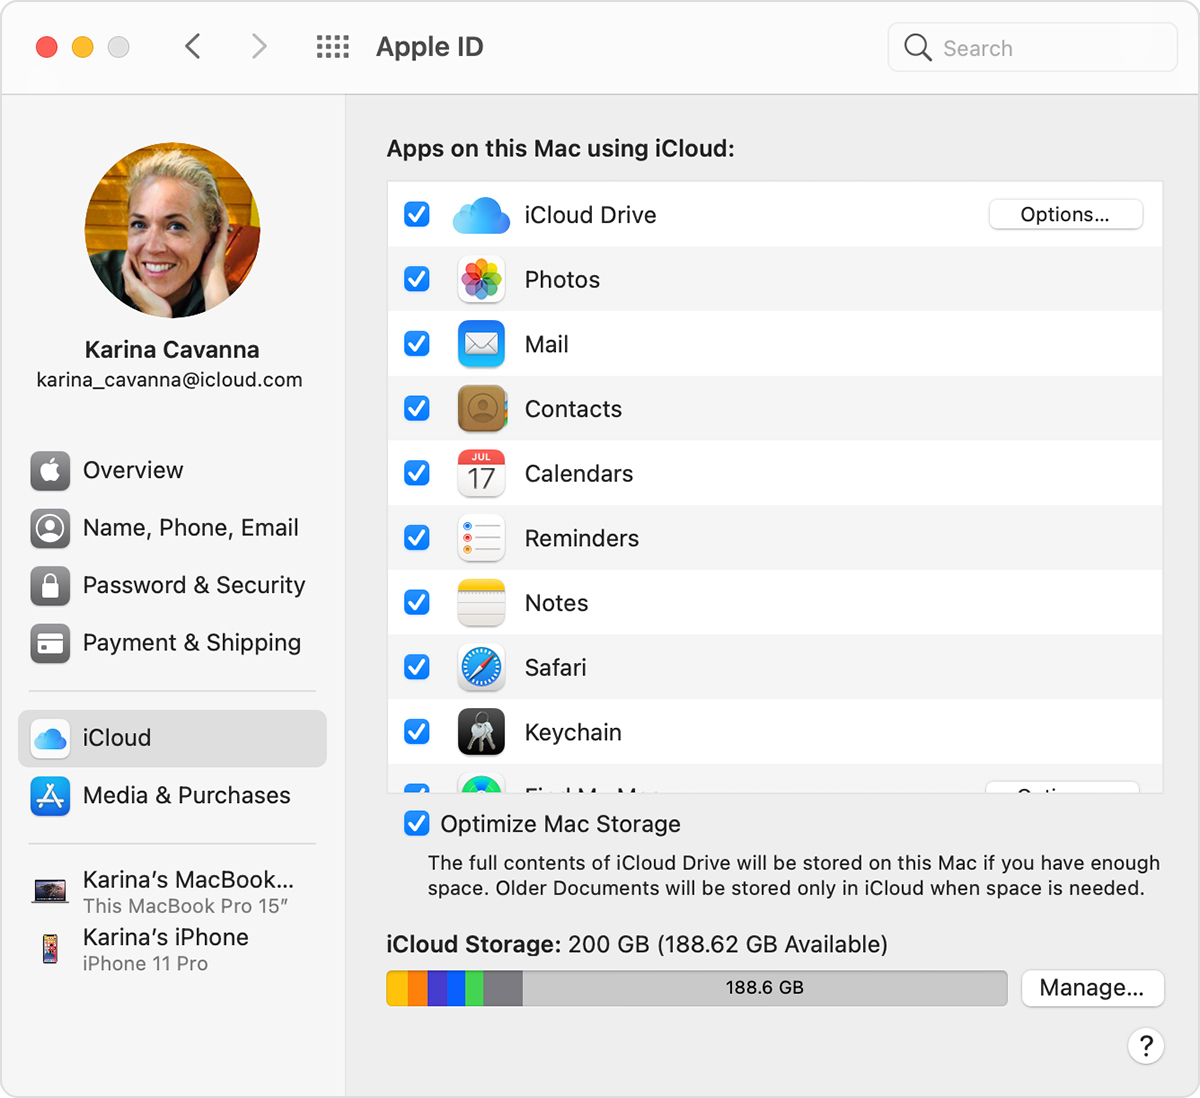
Choose Apple menu > System Preferences, then click Apple ID.
On your PC
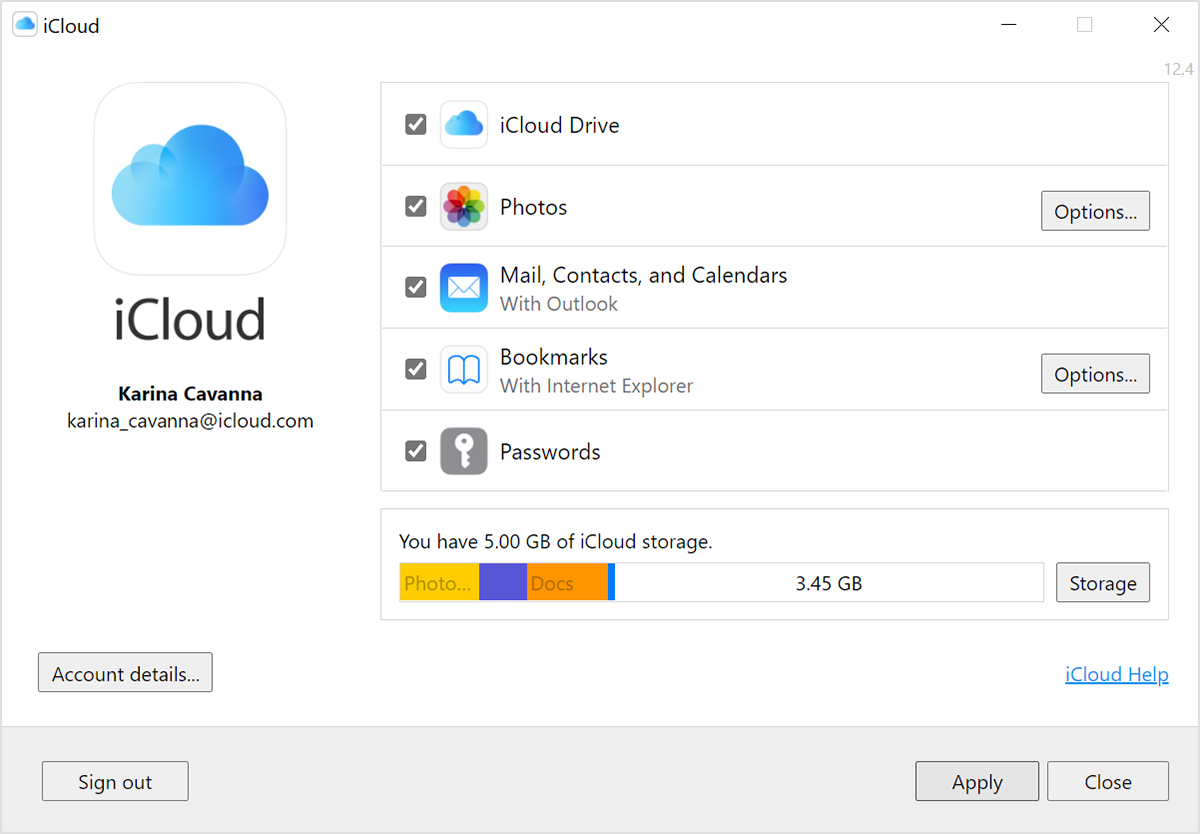
Open iCloud for Windows, then look for your Apple ID under your name.
Other ways to find your Apple ID
You can check if you’re signed in to the App Store, FaceTime, or Messages on your iPhone, iPad, iPod touch, or Mac, or check if you’re signed into iTunes for Windows on a PC. You can also go to iCloud.com or appleid.apple.com and see if your Apple ID prefills on the sign in screen.
FaceTime isn’t available in all countries or regions.
Источник
Applied Energistics 2 (AE2) [1.18] [1.17.1] [1.16.5] [1.15.2] [1.12.2] [1.7.10] [rus]

Мод Applied Energistics — добавляет материальную энергию, автоматизацию крафтов, переплавки и дробления руд, систему хранения предметов в системе, это крупный и популярный индустриальный мод для майнкрафта.
Основной идеей мода является технология преобразования реальных предметов, ресурсов в материальную энергию (МЭ), благодаря этой технологии вы сможете загрузить в систему все ресурсы и попрощаться с сундуками и долгими поисками компонентов для крафта. Загрузка ресурсов и предметов в сеть дает много преимуществ, вы сможете получать доступ к своему хранилищу из любого места, автоматически кратить, собирать и пополнять инвентаре различных устройств. Как и полноценный индустриальный мод — Applied Energistics добавляет множество сопутствующих предметов, механизмов, материалов.
Руды.

1. Кварцевая руда — Встречается на высоте от 17 высоты 69 высоты.
2. Материалы.

1. Кварцевый кристалл — используется для изготовления конвертирующих матриц и компонентов молекулярного сборщика.

2. Кварцевая пыль — используется для создания аметистовой пыли.

3. Пыль кварца Нижнего мира — используется для создания аметистовой пыли.

4. Аметистовая пыль — Используется при создании конвертирующих матриц и МЭ Кабеля.

5. Аметистовый кристалл — используется при создании предметов беспроводной МЭ сети.

6. Аметистовая жемчужина — используется при создании предметов беспроводной МЭ сети.

7. Кремний — Используется только при крафте процессоров.

8. Конвертирующая матрица — используется для создания механизмов.

9. Энергетическая ячейка — используется для создания предметов, потребляющих энергию.

10. Беспроводной приемник — используется при создании предметов беспроводной МЭ сети.
3. Инструменты.


1. Кварцевые инструменты — идентичны железным.

2. Кварцевый нож — используется для создания механизмов процессоров.

3. Кварцевый ключ — как ключ из Thermal Expansion и BuildCraft.

4. Катализатор вибрации — нагревает блоки, руды в слитки и, песок в стекло, лед в воду, руды в слитки и т.д.

5. Ускоритель энтропии — охлаждает блоки, лаву в обсидиан, камень в булыжник, воду в лед и т.д.

6. Материальная пушка — оружие, стреляет самородками и шариками материей.

7. Ручной дробитель — как дробитель из IC2, но не использует энергию. Вместо этого нужно крутить рукоятку.

8. Деревянная рукоятка — нужна для работы ручного дробителя.
Остальное короче в вики посмотрите.
Аддоны и дополнения:
Just Enough Energistics — позволяет переносить и создавать шаблоны без наличия самих компонентов.
AE2 Additional Opportunity — убирает ограничение на каналы, позволяет соединять контроллеры по кабелю, позволяет расширять или сужать размер мультиблока из контроллера.
Источник
Citadel: Found Forged ID
A forged ID has been located while assaulting Harkin’s hideout in the Zakera Wards factory district. It may prove useful to someone.
Contents
Acquisition
The assignment is acquired and completed in one of two ways on the Citadel:
- During Garrus’ loyalty mission, there is a forged ID right before the two large mechs. Picking it up activates the assignment.
- After completing Thane’s loyalty mission, there are two asari sitting on the couch near the stairs that take you down to Level 26, under the Level 27 Sign on the west of the map. If the assignment is acquired this way, it is called Citadel: False Positives.
Regardless of how you get the assignment, you must finish Thane’s loyalty mission first to complete it. Depending on whether you saved or abandoned the Council in Mass Effect, their dialogue changes but the assignment remains the same.
Walkthrough

Talk to an asari named Kalara Tomi sitting on a couch with another asari in the transit corridor between the middle (Level 27) and west (Level 26) sections of the map. She complains of being flagged as a potential for geth infiltration, apparently for no reason.
At this point, you can resolve the assignment in a few ways, each with their own associated rewards:
- If you have the fake IDs, simply give them to her and the assignment is complete, provided the Garrus loyalty mission has been completed. This option gives 5 Renegade points. This mission is called Citadel: Found Forged ID.
- If you do not have or do not wish to give the fake IDs, investigating the problem further will reveal that you need to talk to C-Sec Customs, which is located to the left of the entrance to the Citadel opposite of the Gunnery Chief. If your Paragon / Renegade score is high enough (or if you regained your Spectre status) the customs officer can be persuaded to allow the asari to leave. The Forged ID assignment changes into Citadel: False Positives and is completed, and 5 morality points in either direction will be given. Telling the asari the good news will grant you 2 more Paragon points, or if you change your mind you can still give them the fake IDs for 5 Renegade points.
- If you do not have the fake IDs, have not done Garrus’ loyalty mission, but have done Thane’s loyalty mission, you may be able to complete both. First, do Thane’s loyalty mission before Garrus’, and convince C-Sec security. Then do Garrus’ loyalty mission, acquire the fake IDs, and turn them in to the women (they will be back, i.e. you can complete the assignment twice and are rewarded twice). If they do not reappear after completing Garrus’ mission, you cannot complete it a second time.
- If you imported a character from Mass Effect where you chose to abandon the Council, her attitude will be hostile toward you and humanity. Being rude back to her causes the mission in the Journal to be completed with no experience. However, apologizing and asking if they need help will allow you to complete the mission normally, either by giving them the IDs or talking to C-Sec. The Journal entry will not change and will remain listed as though you did nothing to help them but credits and experience will be rewarded as normal. After apologizing you can also ‘put Kalara in her place’ since she won’t accept your apology, instead of helping her. This, again, will give no experience, renegade points or credits.
Note that the Forged IDs are found during Garrus’ loyalty mission at the C-sec warehouse. In the small room before the two big mechs with the shutters, you can obtain the Forged IDs. Even if the mission has already been completed, these IDs can still be obtained, although nothing can be done with them.
Источник
Как зарегистрировать аккаунт NCSOFT и исправить ошибку при регистрации аккаунта plaync
Данный материал подготовлен на основе официальной информации. Из него вы узнаете: как зарегистрировать аккаунт NCSOFT для игры в Lineage 2M и исправить ошибку при регистрации аккаунта plaync, но для начала немного объяснений.
Для того, чтобы писать сообщения на нашем форуме, необходимо зарегистрировать аккаунт официальной платформы NCSOFT plaync. На платформе вы можете узнать не только последнюю информацию об интересующих вас играх NCSOFT, но также общаться с другими игроками о разных темах, связанных с вашей игрой.
Также можно отыскать друзей или клан, обсудить обновления или ивенты вместе. Еще здесь разрешается найти всю интересующую вас информацию об игре в будущем: объявления, ивенты, а также гайды по игре.
Итак, зарегистрировать аккаунт plaync можно следующим способом.
Способ подачи заявки. Перейдите по данной ссылке и завершите процесс подачи заявки. Язык вы можете поменять внизу окна.

Как вы можете увидеть, существует много различных способов подачи заявки. Выберите самый удобный вам способ.
- Электронная почта
- Номер телефона
- Apple
- LINE
- ВК
Также мы хотели бы проинформировать вас, что при попытке регистрации через Google, Facebook и ВК на последнем этапе регистрации вы можете столкнуться с ошибкой «Регистрация временно недоступна».

Однако даже при возникновении данной ошибки аккаунт будет создан успешно. Попробуйте войти еще раз через созданный аккаунт и вход будет совершен успешно. Вы окажетесь на официальной странице plaync. Надеемся, что данная информация была полезна для вас!
Источник
Two-Factor Authentication
In an effort to keep your account more secure, two-factor authentication is required for developer program Account Holders to sign in to their Apple Developer account and Certificates, Identifiers & Profiles. Two-factor authentication or two-step verification is required for all users to sign in to App Store Connect. This extra layer of security for your Apple ID helps ensure that you’re the only person who can access your account.
About two-factor authentication
What is it?
Two-factor authentication is an extra layer of security for your Apple ID designed to ensure that you’re the only person who can access your account, even if someone knows your password. It protects your account by requiring a password and access to either a trusted device or verification code delivered via SMS or phone call. Requiring more than just your password to access your account improves the security of your Apple ID and all personal information you store with Apple.
Who is required to enable it?
Only developers with the Account Holder role (formerly the “Team Agent”) in the Apple Developer Program, Apple Developer Enterprise Program, or iOS Developer University Program need to enable two-factor authentication. Developers who are registered for a free account or who have other team roles are not required to enable two-factor authentication.
Why is it required?
As the primary representative for their development team, the Account Holder is responsible for the membership and has full access to all related tools, resources, and benefits. Two-factor authentication provides an additional level of security for these accounts.
Will I need to enter a verification code every time I sign in to my Apple Developer account?
Once two-factor authentication is enabled, you’ll need to enter a verification code every time you sign in, unless you choose to trust the browser, in which case you won’t be asked for a verification code again from that computer for 30 days. You may be asked to reverify if you reset or change browsers.
What is a trusted device and a trusted phone number?
A trusted device is an iOS device, iPadOS device, or a Mac on which you’ve signed in with your developer Apple ID using two-factor authentication. It’s a device we know is yours and can be used to verify your identity by displaying a verification code from Apple when you sign in.
A trusted phone number can be used to receive verification codes by text message or automated phone call. You must verify at least one trusted phone number to enroll in two-factor authentication. This can be any type of phone number you use.
How is two-factor authentication different than two-step verification?
Two-factor authentication is built directly into iOS, iPadOS, macOS, tvOS, watchOS, and Apple websites. It supports several methods to trust devices and deliver verification codes, and offers a more streamlined user experience.
Two-step verification is an older method that uses SMS to deliver verification codes. It’s available to users who don’t have Apple devices, can’t update their devices, or are otherwise ineligible for two-factor authentication.
Enabling two-factor authentication
What are the system requirements?
You can enable two-factor authentication on an iPhone, iPad, or iPod touch with iOS 9 and later, or a Mac with OS X El Capitan and later. If you create an Apple ID on the web, two-factor authentication will automatically be enabled on your account regardless of the device or OS you use.
How do I set up two-factor authentication?
You can learn how to set up two-factor authentication for your Apple ID by viewing the support page.
Will I need a trusted device dedicated to my Apple Developer account if I enable two-factor authentication?
No. If you don’t have an iPhone, iPad, iPod touch, or Mac, you can update your Apple ID or create a new Apple ID with two-factor authentication enabled on the web. You’ll need to verify both an email address and a phone number to enable two-factor authentication on this Apple ID.
When possible, you should use a trusted device to increase security and streamline the process. You can use the same trusted device for multiple Apple IDs that have two-factor authentication turned on. If you don’t have access to your trusted device, you can get your verification code via SMS or phone call.
How can I find out if I already have it enabled?
You can check your security settings by signing into iCloud on a supported device with the Apple ID that you use for your Apple Developer account.
- On iOS 10.3 or later or iPadOS 13.1 or later
Go to Settings > [your name] > Password & Security. - On iOS 10.2 or earlier
Go to Settings > iCloud. Tap your Apple ID > Password & Security. - On OS X El Capitan or later
Go to the Apple () menu > System Preferences > Apple ID > Password & Security.
If enabled, you’ll see: Two-Factor Authentication: On.
If not enabled, you’ll see: Two-Factor Authentication: Off and a link to turn on two-factor authentication.
More information
How can I use different Apple IDs for iCloud and my Apple Developer account?
If your personal Apple ID is different from the Apple ID associated with your Apple Developer account, you can configure your device to receive verification codes for both of these Apple IDs.
- On iOS or iPadOS
- iOS 14 or later or iPadOS 14 or later
Add your developer Apple ID to your device at Mail > Accounts > Add Accounts > iCloud. - iOS 12–13.7 or iPadOS 13.1–13.7
Add your developer Apple ID to your device at Settings > Passwords & Accounts > Add Account > iCloud.
- iOS 14 or later or iPadOS 14 or later
- On macOS
- OS X El Capitan or later
Add your developer Apple ID to your Mac at System Preferences > Internet Accounts > iCloud.
- OS X El Capitan or later
If your Apple IDs are not yet enabled for two-factor authentication:
- On iOS or iPadOS
- iOS 14 or later or iPadOS 14 or later
- Enable two-factor authentication for your personal Apple ID at Settings > [your name] > Password & Security.
- Sign out of iCloud on your iOS device at Settings > [your name] > Sign Out. Sign in to iCloud on your device with your developer Apple ID.
- Enable two-factor authentication for your developer Apple ID at Settings > [your name] > Password & Security.
- Sign in to iCloud on your iOS device with your personal Apple ID.
- Add your developer Apple ID to your device at Settings > Mail > Accounts > Add Account > iCloud.
- iOS 10.3 to 13.7 or iPadOS 13.1 to 13.7
- Enable two-factor authentication for your personal Apple ID at Settings > [your name] > Password & Security.
- Sign out of iCloud on your iOS device at Settings > [your name] > Sign Out. Sign in to iCloud on your device with your developer Apple ID.
- Enable two-factor authentication for your developer Apple ID at Settings > [your name] > Password & Security.
- Sign in to iCloud on your iOS device with your personal Apple ID.
- Add your developer Apple ID to your device at Settings > Passwords & Accounts > Add Account > iCloud.
- iOS 10.2 or earlier
- Enable two-factor authentication for your personal Apple ID at Settings > iCloud. Tap your Apple ID > Password & Security.
- Sign out of iCloud on your iOS device at Settings > iCloud > Sign Out. Sign in to iCloud on your device with your developer Apple ID.
- Enable two-factor authentication for your developer Apple IDs at Settings > iCloud. Tap your Apple ID > Password & Security.
- Sign in to iCloud on your iOS device with your personal Apple ID.
- Add your developer Apple ID to your device at Settings > Passwords & Accounts > Add Account > iCloud.
- iOS 14 or later or iPadOS 14 or later
- Enable two-factor authentication for your personal Apple ID at System Preferences > Apple ID > Password & Security.
- Create a new system account on your Mac for your developer Apple ID at System Preferences > Users & Groups.
- Sign in to your new developer system account and enable two-factor authentication for your developer Apple ID at System Preferences > Apple ID > Password & Security.
- Sign in to your primary system account and add your developer Apple ID to your Mac at System Preferences > Internet Accounts > iCloud.
- Your Mac is now set up to receive verification codes for your personal and developer Apple IDs on your primary user account.
You can also receive verification codes for multiple Apple IDs via text message or phone call to your trusted phone number rather than through iCloud.
What if I’ve enabled two-step verification?
If your Apple ID has two-step verification enabled and two-factor authentication is available in your region, you’ll need to update to two-factor authentication for increased security.
Can I have multiple trusted devices associated with one Apple ID?
Yes. You can sign in to multiple devices with your developer Apple ID using two-factor authentication.
Can I have multiple trusted phone numbers associated with one Apple ID?
Yes. You can manage your trusted phone numbers, trusted devices, and other account information on your Apple ID account page. You can also manage your trusted phone numbers in the Apple ID security setting on your trusted devices.
Can I use the same trusted phone number for multiple Apple IDs?
Yes. You can assign the same trusted phone number to multiple Apple IDs that you use.
What if I lose access to my trusted devices and trusted phone number?
You can request account recovery to regain access to your account. Account recovery might take a few days or longer, depending on the specific account information you can provide to verify your identity.
Can I still use a recovery key with my two-factor authentication enabled account?
If you previously enabled two-step verification with a recovery key on your account and you sign in on a device running iOS 11 or macOS High Sierra, your Apple ID is automatically updated to two-factor authentication. After your account is updated, you have the option to generate a new recovery key. This option is only available if you are updating an account from two-step verification to two-factor authentication. Learn how to create a recovery key.
How do I reset or change my password on my two-factor authentication enabled account?
You can learn how to reset or change your password from your trusted device here.
Can I reset or change my password from a non-trusted device?
You can initiate a request for a password reset from a non-trusted device. You’ll need to provide both your trusted phone number as well as the passcode associated with your trusted device in order to reset your password.
What if two-factor authentication is not yet available in my region?
If your Apple ID is associated with a region that does not yet support two-factor authentication, you’ll need to enable two-step verification instead.
What if I can’t enable two-factor authentication for some other reason?
If you are unable to enable two-factor authentication for your account, please contact us.
Feedback Assistant
Submit bug reports and request enhancements to APIs and developer tools.
Send us feedback
Developer Forums
Ask questions and find answers by Apple engineers and other developers.
Contact Us
Tell us how we can help and we’ll find a solution by phone or email.
Источник


