- About your Apple ID email addresses
- Email addresses you use with your Apple ID
- Apple ID email address
- Change your Apple ID email address
- Reset your Apple ID password
- Get a verification code
- Additional email addresses
- Add an additional email address
- Delete an additional email address
- Rescue email address
- Add or edit a rescue email address
- Delete a rescue email address
- Reset your security questions
- Learn more
- Fix: This email address is not available for use as an Apple ID
- Method #1. Remove Your Secondary Email Address.
- Method #2. Try with Another Email Address.
- Method #3. Try with Another Company Email.
- About your Apple ID email addresses
- Email addresses you use with your Apple ID
- Apple ID email address
- Change your Apple ID email address
- Reset your Apple ID password
- Get a verification code
- Additional email addresses
- Add an additional email address
- Delete an additional email address
- Rescue email address
- Add or edit a rescue email address
- Delete a rescue email address
- Reset your security questions
- Learn more
About your Apple ID email addresses
Learn how to add, change, or delete the different types of email addresses that you can use with your Apple ID account.
Email addresses you use with your Apple ID
Your Apple ID uses email addresses to sign you in to your account with Apple. With your Apple ID, you can access services like the App Store, Apple Music, iCloud, iMessage, FaceTime, and more. We use your email addresses to send you information about your account, and to help friends and family communicate and share with you.
Apple ID email address
In most cases, your Apple ID is also the primary email address of your Apple ID account.
Additional email addresses
Add extra email addresses to your account to help people find you on Apple services like FaceTime, iMessage, and Find My.
Rescue email address
Most people have a notification email address instead of a rescue email address. Apple uses this to send you important account and security related information. If you don’t use two-factor authentication or two-step verification (learn how to check what security method you use), you have the option to add a rescue email address to your account for more security. You can see it when you sign in to your Apple ID account page.
Before you can use a new or updated Apple ID, we’ll send you a verification email to make sure that the email address belongs to you.

Apple ID email address
When you create an Apple ID, you enter an email address. This email address is your Apple ID and the username that you use to sign in to Apple services like Apple Music and iCloud. It’s also the contact email address for your account. Be sure to check your email address regularly. We’ll send you email notifications to help you manage your account and make the most of your Apple ID.
Change your Apple ID email address
Reset your Apple ID password
If you know your current Apple ID password and want to change it, follow these steps on your iPhone, iPad, iPod touch, or Mac. If you’ve forgotten your Apple ID password and need to reset it, follow these steps.*
Get a verification code
With two-factor authentication, you’ll need a verification code to sign in with your Apple ID on a new device or browser. Learn how to get and use the code on a trusted device, or get a text or phone call.
* If you use two-factor authentication, in some cases you might be able to speed up the account recovery process or reset your password immediately by verifying a six-digit code sent to your primary email address.
Additional email addresses
Many of us have more than one email address that friends and family use to reach us. Add an email address that you commonly use to your Apple ID account, so people can easily find and communicate with you on Apple services like FaceTime, iMessage, Shared Albums, iWork collaboration, and Find My.
Add an additional email address
- Sign in to your Apple ID account page.
- Click Edit in the Account section.
- Under Reachable at, select Add More.
- Enter your additional email address. Make sure you’re not already using it as an Apple ID.
- We’ll send a verification to that address. Didn’t get the email?
- Enter the verification code and click Verify.
Delete an additional email address
- Sign in to your Apple ID account page.
- Click Edit in the Account section.
- To delete one of your additional email addresses, click next to the address.
Rescue email address
Having a rescue email address is optional but recommended if you do not have two-factor authentication or two-step verification. If you ever forget your security questions, you can use your rescue email address to reset them. We also send any account security-related notifications to your rescue email address. If you have two-factor authentication or two-step verification, you have a notification email address instead of a rescue email address and won’t need to remember security questions.
Add or edit a rescue email address
- Sign in to your Apple ID account page.
- Click Edit in the Security section. You might be asked to answer one or more security questions before you continue.
- To add a rescue email address:
- Under Rescue Email, click Add an Email Address, then enter your rescue email address. We send a verification to that address. Didn’t get the email?
- Enter the verification code and click Verify.
- To edit a rescue email address:
- Select Change Email Address under the address you want to edit, then enter the new address. We send a verification to that address. Didn’t get the email?
- Enter the verification code and click Verify.
If you had a rescue email address on file when you upgraded to two-factor authentication or two-step verification, you can also use these steps to edit your notification email address. If you remove the notification email, you won’t be able to add a new one.
Delete a rescue email address
- Sign in to your Apple ID account page.
- Click Edit in the Security section. You might be asked to answer one or more security questions before you continue.
- To delete a rescue email address, click next to the address.
Reset your security questions
If you’ve forgotten the answers to your security questions, follow these steps to verify your identity and reset your security questions. If you set up two-factor authentication or two-step verification, you won’t need to remember any security questions.
Learn more
If you receive suspicious email, learn how to identify fraudulent email.
FaceTime is not available in all countries or regions.
Источник
Fix: This email address is not available for use as an Apple ID
This error message pops up in your settings when you are trying to change your Apple ID email and may be confusing and very annoying if you have only one email associated with your iPhone and Apple ID.
Also, this error message can be shown when you are trying to change your default email address that is associated with your Apple ID.
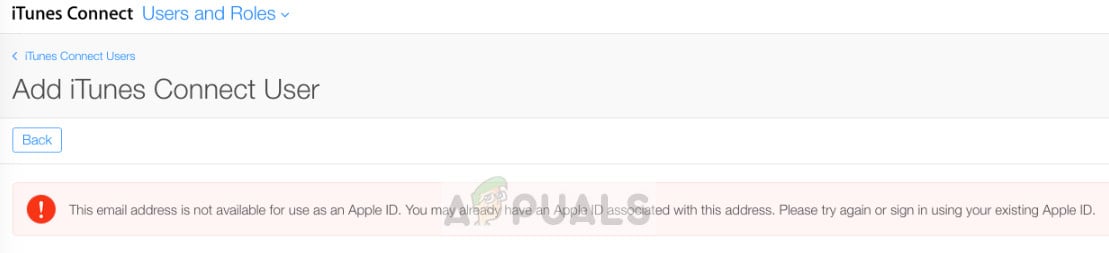 This email address is not available for use as an Apple ID
First of all, we will explain why this error appears. When you are making an Apple ID, you are required to enter a secondary email address in order you forgot the password for the primary address or the password for your Apple ID. In this article, we will show you how you can get rid of and fix “This email address is not available for use as an Apple ID” error message.
Method #1. Remove Your Secondary Email Address.
Before the start, you need to check in the Apple ID settings if the email address that you are using as primary is secondary to the email address that is associated with your Apple ID. If you find out that the email address you are trying to use as your primary Apple ID is already being used as a secondary email address for other Apple ID email, you need to remove that secondary email and use an email address that you are not already using.
- Open the Settings app on your iPhone.
- Tap on the Apple ID at the top of the main Setting screen.
- Find the section with your Apple devices.
- Tap on a Device.
- Select the email address that you want to remove it.
- Choose the Remove from Account option.
- Tap Remove to confirm.
 Remove Email Address
 Remove Email Address
The second option for removing email address is from the Apple Server.
- Go to https://appleid.apple.com/.
- Log in to your Apple ID.
- Go to Account and then Management.
- Click Edit at the right side of the account section.
Method #2. Try with Another Email Address.
If you want to change your primary email address for your Apple ID, you try with another email address rather than using the email address that is causing this error and being rejected.
- Open Settings app on your iPhone.
- Open Passwords & Accounts.
- Choose Add Account.
- Choose the email provider.
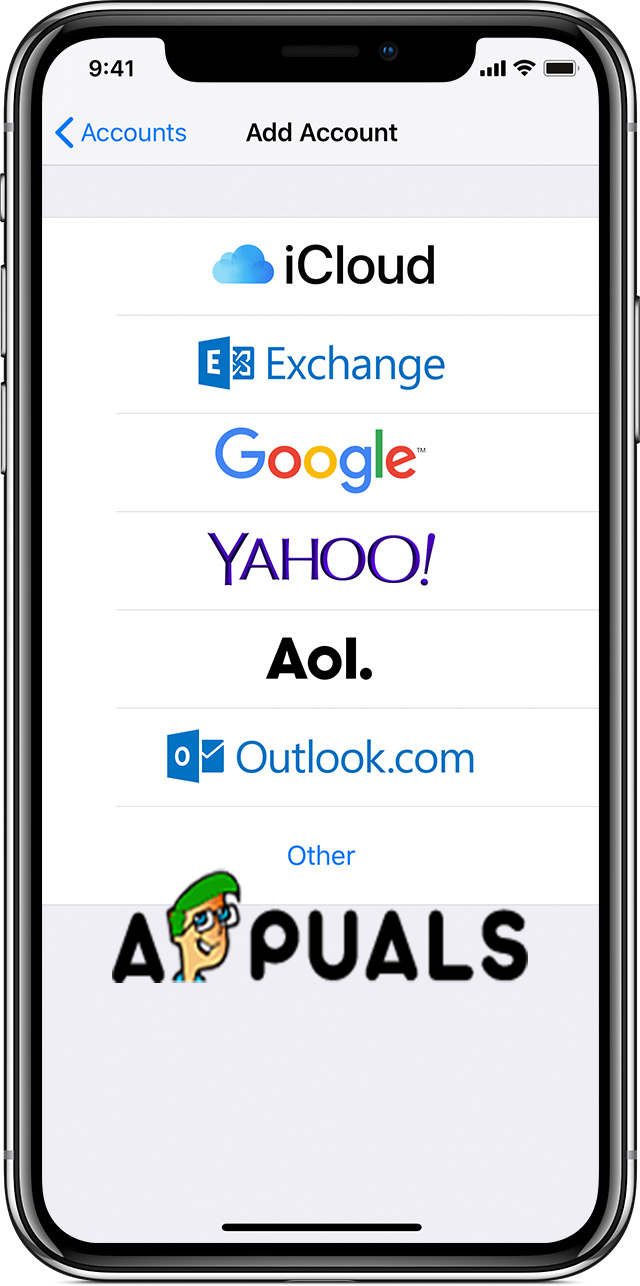 Add Account
Method #3. Try with Another Company Email.
If you are still seeing this error message you also can try adding another email address but from a different provider. For example, if you are using an email address from Gmail then you can try with Yahoo, Live, Outlook, Hotmail or some other provider. There can be some problem with the companies email that you are trying to use which is stopping and interfering your iPhone or iOS device from accepting the email address.
- Open Settings app on your iPhone.
- Open Passwords & Accounts.
- Choose Add Account.
- Choose the different email provider.
- Enter the email address and the password.
- Tap on the Next button and verify your account.
- Include Calendar and/or Contacts.
- Tap Save.
Источник
About your Apple ID email addresses
Learn how to add, change, or delete the different types of email addresses that you can use with your Apple ID account.
Email addresses you use with your Apple ID
Your Apple ID uses email addresses to sign you in to your account with Apple. With your Apple ID, you can access services like the App Store, Apple Music, iCloud, iMessage, FaceTime, and more. We use your email addresses to send you information about your account, and to help friends and family communicate and share with you.
Apple ID email address
In most cases, your Apple ID is also the primary email address of your Apple ID account.
Additional email addresses
Add extra email addresses to your account to help people find you on Apple services like FaceTime, iMessage, and Find My.
Rescue email address
Most people have a notification email address instead of a rescue email address. Apple uses this to send you important account and security related information. If you don’t use two-factor authentication or two-step verification (learn how to check what security method you use), you have the option to add a rescue email address to your account for more security. You can see it when you sign in to your Apple ID account page.
Before you can use a new or updated Apple ID, we’ll send you a verification email to make sure that the email address belongs to you.
Apple ID email address
When you create an Apple ID, you enter an email address. This email address is your Apple ID and the username that you use to sign in to Apple services like Apple Music and iCloud. It’s also the contact email address for your account. Be sure to check your email address regularly. We’ll send you email notifications to help you manage your account and make the most of your Apple ID.
Change your Apple ID email address
Reset your Apple ID password
If you know your current Apple ID password and want to change it, follow these steps on your iPhone, iPad, iPod touch, or Mac. If you’ve forgotten your Apple ID password and need to reset it, follow these steps.*
Get a verification code
With two-factor authentication, you’ll need a verification code to sign in with your Apple ID on a new device or browser. Learn how to get and use the code on a trusted device, or get a text or phone call.
* If you use two-factor authentication, in some cases you might be able to speed up the account recovery process or reset your password immediately by verifying a six-digit code sent to your primary email address.
Additional email addresses
Many of us have more than one email address that friends and family use to reach us. Add an email address that you commonly use to your Apple ID account, so people can easily find and communicate with you on Apple services like FaceTime, iMessage, Shared Albums, iWork collaboration, and Find My.
Add an additional email address
- Sign in to your Apple ID account page.
- Click Edit in the Account section.
- Under Reachable at, select Add More.
- Enter your additional email address. Make sure you’re not already using it as an Apple ID.
- We’ll send a verification to that address. Didn’t get the email?
- Enter the verification code and click Verify.
Delete an additional email address
- Sign in to your Apple ID account page.
- Click Edit in the Account section.
- To delete one of your additional email addresses, click next to the address.
Rescue email address
Having a rescue email address is optional but recommended if you do not have two-factor authentication or two-step verification. If you ever forget your security questions, you can use your rescue email address to reset them. We also send any account security-related notifications to your rescue email address. If you have two-factor authentication or two-step verification, you have a notification email address instead of a rescue email address and won’t need to remember security questions.
Add or edit a rescue email address
- Sign in to your Apple ID account page.
- Click Edit in the Security section. You might be asked to answer one or more security questions before you continue.
- To add a rescue email address:
- Under Rescue Email, click Add an Email Address, then enter your rescue email address. We send a verification to that address. Didn’t get the email?
- Enter the verification code and click Verify.
- To edit a rescue email address:
- Select Change Email Address under the address you want to edit, then enter the new address. We send a verification to that address. Didn’t get the email?
- Enter the verification code and click Verify.
If you had a rescue email address on file when you upgraded to two-factor authentication or two-step verification, you can also use these steps to edit your notification email address. If you remove the notification email, you won’t be able to add a new one.
Delete a rescue email address
- Sign in to your Apple ID account page.
- Click Edit in the Security section. You might be asked to answer one or more security questions before you continue.
- To delete a rescue email address, click next to the address.
Reset your security questions
If you’ve forgotten the answers to your security questions, follow these steps to verify your identity and reset your security questions. If you set up two-factor authentication or two-step verification, you won’t need to remember any security questions.
Learn more
If you receive suspicious email, learn how to identify fraudulent email.
FaceTime is not available in all countries or regions.
Источник


