- Апгрейд Mac, или как ускорить старый MacBook, iMac или Mac mini
- Установите SSD
- Увеличьте объём оперативной памяти
- Удалите старые и неиспользуемые приложения
- Пользуйтесь «лёгкими» приложениями
- Переустановите macOS
- Уборка внутри и снаружи
- Добавьте красок
- Question: Q: mac mini (mid 2010) upgrade
- Helpful answers
- Upgrade or install memory in your Mac mini
- Before you begin
- Choose your model
- 2012, 2011, 2010
- Remove the bottom cover
- Remove the original memory modules
- Install the new memory
- Replace the bottom cover
- 2009 and earlier
- Confirm that your Mac sees the new memory
Апгрейд Mac, или как ускорить старый MacBook, iMac или Mac mini
Если вы не хотите или у вас нет возможности расставаться со своим стареньким Mac, то ещё не всё потеряно. Есть несколько эффективных способов апгрейда железа и софта, для того чтобы отложить приобретение нового компьютера на несколько лет. И даже несмотря на выход нового MacBook Pro.
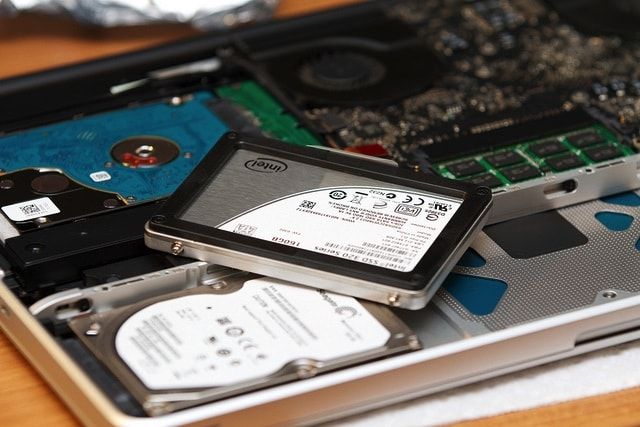
Установите SSD
Один из самых эффективных способов улучшения производительности старого Mac — установка высокоскоростного SSD-диска взамен морально устаревшего HDD.
К примеру, всего за $77 можно приобрести 250 ГБ SSD от Samsung с интерфейсом 2.5-Inch SATA III. Если показалось мало, то есть решение на 500 ГБ стоимостью $180.
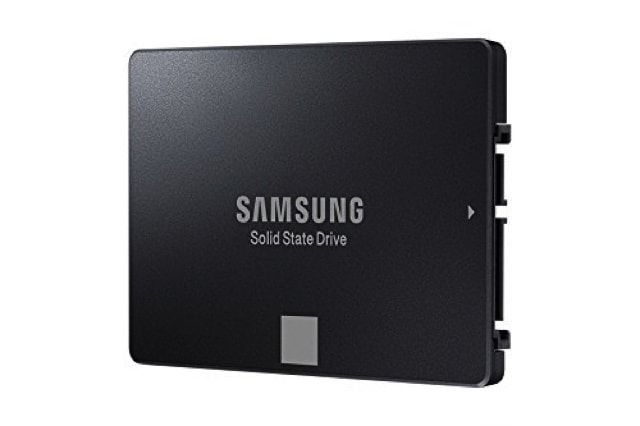
Установка SSD не требует каких-то специальных навыков. Достаточно воспользоваться подробным пошаговым гайдом и специалисты сервисных центров не будут сдирать с вас деньги за установку.
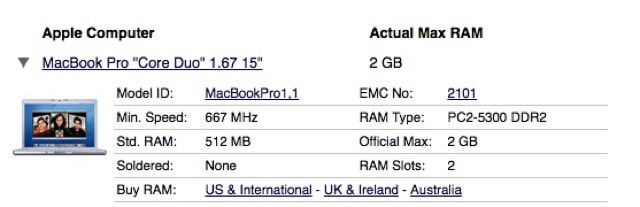
Увеличьте объём оперативной памяти
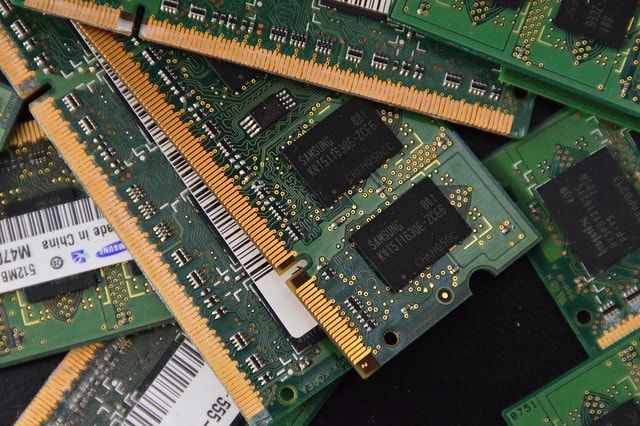
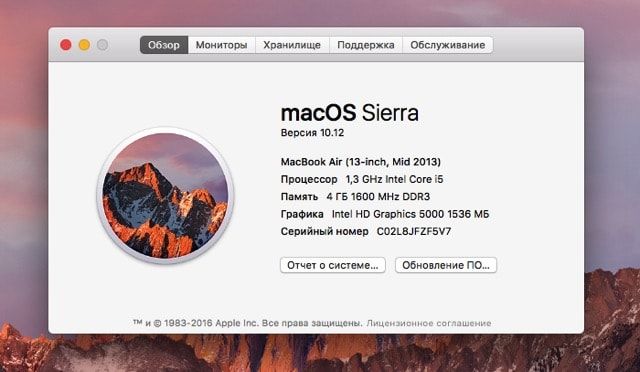
Практически в любом старом Mac можно увеличить объём ОЗУ и это также является достаточно эффективной мерой по повышению производительности старичка. Для более или менее комфортной работы macOS требуется 4 ГБ (чтобы посмотреть специальных навыков. Для того чтобы узнать количество ОЗУ установленного в Mac пройдите в меню -> Об этом Mac и перейдите на вкладку «Обзор»).
Узнать о максимально доступном количестве оперативной памяти устанавливаемой в ваш Mac и все важные технические аспекты, учитываемые при приобретении ОЗУ, можно здесь.
Удалите старые и неиспользуемые приложения

Благодаря этому вы как минимум освободите пространство на диске (а как известно, его много не бывает), да и самой системе станет «дышать» полегче (многие программы прописываются в автозапуске, индексируются поиском Spotlight и так далее). А вообще, для нормальной работы SSD требуется около 10-15 ГБ свободного пространства.
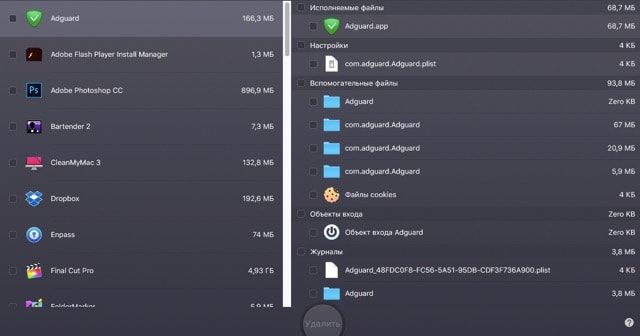
Так что удалите неиспользуемые программы, утилиты, расширения и прочие неактуальные данные. Для этого рекомендуем воспользоваться специализированными утилитами вроде Clean My Mac (агрегатор по масштабной очистке системы) и Gemini (поиск дубликатов).
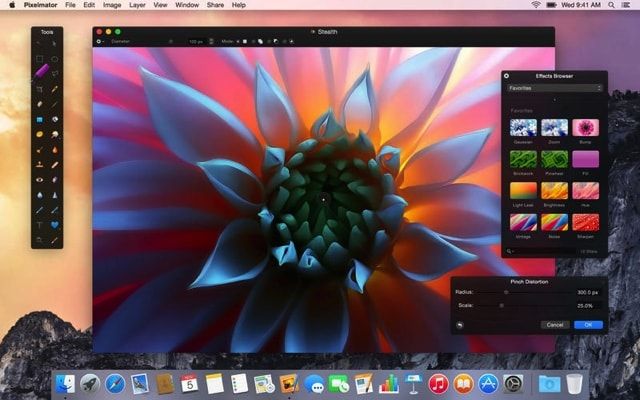
Пользуйтесь «лёгкими» приложениями
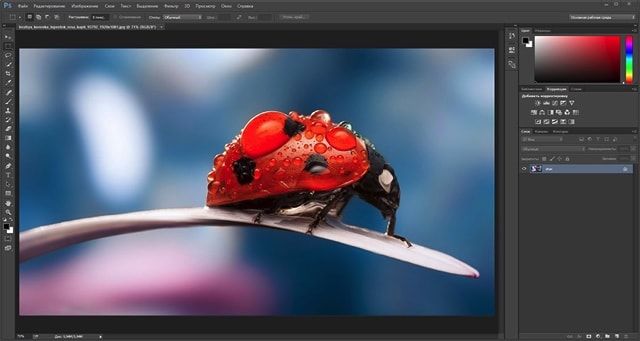
Не стоит использовать профессиональные решения для выполнения каких-нибудь простых задач. Согласитесь, не логично запускать Adobe Photoshop для того чтобы изменить размер холста или добавить надпись на изображении. Куда проще установить шустрый и в то же время функциональный Pixelmator.
То же самое касается и браузеров — мало того что Safari работает ощутимо быстрее чем тот же Chrome, так он ещё и меньше нагружает процессор и экономит заряд аккумулятора (актуально владельцам MacBook). Другое дело если вам необходимы продвинутые расширения, которые далеко не всегда можно найти для Safari.
Переустановите macOS
В отличие от Windows PC, компьютеры Mac не требуют регулярной (раз в 1-2 года) переустановки системы для поддержания высокой скорости работы. Другое дело, если вам не хочется перелопачивать кучу данных для очистки (иногда проще все снести к чертям) или вы имеете в распоряжении совсем уж древний Mac. В таком случае конечно лучше сделать чистую установку macOS. Не забудьте перед осуществлением этой глобальной процедуры сделать резервную копию важных данных.
Уборка внутри и снаружи

Протирайте не только корпус, дисплей и периферию, но и периодически вскрывайте Mac для чистки внутренних частей от пыли. Делать это конечно лучше на специализированном сервисе, но и при большом желании, недорогом инструменте и времени можно заморочиться самому (наглядных материалов в сети предостаточно). Вы бы знали какое количество пыли, ухудшающей теплоотдачу, можно выгрести из вашего помощника (недавно мы чистили пятилетний iMac 27 — пыли было, ну ооочень много).
Добавьте красок

Смена обоев, изменение иконок папок, установка тёмной темы и настройка прочих визуальных аспектов системы скорости работы вашему Mac однозначно не прибавят, а вот ощущения свежести появятся и это довольно приятное чувство.
А в комментариях к этому материалу не забывайте рассказывать о своих эффективных способах увеличения производительности на старых Mac.
Источник
Question: Q: mac mini (mid 2010) upgrade
from previous posts, I understand that I can improve the performance of my mid-2010 Mac mini significantly by upgrading the hardware: 4 GB RAM to 8 GB for
$50 and 320 GB HD to 525 GB SSD for $120.
I am wondering whether you think it’s still worth it. I upgraded to MacOS Sierra but will Apple keep supporting my Mac?
Right now the computer is used for playing Music and for the kids to play educational games and Minecraft.
Thanks in advance for your thoughts,
VIN,Mac mini (Mid 2010), macOS Sierra (10.12)
Posted on Oct 21, 2016 4:27 PM
Helpful answers
By upgrading the Mac Mini, if you have skills and attention to detail for DIY
so you’re not paying a technician (who would likely do the job right; while
preferring you buy the upgrade parts from their shop as well as their labor)
there are those iFixit repair guides and OWC macsales has several videos
on how to do these kinds of upgrade/update/repair services.
You may have looked into a repair guide to see how the parts fit, and how
difficult or tedious replacement of certain parts could be, in order to make
best use of an older Mac for a later OS X.
If yours is correctly identified as the Mid 2010 (first year Unibody) Mac Mini
Yours would have an optical drive built-in; the last of this series has none.
Some estimates of upgrade cost show the lower spec parts/prices; so if
you know or have experience in upgrades, the choices aren’t as daunting.
The cost to upgrade varies with the reasonable price you are willing to put
into an older machine; some users do not upgrade the OS X because that
may ask for more hardware upgrade to support the new system demands.
For examples of hardware, depending on the version of Mac Mini you have
and the correct identification of that specific one, OWC page shows several:
The newest macOS Sierra 10.12 is not unlike older versions of OS X in that
they all prefer as much spare resources to be available for their automatic
consumption; and rely on that . to be there, on-demand.
Also note, older hardware even though ‘supported’ by a newest System may
find some of the older bits unsupported; the old Mac may hobble along any
way and certain things are noted (by build model/year) to not work in those.
The best configuration usually is the combination of a newest hardware that
shipped with the latest operating system and applications.
Or, if you prefer
an older configuration. The best one then, would be a best match for its era.
The old model given hardware upgrades to support the last system it could
possibly use, & be able to run adequately any third-party software you need.
Some users were able to stop at a system best suited for their uses, to include
any pro applications and peripherals such as custom printers (drivers) and
scanners, or various cameras & other bits needed for their avocational interest.
Upgrading an older model computer that has marginal support for a newer OS
may be problematic if you choose to also buy & use a newest iDevice and hope
it will play in the fullest possible extent. The old Mac has limits in hardware. A
Later models would be able to support other products in software. I’d not get
rid of a good working older model, & would tend to keep extra Macs around.
Just not expect them to be cutting edge; within budgets, vintage Mac rules.
Perhaps someone of fewer words can say more. LOL 🙂
Источник
Upgrade or install memory in your Mac mini
Learn how to remove or install memory into your Mac mini computer.
Before you begin
To minimize the possibility of damage to the computer components due to static discharge, it’s important to wear an antistatic wrist strap while you work with your computer’s memory.
Choose your model
Mac mini models have different memory (RAM) installation requirements. Choose your Mac mini model for more information. If you need help determining which Mac mini you have, find out how to identify Mac mini models.

Mac mini (M1, 2020) has memory that is integrated into the Apple M1 chip and can’t be upgraded. You can configure the memory in your Mac mini when you purchase it.
Mac mini (2018) does not have user-installable RAM. You can configure the memory in your Mac mini (2018) when you purchase it. To upgrade the memory in your Mac mini (2018), go to an Apple Store or Apple Authorized Service Provider.
RAM availability varies by country and region.
Mac mini (Late 2014) has memory that is integrated into the main logic board and can’t be upgraded.
2012, 2011, 2010
To remove and install memory in your Mac mini (Late 2012), Mac mini (Mid 2011), or Mac mini (Mid 2010), use the following steps.
Remove the bottom cover
- Turn off your Mac mini. From the Apple menu (), choose Shut Down.
- Disconnect the power cord and all other cables from your Mac mini.
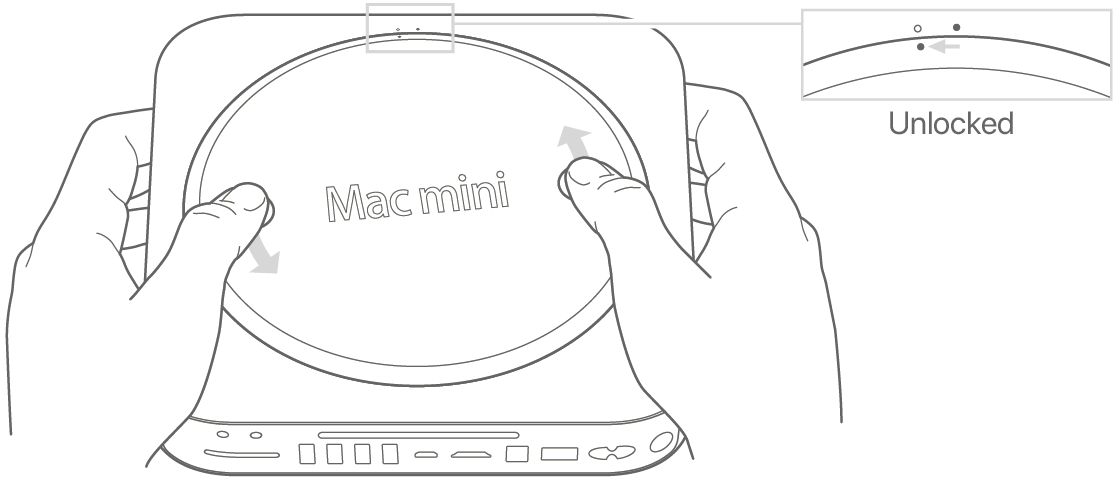
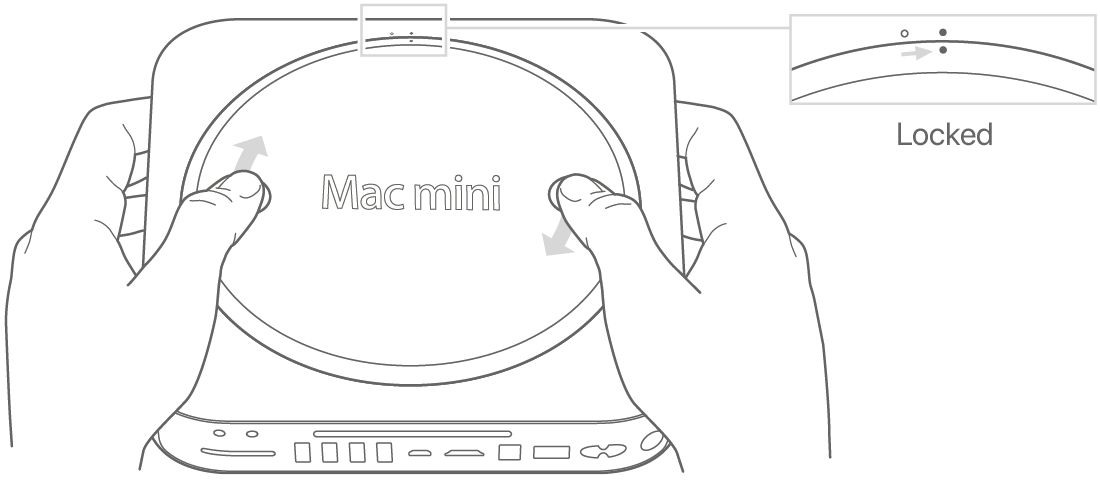
- Lay your Mac mini upside down on a soft cloth or towel, and then rotate the bottom cover counterclockwise to the unlocked position.
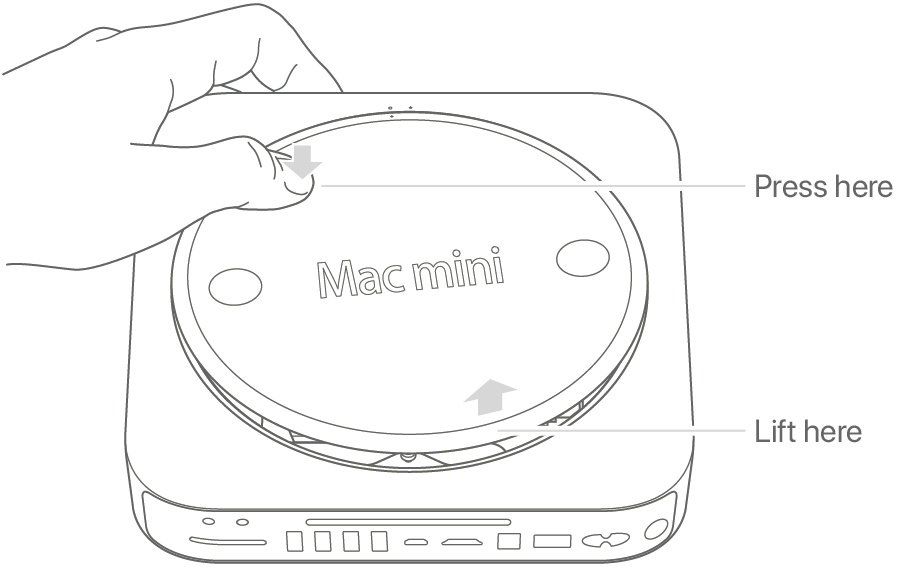
Press on the cover to pop up the opposite side, and then remove the cover.
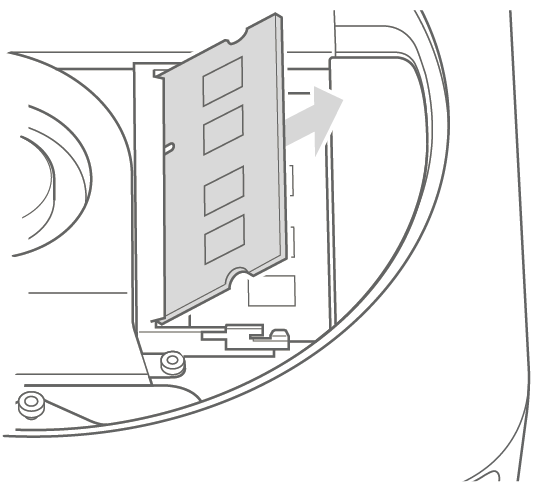
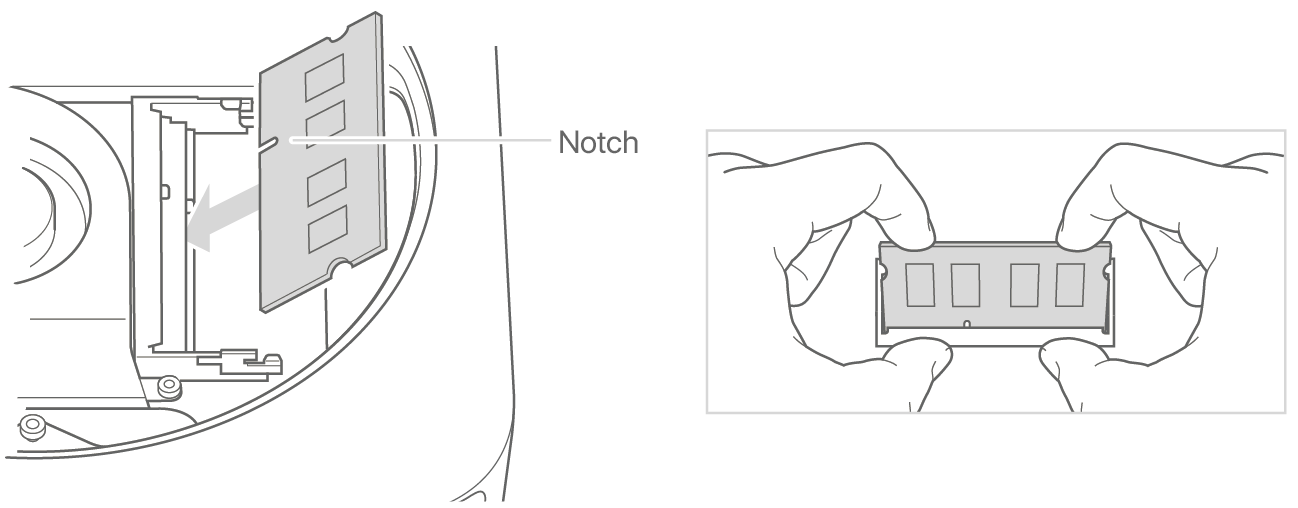
Remove the original memory modules
- Gently spread the clips at the ends of the top memory module just enough to let the free edge pop up.
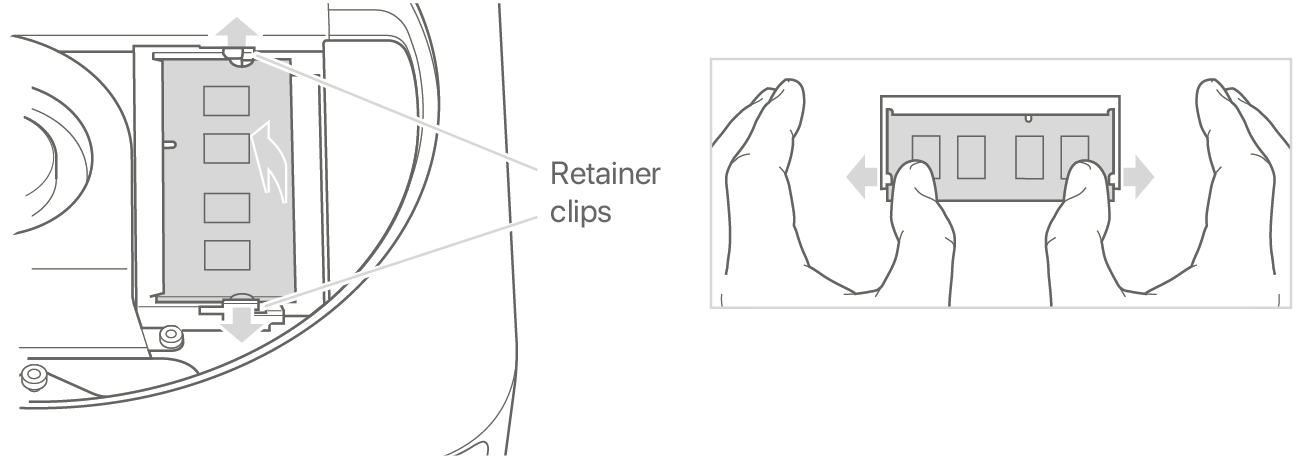
Pull the module out of the slot.
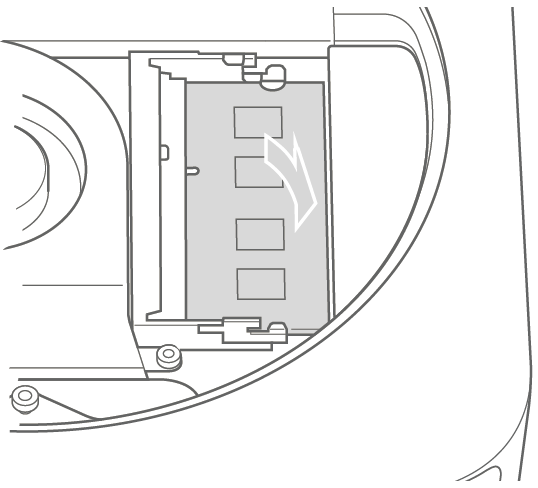
Install the new memory
- Carefully press the notched edge of the new memory module into the bottom slot while keeping the opposite edge slightly raised.

- Press down on the raised edge until the clips snap into place.
- Repeat to install the top memory module.
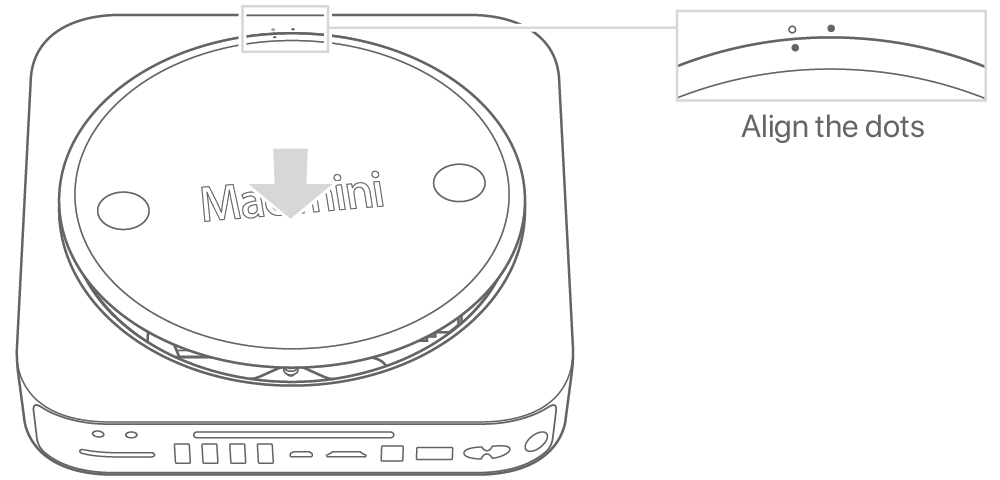
Replace the bottom cover
Don’t connect the power cord or turn on your Mac mini until you replace the bottom cover. Never operate your Mac mini without the cover in place.
- Replace the bottom cover using the alignment dots to place it in the unlocked position.
- Rotate the cover clockwise to lock it in place.
- Reconnect the power cord and any other cables you disconnected.
2009 and earlier
To remove or install memory in the following Mac mini models, go to an Apple Authorized Service Provider.
Confirm that your Mac sees the new memory
To check that the computer recognizes the new memory:
- Start up your computer.
- When you see your desktop, choose Apple menu , then choose About This Mac.
- Confirm that the memory listed matches the memory you installed.
If the reported memory size isn’t correct or if your Mac mini repeatedly plays three tones, it may be having trouble recognizing a memory module. If this happens, shut down your Mac mini, verify the module specifications against the requirements for your Mac mini model, and then repeat the memory installation instructions to make sure that the modules are installed correctly. If you still have issues, remove the memory and consult the support information that came with the memory, or contact the vendor who provided the memory.
Источник


