- Set up your Apple TV
- Here’s what you need
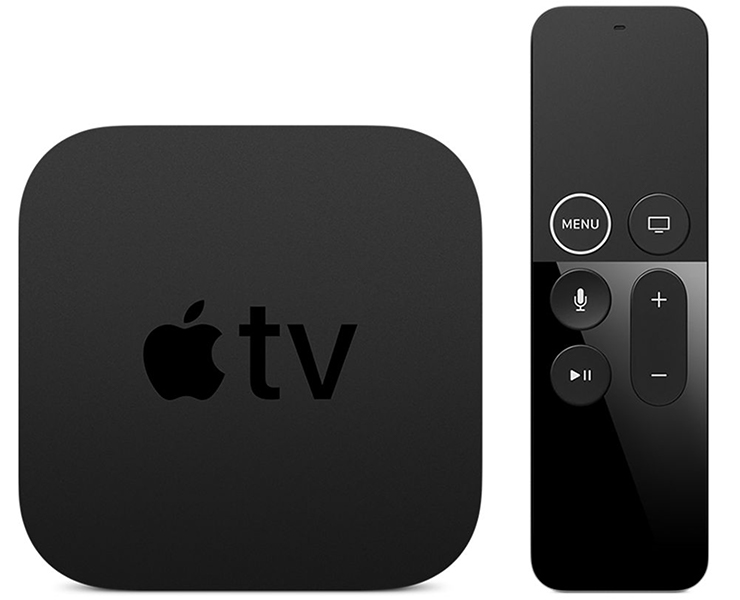
- Choose your Apple TV
- Set up your Apple TV 4K or Apple TV HD
- Plug it in and turn on your TV
- Choose your language, and turn on Siri
- Continue setup with your iOS device or set up manually
- Sign in with your TV provider
- Choose settings
- Get apps and start streaming
- Need help?
- If your Apple TV won’t turn on
- If you can’t use the remote
- If you can’t set up your Apple TV or see an error message
- Set up your HomePod, HomePod mini, Apple TV, or iPad as a home hub
- Set up HomePod, HomePod mini, or Apple TV as a home hub
- Set up iPad as a home hub
- Stereo System Network Setup 4+
- Panasonic Corporation
- Screenshots
- Description
- App Privacy
- No Details Provided
- Stereo System Network Setup 4+
- Panasonic Corporation
- Screenshots
- Description
- App Privacy
- No Details Provided
- Stereo System Network Setup 4+
- Panasonic Corporation
- Screenshots
- Description
- App Privacy
- No Details Provided
Set up your Apple TV
To get started with your Apple TV, follow these steps.
Here’s what you need
- Personal Internet*
- A TV or other display with an HDMI port
- An HDMI cable (On Apple TV 4K, you need an HDMI 2.0 or later compatible cable)
If you want to set up your Apple TV with your iOS device, do these things first on your iOS device:
*Apple TV doesn’t support public or subscription networks with sign-in requirements.
![]()
Choose your Apple TV
Set up your Apple TV 4K or Apple TV HD
To go back to a previous screen during setup, press the Menu button on your remote. To start over, unplug your Apple TV from power, then plug it back in.
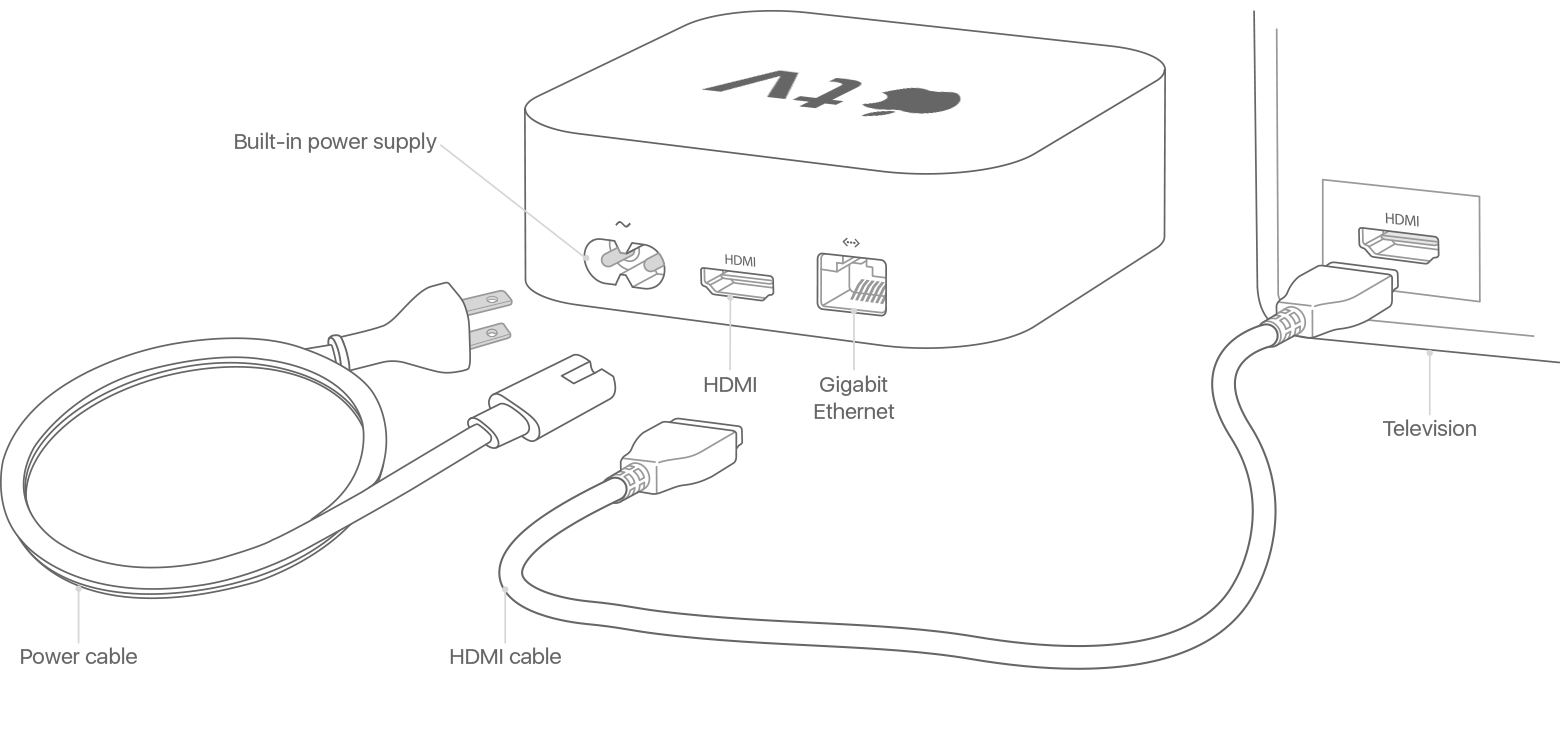
Plug it in and turn on your TV
Plug your Apple TV into power and connect it to your TV with an HDMI cable. To watch movies in 4K HDR on Apple TV 4K, make sure that you’re using an HDMI 2.0 or later cable, and have a TV that supports 4K, HDR, or both. Then turn on your TV and select the HDMI input that your Apple TV is connected to.
If you don’t want to connect to Wi-Fi during setup, you can connect your Apple TV to your router with an Ethernet cable.
Choose your language, and turn on Siri
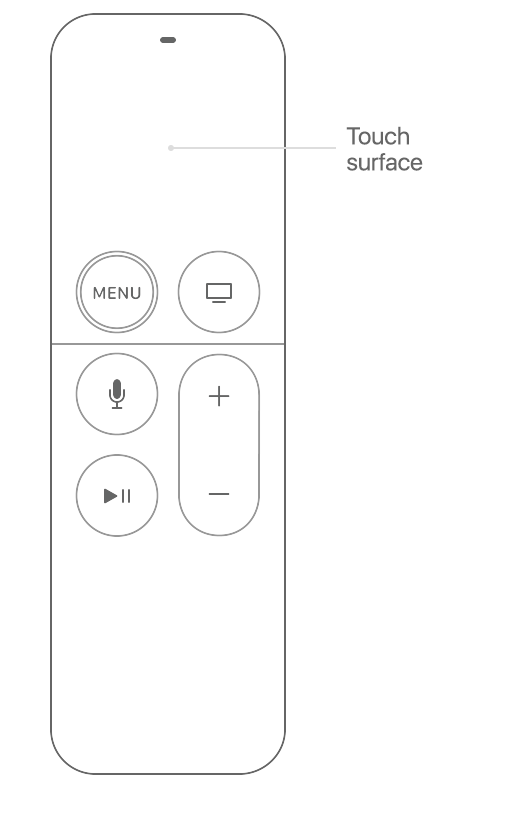
Swipe on the Touch surface of your Apple TV Remote to find your language and country or region. To choose an option, click the Touch surface. If you choose the wrong language, press the Menu button to return to the previous screen.
If asked, choose whether to use Siri.
Continue setup with your iOS device or set up manually
To automatically add your Apple ID and Wi-Fi settings to your Apple TV, choose Set Up with Device. Then unlock your iOS device, hold it next to your Apple TV, and follow the onscreen steps on your iOS device and Apple TV.
If you don’t want to set up your Apple TV with your iOS device, choose Set Up Manually. Then follow the onscreen steps on your Apple TV to connect to your home Wi-Fi network and sign in with your Apple ID.
If you don’t have an Apple ID, you can create one. If you forgot your Apple ID, learn what to do.
Sign in with your TV provider
In some countries and regions, you might be able to sign in with your TV or cable provider on your Apple TV to watch TV shows and movies included in your cable or TV subscription.
Choose settings
Turn on One Home Screen to keep the Home screen and apps the same across every Apple TV. Choose a room where your Apple TV is to automatically add it to the Home app on your iOS device and Mac. Or add users to your Apple TV.
Get apps and start streaming
When setup is complete, you’ll see the Home screen. From here, you can watch your favorite shows, movies, and discover more of what you love to watch in the Apple TV app. You can also download games and apps from the App Store.
To learn more about your Apple TV, read the Apple TV user guide.
Need help?
To learn what to do next, find your issue below.
If your Apple TV won’t turn on
If your Apple TV doesn’t power on, show video, or play sound, learn what to do.
If you can’t use the remote
If you purchased an Apple TV from someone and it didn’t come with a remote, then you’ll need to buy an Apple TV Remote to set up your Apple TV.
If you can’t set up your Apple TV or see an error message
If your Apple TV stops responding during setup, unplug your Apple TV from power, then plug it back in.
If you can’t get past a screen during setup, try connecting your Apple TV to a different Wi-Fi network, like a personal hotspot from your phone. After setup is complete, go to Settings on your Apple TV and connect to your home Wi-Fi network.
If you have other issues, contact Apple Support.
Источник
Set up your HomePod, HomePod mini, Apple TV, or iPad as a home hub
You need a home hub to control your HomeKit accessories while you’re away from your home, grant access to the people you trust, and automate your accessories to do what you want, when you want.
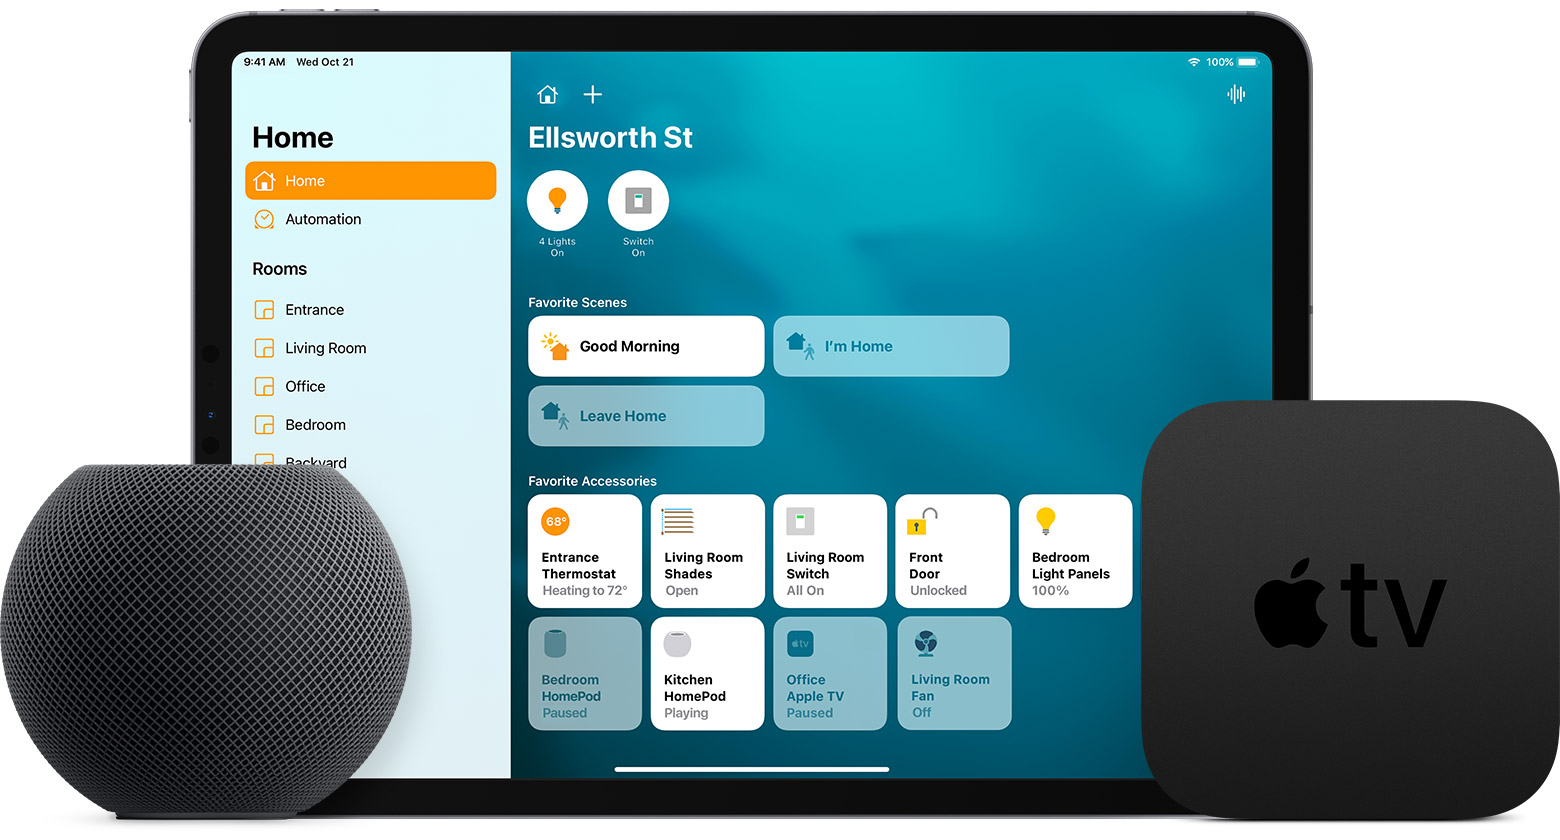
Set up HomePod, HomePod mini, or Apple TV as a home hub
HomePod, HomePod mini, and Apple TV automatically set up as home hubs, so you can control your home even when you’re not in it, and run automations right away. Just make sure that you’re signed in to iCloud on your iOS device or Apple TV with the Apple ID that you used to set up your HomeKit accessories in the Home app.
HomePod, HomePod mini, and Apple TV aren’t available in all countries and regions.

Set up iPad as a home hub
- Tap Settings > [your name] > iCloud and make sure that you’re signed in to iCloud with the Apple ID that you used to set up your HomeKit accessories in the Home app.
- Scroll down and check that Home is turned on.
- Tap Settings > Home and turn on Use this iPad as a Home Hub.
To use your iPad as a home hub, it must remain in your home, powered on, and connected to your home Wi-Fi network.
Источник
Stereo System Network Setup 4+
Panasonic Corporation
Screenshots
![]()
![]()
![]()
Description
Network Setup is an application to connect the Panasonic network compatible stereo system to your home wireless router.
By using this application, such as SSID input and setup in browser are not necessary and you can easily connect the stereo system to your home wireless network.
The procedure to use Network Setup.
1. Connect your Mac to your home wireless network.
(Check the password for the home wireless network.)
2. Turn the stereo system on, and enter NET SETUP mode.
3. Start this app.
4. Enter the password for the home wireless network.
5. Complete the setup when «SUCCESS» is displayed on the stereo system.
Supported devices are as follows.
[Supported devices]
SC-NE3, SC-NE5
(As of April 1st, 2013)
App Privacy
The developer, Panasonic Corporation , has not provided details about its privacy practices and handling of data to Apple. For more information, see the developer’s privacy policy.
No Details Provided
The developer will be required to provide privacy details when they submit their next app update.
Источник


