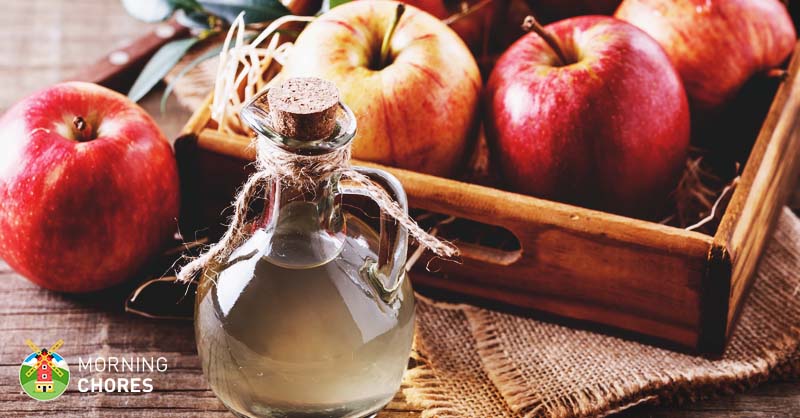
- How to Make Apple Cider Vinegar in 7 Steps (and 3 Mistakes to Avoid)
- How to make Vinegar from Apple Cider
- You’ll Need:
- 1. Gather and Prep Your Apples
- 2. Mix the Sugar
- 3. Add Water
- 4. Cover and Wait
- 5. Strain
- 6. Rinse and Repeat
- 7. Taste and Transfer
- The Mistakes I Made When I First Started Making Vinegar
- 1. I didn’t cover my apples completely
- 2. I forgot about my vinegar
- 3. I didn’t stir it
- How To Make Apple Cider Vinegar
- I didn’t know it at the time . .
- What is fermentation?
- The Transformation from Apples to Apple Cider Vinegar
- How to Make Apple Cider Vinegar
- About Carly Daley
How to Make Apple Cider Vinegar in 7 Steps (and 3 Mistakes to Avoid)
Jennifer is a full-time homesteader who started her journey in the foothills of North Carolina in 2010. Currently, she spends her days gardening, caring for her orchard and vineyard, raising chickens, ducks, goats, and bees. Jennifer is an avid canner who provides almost all food for her family needs. She enjoys working on DIY remodeling projects to bring beauty to her homestead in her spare times.
If you buy an item via links on this page, we may earn a commission. Our editorial content is not influenced by commissions. Read the full disclosure.
Are you new to the homesteading way of life? Or are you just looking for a few extra ways to save money or live healthier?
Maybe you have been homesteading for a while, but you are just now making your way inside the kitchen (I understand!). A small farm can be so time-consuming that you are only now venturing to learn how to make your own pantry staples.
Well, I’ve been to all of those places. I actually began trying to make vinegar during apple season a few years ago. I was on Pinterest one day looking around for more things I could make from scratch when I saw that apple cider vinegar was something I could easily make.
Plus, we were in the middle of dehydrating, canning and freezing large amounts of apples. We always fed the scraps to our animals, but I thought, “Why not save a little for us if I can make a staple?”
So that is what I did. I’m going to share with you how you can make apple cider vinegar, and I’m also going to share with you a few mistakes I made the first time I tried to make vinegar. I laugh about it now, but honestly, I struggle to make some of the easiest things sometimes.
No worries, it’s okay if you laugh at me too. This is how you make apple cider vinegar:
How to make Vinegar from Apple Cider
You’ll Need:
- A mason jar
- Apples or apple scraps
- Raw sugar
- Water
- Cheesecloth
- Rubber band or mason jar ring
1. Gather and Prep Your Apples
Not everyone that makes apple cider vinegar does so in the midst of putting up apples for the year. If you are someone that likes to put up apples, then just know that you’ll have to save a few cores and some peelings.
Just know, you’ll need the peelings and cores of around 6 apples to equate to 1 jar of apple cider vinegar.
Normally, what I’ll do is decide how many jars of vinegar I want to make that year.
Then I’ll do the math to know how many apples that will take.
Finally, I’ll just count the apples as I peel and set those scraps aside specifically for making vinegar. Then everything else will go into a different bowl which I take out to the chickens.
However, if you are someone that just has a few apples on hand with the idea of making vinegar, then you’ll only need about 3 whole apples for each jar of vinegar.
So you’ll need to slice those apples into smaller chunks and add them to a clean and sterilized mason jar.
Again, if you are using scraps, then you’ll just go ahead and place them into a clean and sterilized mason jar as well. It is all about using what you have on hand.
2. Mix the Sugar
So your apples are cut, washed, and in a sterilized jar. (Or your scraps are.) Either way, it is now time to mix your sugar with water.
Now, a good estimate is usually equal teaspoons of sugar to the amounts of apples. If you used 3 apples, then you’ll need around 3 teaspoons of raw sugar. Raw sugar produces the best fermentation results (in my opinion) so I try to stick with it. I’ve heard of some people using honey, but I’ve never tried it myself.
Again, if you use scraps, you’ll still put about 3 teaspoons of sugar in with them for the fermentation process.
When you have your sugar all figured out, you’ll mix it with 1 cup of water. If you are making a lot of batches of vinegar, you’ll need to do a separate sugar/water mixture for each jar. That way you know the desired amount of sugar and water is going into each batch.
3. Add Water
Now, after you have your sugar water and apples in your jars it is time to add more water. The idea is for your apples to be completely submerged.
Truthfully, using fermenting jars makes this part of the process so much easier because they have a little device inside of them that is meant to hold items inside the jar down into the liquid.
However, if you don’t have a fermenting jar, I’ve heard of people using large pitchers to store their vinegar mixture in. That way they can place items inside sandwich baggies (to protect the heavy object) that will hold the apples down into the water.
4. Cover and Wait
Next, we just cover the jar or container you are using. You’ll have to use a cheesecloth to cover it with. Then if using a mason jar, you’ll just use a mason jar ring to secure the cheesecloth in place.
However, if you are using a larger pitcher, you’ll place the cheesecloth over it and then secure it into place with a large rubber band. Be careful so it doesn’t snap loose and hit you. You want to use a cheesecloth so the mixture can still breathe without pests flying in it.
When you’ve accomplished this, you’ll place the mixture in a warm and dark area for around 2-3 weeks. You could use a dark place in your pantry, a cupboard, a dark corner of a closet, or even under a bed.
5. Strain
Once the 2-3 week period has passed, you will need to pull the mixture out. You’ll then strain the liquid away from the apple pieces or scraps that you used in this mixture.
Then you’ll discard the apple pieces while placing the liquid back into the same jar. This is now going to be your vinegar!
6. Rinse and Repeat
After you have your liquid back inside the same jar, you’ll use the same cheesecloth to cover the lid again.
Again, be sure to secure the cheesecloth with a rubber band or ring to ensure that it stays in place. We need to allow the liquid to breathe but not be contaminated by gnats and other flying pests that will be drawn to it.
Then you’ll allow the mixture to sit in that same dark location for another 4-6 weeks.
However, be sure to remember to stir the liquid every 3 or so days with a wooden or plastic spoon. Try to stay away from metal during this process as it messes with the fermentation process. Keep that in mind during step 5 as well.
That way you’ll know to use a plastic strainer if you have one available so the mixture won’t come in contact with stainless steel. You don’t want to put in all of this time to have that one tiny thing mess up your wonderful, homemade apple cider vinegar.
7. Taste and Transfer
Now that the 4 week waiting period has passed, it is time to begin taste testing. Taste a little of this vinegar mixture every day until you are satisfied with the amount of acid in the taste.
As soon as it hits the acidity level that you prefer, you are ready to transfer.
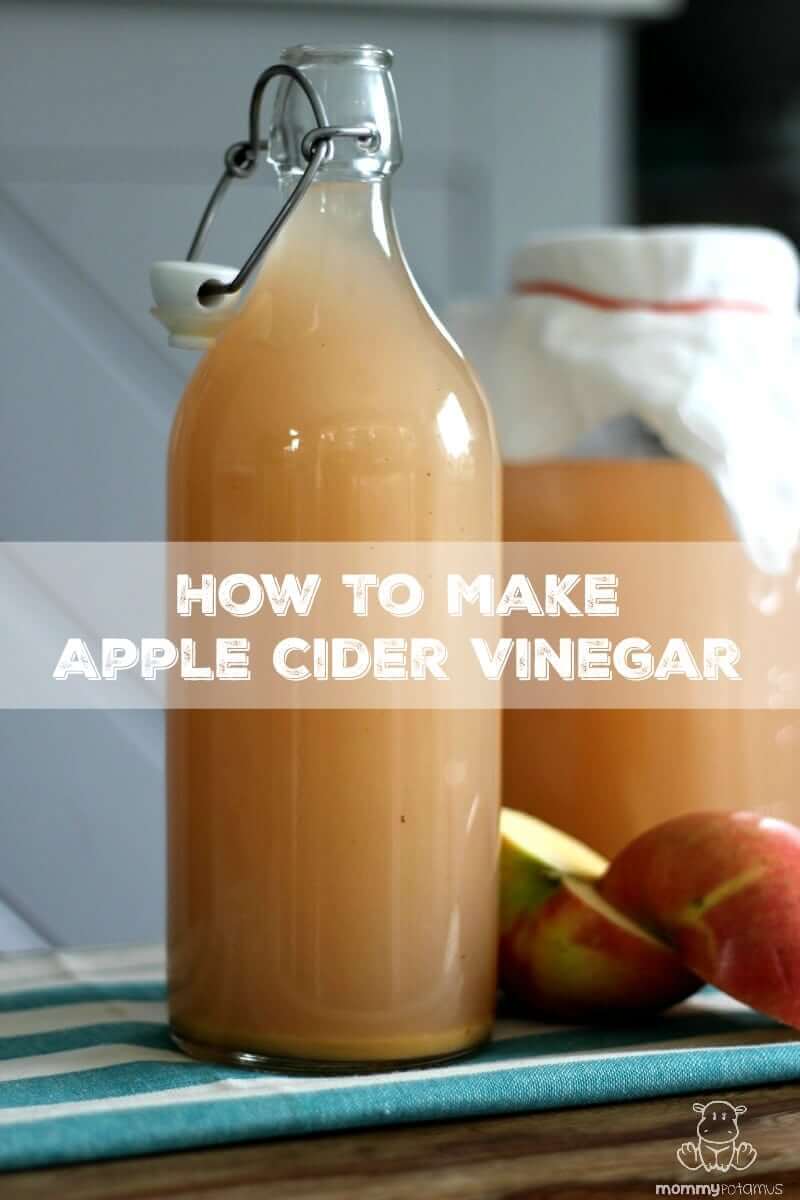
All you’ll do is place the liquid into a vinegar bottle with a lid. Once it is capped, the air will stop getting to it and stop the fermenting process.
The Mistakes I Made When I First Started Making Vinegar
I told you I would share with you a few of the mistakes I made when I first began making vinegar. Here they are:
1. I didn’t cover my apples completely
The first time I made vinegar I followed a tutorial online. As we all know, sometimes we achieve different results from those shown on a tutorial. I’m a writer, and I know how easy it can be to miss a step.
However, I’m also a human that tries tutorials, and I know how easy it can be to skim over something not realizing how important it actually is.
Well, I’m not sure which of those two instances happened, but I do know I didn’t cover my apples completely.
Also, I don’t think I added enough sugar to the mixture either.
As you can tell my vinegar making days got started off on a rocky foot.
2. I forgot about my vinegar
Next, I forgot about my vinegar. I mean, it is easy to do! When you spend 8 weeks making something (and the majority of that time is spent with a mixture sitting in a dark corner) you have a tendency to move on with life. I have the same issue with making a sourdough starter from time to time.
Still, I digress. I completely forgot about it, and I left uncovered apples sitting far too long.
Naturally, my first batch of vinegar molded. It was disheartening, but I didn’t give up.
3. I didn’t stir it
I went back to the drawing board making sure that all of my apple scraps were covered this time. Also, I set a reminder on my phone to help me tend to the vinegar when I needed to, and I made it past the first steps.
Then I strained it and transferred it back into the original jar and forgot about it again. Which means, I failed to stir it.
Also, I don’t think I ever put mine in a dark enough location either. I don’t have a pantry or a closed cupboard in my current home because we have all open shelving in our farmhouse kitchen.
So I had the issue of finding a dark corner to stash it in, but I learned a valuable lesson through making vinegar as well. Though it is time-consuming, and I struggled a bit, I didn’t quit and now I’ve learned something new that I’ll probably never forget.
This leads me to point in sharing my mistakes: hopefully, you won’t be like me and struggle through any of our tutorials. (I try really hard to make them as detailed and easy to read as possible.) However, if you do, don’t give up. You’ll get it, and always feel free to ask us or anyone in our community because we are here to help you lead a more self-sufficient lifestyle!
Well, now you all know how to make apple cider vinegar from whole apples or scraps of apples. You also know a few of the (embarrassing) mistakes I made in my first couple of go-rounds with making vinegar. I hope that you find great success in your vinegar making times.
Also, don’t forget that vinegar is great for a lot of things, but my absolute favorite thing to do with vinegar is to make vinegar pie. It is very frugal but tastes wonderful.
So don’t think that everything that comes from vinegar has to be bitter because vinegar pie is one of my favorite desserts.
Источник
How To Make Apple Cider Vinegar
Note from Mommypotamus: What do scented jelly jars and a tutorial on how to make apple cider vinegar have in common? They’re both the subjects of half-written posts sitting in my drafts folder, of course! The jelly jars, which sprouted alien mold and sent colonies to mars, will never see the light of day.
Lucky for you, though, Carly of Modern Hippie Housewife has an amazing tutorial for making apple cider vinegar that she’s sharing with us today. I can’t wait to make up a batch for fire cider, hair detangler, and homemade cough syrup!
I didn’t know it at the time . .
But I was actually aware of fermentation before I knew exactly what it was. When I was a kid, I remember my Nana telling us stories about making sauerkraut and pickles in large crocks – “Like that one,” she’d say, as she pointed to an old crock that, at the time, my mom had filled with dried flowers.
Its been a few years now since I started my own fermentation journey. One rainy afternoon, I decided to give homemade sauerkraut a try. It seemed like the appropriate, stereotypical place to start.
Initially, I was a little intimidated. As I read through the steps in my mom’s fermentation book, I felt like I was missing something. Could it really be so simple? Just shred cabbage, add salt, pound with a potato masher, and wait?
Sure enough, it really was that simple. And then I was hooked…
Since then, my little curiosity has evolved in to a full-fledged obsession, and I’ve fermented everything from condiments to wine. Fermenting food and beverages truly is one of the most practical, beneficial and rewarding skills that I’ve learned on my journey toward self-sufficiency.
Last September, I decided to give apple cider vinegar a try. It was an obvious choice since friends of ours had an over-abundance of apples and I had already fermented apple sauce. We also use a TON of ACV in our household – I’m sure more then the average.
But before I go any further, let’s talk a little bit about the basics of fermentation. Perhaps you’re reading this and thinking, “Who is this crazy, fermentation lady, and what the heck is fermented food?” Ok, let me very briefly explain – a little fermentation 101 will also make the process easier and help with any trouble-shooting along the way.
What is fermentation?
Fermentation takes place in the absence of oxygen (an anaerobic environment), and in the presence of beneficial microorganisms (yeasts, molds and bacteria) which obtain their energy through fermentation. During the fermentation process, these microorganisms break down sugars and starches into alcohols and acids – lactic acid and acetic acid (a.k.a vinegar!) What you’re left with is a food that has been transformed into a more nutritious version of itself, which can be stored for much longer without spoiling.
In sum, by fermenting food, you’re giving it nutritional superpowers, and a longer life. Superfood, if you will.
Fermented food goes far beyond sauerkraut–you can actually ferment almost every food group! Fermenting grains gives you sourdough bread and beer, fermenting meat gives you salami, fermenting dairy gives you yogurt and cheese, fermenting veggies gives you pickles, and fermenting fruit gives you cider and vinegar! The possibilities are really endless.
You can read my full article on Fermentation 101: The Very Basics on Fermenting Food HERE.
The Transformation from Apples to Apple Cider Vinegar
There are three types of fermentation: lactic acid fermentation, ethyl alcohol fermentation, and acetic acid fermentation. To make apple cider vinegar, we’ll be utilizing acetic acid fermentation.
Acetic fermentation takes place when alcohol is exposed to air and is converted to acetic acid, which, like I mentioned before, is another word for vinegar! Yes, your apple cider vinegar was once good ol’ apple cider.
You’ve probably noticed that if you leave a bottle of wine out, uncovered, for too long, it starts to smell and taste a bit vinegar-y…well, now you know why!
How to Make Apple Cider Vinegar
Learning how to make apple cider vinegar is a pretty forgiving and simple process. No real skill is required, and all you need is apples, some raw cane sugar, water and patience.
I don’t use exact ratios for this recipe because the amounts vary depending on the size of your jar and the amount of apples or apple scraps you use.
You’ll need:
- A large, glass jar (half gallon mason jars work well)
- Cheese cloth + an elastic band to secure over the jar
- A glass weight (used to hold the apples below the surface of the water)
- Organic apples
- Filtered water
- Raw cane sugar (about 2-3 tbsp. for each half-gallon jar )
Step 1 – Prep
Prep your area – The only real thing that you’ll want to be cautious about is that the apples, utensils, jar and surface area that you’re working on is very clean – you don’t want to introduce any bad bacteria into the fermenting process, as it will spoil your ACV. Clean everything in warm, soapy water and leave to air-dry.
Prep your apples – Clean your apples in a sink full of cold water and wipe them down with a cloth to remove any residue or dirt. Make sure to cut off any yucky bits, bruises and blemishes before-hand – if you wouldn’t eat it, don’t use it for your ACV.
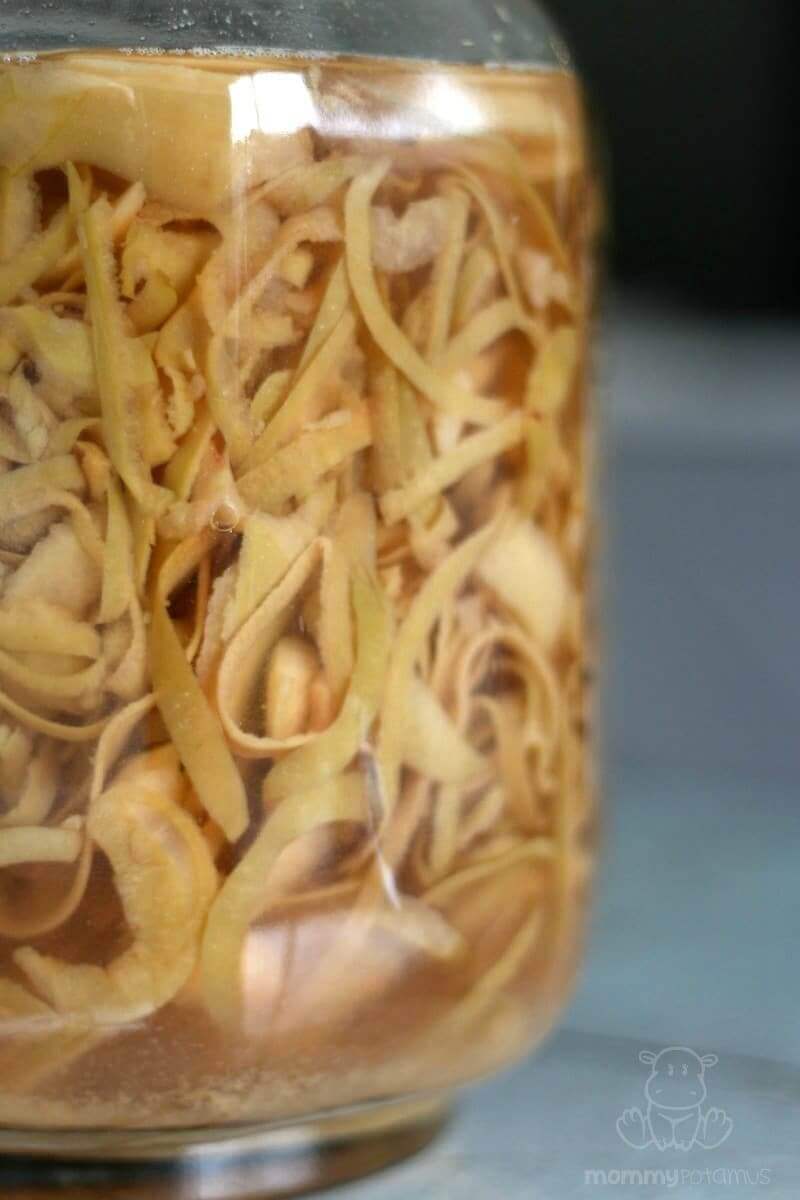
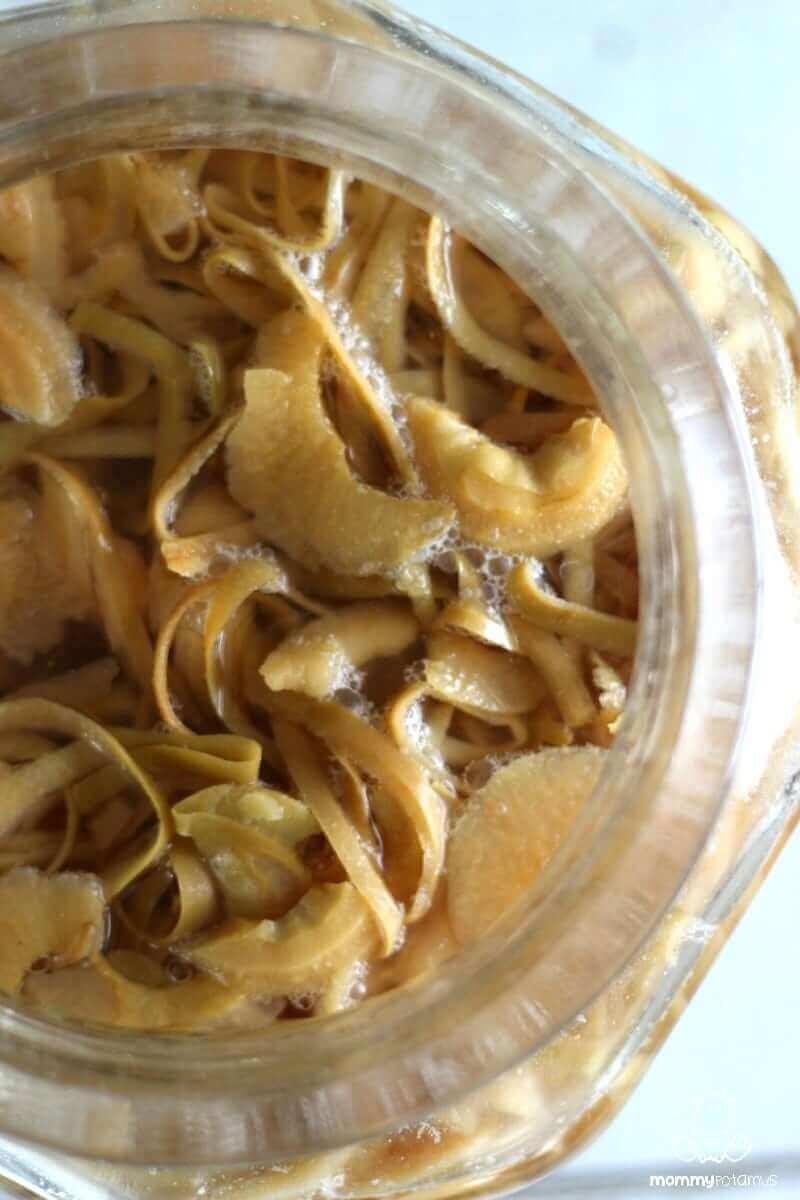
For this batch of ACV I used only the peels, and some of the core pieces, which I had left over from making apple sauce – very little apple made it to the compost!
If you’re using the whole apple, dice it in to small, half-inch pieces.
Step 2 – Assemble
Fill you jar 3/4 full of clean, diced apples.
Cover the apples with water and sprinkle with the sugar. The sugar will act as food for the beneficial bacteria which will help move the fermentation process along. (I’ve also made it without sugar, and instead used a 1/2 cup of ACV as a “starter” which worked well, too!)
Submerge the apples below the surface of the water. You’ll need to use a weight to prevent the apples from floating to the surface. I use special, glass fermentation weights, but you may have to get creative. Many people use a clean zip-lock bag filled with water, or a plastic lid, perhaps left-over from a yogurt or sour cream container, cut to size and then held down with a sterilized rock. Again, you may have to get creative. If there are pieces of apples left exposed to the surface air, they may mold which will spoil your ACV.
Cover the jar with a doubled-up piece of cheese cloth, and secure it with an elastic band to prevent fruit flies and critters from getting in.
Step 3 – Wait
Store your soon-to-be ACV in a room-temperature environment, away from direct sunlight (like in your pantry, or tucked away in an undisturbed corner of your kitchen) and leave it to ferment for 4 weeks. If the room is cooler then “room temperature” (about 70°F) then your ACV will take longer to ferment.
In about 3 days you should see little bubbles forming – this means it’s working! The beneficial bacteria are breaking down the sugars into CO2!
Check on the ACV every few days to ensure that the apples are still submerged. It should smell sweet in the beginning, and then eventually start to smell more and more sour.
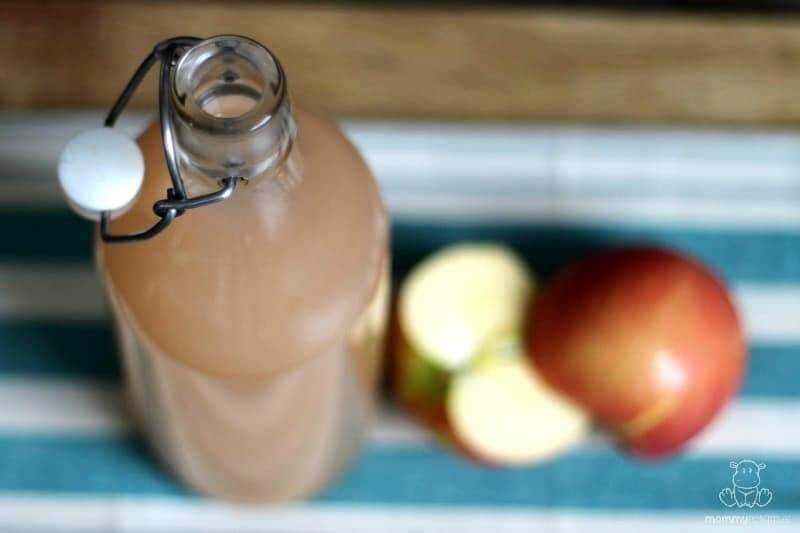
Step 4 – Strain & Store
Something similar to a kombucha “mother” may form on the top, which is great – you can use it as a starter culture for your next batch of ACV, if you like. Simply store it in a small jar with some ACV, like you would your kombucha mother.
After about 4 weeks, it should be ready to strain. Use a cheese cloth to squeeze out, and break down, as much of the apple as you can.
Pour the liquid back into the jar, cover again with the cheese cloth, and leave it to ferment for another 2-3 weeks, stirring every few days.
Once it has developed the taste that you desire, you can now bottle it, seal it with a lid and start to use it.
About Carly Daley
Carly is passionate about the environment, sustainable living, and cooking healthy (yet delicious!) meals for her family. She’s a proud “modern hippie housewife” and mama of two!
Her hobbies include traveling, fermenting food and beverages, cooking from-scratch, gardening, dancing, DIY-ing almost everything, and relaxing after a long day by tuning in to whatever Netflix show she’s currently addicted to with her husband.
Источник


