- Application Folder Pro 3.0.0
- How to Make App Folders on Android
- Organize your apps and save screen space
- What to Know
- How to Make a Folder
- Name Your Folder
- Add Your Folder to the Home Row
- Some Things Do Not Drag Like the Others
- Organizing your Source Files
- Assets Folder in Android Studio
- How the asset folder is different from the Resource Raw folder?
- But when to use which folder?
- How to Create Assets Folder in Android Studio?
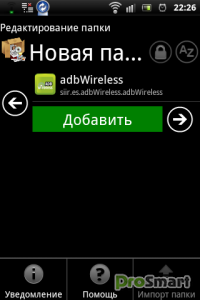
Application Folder Pro 3.0.0

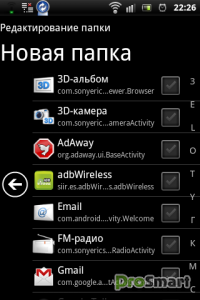
Разработчик: J.H. Jeong
Сайт разработчика: http://jjhnote.blogspot.com/
Язык интерфейса: Русский
Совместимость: Android 2.1 и выше
Состояние: Бесплатно
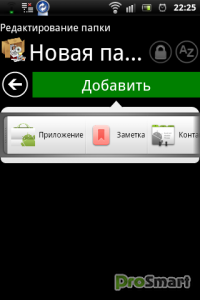
[/b] Приложение, позволяющее разместить красивые и удобные папки на рабочем столе.
[b]Изменения:
— Compatible issue on Android 2.2.0 or lower
— Set default language as English for non English users


Telegraph (Graph Messenger) 8.2.7 — P9.4 [Mod]:
Hi dymonyxx bro. Can you crack/mod Vidma screen Recorder app?
https://play.google.com/store/apps/details?id=vidma.screenrecorder.videorecorder.videoeditor.pro
It better than az screen recorder app.
Tks
BGram T6.0.1-B6.8.2 Mod:
Дмитрий добрый день!
Большая просьба обновить ваш мод BGram.
Спасибо!
AppMgr Pro III 5.31 Patched:
Привет! На Xiaomi poco x3 пишет, что работает не корректно и невозможно ничего делать, подскажите пожалуйста что делать? Заранее благодарен
TuneIn Radio Professional 28.2 Paid Mod:
Версия триал
Версия почему то триал. Ранее это радио не ставил. Выпадает окно с выбором срока в 7 или 30 дней
TuneIn Radio Professional 28.2 Paid Mod:
Если бы у меня была такая проблема я просто бы подписывал своей подписью или тестовой все скачанные версии и только потом устанавливал и будет все ок.
TuneIn Radio Professional 28.2 Paid Mod:
Я постоянно скачиваю данную программу с этого сайта. Периодически при попытке обновления пишет, что приложение не может быть установлено. Приходится удалять предыдущую версию и устанавливать новую. Как решить эту проблему?
Wallpapers HD Backgrounds 7Fon Premium 5.5.2:
Спасибо.
Источник
How to Make App Folders on Android
Organize your apps and save screen space
:max_bytes(150000):strip_icc()/MarziahBioPic-57fc61e83df78c690f7dd0a7-e388c9f1295b4bdc9a8001547e9aca6f.png)
:max_bytes(150000):strip_icc()/WorkBadgePhoto-61c0b98ef5a74e4a85851a8f706dbd65.jpg)
What to Know
- Long-press an app and drag it onto another app to create a folder.
- Long-press the folder to rename it. (On some devices, tap the folder to open it, then tap the name to edit it instead).
- You can also drag the folder into the row of favorite apps on the bottom of the Home screen on Android phones.
This article explains how to create new folders on an Android device, how to rename those folders, and how to move them around your Home screen. The directions below should apply no matter who made your Android phone: Samsung, Google, Huawei, Xiaomi, etc.
:max_bytes(150000):strip_icc()/app-folders-on-android-1616144-b80a82347c9b4d0a937251f14923821c.png)
How to Make a Folder
To create a folder, long-press an app. Press and hold a finger on the app until you feel a mild feedback vibration and the screen changes.
Then, drag the app onto another app to make a folder. This is the same as on iOS devices such as the iPad and iPhone.
:max_bytes(150000):strip_icc()/001_app-folders-on-android-1616144-5c58a3e346e0fb00012bb286.jpg)
Name Your Folder
Unlike iOS, Android doesn’t provide a default name for new folders; it appears as an unnamed folder. When a folder is unnamed, nothing displays as the name of the collection of apps.
To give the folder a name, long-press the folder. It opens, displays the apps, and launches the Android keyboard. Enter a name for the folder and tap the Done key. The name displays on the Home screen.
Some phones do this differently. On a Samsung or Google Pixel device, tap the folder to open it, then tap the name to edit it.
Add Your Folder to the Home Row
You can also drag the folder onto your favorite apps on the bottom of the Home screen on Android phones. That makes it two clicks to get to the app, but Google demonstrates this by grouping Google apps into a folder and putting it on the Home row at the bottom.
Some Things Do Not Drag Like the Others
Dragging order is important. You can drag apps onto other apps to make folders. You can drag apps into existing folders to add the app to the folder. You cannot drag folders onto apps. If an app runs away when you drag something on it, that could be what happened. The other thing you can’t do is drag Home screen widgets into folders. Widgets are mini apps that run continuously on the Home screen, and won’t run properly inside a folder.
Источник
Organizing your Source Files
Android applications should always be neatly organized with a clear folder structure that makes your code easy to read. In addition, proper naming conventions for code and classes are important to ensure your code is clean and maintainable.
Be sure to check out the Ribot Code and Style Guidelines for a more extensive breakdown of suggested style and naming guidelines.
The following naming and casing conventions are important for your Java code:
| Type | Example | Description | Link |
|---|---|---|---|
| Variable | incomeTaxRate | All variables should be camel case | Read More |
| Constant | DAYS_IN_WEEK | All constants should be all uppercase | Read More |
| Method | convertToEuroDollars | All methods should be camel case | Read More |
| Parameter | depositAmount | All parameter names should be camel case | Read More |
See this naming guide for more details.
Android classes should be named with a particular convention that makes their purpose clear in the name. For example all activities should end with Activity as in MoviesActivity . The following are the most important naming conventions:
| Name | Convention | Inherits |
|---|---|---|
| Activity | CreateTodoItemActivity | AppCompatActivity , Activity |
| List Adapter | TodoItemsAdapter | BaseAdapter , ArrayAdapter |
| Database Helper | TodoItemsDbHelper | SQLiteOpenHelper |
| Network Client | TodoItemsClient | N/A |
| Fragment | TodoItemDetailFragment | Fragment |
| Service | FetchTodoItemService | Service , IntentService |
Use your best judgement for other types of files. The goal is for any Android-specific classes to be identifiable by the suffix.
There are several best practices for organizing your app’s package structure.
The way to do this is to group things together by their category. Each component goes to the corresponding package:
- com.example.myapp.activities — Contains all activities
- com.example.myapp.adapters — Contains all custom adapters
- com.example.myapp.models — Contains all our data models
- com.example.myapp.network — Contains all networking code
- com.example.myapp.fragments — Contains all fragments
- com.example.myapp.utils — Contains all helpers supporting code.
- com.example.myapp.interfaces — Contains all interfaces
Keeping these folders in each app means that code is logically organized and scanning the code is a pleasant experience. You can see a slight variation on this structure as suggested by Futurice on their best-practices repo.
Alternatively, we can package-by-feature rather than layers. This approach uses packages to reflect the feature set. Consider the following package structure as outlined in this post:
- com.example.myapp.service.* — Is a subpackage for all background related service packages/classes
- com.example.myapp.ui.* — Is a subpackage for all UI-related packages/classes
- com.example.myapp.ui.mainscreen — Contains classes related to some app’s Main Screen
- com.example.myapp.ui.detailsscreen — Contains classes related to some app’s Item Details Screen
This feature allows you to place DetailsActivity , DetailsFragment , DetailsListAdapter , DetailsItemModel in one package, which provides comfortable navigation when you’re working on «item details» feature.
DetailsListAdapter and DetailsItemModel classes and/or their properties can be made package-private, and thus not exposed outside of the package. Within the package you may access their properties directly without generating tons of boilerplate «setter» methods.
This can make object creation really simple and intuitive, while objects remain immutable outside the package.
Resources should be split up into the following key files and folders:
| Name | Path | Description |
|---|---|---|
| XML Layouts | res/layout/ | This is where we put our XML layout files. |
| XML Menus | res/menu/ | This is where we put our AppBar menu actions. |
| Drawables | res/drawable | This is where we put images and XML drawables. |
| Colors | res/values/colors.xml | This is where we put color definitions. |
| Dimensions | res/values/dimens.xml | This is where we put dimension values. |
| Strings | res/values/strings.xml | This is where we put strings. |
| Styles | res/values/styles.xml | This is where we put style values. |
See the full list of resources here and note the following:
- Don’t hardcode color hex values in the layout. Instead of hardcoding these values, be sure to move all colors into res/values/colors.xml and reference the colors in layouts with @color/royal_blue .
- Don’t hardcode margin / padding dimensions in the layout. Instead of hardcoding these values, be sure to move all dimension values into res/values/dimens.xml and reference these in layouts with @dimen/item_padding_left .
- To support multiple devices, we can then use the alternative resources system to provide different colors, strings, dimens, styles, etc based on the device type, screen size, API version and much more.
Be sure to start properly organizing your resources early on in the development of an application. Be sure to check out the Ribot Code and Style Guidelines for a more extensive breakdown of suggested style and naming guidelines.
Often there are questions about organizing not just the source files but also better organizing the application resources. In a modern app, there are often hundreds of different layout files, drawables, styles, etc and by default these are all grouped together in a flat list within a single subdirectory (i.e res/layout ). For now, keep the layout resource files in the same directory.
Refer to stackoverflow post for a discussion of explored options. The main problem is that if you try to use the nested resource layout approach, the current logic for the Android Studio’s Gradle plug-in will not update the resource files after they have changed for nested resource sets. The current implementation attempts to check the resource directories using startsWith(), so a directory structure that is nested (i.e. src/main/res/layout/layouts and src/main/res/layout/layouts_category2) will choose src/main/res/layout/layouts consistently and never actually update the changes. A result, you will you have to rebuild/clean the project each time whenever making layout file changes.
It is up to you to decide which of the aforementioned approaches suits your project best.
However, in general Java programming, packaging apps by feature is considered preferable and makes a lot of sense.
Источник
Assets Folder in Android Studio
It can be noticed that unlike Eclipse ADT (App Development Tools), Android Studio doesn’t contain an Assets folder in which we usually use to keep the web files like HTML. Assets provide a way to add arbitrary files like text, XML, HTML, fonts, music, and video in the application. If one tries to add these files as “resources“, Android will treat them into its resource system and you will be unable to get the raw data. If one wants to access data untouched, Assets are one way to do it. But the question arises is why in the asset folder? We can do the same things by creating a Resource Raw Folder. So let discuss how the assets folder is different from the Resource Raw folder?
How the asset folder is different from the Resource Raw folder?
In Android one can store the raw asset file like JSON, Text, mp3, HTML, pdf, etc in two possible locations:
- assets
- res/raw folder

Both of them appears to be the same, as they can read the file and generate InputStream as below
But when to use which folder?
Below is some guidance that might be helpful to choose
1. Flexible File Name: (assets is better)
- assets: The developer can name the file name in any way, like having capital letters (fileName) or having space (file name).
- res/raw: In this case, the name of the file is restricted. File-based resource names must contain only lowercase a-z, 0-9, or underscore.
2. Store in subdirectory: (possible in assets)
- assets: If the developer wants to categories the files into subfolders, then he/she can do it in assets like below.

3. Compile-time checking: (possible in res/raw)
- assets: Here, the way to read it into InputStream is given below. If the filename doesn’t exist, then we need to catch it.
- res/raw folder: Here, the way to read it into InputStream is:
So putting a file in the res/raw folder will provide ensure the correct file-name during compile time check.
4. List filenames at runtime: (possible in assets)
- assets: If the developer wants to list all the files in the assets folder, he/she has used the list() function and provide the folder name or ” “ on the root folder as given below.
- res/raw: This is not possible in this folder. The developer has to know the filename during development, and not runtime.
So, in assets, one can read the filename during runtime, list them, and use them dynamically. In res/raw, one needs to code them ready, perhaps in the string resources file.
5. Filename accessible from XML: (possible in res/raw)
So if you need to access your file in any XML, put it in the res/raw folder. Let’s make a table to remember the whole scenario easily.
| Res/Raw Folder |
|---|
| Flexible File Name NO |
| Store in subdirectory NO |
| Compile-time checking YES |
| List filenames at runtime NO |
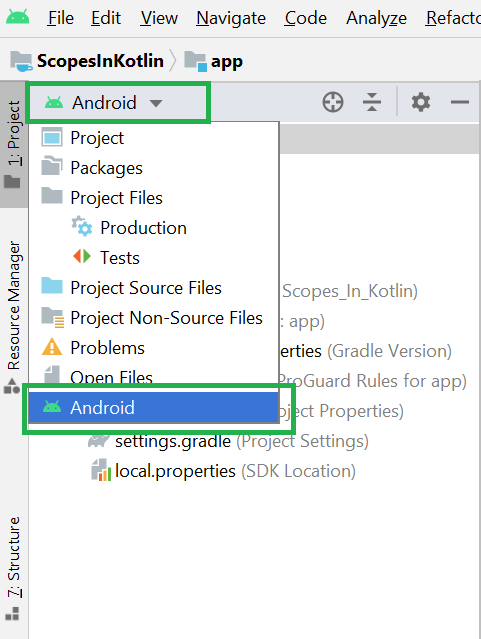
Filename accessible from XML How to Create Assets Folder in Android Studio?Now let’s discuss how to create an assets folder in the android studio. Below is the step-by-step process to create an assets folder in Android studio. Step 1: To create an asset folder in Android studio open your project in Android mode first as shown in the below image.
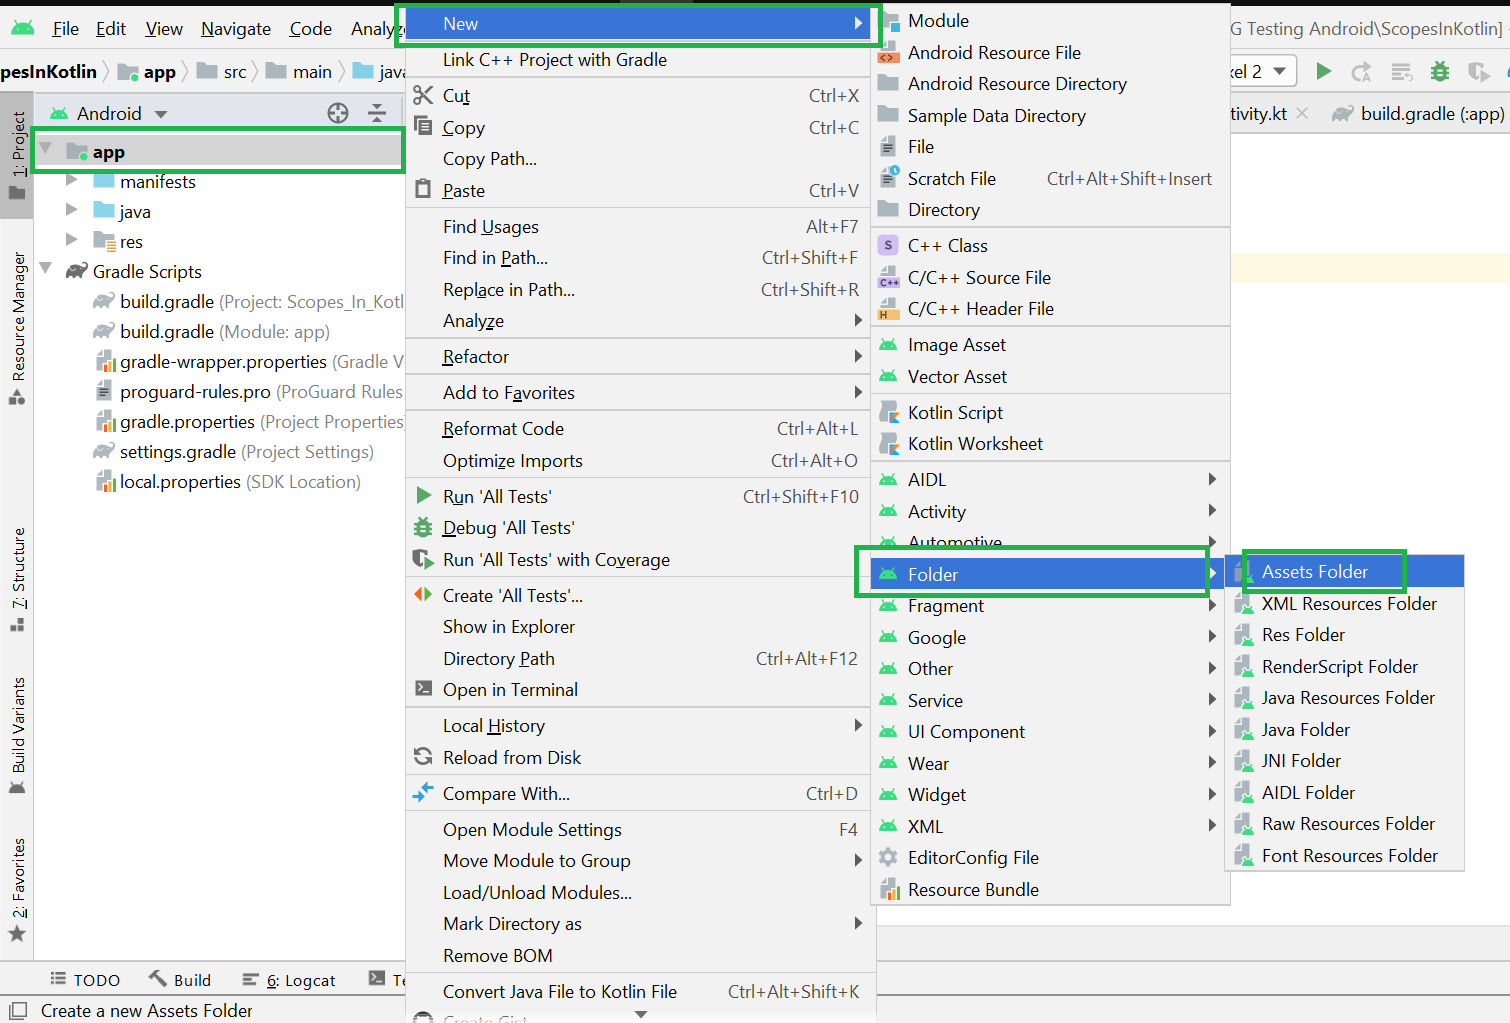
Step 2: Go to the app > right-click > New > Folder > Asset Folder and create the asset folder.
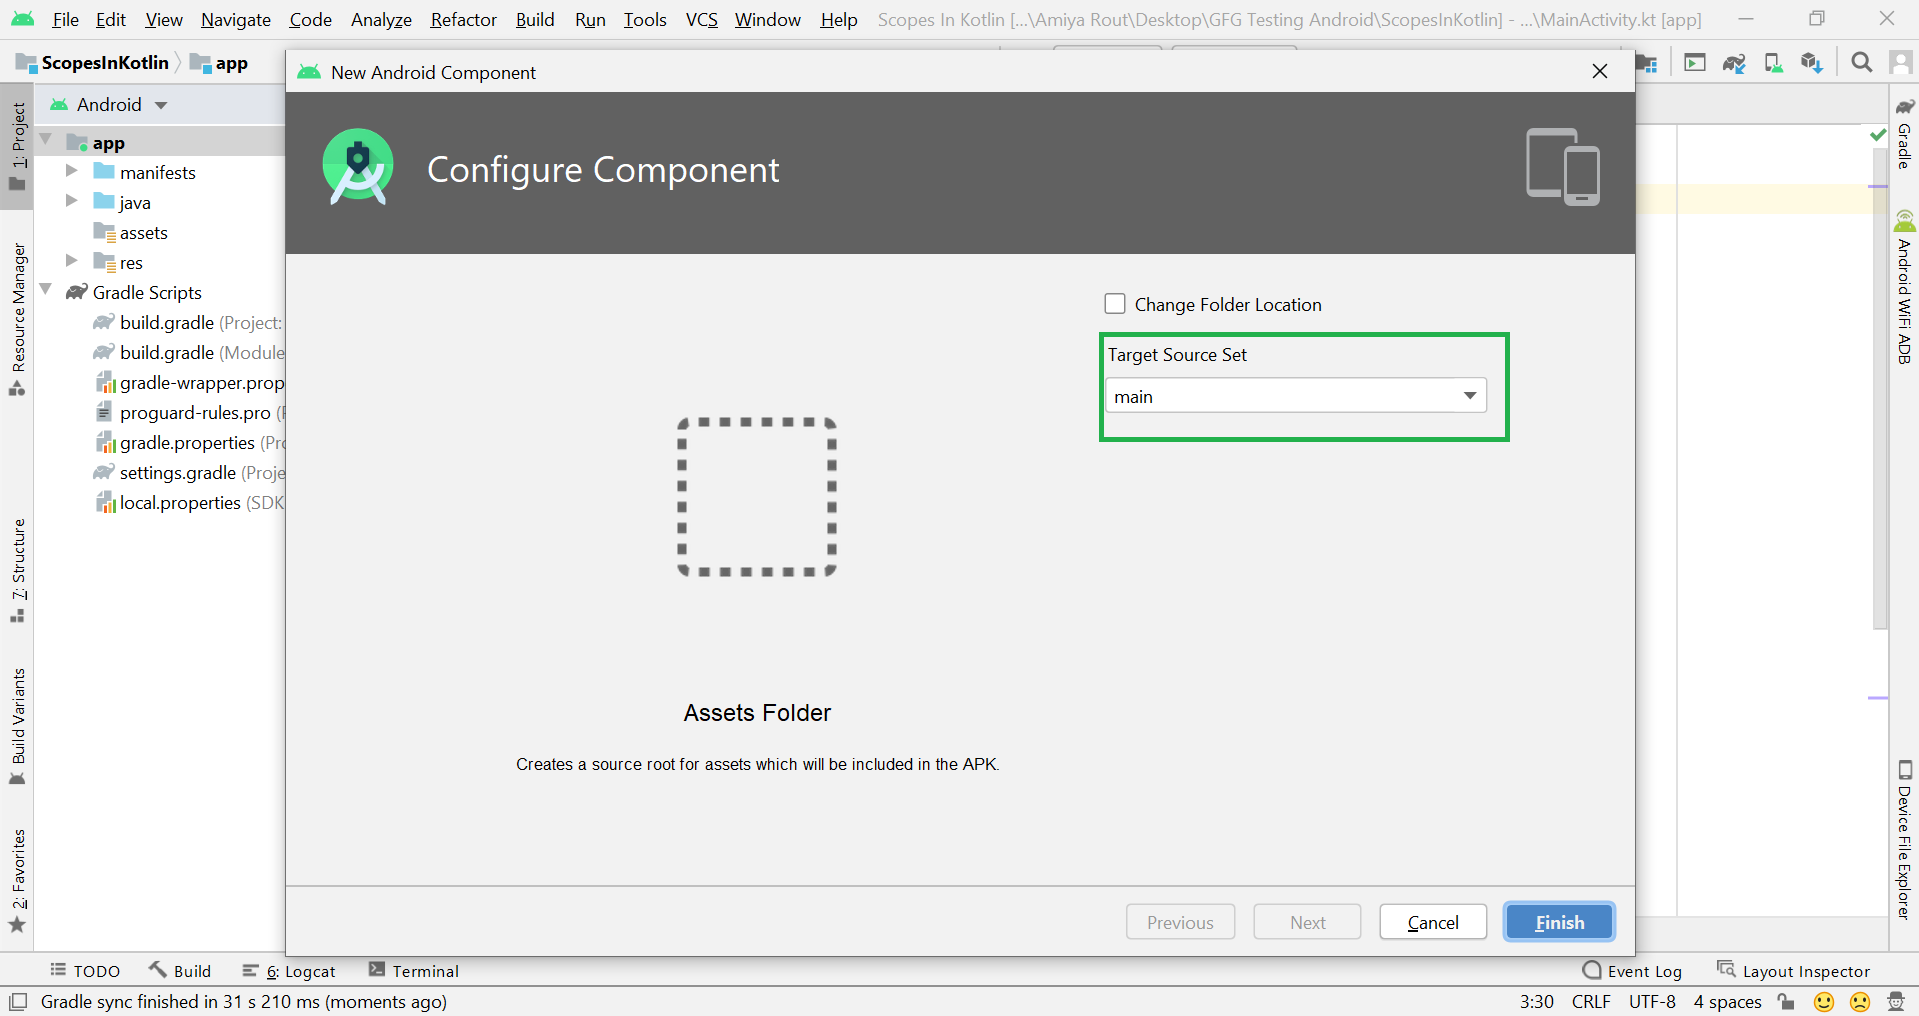
Step 3: Android Studio will open a dialog box. Keep all the settings default. Under the target source set, option main should be selected. and click on the finish button.
Step 4: Now open the app folder and you will find the assets folder by the name of “assets” as shown in the below image. Источник  Когда к мобильному устройству присоединены наушники  ОС Google Android развивается, и по всему видимому |