- Jetpack Compose: Styles and Themes (Part II)
- Waseef Akhtar
- Previous Post
- Enabling Dark Mode 💡
- The Final Fixes 👨🎨
- Up Next
- Source code for the Final Version
- Sign up for more like this.
- Jetpack Compose: Implementing the Detail View (Part IV)
- Monthly Digest # 2 — June 2021
- Jetpack Compose: Navigating to a Detail View (Part III)
- Android: Changing app theme at runtime
- Changing the theme at runtime
- Possible issues
- Recursively change attributes on all your Views
- Possible issues
- There is a third option?
- What I recommend
- Do you know a better way of doing this?
- Темы и стили в Android-приложениях
- О чем пойдет речь:
- Начнем с основ
- Стиль
- Атрибут
- Наследование тем и стилей
- ThemeOverlay
- Последовательность применения тем и стилей ко View-компоненту
- Да прибудет с нами Material Components
- Перейдем к практике
- Что там по темной теме?
- А если мы хотим все делать самостоятельно?
- 9. Тема, стиль или… ?
- 10. Использовать TextAppearance
- Заключение
Jetpack Compose: Styles and Themes (Part II)
If you’re new to Jetpack Compose and looking at all the cool UI screens and animations around the internet like me, you’re probably a bit overwhelmed but also curious about how things work in compose.

Waseef Akhtar
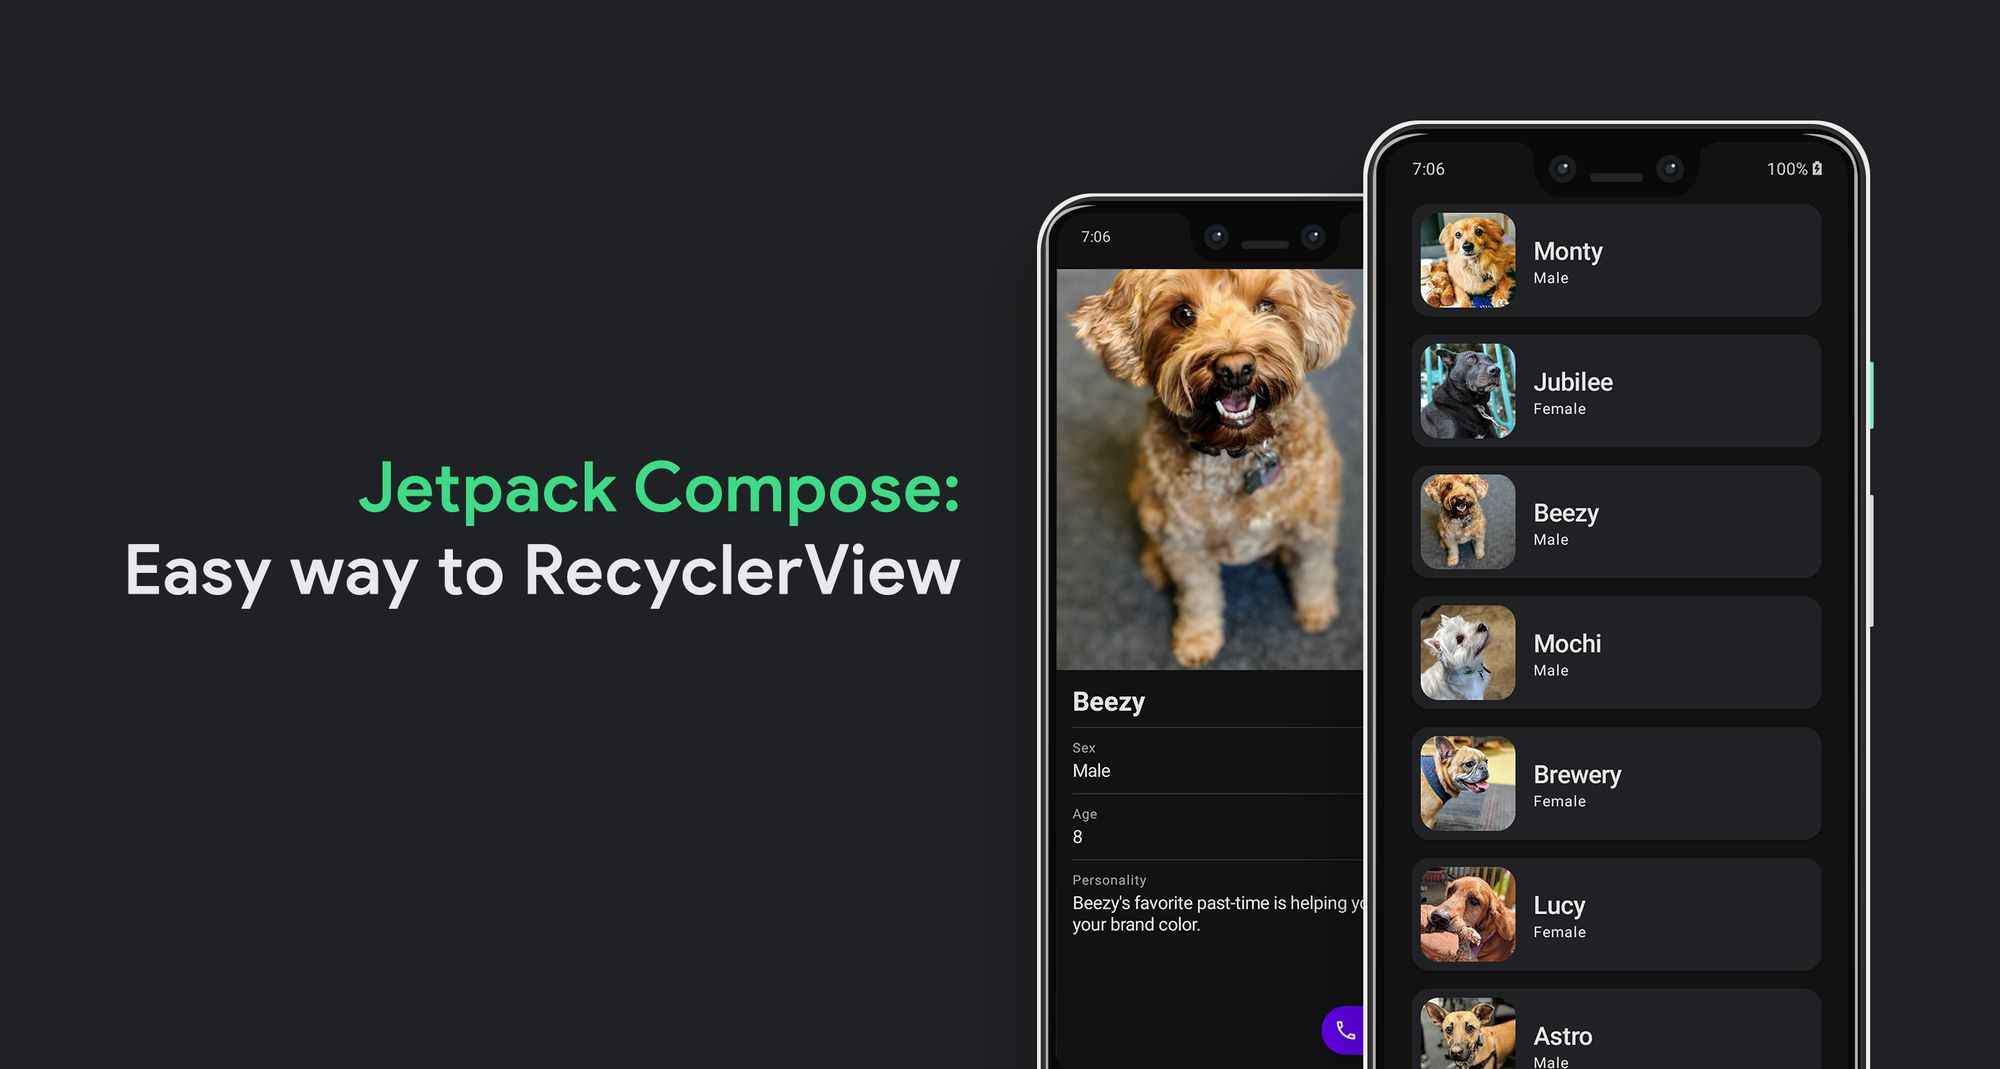
As of Part I, we successfully implemented a RecyclerView (known as LazyColumn in Compose), populating it with a list of puppies that we have for adoption. 🐶
But as I mentioned, we still have some things to do before we call it a complete Compose app. The two things left now are:
- To style the app to our final look.
- To implement a detailed view screen.
In case you’re not fond of reading blog posts, I’ve also turned this 4-part Jetpack Compose series into a 13-minute speed code video with some laid back music for you to watch and relax to! 😊
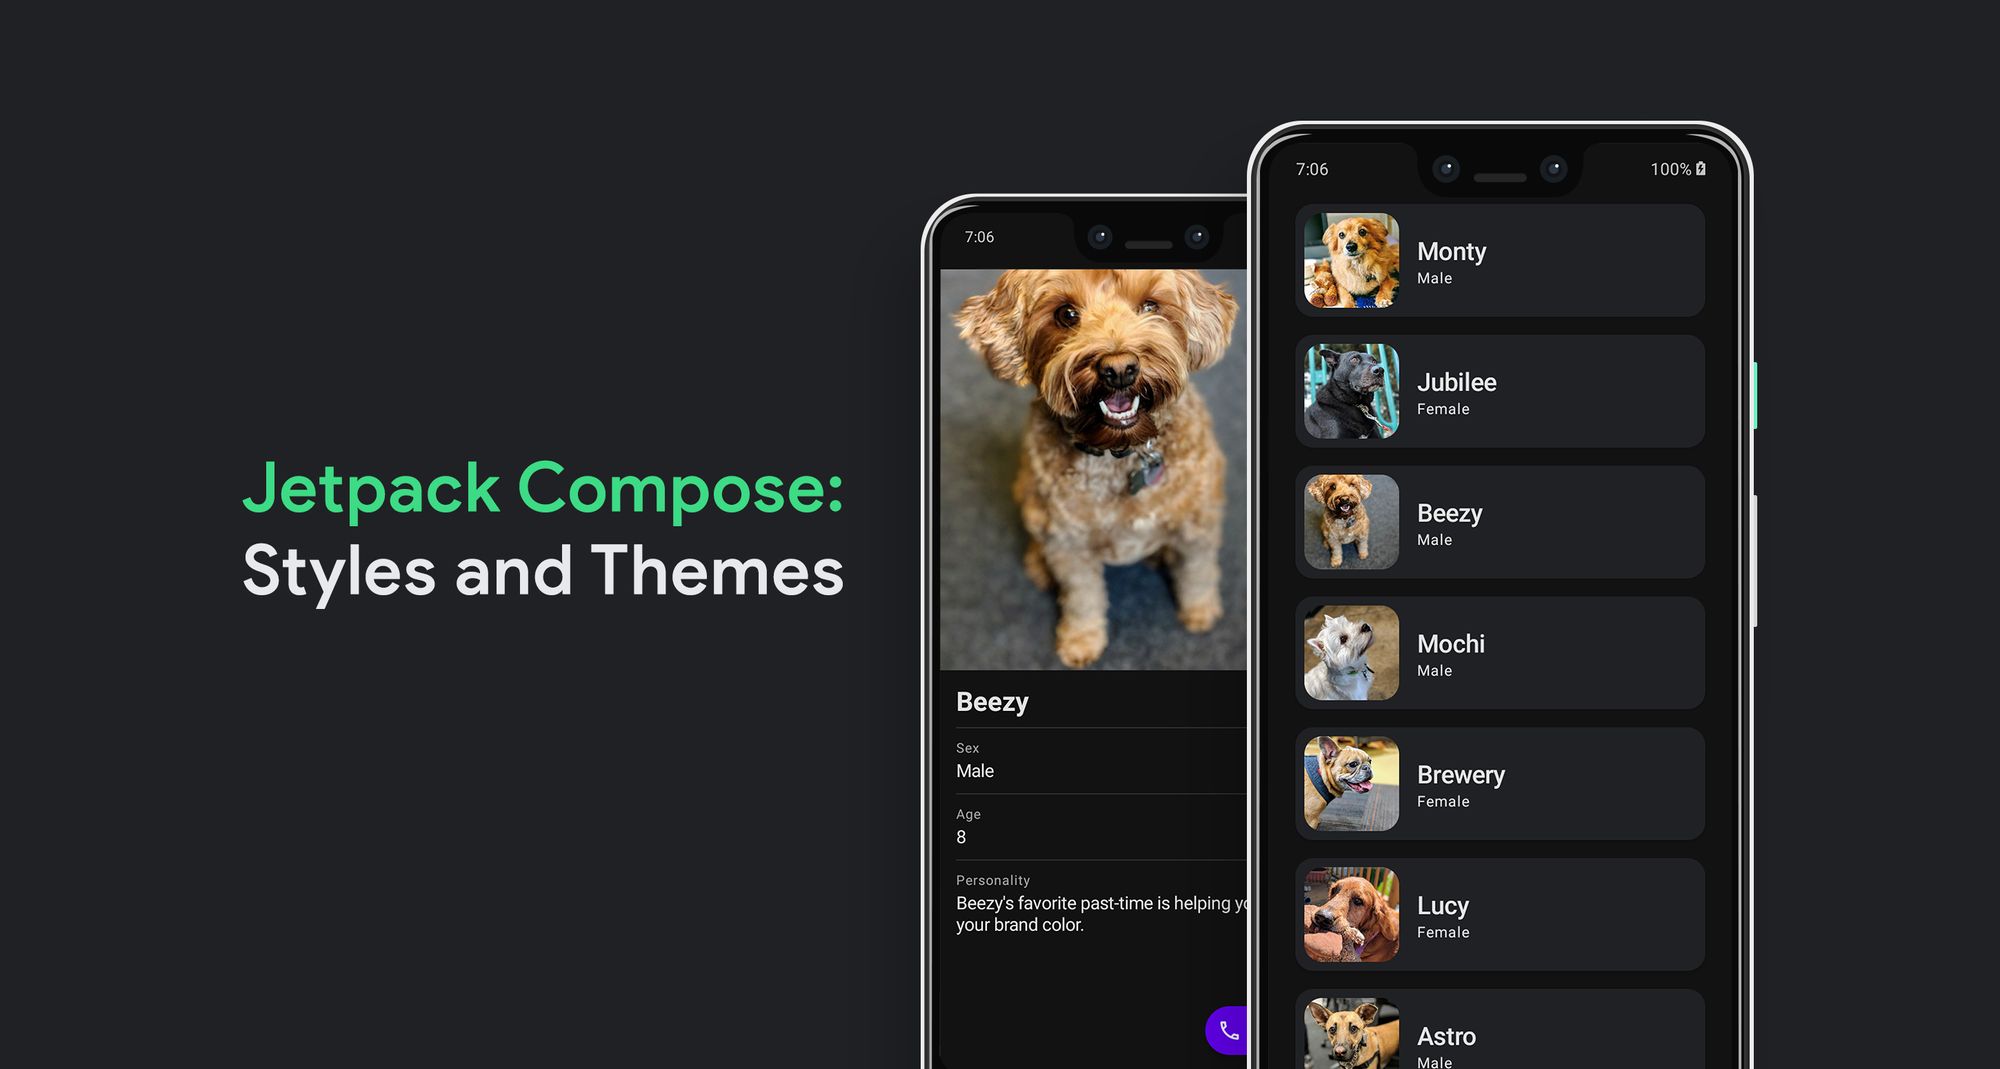
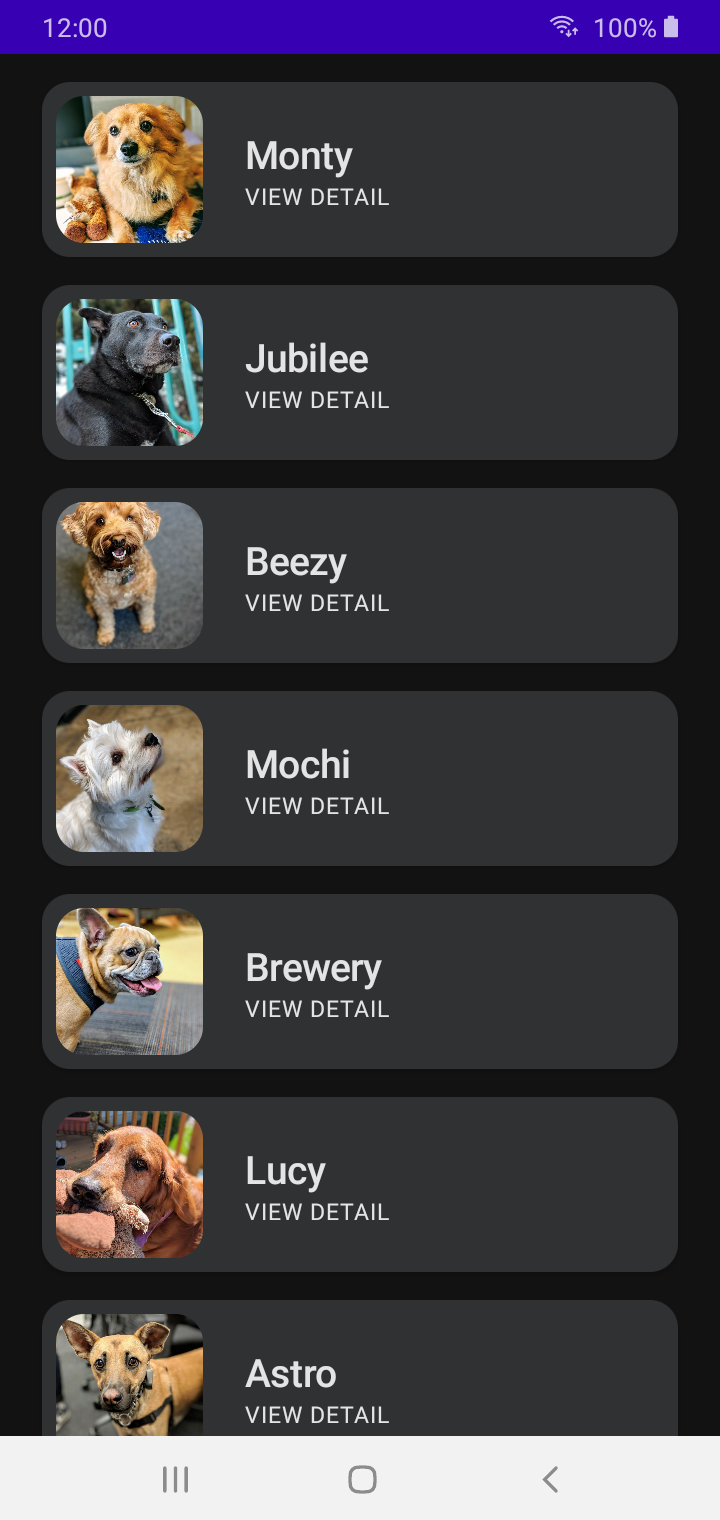
In this part of the series, we’ll look at how styles and themes work in Compose, taking our app from Part I and giving it the final look that we want to achieve:
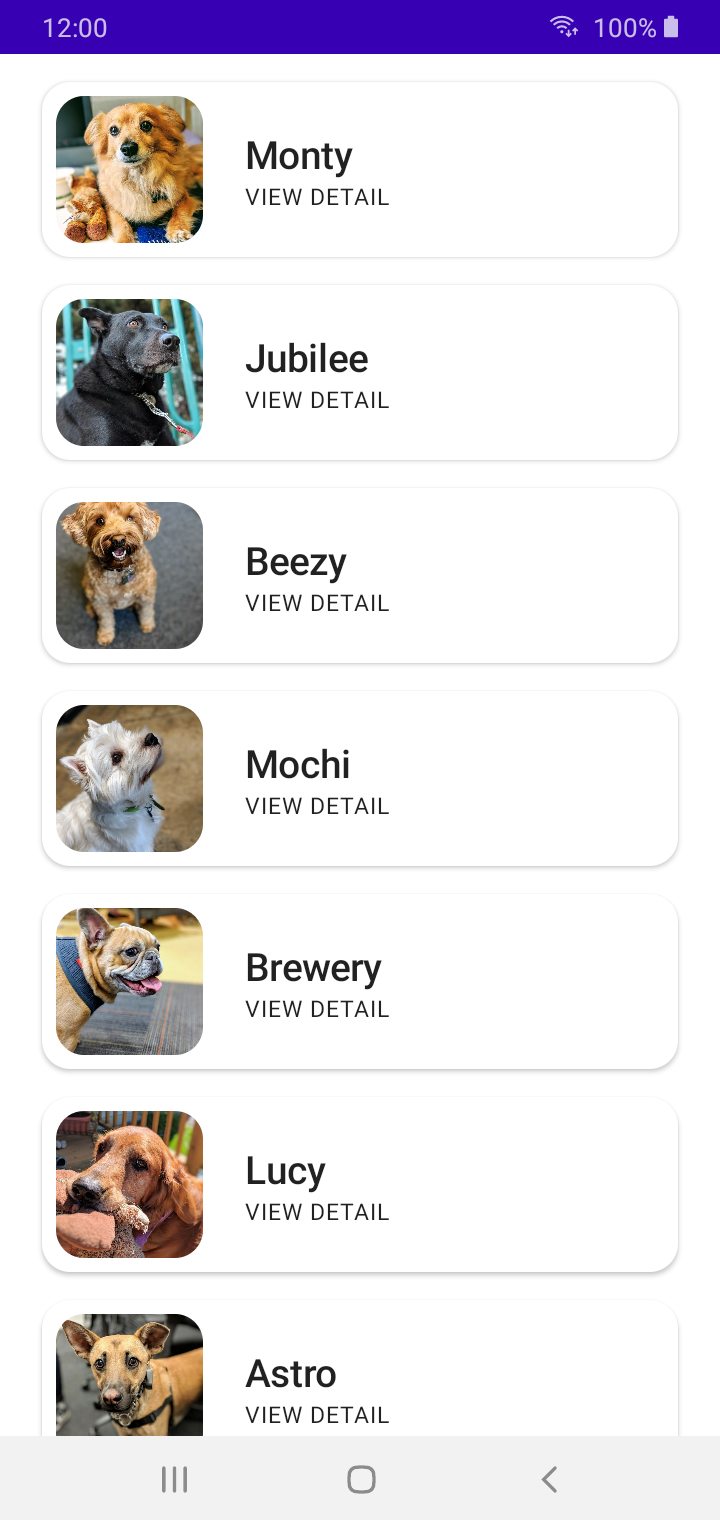
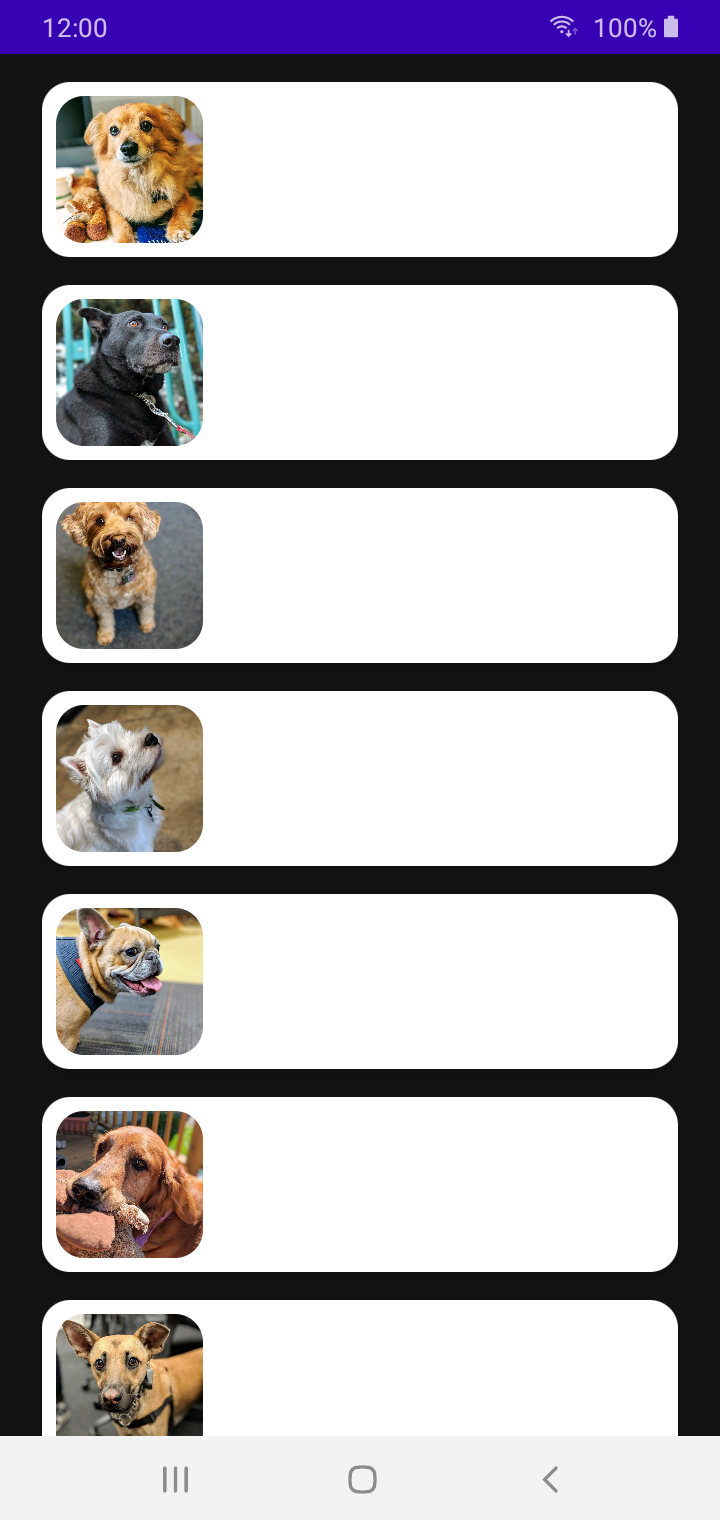
To look at where we need to continue from, let’s first look at the final screen from Part I:
The things we’re going to look at:
- Change color throughout the app using Color.kt and Theme.kt .
- Look at how dark/light mode works in Compose.
- Fix status bar and system navigation bar to adapt to our app’s theme.
Let’s get started!
Previous Post
Enabling Dark Mode 💡
As you can see in our final screen, our app looks like it has dark mode enabled. If that’s the final look we want (or if we want an app that has support for Dark mode), it’s super easy with how our project is set up initially by the Android Studio template. Let’s explore a bit more to see what we mean.
If you open you project directory, you can see that you already have /ui/theme directory and inside that, you have a few Kotlin classes: Color, Shape, Theme, Type.
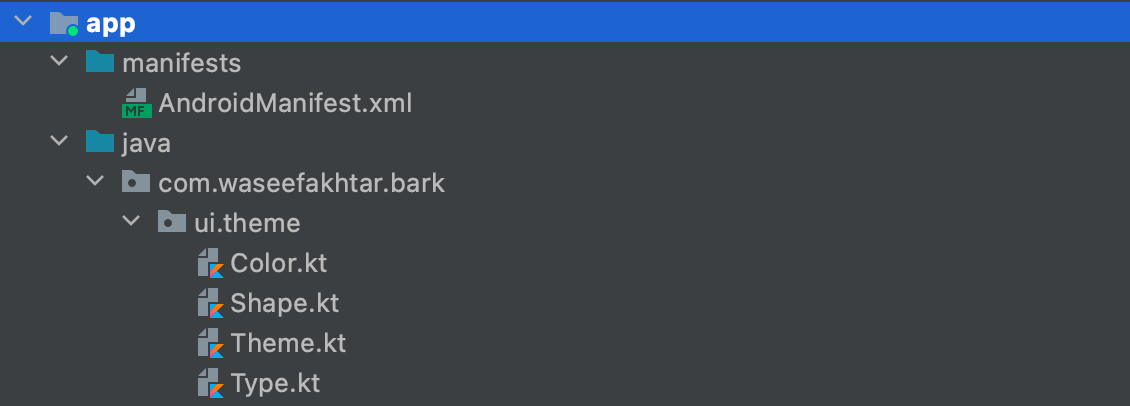
These are all the classes that you need to modify the theme and styling of your app.
Since in our case, we need to enable dark mode for our app, do the following:
- Open Theme.kt .
- Inside BarkTheme composable, replace the darkTheme default value from isSystemInDarkTheme() to true .
3. Run the app to see the changes.
We can see that our background has changed.. but, with that, we also have our text color changed but not the puppy card color.
Let’s quickly fix that:
- Open Color.kt .
- Add a new color named graySurface .
3. Now open Theme.kt .
4. Inside the DarkColorPalette variable, add a new color definition for surface and set its value to the graySurface color that we set in #2.
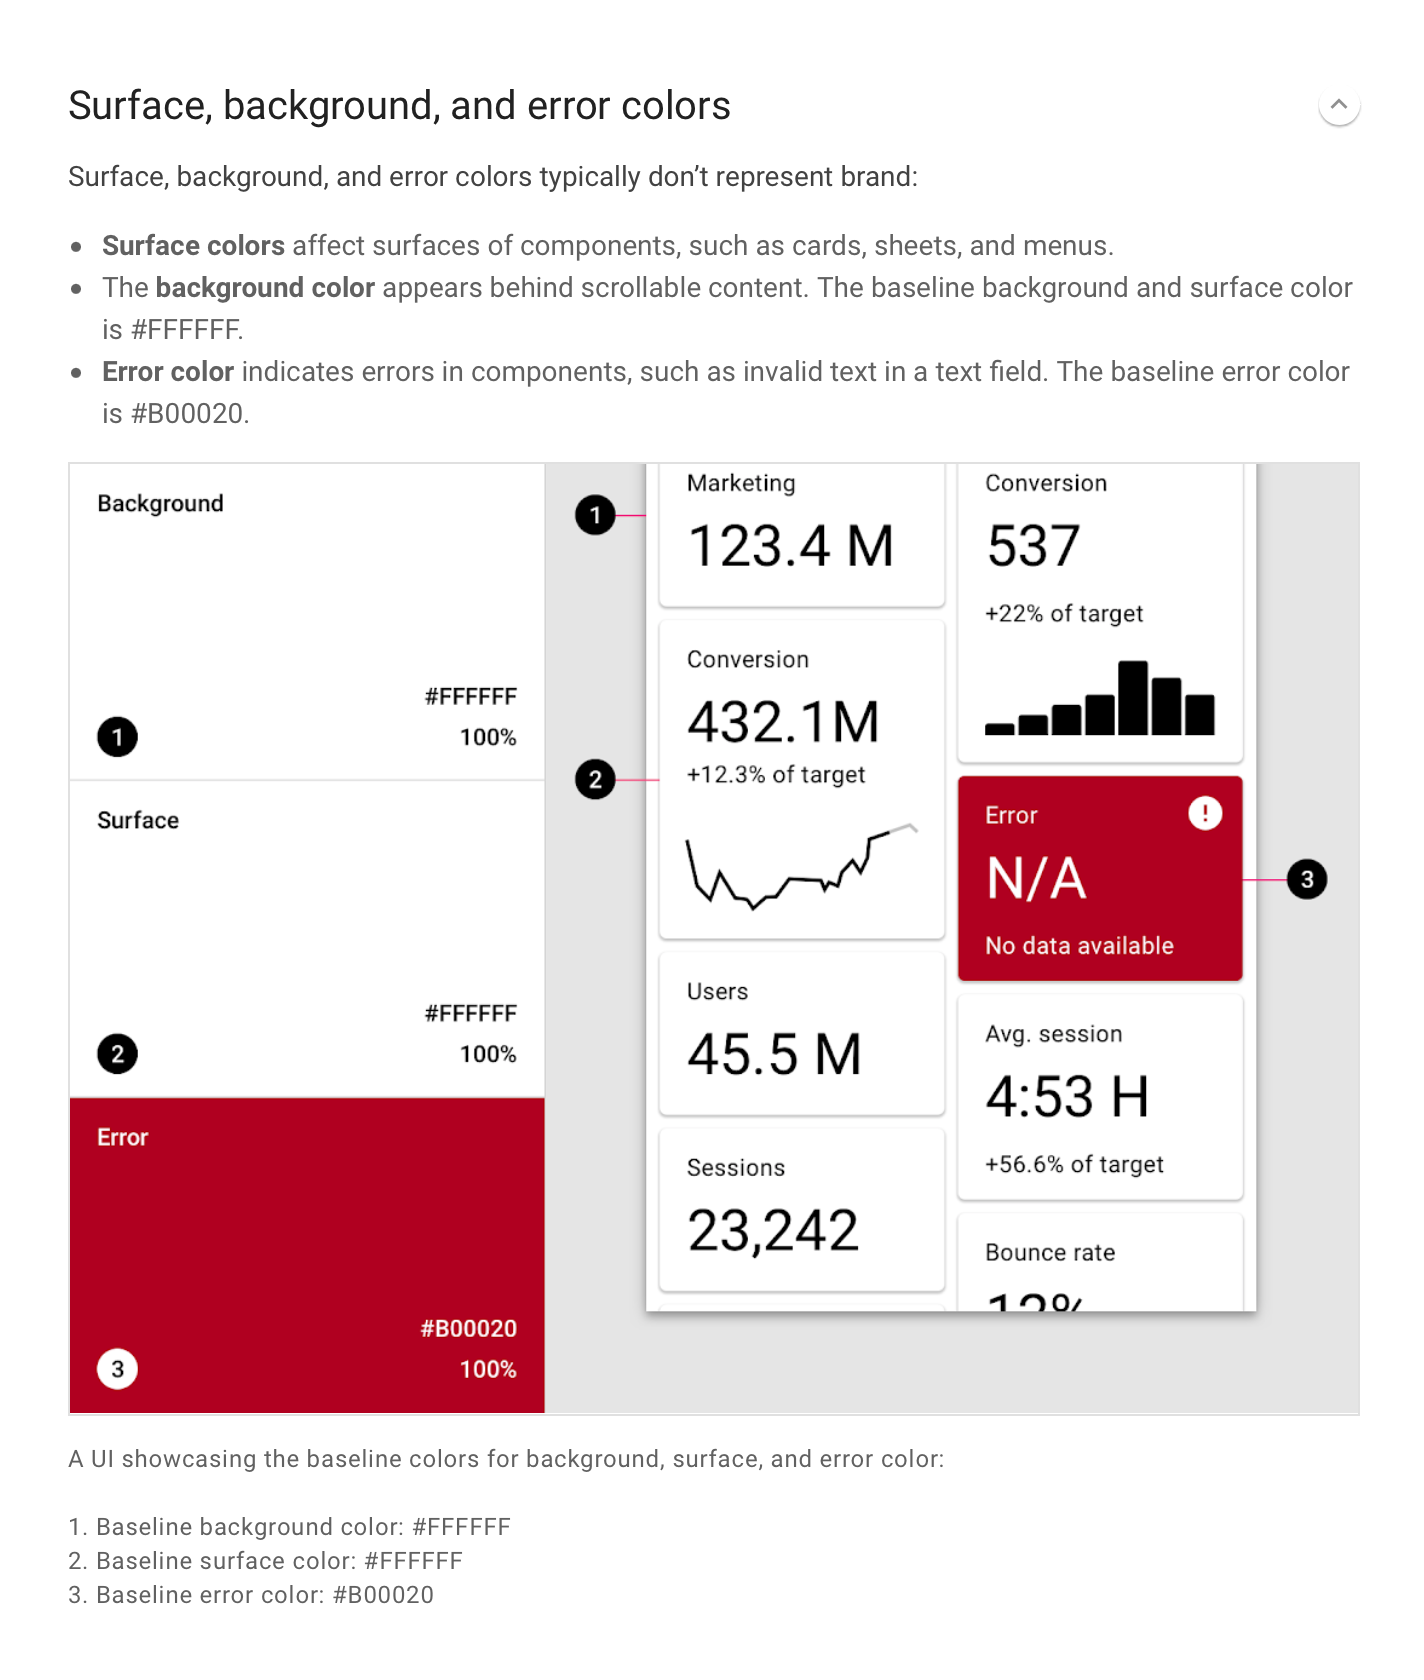
Note: In case you want to know what surface is, it’s a color definition provided by the color system of Material Design that affect surfaces of components, such as cards, sheets, and menus:
5. Finally, if you’ve been following the tutorial step by step, you might remember that we hardcoded our card color when we implemented it in Part I, which is not really a great way of doing it. In order to let our app color values from Color.kt work consistently throughout the app, it’s always a better idea to change the color values of the UI elements using Color.kt rather than changing each UI element’s color individually.
So at this step, we remove that hardcoded color from our puppy card in order for the card to show the true surface color we just set.
- Open PuppyListItem.kt .
- Inside PuppyListItem composable function, remove this parameter from the Card composable: backgroundColor value: backgroundColor = Color.White
Run the app now to see the changes.
Super! We’ve done everything we needed to do at this time.
Do you see that the status bar looks a bit odd at the top with that odd color? And what about the system navigation bar at the bottom? It’d be extra cool if we fixed them to match our overall theme.
But there’s a catch. Since Jetpack Compose is still early to work with, it comes with its limitation for the time being (And I’m not entirely sure if there even is this particular limitation). So to fix the status bar and navigation bar, we’re going to head to our dear ‘ol XML for this.
The Final Fixes 👨🎨
In order to change the status bar color to match our theme:
- Open colors.xml under /res .
- Add the same gray color we added to our Color.kt .
3. Open themes.xml .
Note: You might notice that you have two themes.xml in themes directory. Make it a good practice from now onwards to change the values in both these files whenever you’re making a change because these two files refer to the dark mode and light mode theme of the app.
4. Define the statusBarBackground attribute inside Theme.Bark and set its value to our gray color.
5. Now add this statusBarBackground attribute as our value for android:statusBarColor .
Now in order to change the system navigation bar’s color:
- Open themes.xml .
- Add another item for navigationBarColor and set its value to ?android:attr/windowBackground attribute (which is a color value that changes automatically with system preferences)
Run the app now to see the changes.
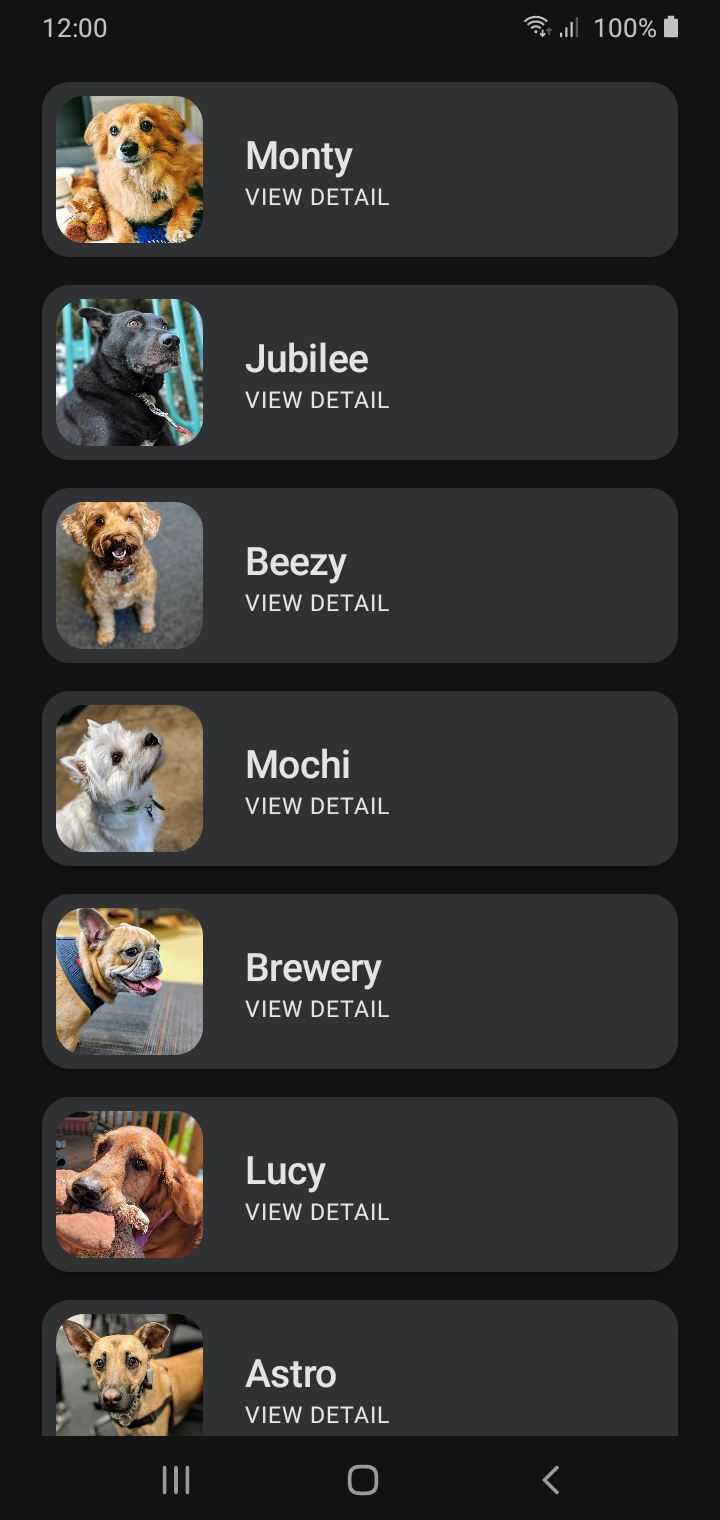
And.. there you go! Thats our final look of the app! 😍
Give yourself a pat on the back at this point for having now learnt how theming and styling are done in Compose. 👏
Up Next

Source code for the Final Version
Awesome that you came this far! 👏 Now I’d love to know what the most annoying part of this post was or if it was of any help to you. Either ways, you can drop me a DM on: www.twitter.com/waseefakhtar ✌️
Sign up for more like this.
Jetpack Compose: Implementing the Detail View (Part IV)
If you’re new to Jetpack Compose and looking at all the cool UI screens and animations around the internet like me, you’re probably a bit overwhelmed but also curious about how things work in compose.

Monthly Digest # 2 — June 2021
This month’s digest is about moving fast and prioritizing bugs, how to be a good creator, why companies need to be led by people with a creative mindset, and much more!
Jetpack Compose: Navigating to a Detail View (Part III)
If you’re new to Jetpack Compose and looking at all the cool UI screens and animations around the internet like me, you’re probably a bit overwhelmed but also curious about how things work in compose.
Источник
Android: Changing app theme at runtime

Jun 28, 2015 · 5 min read
Every so often, I see a question posted on StackOverflow which is effectively asks how to change the themes of an app at runtime. The use case is often that there is a setting, button or check box which can switch between different colour themes or between something like day and night mode.
Every time such a requirement comes up, the fir s t thing a quick Google search shows is that it’s not possible to change themes at runtime. That being said, it is possible to change the theme of an Activity, however only in the`onCreate` method and only before `super` is called.
This is problematic because it’s hard to provide a seamless experience to the user if you have to restart the app or Activity in order to change the theme. So our second option is to recursively loop through all of our views and set their attributes each time an Activity or Fragment is created. This way, when the theme is changed, you can loop through all the Views again and change the attributes to reflect the new theme. Neither of these options is ideal, you may even want to consider a hybrid of these two approaches. I’ve provided an example implementation of each of these methods below.
Changing the theme at runtime
As mentioned before, it’s only possible to change the theme of an Activity in the `onCreate` method and that to only before `super` has been called. Changing the theme is fairly straight forward, something like below should do it:
This is pretty straight forward, however this works when an activity is first created and has no effect on the current open Activity or any backgrounded Activities. In order to affect change on the current Activity, we’ll have save the state of the current Activity and relaunch the activity, in order to make this experience seamless for the user, you have 2 options, either remove all transition animations for Activities or change them to provide a nice fade in effect. The result of this approach is shown in the video below.
As you can see, the approach produces a pretty nice result. If you don’t want a fade in effect, remove all animations for Activity transition and you should have a sudden change.
The code to achieve this is in my gist “Transition themes”.
Possible issues
- In order to achieve theme change in this manner, you have to make sure that all your View inherit attributes that matter from the theme and do not in-line any attributes that matter like background colour or text colour.
- Saving your Activity state and relaunching it may not be as smooth as in my example above. This depends a lot of how heavy your Activity and it’s layouts are. Some elements may need to be reloaded.
- Any Activities that are already open in the background will not have the theme change applied to it when you go back to them. The easiest solution to this is to close all the backgrounded Activities, or else, you’ll have to save their state, close them and relaunch them in `onStart` or `onResume`.
Recursively change attributes on all your Views
As much as we hope that the theme can contain all our formatting, we invariably need to override a text colour or background colour in-line in our layout or an in a style attribute and this needs to be changed programmatically. In this scenario, you would likely have to check the appropriate Views or all Views to see if they are consistent with your set theme. If you know which Views are likely to be affected and can check them directly, nothing could be better. If not, you will have to loop through all the View in your layout and check them. The code to do this depends heavily on your project and it’s requirements, however, the skeleton code for checking all your Views be something like this:
Possible issues
- Depending on how complex your screens are, your code for checking each View can become quite complex. An alternate solution can be to set the Views theme related attributes when we build our Activity, Fragment or Layout. This will still add to the complexity of your code.
- There is a time and performance cost to doing this for each layout.
There is a third option?
You could bundle duplicate layouts for each of your themes where the only difference between each layout is that the style or in-line style related attributes are different. Then in your code, depending on the selected theme you inflate or set the appropriate layout. This approach while very simple, however it has the same issues as the first option.
What I recommend
If this is a requirement for your app, I recommend you research what is possible before you try any of these approaches. If all you want to do is change some text colour and the colour of the Toolbar and tabs, this is possible without having to change the theme. I would take a look at the Design Support Library.
If you are going to do down one of the routes I have talked about above, I would recommend not getting too attached to any one approach and to combine all three approaches above. Find the best fit for your particular situation.
Also, if you’re going to need to change the colour of your drawable assets, my article on how to change the colour of drawable assets may help.
Do you know a better way of doing this?
I’m honestly asking the readers, if there are any out there, to chime in and tell me if there is a better way to handle runtime theme changes. It’s a topic I have researched and Google’d, however, I’m just not happy with what I’ve found so far. If you have a better approach or some advice on the matter, I’d love to hear it.
For more Android development article or follow me on LinkedIn, Twitter or Google+.
Источник
Темы и стили в Android-приложениях

Каждому Android-разработчику так или иначе приходилось работать со стилями. Кто-то чувствует себя с ними уверенно, у кого-то есть только поверхностные знания, которые зачастую не позволяют самостоятельно решить поставленную задачу.
В преддверии выхода темной темы было решено освежить в памяти всю информацию, касающуюся тем и стилей в Android-приложениях.
О чем пойдет речь:
Начнем с основ
По своей структуре темы и стили имеют общее строение:
Для создания используется тег style . У каждого cтиля есть имя и он хранит в себе параметры key-value .
Все достаточно просто. Но в чем же разница между темой и стилем?
Единственное отличие заключается в том, как мы их используем.
Тема — это набор параметров, которые применяются ко всему приложению, Activity или View-компоненту. Она содержит базовые цвета приложения, стили для отрисовки всех компонентов приложения и различные настройки.
В теме переопределены основные цвета приложения ( colorPrimary , colorSecondary ), стиль для текста ( textAppearanceHeadline1 ) и некоторых стандартных компонентов приложения, а также параметр для прозрачного статус-бара.
Для того чтобы стиль стал настоящей темой, необходимо отнаследоваться (о наследовании мы поговорим чуть позже) от дефолтной реализации темы.
Стиль
Стиль — это набор параметров для стилизации одного View-компонента.
Атрибут
Атрибутом принято называть ключ стиля или темы. Это маленькие кирпичики из которых все строится:
Все эти ключи являются стандартными атрибутами.
Мы можем создавать свои атрибуты:
Атрибут myFavoriteColor будет указывать на цвет или ссылку на ресурс цвета.
В формате мы можем указать вполне стандартные значения:
По своей природе атрибут является интерфейсом. Его необходимо реализовать в теме:
Теперь мы можем на него ссылаться. Общая структура обращения выглядит так:
Ну и, наконец, давайте поменяем, например, цвет текста у поля:
Благодаря атрибутам мы можем добавлять какие-угодно абстракции, которые будут изменяться внутри темы.
Наследование тем и стилей
Как и в ООП, мы можем перенимать функционал существующей реализации. Сделать это можно двумя способами:
При явном наследовании мы указываем родителя с помощью ключевого слова parent :
При неявном наследовании мы используем dot-notation для указания родителя:
Никакой разницы в работе этих подходов нет.
Очень часто мы можем встретить подобные стили:
Может показаться, что стиль создан путем двойного наследования. На самом деле это не так. Множественное наследование запрещено. В таком определении явное наследование всегда выигрывает.
То есть будет создан стиль с именем Widget.MyApp.Snackbar , который является наследником Widget.MaterialComponents.Snackbar .
ThemeOverlay
ThemeOverlay — это специальные «легковесные» темы, которые позволяют переопределить атрибуты основной темы для View-компонента.
За примером далеко ходить не будем, а возьмем кейс из нашего приложения. Дизайнеры решили, что нам нужно сделать стандартное поле для ввода логина, которое будет иметь отличный от основного стиля цвет.
С основной темой поле ввода выглядит так:
Выглядит отлично, но дизайнеры настаивают на том, чтобы поле было в коричневом стиле.
Окей, как мы можем решить такую задачу?
Да, мы можем переопределить стиль и вручную поменять основные цвета вьюшки, но для этого нужно будет писать много кода, да и есть шанс, что мы про что-нибудь забудем.
Написать свою вьюшку по гайдлайнам и с кастомными параметрами?
Хороший вариант, так мы сможем удовлетворить любые хотелки дизайнеров и заодно прокачать скилл, но все это трудозатратно и может привести к нежелательным багам.
Переопределить основной цвет в теме?
Мы выяснили, что для нужного нам вида достаточно поменять colorPrimary в теме. Рабочий вариант, но так мы затронем внешний вид остальных компонентов, а нам это не нужно.
Правильное решение — это использовать ThemeOverlay.
Создаем ThemeOverlay и переопределяем основной цвет темы:
Далее указываем его с помощью специального тега android:theme в наш TextInputLayout :
Все работает так, как нам и нужно.
Конечно же возникает вопрос — как это работает под капотом?
Эту магию позволяет провернуть ContextThemeWrapper . При создании View в LayoutInflater будет создан контекст, где за основу будет взята текущая тема и в ней будут переопределены параметры, которые мы указали в нашей Overlay теме.
Аналогичным образом мы можем самостоятельно переопределить любой параметр темы в приложении.
Последовательность применения тем и стилей ко View-компоненту
Главный приоритет имеет файл разметки. Если в нем определен параметр, то далее все аналогичные параметры будут игнорироваться.
Следующий приоритет имеет стиль View:
Далее используются предопределенные стили для компонента:
Если параметры не были найдены, то используются атрибуты темы:
В общем-то это все, что нужно знать для того чтобы начать работу с темами. Теперь кратко посмотрим на обновленную дизайн-библиотеку Material Components.
Да прибудет с нами Material Components
Material Сomponents была представлена на Google I/O 2018 и является заменой Design Support Library.
Библиотека дает нам возможность использовать обновленные компоненты из Material Design 2.0. Кроме того, в ней появилось множество интересных настроек по кастомизации. Все это позволяет писать яркие и уникальные приложения.
Вот некоторые примеры приложений в новом стиле: Owl, Reply, Crane.
Перейдем к практике
Для создания темы нужно отнаследоваться от базовой темы:
Все они очень похожи на AppCompat темы, но имеют дополнительные атрибуты и настройки.
Подробнее с новыми атрибутами можно познакомиться на material.io.
Если по каким-то причинам вы сейчас не можете переключиться на новую тему, то вам подойдут Bridge темы. Они наследуются от AppCompat тем и имеют все новые атрибуты Material Components. Нужно всего лишь добавить постфикс Bridge и использовать все возможности без опасений:
А вот и наша тема:
Важно понимать, что когда вы переопределяете стиль в теме, он применится ко всем View этого типа в приложении (Activity).
Если же вы хотите применить стиль только к одной конкретной View, то нужно использовать тег style в файле с разметкой:
Одно из нововведений, которое меня действительно впечатлило — это ShapeAppearance. Оно позволяет изменять форму компонентов прямо в теме!
Каждый View-компонент относится к определенной группе:
shapeAppearanceSmallComponent
shapeAppearanceMediumComponent
shapeAppearanceLargeComponent
Как мы можем понять из названия, в группах вьюшки разных размеров.
Проверим на практике:
Мы создали Widget.MyApp.SmallShapeAppearance для «маленьких» компонентов. Закруглили верхний левый угол на 20dp и правый нижний угол срезали на 15dp .
Получили такой результат:
Выглядит интересно. Будет ли это работать в реальной жизни? Время покажет.
Как и для стилей, мы можем применить ShapeAppearance только для одного View-компонента.
Что там по темной теме?
Совсем скоро состоится релиз Android Q, а вместе с ним к нам придет и официальная темная тема.
Пожалуй, одна из самых интересных и эффектных возможностей новой версии Android — это автоматическое применение темной темы для всего приложения одной строчкой кода.
Звучит здорово, давайте пробовать. Предлагаю взять всеми любимый гитлаб клиент от terrakok.
Разрешаем перекрашивать приложение (по умолчанию запрещено):
Атрибут android:forceDarkAllowed доступен с API 29 (Android Q).
Запускаем, смотрим что получилось:
Согласитесь, что для одной строчки кода выглядит очень круто.
Конечно, есть проблемы — BottomNavigationBar сливается с фоном, лоадер остался белым, выделение кода страдает и, вроде бы, все, по крайне мере мне больше ничего серьезного в глаза не бросилось.
Уверен, что потратив не так много времени, можно решить основные проблемы. Например, отключив автоматический темный режим для отдельных вьюшек (да, так тоже можно — android:forceDarkAllowed доступен для View в файле-разметке).
Следует помнить, что данный режим доступен только для светлых тем, если вы используете темную, то принудительная темная тема работать не будет.
Рекомендации по работе можно почитать в документации и на material.io.
А если мы хотим все делать самостоятельно?
Как бы не было просто использовать принудительную темную тему, этот режим лишен гибкости. Фактически, все работает по заранее определенным правилам, которые могут не устраивать нас и, что более важно, заказчика. Думаю, что такое решение можно рассматривать как временное, до тех пор пока мы не сделаем свою реализацию темной темы.
В API 8 (Froyo) был добавлен квалификатор -night , который и по сей день используется для применения темной темы. Он позволяет автоматически применять нужную тему в зависимости от времени суток.
В темах DayNight уже используется такая реализация, нам достаточно отнаследоваться от них.
Давайте попробуем написать свою:
Нам теперь на каждую версию API делать тему со всеми параметрами? Нет, конечно! Мы сделаем базовую тему, где будут определены базовые атрибуты, доступные для всех версий API и отнаследуемся от нее в нужной версии API:
9. Тема, стиль или… ?
При созданий собственных тем и стилей будет здорово, если вы укажите префикс, говорящий о том что это за стиль и для чего он определен. Такое именование позволит очень просто структурировать и расширять стили.
10. Использовать TextAppearance
Хорошим тоном будет расширить основные стили для текста и везде их использовать.
Много полезной информации можно найти на сайте Material Design: Typography, Typography Theming.
Заключение
В заключение хочется сказать, что стилизация приложения — это обязанность не только разработчиков, но и дизайнеров. Только благодаря тесному взаимодействию мы сможем получить по-настоящему хороший и красивый продукт. Дизайнеры должны иметь представления о платформе и возможностях Material Components. Ведь именно на их плечи ложится ответственность по поддержке визуальной составляющей приложения. Дизайнерам доступен специальный плагин для Sketch — Material Theme Editor. В нем очень просто выбирать цвета для приложения и строить экраны на основе стандартных компонентов. Если ваши дизайнеры еще не знают о нем, то обязательно расскажите им.
Начать изучать Material Components можно с репозитория на GitHub — Modular and customizable Material Design UI components for Android. В нем собрано очень много информации по стандартным стилям и их возможностям. Кроме того, там есть приложение — sample, чтобы все сразу попробовать на практике.
Источник


