- Android — Audio Capture
- Example
- Audio Capture
- In this document
- Key classes
- See also
- Performing Audio Capture
- Example: Record audio and play the recorded audio
- Android 10 — Audio Capture
- Capturing Audio in Android Q
- In Android Q there’s a new API which allows applications to capture the audio of other applications. It’s called the…
- Audio Playback Capture in Android X
- Version
- Getting Started
- What Is Audio Playback Capture API?
- Managing Permissions for Audio Capture
- Requesting Permissions
- Checking for Permissions in Your Activity
- Changing Permissions
- Recording Audio From Other Apps
- Requesting Permission Before a Capturing Session
- Checking Permissions
- Overriding onActivityResult
- Creating MediaCaptureService
- Starting the Service and Getting Notifications
- Triggering the Audio Capture Playback
- Starting the Playback Audio Capture
- Stopping the Audio Capture
- Connecting the Service
- Adding Your Service to the Android Manifest
- Disabling Audio Playback Capture
- Listening to Recorded Audio
- Getting the Files From Memory
- Listening to Your Files
- Where to Go From Here?
Android — Audio Capture
Android has a built in microphone through which you can capture audio and store it , or play it in your phone. There are many ways to do that but the most common way is through MediaRecorder class.
Android provides MediaRecorder class to record audio or video. In order to use MediaRecorder class ,you will first create an instance of MediaRecorder class. Its syntax is given below.
Now you will set the source , output and encoding format and output file. Their syntax is given below.
After specifying the audio source and format and its output file, we can then call the two basic methods prepare and start to start recording the audio.
Apart from these methods , there are other methods listed in the MediaRecorder class that allows you more control over audio and video recording.
| Sr.No | Method & description | |||||||||||
|---|---|---|---|---|---|---|---|---|---|---|---|---|
| 1 |
| Steps | Description |
|---|---|
| 1 | You will use Android studio IDE to create an Android application and name it as AudioCapture under a package com.example.sairamkrishna.myapplication. |
| 2 | Modify src/MainActivity.java file to add AudioCapture code |
| 3 | Modify layout XML file res/layout/activity_main.xml add any GUI component if required. |
| 4 | Modify AndroidManifest.xml to add necessary permissions. |
| 5 | Run the application and choose a running android device and install the application on it and verify the results. |
Here is the content of src/MainActivity.java
Here is the content of activity_main.xml
In the below code abc indicates the logo of tutorialspoint
Here is the content of Strings.xml
Here is the content of AndroidManifest.xml
Let’s try to run your application. I assume you have connected your actual Android Mobile device with your computer. To run the app from Android studio, open one of your project’s activity files and click Run  icon from the toolbar. Before starting your application, Android studio will display following images.
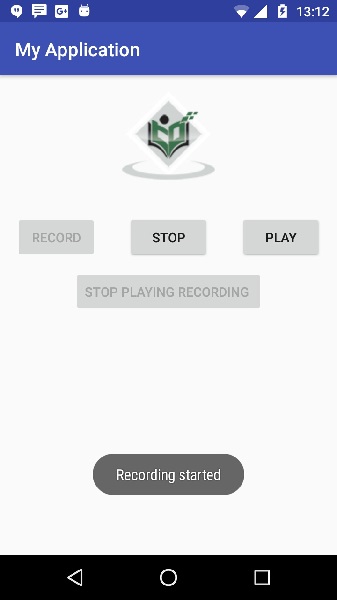
Now by default you will see stop and play button disable. Just press the Record button and your application will start recording the audio. It will display the following screen.
Now just press stop button and it will save the recorded audio to external sd card. When you click on stop button , the following screen would appear.
Now just press the play button and and recorded audio will just start playing on the device. The following message appears when you click on play button.
Источник
Audio Capture
In this document
Key classes
See also
The Android multimedia framework includes support for capturing and encoding a variety of common audio formats, so that you can easily integrate audio into your applications. You can record audio using the MediaRecorder APIs if supported by the device hardware.
This document shows you how to write an application that captures audio from a device microphone, save the audio and play it back.
Note: The Android Emulator does not have the ability to capture audio, but actual devices are likely to provide these capabilities.
Performing Audio Capture
Audio capture from the device is a bit more complicated than audio and video playback, but still fairly simple:
- Create a new instance of android.media.MediaRecorder .
- Set the audio source using MediaRecorder.setAudioSource() . You will probably want to use MediaRecorder.AudioSource.MIC .
- Set output file format using MediaRecorder.setOutputFormat() .
- Set output file name using MediaRecorder.setOutputFile() .
- Set the audio encoder using MediaRecorder.setAudioEncoder() .
- Call MediaRecorder.prepare() on the MediaRecorder instance.
- To start audio capture, call MediaRecorder.start() .
- To stop audio capture, call MediaRecorder.stop() .
- When you are done with the MediaRecorder instance, call MediaRecorder.release() on it. Calling MediaRecorder.release() is always recommended to free the resource immediately.
Example: Record audio and play the recorded audio
The example class below illustrates how to set up, start and stop audio capture, and to play the recorded audio file.
Источник
Android 10 — Audio Capture
Sep 16, 2019 · 2 min read
Android 10 launched with an Audio Capture feature to support Live Captions. This feature is enabled automatically once an app targets Android 10. The recommendation is to disable it for any copyrighted/DRM protected audio content.
Further developer instructions are documented here.
Capturing Audio in Android Q
In Android Q there’s a new API which allows applications to capture the audio of other applications. It’s called the…
At the time of writing there is no app to demonstrate audio capture and Live Captions is not available yet. This post is about developing an app to capture audio.
App needs the following permission. RECORD_AUDIO needs to be requested at runtime.
It needs a foreground service of type (mediaProjection)
App has t o start the foreground service before starting the activity returned from MediaProjectionManager.createScreenCaptureIntent()
This will prompt the user to grant audio capture permission and that is a good place to start capturing Audio.
This setup is similar to usage of AudioRecord to record audio from microphone except that it sets AudioPlaybackCaptureConfig which has reference to granted media projection.From here on, audio data can be fetched from AudioRecord using one of the read() APIs.
With this setup on an app with enabled audio capture (android:allowAudioPlaybackCapture=”true”), the captured raw audio data looks like this in Audacity. As a bonus, this captured audio is free from noise too.

The only downside is that Android shows the Audio Capture app as requesting microphone access. It would have been nice if the permission request was more granular and capture apps could have worked without microphone access.
Источник
Audio Playback Capture in Android X
Learn how to integrate the Android Playback Capture API into your app, allowing you to record and play back audio from other apps.

Version
- Kotlin 1.3, Android 10.0, Android Studio 4.0

Google first introduced the Android Playback Capture API in Android 10. It allows you to capture audio from other apps, similar to screen captures or screen recording.
In this tutorial, you’ll learn how the Audio Playback Capture API works and how to use its main features. You’ll do this by integrating it into a Cat Sounds app. This app captures cat sounds on YouTube.
In the process you’ll learn how to:
- Configure an app for Audio Playback Capture.
- Request permission from the user to capture audio.
- Find the captured content in your app’s files.
- List the captured contents and play them back.
Furthermore, Audio Recording doesn’t work on emulators, so please build this tutorial on a device.
Getting Started
Download the starter project by clicking the Download Materials button at the top or bottom of the tutorial. Then, open the starter project in Android Studio 4.0 or later.
You’ll find the starter project provides the interface and some logic for the Cat Sounds app already.
Build and run. You’ll see the Cat Sounds home screen with buttons to capture and stop capturing audio which, currently, does nothing. You’ll also see a tab bar at the bottom with access to a list of audio clips. This is currently just a group of mock items, but by the end of the tutorial, you’ll find your saved audio clips there.
Here’s how the Cat Sounds app looks at the moment:

What Is Audio Playback Capture API?
Suppose you want to capture some audio from an app you’re using on your smartphone. Before, the only option was to do a full-screen recording to capture the audio. But with the Audio Playback Capture API, an app can capture audio without needing to record video.
This API is useful for use cases such as live audio translation or recording and re-transmitting audio from games or apps, without having to store the data first.

Let’s get started.
Managing Permissions for Audio Capture
When you introduce a new API, you need to make changes to your project to make it work.
As you’ll be using Android Playback Capture to record data that could be sensitive, you need to ask for permission from the user first.
Requesting Permissions
Open AndroidManifest.XML. Inside, you’ll find a TODO item indicating where to add code to request permissions. Replace that with the following lines of code:
Those permissions are for (in order from top to bottom):
- Recording audio.
- Using the audio capture as a foreground service.
- Writing audio files to the phone’s memory.
- Reading audio files from the phone’s memory.
Checking for Permissions in Your Activity
You also have to ask for these permissions in Activities and Fragments.
Open MainActivity.kt and locate the TODO that asks you to check for permissions, then add the following code:
Let’s break the above code into three parts:
- This if checks if the user gave permissions for recording audio and writing and reading the data.
- If the user hasn’t granted the permissions, you add them to an array, to request them after.
- Once you have the array of permissions, you give it to a built-in function from Android Activity called requestPermissions . This automatically creates an alert with options for the user to grant them.
Now, you might see some warnings due to missing imports. At the top of the file, add:
Now, all the errors should be gone and you can run the app with the changes you made.
Build and run; the app will display two permission dialogs. The first is for recording:

The second asks for permission to access the device’s storage:

Changing Permissions
Sometimes, you want to test your permissions and see what happens if you deny them. To revert or change your response, go to Settings ▸ Apps and Notifications ▸ CatAudio ▸ App Permissions.

Click Microphone and you’ll see the same three options you got in the alert. You can now pick a different option.
Recording Audio From Other Apps
Now that you’ve set up the permissions, you can get back to your original purpose: capturing audio playback!
You’ll start by adding functionality to the buttons on the app’s home screen.
Open RecordFragment.kt and locate the TODO prompting you to add OnClickListeners inside of onActivityCreated . Add the following code:
The code above tells the app what the buttons should do when you click on them.
After adding that code, you’ll see some errors. That’s because you’re calling functions that don’t exist yet. You’ll add them next.
Find the TODO prompting you to add those methods and add the following code:
Currently, these two functions will only show a toast. A toast is an Android item that shows text over the screen for a couple of seconds and then disappears.
In case you have an import error add the following at the top of the file:
With those changes, you now know when the user taps the buttons.
Build and run, the screen should now look like the following.

Great work! Next, you need to prompt the user for permissions one final time.
Requesting Permission Before a Capturing Session
Your next task is to request this additional permission with a prompt that displays every time the user clicks the Start Audio Capture button.
In RecordFragment.kt, you’ll find another TODO at the top to create a variable. Add this code below the class declaration to do so:
Then, below the two functions you created for the listeners, create a new function:
The code above is a standard function to request this permission. Here’s what it does:
- It initializes the Media Projection Manager, which is an Android Service with all the necessary logic to capture audio.
- startActivityForResult is an Android method that executes when you want to get a callback after executing another activity. In this case, you execute it after the permission result.
Next, create a companion object with the MEDIA_PROJECTION_REQUEST_CODE code:
You placed that variable in a companion object because they won’t change at any moment.
Finally, replace Toast in startCapturing() with the following:
The code above checks for audio record permissions. If the user authorized them, you start the audio capture.
Next, you’ll make sure that your app has the necessary permissions before proceeding. You will soon understand all the pieces you just put together. For now, go ahead and check the permissions:
Checking Permissions
You don’t have the functions for checking permissions yet, so add them below startCapturing() .
After adding those functions to the fragment, you’ll get some missing import errors. Resolve these by adding:
Finally, you’ll get an error on RECORD_AUDIO_PERMISSION_REQUEST_CODE , which tells you that you don’t have a variable or constant with that name. Go to your companion object at the bottom of the class and add the constant:
Build and run. Now, click the START AUDIO CAPTURE button and you’ll see a permission prompt:

Click START NOW now, and nothing happens. That’s because you need to override onActivityResult . You’ll do that next.
Overriding onActivityResult
As mentioned above, once this alert appears, an activity result will return. onActivityResult() is a method that’s part of your fragment, but you need to override it to start the cast once the user gives permission.
To do this, add the following code after startMediaProjectionRequest() :
This may look like a big function, but don’t worry. It’s just a series of validations that check whether the user started or canceled the cast. Look at it in greater detail:
- First, you check whether the app requested the correct permission, which is the one you added in your companion object.
- Next, you check if the result was OK, meaning the user clicked on the START NOW button.
- If they clicked the START NOW button, you’ll show a toast saying the cast will start.
- Otherwise, you show another toast saying the user denied the permission.
if you get an onActivity Result Overrides nothing error, make sure that you imported Intent and Activity properly by adding the code below to imports:
Permissions are a major part of using such APIs. Now that you have taken care of that, you are going to implement the Audio Capture API itself.
Creating MediaCaptureService
In the following section, you’ll create an Android Service that takes care of the Audio Capture.
You don’t need to know what an Android Service is for this tutorial, but if you’re curious, take a look at the Android Services tutorial.

In the Android View of the project, go to com.raywenderlich.android.cat_audio/services/MediaCaptureService. This file, and the code that you’ll add next, will be the same for almost any project you create. Some code has been pre-populated because the service is a really long class.
Starting the Service and Getting Notifications
Inside the service’s onCreate , you’ll find a TODO to start the service and notifications. Add the code below to it:
Here’s a breakdown of the code to understand what’s going on:
- First you create a notification channel. This is one of the prepopulated functions. If you don’t know what a notification channel is, you can learn more about it in this Notifications Tutorial.
- Then you start the service in the foreground. Starting audio capturing in the background may cause trouble if Android kills your app.
- Finally, you get the media projection service that the system provides, which will help capture the audio.
After adding that function, you may, again, see a couple of errors due to missing imports. Add the following to the top of the file:
Build and run. You’ll now see toasts, one for when you click START NOW in the dialog that asks you whether you want to start the casting.

And the other if you choose to stop the audio capture.

Triggering the Audio Capture Playback
When you start a service, it executes onStartCommand . In this case, you need to override that method to provide what to do when the service starts.
Replace the return statement inside onStartCommand with:
Now, break down the code above:
- The service checks whether it received an intent to start action.
- You initialize mediaProjection to store the information from the audio capture.
- You call the method that will do the audio capture.
- This is the item you need to return from onStartCommand , which means the service will stay running until something triggers the stop command.
- When you trigger onStartCommand with the stop action, you execute the stop capture method.
- Then you start the service, but this time, with the non-sticky statement because the service doesn’t need to keep running.
- If the action is neither start nor stop, you throw an exception because that’s not expected.
- Finally, if there is no intent, you also start the service with the non-sticky flag, so it will stop after onStartCommand finishes.
When you build and run the app at this point, you’ll see no change. That’s because even though you created the service, record fragment isn’t using it yet.
You have two more functions to implement in your service before it works correctly.
Starting the Playback Audio Capture
The first thing you’ll implement in this section is startAudioCapture . Locate it just below onStartCommand and add:
Again, this is a large function. Here’s what you’re doing with it:
- You create a constant that handles the audio capture configuration. The three options available for the Usage type are: USAGE_GAME , USAGE_MEDIA and USAGE_UNKNOWN .
- Then you set the values for the recording. The ones in this code are standard, but you may want to modify them.
- Here, you set the previous two values into the audio record builder so it can start recording.
- Finally, the output of the recording goes through to two of the functions you already have in the service. One creates an audio file, while the other writes it to the phone memory.
If you want to know more about the usage attributes, here’s a brief description of each:
- USAGE_MEDIA: For media like music or movie soundtracks.
- USAGE_GAME: For game audio.
- USAGE_UNKNOWN: Use when you don’t know what type of audio you’ll record.
The function you just created also requires some imports:
Build and run to verify everything runs correctly. Click the START AUDIO CAPTURE and STOP AUDIO CAPTURE buttons and you’ll still see the toasts. That’s because the service isn’t attached to RecordingFragment yet.
Stopping the Audio Capture
Great! You can now start the recording and save it to a file in the device. But you still need to be able to stop it — otherwise, it will keep going forever.
To implement this feature, add this code to stopAudioCapture :
To stop the audio capture, you need to handle several things. As with the previous functions, here’s a breakdown of the issue to understand it:
- You need to ensure an audio capture is really taking place.
- Next, you interrupt the audio capture thread. The join is just a method that waits until the thread is fully stopped.
- You stop the audio record and release the memory manually.
- Finally, you stop the media projection and the service itself.
Great, now your service is finally complete! However, you still have to connect the service to the fragment.
Connecting the Service
Now that your service is complete, you need to connect it to the UI.
Locate onActivityResult in RecordFragment.kt and add the code below inside if (resultCode == Activity.RESULT_OK) :
Then, in stopCapturing, you’ll also need to call the stop method:
You used setButtonsEnabled in both the start and stop methods above. This method will enable and disable the play buttons.
Next, implement this method:
Android Studio will also ask you to import the service. Add it at the top of the file:
Build and run and… the app still doesn’t work. For now, just verify your app is running and works as it did before. The only notable difference now is that one of the buttons is disabled whenever the other is enabled.
One more thing, services have to be declared in the Manifest just like activities. You’ll do that next:
Adding Your Service to the Android Manifest
Open AndroidManifest.xml and, inside the application tags, add:
Build and run. It’s finally working! You’ll notice a red icon in the top-right corner of the phone, close to where you find the clock. This icon indicates that casting is taking place.

Now, go to another app and capture Cat Sounds!
Disabling Audio Playback Capture
Something important to consider is that some apps disable Audio Playback Capture. Apps that target Android 28 need to manually opt-in for audio capture for your app to use it.

If you have an app with content that you don’t want others to record, you can use two methods to restrict it:
- Add the following code to AndroidManifest.xml: android:allowAudioPlaybackCapture=»false» .
- If you have specific audio you don’t want other apps to capture, set its capture policy to AudioManager.setAllowedCapturePolicy(ALLOW_CAPTURE_BY_SYSTEM) before playing it.
Listening to Recorded Audio
Great! Now that your app captures playback audio, the only step you’re missing is being able to listen to the audio content you saved.
You’ll do this in the other tab at the bottom of the app, List of Audios.
Getting the Files From Memory
You need to get the captured files from your device’s memory.
Open RecordingListFragment.kt located in com.raywenderlich.android.cataudio/UI. Next, locate a TODO prompting you to create a function for this and add:
Now, review what the code above does:
- First, you retrieve the directory where the files are.
- Then you add them to an array called items .
You also need to add a call in resetUI . Look for the TODO indicating where you should add:
The items array doesn’t exist yet. You’ll find a TODO indicating where to do it. Add this:
Lastly, you need to display the items in your recycler view. Locate the last TODO item inside onCreateView and add a call to createItems :
Just below the code you just added, substitute DummyContent.ITEMS for your items variable.
Now that you’ve made this change, you’ll get an error in the adapter.
To fix this, open MyItemRecyclerViewAdapter and change values‘ type from List of DummyItems to List of File. The code should look like this:
Add the following import as well:
Now, onBindViewHolder is complaining because the properties in the files are different than they were with the dummy items. Fix this by replacing the two lines with an error inside onBindViewHolder with:
With that, the errors in RecordListFragment should be gone.
Build and run. Go to the List of Audios tab and you’ll see your audios:

Finally, you need to change the UI to actually play your recordings.
Listening to Your Files
Each of the recorded files has a Play button, but nothing happens when you tap them. You’ll get the buttons working soon.
Go to MyItemRecyclerViewAdapter and add a listener in the constructor. See code below:
Now, in ViewHolder , below where you have the TextView declaration, add a reference to the button:
With this line of code, the holder knows there’s a button on each row and will hold a reference to each one.
Android Studio might show an error because you haven’t imported ImageButton , add the import at the top:
Finally, in onBindViewHolder() , add onClickListener at the bottom of the function:
This listener references the one you added in the class declaration. Now the line of code where you initialized the adapter is showing an error because you aren’t passing listener as a parameter.
For the above code to work, you need to import PorterDuffColorFilter :
Additionally, you need to add isPlaying as an instance of the class. Below the class, add:
Go to onCreateView in RecordingListFragment.kt and you’ll see an error because of the above mentioned listener. Change the adapter declaration to the code below:
playSound and its helper classes have already been provided, so with these changes, you’ll be able to play the sound.
Go ahead and try it!
Keep in mind that capturing copyrighted material from YouTube or other sources might violate copyright laws. Be sure to only capture copyright-free material or material you have permission to store.
Congratulations! You’ve now made an app that uses the Audio Playback Capture API to capture audio and play it back on demand.

Where to Go From Here?
You can download the final project by using the Download Materials button at the top or bottom of this tutorial.
In this Audio Playback Capture API tutorial you learned how to:
- Configure your app to use the Audio Playback Capture API.
- Request all the necessary permissions to start an audio capture.
- Create a service and tie it to your app so it does the capturing work for you.
This project is only the beginning of your journey with the Audio Playback Capture API. If you want to learn more about media capturing, check out our tutorial Media Playback on Android with ExoPlayer.
If you have any suggestions, questions, or if you want to show the cool things you added to this project, join the discussion below.
Источник


