- About eSIM on iPhone
- What you need
- How to set up an eSIM
- Scan a QR code
- Install an assigned cellular plan
- Use a carrier app
- Enter the information manually
- Transfer an eSIM from your previous iPhone
- If you can’t set up an eSIM
- Erase your eSIM
- How to pair your Apple Watch with a new iPhone
- Here’s what you need
- If you have your old iPhone
- Update your old iPhone
- Check your Health and Activity settings
- Back up your old iPhone
- Set up your new iPhone
- Open the Apple Watch app on your new iPhone
- Need more help?
- If you don’t have your old iPhone or you erased it
- If you have your old iPhone and you didn’t erase it
- If your Apple Watch is stuck while pairing
- If your iPhone doesn’t ask if you want to use your Apple Watch during setup
- If you transferred your content to your new iPhone using your computer, but Health and Activity content is missing
- Use Shared with You on your iPhone, iPad, and iPod touch
- Find shared content
- Continue the conversation
- Pin content
- Share content
About eSIM on iPhone
An eSIM is a digital SIM that allows you to activate a cellular plan from your carrier without having to use a physical nano-SIM. Learn about setting up an eSIM, transferring your SIM, what to do if you can’t set one up, and how to erase an eSIM, if you ever need to.
You can install multiple eSIM profiles on an iPhone that supports eSIM. If your iPhone is unlocked, you can subscribe to several cellular plans.
What you need
- An iPhone XS, iPhone XS Max, iPhone XR, or later
- A wireless carrier that supports eSIM
eSIM on iPhone is not offered in mainland China. In Hong Kong and Macao, iPhone 13 mini, iPhone 12 mini, iPhone SE (2nd generation), and iPhone XS feature eSIM. Learn about using Dual SIM with two nano-SIM cards in mainland China, Hong Kong, and Macao.
How to set up an eSIM
If you purchased an iPhone 13 model from an Apple Retail Store or Apple Online Store in the United States, your iPhone won’t arrive with a SIM card installed. To activate your iPhone, turn it on, connect to a Wi-Fi network, and follow the onscreen instructions.
Otherwise, if you do need to set up an eSIM, you can scan the QR code your carrier gave you, use your carrier’s iPhone app, install an assigned plan, enter the information manually, or transfer an eSIM from your previous iPhone:
Scan a QR code
- Open the Camera app and scan your QR code.
- When the Cellular Plan Detected notification appears, tap it.
- Tap Continue, at the bottom of the screen.
- Tap Add Cellular Plan.
If you’re asked to enter a confirmation code to activate the eSIM, enter the number that your carrier provided.
Install an assigned cellular plan
With iOS 13 and later, some carriers can assign a cellular plan for you to install. Contact your carrier for more information.
If a plan was assigned to you, follow these steps:
- When a notification appears that says Carrier Cellular Plan Ready to Be Installed, tap it.
- In the Settings app, tap Carrier Cellular Plan Ready to Be Installed.
- Tap Continue, at the bottom of the screen.
If you’re asked to «Transfer Cellular Plan» while setting up your iPhone, learn how to transfer your eSIM.
Use a carrier app
- Go to the App Store and download your carrier’s app.
- Use the app to purchase a cellular plan.
Enter the information manually
If necessary, you can manually enter your plan information. To enter your plan information manually, follow these steps:
- Go to Settings.
- Tap either Cellular or Mobile Data.
- Tap Add Cellular Plan.
- Tap Enter Details Manually, at the bottom of your iPhone screen.
Transfer an eSIM from your previous iPhone
To transfer an eSIM to your new iPhone, you can scan the QR code your carrier gave you, use your carrier’s iPhone app, or install an assigned cellular plan. When your cellular plan is activated on your new iPhone, the plan on your previous iPhone will deactivate.
If you can’t set up an eSIM
- Make sure that carrier or carriers support eSIM.
- Open Control Center: Swipe down from the upper-right corner of the screen. Then make sure that your carrier appears in the status bar. If not, try turning Airplane Mode on and off.
- Go to Settings > General > About and look for any numbers under EID. If there are no numbers, contact Apple Support.
- If you still can’t set up your eSIM, contact your carrier.
Erase your eSIM
If you need to erase your eSIM, follow these steps:
- Go to Settings.
- Tap either Cellular or Mobile Data.
- Tap the plan you want to erase.
- Tap Remove Cellular Plan.
If you erase all content and settings from your iPhone, you can choose to erase your eSIM as well or keep it. If you want to cancel your cellular plan, you still need to contact your carrier.
Источник
How to pair your Apple Watch with a new iPhone
Ready to get a new iPhone? Learn how to transfer your Apple Watch from your old iPhone to your new one.
Here’s what you need
- Your Apple ID and password (so you can turn off Activation Lock)
- Your old and new iPhone both need to be connected to Wi-Fi
- Your Apple Watch and iPhone both need to be at least 50 percent charged
- Your Apple Watch passcode (get help if you forgot your passcode)
If you don’t have your old iPhone, you need to use different steps. Choose an option below.
If you have your old iPhone
If you don’t have your old iPhone
If you have your old iPhone
Use these steps to back up your Apple Watch before pairing with your new iPhone.
Update your old iPhone
Before you switch your Apple Watch to a new iPhone, update your old iPhone to the newest version of iOS that’s available.* You should also update your Apple Watch. It could take from several minutes to an hour for the updates to complete. You might want to update overnight or wait until you have time, and make sure that both of your devices are charged.
* You might see that your iPhone is up to date on its current version, and there’s an update available. For example, even if your iPhone is up to date on the latest version of iOS 14, there might be an option to update to iOS 15.

Check your Health and Activity settings
If you back up using iCloud, go to Settings > [your name] > iCloud and make sure that Health is on.
If you back up using your computer, encrypt your backup to save your Health and Activity content.

Back up your old iPhone
Use these steps to back up your old iPhone in iCloud or on your computer. Your iPhone also backs up your Apple Watch. Learn what’s backed up.
Set up your new iPhone
Set up your new iPhone. When asked if you have an iCloud or iTunes backup, choose your most recent backup to restore your data from your old device to your new device. Make sure that your iPhone and Apple Watch are up to date; if they aren’t, you might not see your backup in the list.
If your iPhone asks if you want to use your Apple Watch, tap Continue. If it doesn’t ask, you can still set up your Apple Watch manually in the next step. Get help if your iPhone doesn’t ask if you want to use your Apple Watch.

Open the Apple Watch app on your new iPhone
Keep your Apple Watch and iPhone close together. Open the Apple Watch app on your iPhone.
If your iPhone asks you to confirm that you want to use your watch, follow the onscreen steps to finish setting up.
If your iPhone asks you to Start Pairing, unpair your Apple Watch so that you can set it up.
After setup, you can start using your Apple Watch with your new iPhone.
Need more help?
Follow the steps below for your situation.
If you don’t have your old iPhone or you erased it
Your Apple Watch might still be paired with your old iPhone. Use the steps below to unpair:
- Erase your Apple Watch.
- Set up your new iPhone and sign in to iCloud. If you’ve already set up and signed in, skip this step.
- Open the Apple Watch app on your new iPhone, then pair your watch with your new iPhone.
- Try to restore from a backup. Make sure that your iPhone and Apple Watch are up to date; if they’re not, you might not see your backup in the list. You will lose Activity, Workouts, or settings on your watch that changed between the last backup and now. If you use iCloud in iOS 11 and later, Health and Activity data is stored in iCloud and automatically kept up to date on devices where you’re signed in with the same Apple ID.
- If you’re asked to restore from a watch backup, select the most recent backup.
- If you don’t have a backup, you need to set up your Apple Watch as new.
- Follow the onscreen steps to finish setting up.
- Start using your Apple Watch with your new iPhone. You might need to wait a few days for all your iCloud data to appear.
If you have your old iPhone and you didn’t erase it
Unpair your Apple Watch from your old iPhone. Then choose one of these options depending on when you set up your new iPhone:
- If you just restored your new iPhone from a recent backup, pair your devices. Make sure that your iPhone and Apple Watch are up to date, otherwise you might not see your backup in the list. When you’re asked, restore from a watch backup. Your recent Activity, Workouts, or settings content might be lost depending on how old the backup is.
- If your iPhone backup is several days or weeks old and you want to preserve as much content as possible, erase your new iPhone. Then transfer the content from your old iPhone to your new iPhone. You might lose some of the content on your new iPhone. Remember to pair your Apple Watch and iPhone again.
If your Apple Watch is stuck while pairing
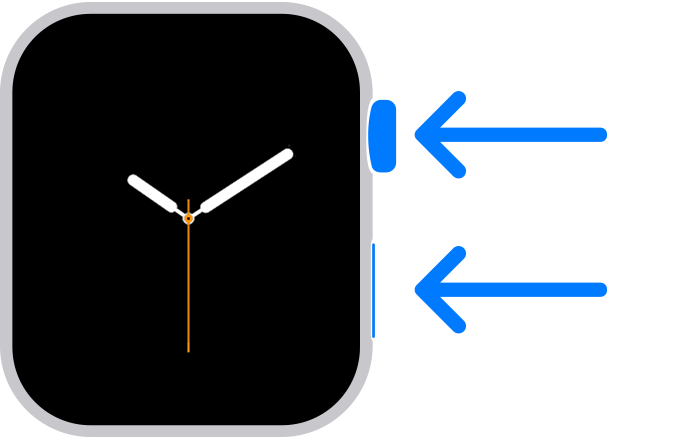
If your Apple Watch gets stuck at the black screen that shows the white Apple logo, follow these steps:
- Press and hold the Digital Crown and the side button at the same time until your watch restarts. Then release the Digital Crown and side button.

- After your watch restarts, firmly press the screen or press and hold the Digital Crown.
- Tap Reset.
- After your watch resets, you can pair it with your iPhone. Bring your iPhone near your watch, then follow the on-screen instructions.
If your iPhone doesn’t ask if you want to use your Apple Watch during setup
Unpair your Apple Watch from your old iPhone, then pair it with your new iPhone. When asked, restore your Apple Watch from a backup. Make sure that your iPhone and Apple Watch are up to date; if they’re not, you might not see your backup in the list.
If you transferred your content to your new iPhone using your computer, but Health and Activity content is missing
If you use iCloud to keep Health up to date on your old iPhone, your data will automatically update on your new iPhone whenever you’re connected to Wi-Fi and signed in to iCloud. On your old iPhone and your new one, go to Settings > [your name] > iCloud and make sure that Health is on.
If you don’t use iCloud, you can try to restore from a computer backup of your old iPhone. If you have your old iPhone and didn’t erase it, make a new iCloud backup or encrypted computer backup. Then erase your new iPhone and restore it from the new backup. Remember to pair your Apple Watch and iPhone again. If you use a computer, make sure that you encrypt your backup.
If you don’t have your old iPhone or you can’t back it up, you can’t recover your Health and Activity content.
Источник
Use Shared with You on your iPhone, iPad, and iPod touch
With iOS 15 and iPadOS 15, you can use Shared with You when others share content with you from the Music, Apple TV, News, Photos, Podcasts, and Safari apps.
Find shared content
Content that’s shared with you in the Messages app is automatically organized in a Shared with You section in the Music, Apple TV, News, Photos, Podcasts, and Safari apps.
Music: Tap the Listen Now tab. You should see a section called Shared with You.
TV: Tap the Watch Now tab. Shared With You displays movies and shows that were shared with you.
Safari: Open a new browser tab and scroll past your Favorites on the Start Page. Scroll down until you see Shared with You.
![]()
Photos: Tap the For You tab, then scroll down to Shared with You. Multiple photos in Messages appear as a collage of images that you can easily swipe through.
Podcasts: Tap the Listen Now tab and scroll until you see Shared with You.
News: Tap the Today tab and scroll until you see Shared with You.
From each app that supports Shared with You, you can easily reply to the person who sent you the content. Tap the person’s name listed under or near the content they shared, then reply within Messages.

Continue the conversation
Content that’s shared with you is automatically labeled in the corresponding apps. This lets you see who shared the content with you later and easily continue the conversation about it inline. Here’s how:
- Go to the Shared with You section of the app.
- Tap the content that was shared with you.
- Tap the “From [Name]» label near the content.
- Reply to the shared content, then tap the Send button .
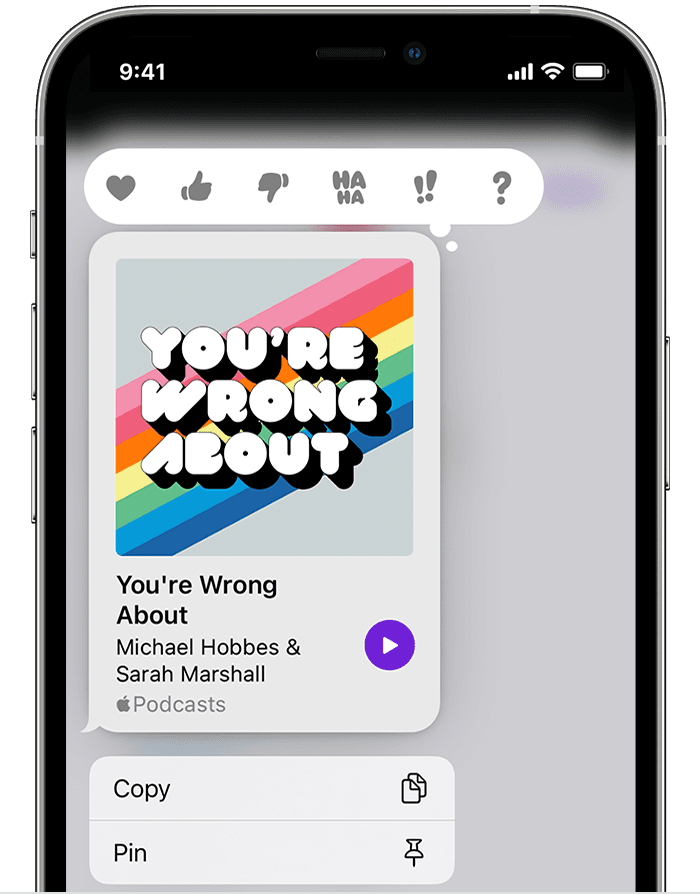
Pin content
For content that’s interesting to you, you can quickly pin it in Messages to easily keep track of it in Shared with You, Messages search, and the Details view of the conversation. Here’s how:
- Go to the Messages conversation.
- Touch and hold the piece of content within the thread.
- Tap the Pin button .
Repeat the steps to unpin the content.
To find the pinned content:
- Go to the Messages conversation.
- Tap the name at the top of the thread.
- Scroll down until you see the Pins section.
You can also tap the Search bar in Messages to see a Pins section.
Photos can be saved to your library, but not pinned.
![]()
Share content
Here’s how to share content through the Messages app across the different apps that support Shared with You:
Music: Select the song or album you want to share, tap the More button , then tap Share Song or Share Album , choose Messages, then select your contact and send the message.
TV: Select the TV show or movie, tap the Share button , choose Messages, then select your contact and send the message.
Safari: Go to the website you want to share, tap the Share button , choose Messages, then select your contact and send the message.
Photos: Select the Photo you want to share, tap the Share button , choose Messages, then select your contact and send the message.
Podcasts: Select the Podcast you want to share, tap the More button , then tap the Share button . Choose Messages, then select your contact and send the message.
News: Select the article you want to share, tap the More button , then tap Share Story . Choose Messages, then select your contact and send the message.
Источник


