Bitbucket для android studio
If you are working on a big application with Android Studio and you may want to securely store the project code to a remote server. For this purpose, we can use BitBucket repository system. Which will allow you to create a repository and push all source code safely.
 It is an online Application for versioning control, web-based storage of codes. In simplest term, it can contain a repository of project source codes in Mercurial or Git revision control system. It’ll provide you all Git features with Project management system. So you can create Multiple branches, Tags and manage your source code safely even with multiple developers working on the same project.
In this post, we’ll explain the complete steps to upload and manage your project source code with Android Studio and BitBucket. Let’s see with following steps:
1. First of all, create a BitBucket account, You can create a BitBucket account from here.

2. After creating Account, Login to BitBucket website and Create a new repository.

3. After that, get the link of the new repository. It’ll be used in Android Studio later.


After clicking on Add, Project files will change to the green color.
7. Now Again right click on Project and in menu Go to Git-> Select Commit Directory.


In the next pop up window, you have to enter your email and password of BitBucket account. Enter it carefully.
10. It’ll show all the Committed files and message you entered before when committing directory. Now Click on Push. It’ll push all code files to the BitBucket repository.
Источник
FreshByte Labs
Android Studio git tutorial using github, bitbucket
Hi guys! In this tutorial we will see how to work with git in android studio. We will be showing how to setup git using both github and bitbucket.
Git is basically a distributed version control system for tracking changes in source code during software development. Repository hosting services like github, bitbucket etc are used for version control using git.
We will be breaking down the tutorial into the following steps :
1) Downloading and Installing git
2) Create an account on github/bitbucket and then save the credentials to your git configuration
3) Create a remote git repository using github/bitbucket.
4) Create an android studio project and initialise git within the project.
5) Add the remote repository as the origin of your android studio project.
6) Commit and push your code into remote repository(github/bitbucket)
1) Downloading and Installing git
- For mac users first of all go to your terminal and check if git is already installed by typing the command git —version , if you get a version value like shown below you already have git installed and you are good to go. If you don’t have git installed, you will be getting a message like «command not found», in that case go here >>https://git-scm.com/download/mac . and install git on your mac
 |
| git version check |
- For windows users check if git is already installed by typing git —version in the command prompt, if you are able to get a proper version, then you already have git installed. If you don’t have git installed, go here >>https://git-scm.com/download/win and complete the installation
- If you are working with github, go here >>https://github.com/ and create an account(signup)
 |
| github signup |
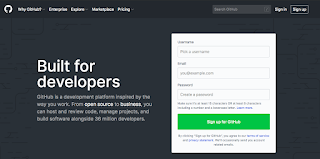
- If you are working with bitbucket, go here >>https://bitbucket.org/account/signup/ and create an account(no need to signup for both github and bitbucket, choose only one which is convenient to you)
 |
| bitbucket signup |
- Once you have created the account in one of the repository hosting services, you will now need your local git version control system to be connected with it. For that, go to your terminal and type git —version to ensure that git is properly installed. It should be displaying proper git version number, if not try installing git properly as discussed above. Now, execute the following command in your terminal(mac) or cmd(windows) to connect your remote repo with your local git.
git config —global user.email «your_github_or_bitbucket@email.com»
git config —global user.name «your_ github_or_bitbucket_username «
- As shown above you will have to specify your registered email and username in above commands. Now when you make commits and other activities to your remote repo(github/bitbucket), your identity will be shown based on these credentials
- For github, login with your account and click on the plus button at the top right corner which brings up an option «new repository».
 |
| github — create new repository |
- Click on «new repository» and enter the details to complete repository creation. You can either make your repository «public» or «private» as well. When made public, it can be accessed by anyone across the globe whereas private repositories can be accessed only by select individuals whom you choose to share it with. Private repositories were a paid feature in github before, but now it has been made free, thanks to github!
- Once the repository has been created successfully, it will bring up a screen like shown below
 |
| unique link to your github remote repo(highlighted with red marker) |
- Copy the command that starts with » git remote add origin .. «, which is the unique link to your remote repo. This command will be used in our android studio terminal to connect your local repo with the remote repo that we just created.
- For Bitbucket, repository creation is similar to github and is straight forward(If you are using github, you are free to skip this step). After logging in to your bitbucket dashboard, you can see a ‘+’ button on the left sidebar, click on it and then select repository from next window to create a new bitbucket repository.
 |
| create new bitbucket repository |
- Give a name to your repository and similar to github here also you have option to make it public or private. Choose private if you want it be accessed by people whom you give access only. Now complete repository creation
- Once the repository has been created you will see the following window from which you will need to copy the remote repo url at the bottom of the screen as shown below
 | |
|
- The above copied url will be used in android studio terminal to connect local git repo with the bitbucket repo that we now created
- Now start up your android studio. First of all create a new android studio project, finally when your project gets properly build click to open the terminal window at the bottom of the Android Studio IDE.
- Now type the following command in your android studio terminal to initialise git within your android studio peoject and hit enter
 |
| git init command executed in android studio terminal |
5) Add the remote repository as the origin of your android studio project.
- This url will be different for your repository, so make sure to copy the right url from your repository. Now paste this inside your android studio terminal and hit enter. If everything is fine, we won’t see any error and hence we have successfully linked our local repo with the remote repo.
If you are asked to enter the password, please enter the password for your github/bitbucket account, you wont be shown a password preview, but keep typing and then press enter
- Now we will see how to move your repository from your local machine to the remote github/bitbucket repository. For that, first of all we will need to add all the files that we need to move to your remote github repository. Since we are starting with a new project let us add entire project( all the files) to github/bitbucket repo. So type in the following command and hit enter
- As a result of the above command the entire project gets added(i.e, gets prepared for commit). Here ‘.’ means you are going to add all files to remote repo. Instead if you need to add only a single file, you will need to execute something like this git add your_filename.java . For now we will be doing git add . since we will have to move entire project to our remote repo(github/bitbucket)
- Before we push our project to github/bitbucket, we will need to commit the changes with a commit message. Since we are making an initial commit for our project we can keep the commit message as «initial commit»(of course, you may set a different message of your choice!). Always make sure to keep a meaningful commit message to all your commits. This helps a lot since it becomes a lot easier to identify changes in each commit at a later point of time. Now execute the following command to commit all the files that have been added.
 |
| committing all the added files to git |
- As soon as the commit command is executed, all the files gets saved in your local git. Now we are ready to «push» our changes into our remote github/bitbucket repo. So execute the following push command to push all the committed changes into the remote repository’s master branch
 |
| pushing committed changes to github/bitbucket remote repo |
- Now if we go ahead and check our repo in github, we can see that all the files have been successfully pushed like shown below
- Now if we check the «commit» tab you can see your «initial commit» is shown there with the person who did the commit and the date in which the commit has been made. Hence it becomes helpful in identifying a commit very easily.
- Now go inside one of your files and make a small change for testing purpose (below i’m adding a comment inside MainActivity.java file)
 |
| added a test comment to commit |
- Now go ahead and commit this change by running the following command in android studio terminal
- As a result of the above command all the changes get added and committed with the commit message «test commit». This command is basically a shortcut to both add and commit the changes in a single command. (You can alternatively type git add . and git commit -m «test commit» separately also)
- Now again execute the push command like shown below
- Now if you check your repository in github, you can see that the changes have been reflected there also.
 |
| test commit successfully pushed |
- Now if you check the commit tab you can see that our new commit has appeared there as well, see image below
- Thats all for this tutorial guys, i will try to make more tutorials on git like this later
Источник


