- Build AOSP(Android 11 beta 1) on Ubuntu 20.04(Focal Fossa)
- Creating a Android/AOSP Build machine on Ubuntu 20.04
- Introduction
- Requirements
- Recommended Specs
- Setting up our machine
- Updating
- Installing required packages
- Downloading Sources
- Setting up repo tool
- Finding the right branches for you
- Download sources for branch
- Proprietary Drivers
- Building
- Flashing
- How To Install Android SDK Tools On Ubuntu 20.04
- Download SDK Tools
- Install SDK Tools
- Download and Install Platform Tools
- Configure Environment Variable
- Using the SDK Manager
- Using the Emulator and AVD Manager
- Summary
Build AOSP(Android 11 beta 1) on Ubuntu 20.04(Focal Fossa)

The instructions we find on the Establishing a Build Environment work only on Ubuntu 14.04 and older Ubuntu versions. To build the AOSP on latest Ubuntu version(Ubuntu 20.04 Focal Fossa at the time of this writing), we need to install some additional dependencies to avoid problems such as:
At the time of writing this article, the Android 11 beta 1 was on master branch. So, we will be building the AOSP master branch which has Android 11 beta 1 source code, on the Ubuntu 20.04 system. Let us get started.
Install the dependencies using following command:
After the dependencies are installed successfully, configure the user’s name and email for git with following commands:
Download the repo client and put it in the executable path with following commands:
At this point executing repo init -u https://android.googlesource.com/platform/manifest command gives following error:
Ubuntu 20.04 comes with python3 out of the box. When installing the dependencies, we installed python3.8 . To use this version of python , and still have option to use any other version of python, my preferred method is to use update-alternatives . Use the following set of commands to link python command to python3.8 .
Select the number associated with python3.8 (2 in this case) here.
At this point code can be downloaded using following commands:
Источник
Creating a Android/AOSP Build machine on Ubuntu 20.04
Introduction
In this guide I will be going through the process of setting up an Ubuntu 20.04 LTS machine for building custom Android ROMs. This will be done by setting up our machine, getting the Android Open Source Project’s (AOSP) code from Google and actually building it. This guide will be aimed at building a Android 9 image for the Pixel 2 although this process should work on any Pixel device and possibly others. Given the size of the Android project, building will take a large amount of resources and time (several hours)
Requirements
- Fresh Ubuntu 20.04 Install
- Root privileges (or sudo)
- 300GB Disk space (or 180GB for source just for a single version of Android
Recommended Specs
I recommend doing this on a machine with the following specs
At the end of the day, the faster the machine, the faster the build. The slower the machine, the slower the build!
Setting up our machine
Updating
First thing we are going to want to do is do an apt update and upgrade to make sure we have the latest versions of all of our packages. This will be helpful for later when we do a big install.
Installing required packages
Now we have the latest versions of all the packages we require, lets install everything we need to build Android!
As you can see from the screenshot, this requires a lot of packages and may take a while to download.

Downloading Sources
Setting up repo tool
In this next section, we are going to start the process of downloading all of the Android source code from Google. All of this code is stored across hundreds of git repositories. To handle downloading all of these, Google have released a tool called repo. We will need this to continue.
You can test to make sure repo works by typing in repo . If you get the following, it should work
You will also need to setup git — These details will be used to identify you if you ever decide you want to contribute to AOSP.
Finding the right branches for you
You can find the right build numbers / branch names / codenames here. Its worth noting the correct tag for whatever device you want to build for. For example, I will be using the tag android-9.0.0_r34 to build for the Pixel 2 device. This has the build id of PQ2A.190305.002
Download sources for branch
This could take a while so its worth creating a screen session so we can pickup where we left off later if we get disconnected.
Change to the directory you want the sources to be downloaded to — I have a seperate drive mounted to /aosp
This command will then download all of the sources that are required for the branch mentioned after the b tag.
If you are worried about space, you can use the —depth=1 flag to the end of the command to only download source for your particular branch.
When you do this, you should see something like this:

You can now sync to download all required files. The -j12 flag tells repo to use 12 cores when syncing. Change this to whatever is appropriate for your system.
This may take a while depending on the speed of your connection. Doing this on my system with a depth of 1 downloaded about 16GB and used 51GB disk space.
Proprietary Drivers
Before you are able to build, you will need to make sure that you have the device specific drivers downloaded if there are any. For Google Devices, this is pretty straight forward. You will need to go to Driver Binaries page and download the files for your device/codename. For me, this will be the links in the Pixel 2 binaries for Android 9.0.0 (PQ2A.190305.002) section. Make sure this is definitely for your device variant as there may be newer models which use different drivers. If you get the wrong ones, the device will not boot. Wget these files into the root of the AOSP directory
Once these are downloaded, you will need to extract them
After this, you should notice there are two new files extract-google_devices-walleye.sh and extract-qcom-walleye.sh
You will need to execute each of these are then accept their terms and conditions.
I recommend spamming the SPACE key until you are prompted with Type «I ACCEPT» if you agree to the terms of the license: . You can then type in I ACCEPT and return. 
Building
Once you have all of the sources downloaded, you are almost ready to build. Before this however you will need to source the guild environment setup script. This will put all of the required build tools and functions into your PATH. You will need to do this every time you get a new terminal session. To be safe, just do it before every build.
You can now use the lunch command (you will need to do this every time you want to build). This will load up a bunch of device profiles
The output for me is as follows:
From this list, select the most appropriate profile for your device. E.g. aosp_walleye-userdebug for the pixel 2.
When building in the future, you can just type in
The output of this should be something like this:

Now you are ready to build. This can be done using the make command. The number of 12 can be replaced with the number of cores you would like to allocate to the build process. Beware that building android takes a large amount of RAM and CPU and may take several hours. It is also very IO intensive so if you are using a slower hard drive, it may also take a long time.
Flashing
After successfully building you should be able to flash your Android ROM on to your device.
Assuming that the Pixel 2 is unlocked and booted into the bootloader and plugged into the machine you are building on, you should be good to go. First of all, set the following environment variable with this command:
After this, you should be able to just type
The -w flag tells fastboot to wipe the data partition. If you don’t do this after the initial install, it may not boot.
Источник
How To Install Android SDK Tools On Ubuntu 20.04
It provides all the steps required to install Android SDK Tools on Ubuntu 20.04 LTS.
In this tutorial, we will discuss all the steps required to install Android SDK Tools, SDK Manager, and AVD Manager on the popular Linux distribution i.e. Ubuntu 20.04 with Java 16. This tutorial provides the steps to install Android SDK Tools on Ubuntu 20.04 LTS, though the steps should be the same for other versions of Ubuntu and Linux systems.
This post is useful for the developers using Android SDK Tools with other IDEs without installing Android Studio for the use cases including hybrid app development using Ionic. It also assumes that a valid JAVA_HOME environment variable exists pointing to the installation directory of Java. You may follow the Java installation tutorials written by us including How To Install Java 8 On Ubuntu, How To Install Java 16 On Ubuntu 20.04 LTS, and How To Install OpenJDK 16 On Ubuntu 20.04 LTS.
In case you are interested in developing Android applications using Android Studio, you can also follow the other tutorials written by us including How To Install Android SDK Tools On Windows, How To Install Android Studio On Windows, and How To Install Android Studio On Ubuntu 20.04.
You may also be required to execute the below-mentioned command in case you have set the options previously for Java 9 or Java 10.
Notes: The Ubuntu 18.04 LTS version of this tutorial is available at — How To Install Android SDK Tools On Ubuntu 18.04. You can continue this tutorial for Ubuntu 20.04 LTS.
Download SDK Tools
Open the download tab of Android Studio and scroll down to the Command line tools only section. This section shows various options to download the SDK tools as shown in Fig 1.
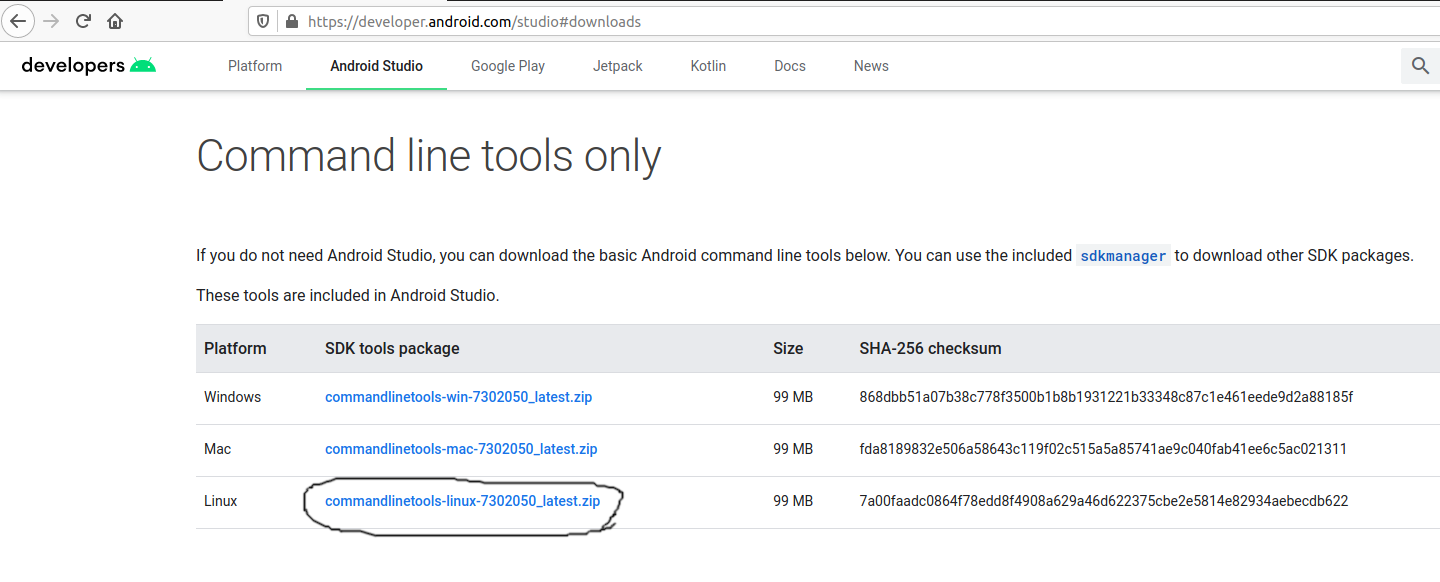
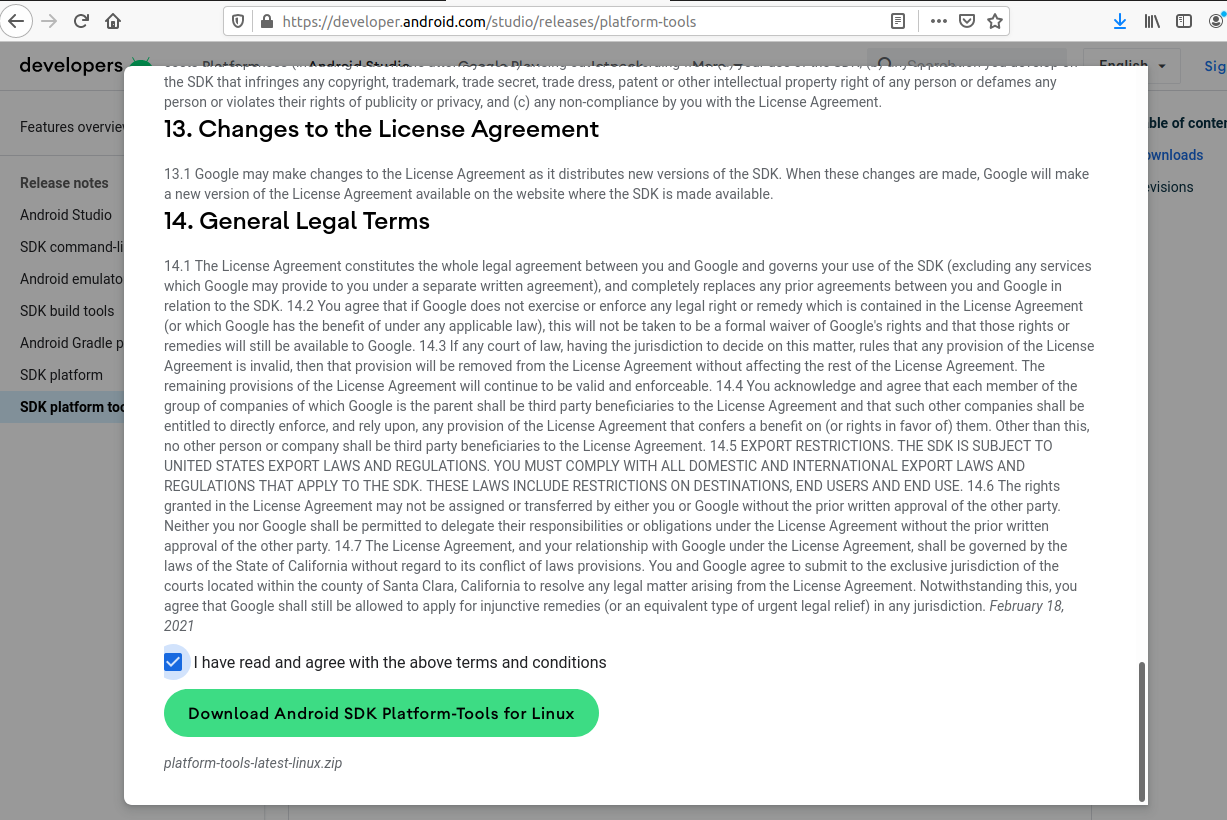
Click on the Download Link as highlighted in Fig 1. It will ask to accept the Terms and Conditions as shown in Fig 2.
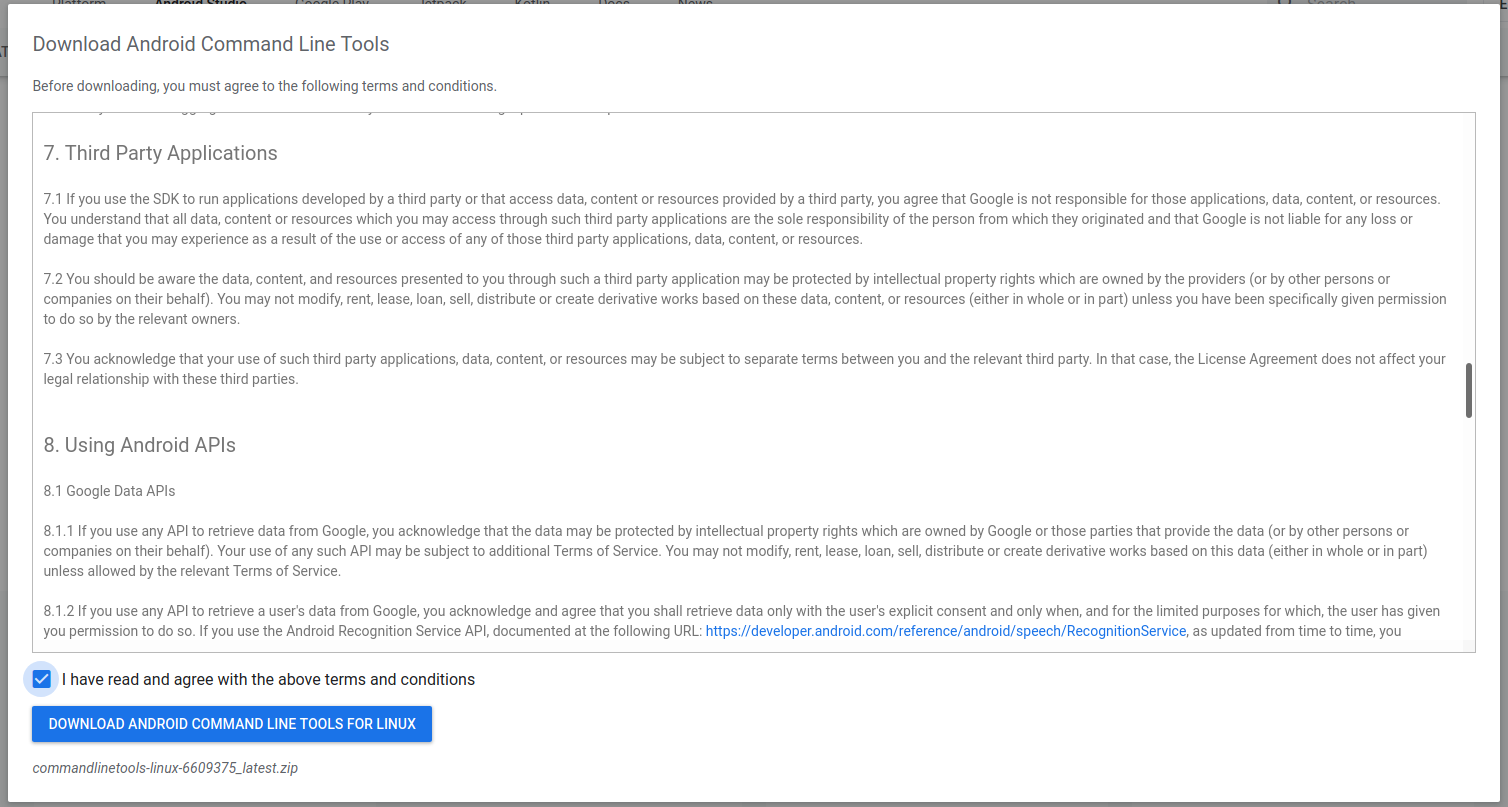
Go through the details, agree to the terms and conditions, and click the Download Button to start the download.
Install SDK Tools
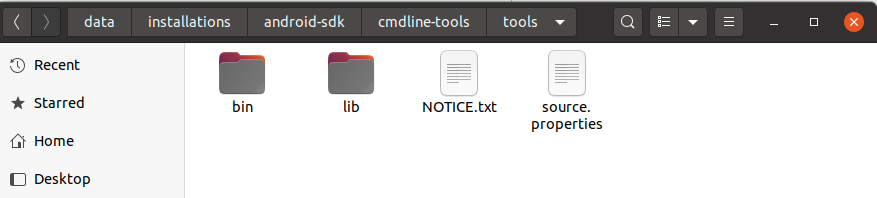
In this step, we will install the Android SDK Tools on Ubuntu. Create a directory having the name set to android-sdk and extract the content of the downloaded SDK Tools zip to this directory. Create another directory android-sdk/cmdline-tools to store the sdk-tools. Make sure that the tools directory is available directly within the android-sdk/cmdline-tools directory created by us.
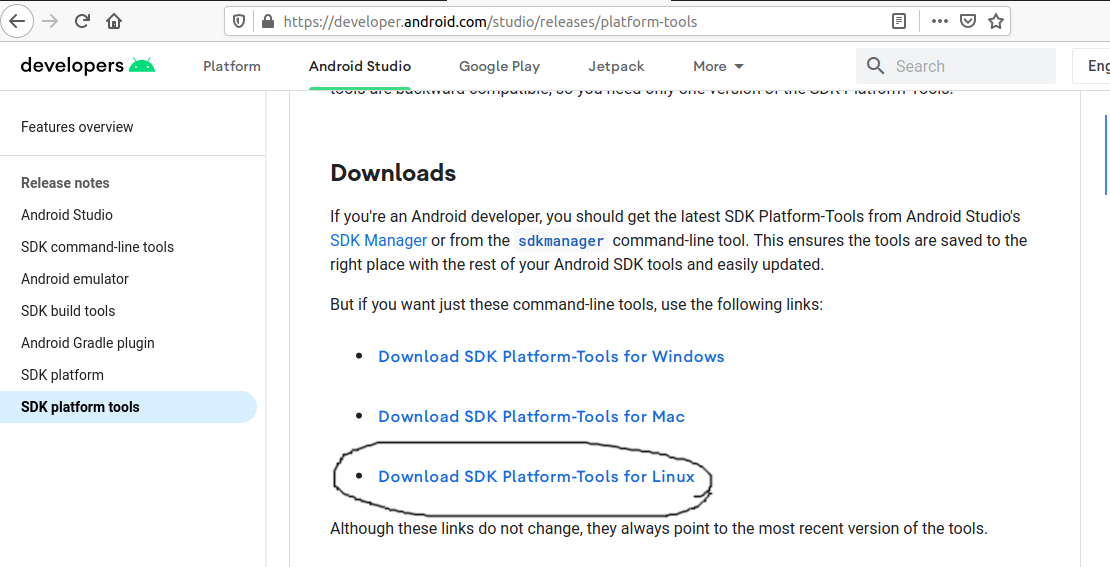
Download and Install Platform Tools
In this step, we will install the Android Platform Tools on Ubuntu. Follow the same steps similar to Android SDK Tools as shown in Fig 4, Fig 5, and Fig 6 to install Android Platform Tools using the download link.
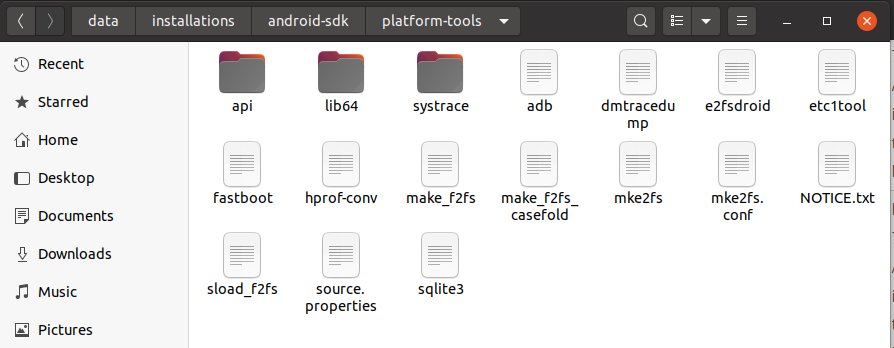
Make sure that the platform-tools content is available within the directory platform-tools. The directory structure should be similar to:
Configure Environment Variable
In this step, we will configure the environment variable to use the SDK tools installed by us. There are two ways to do it. In the first approach, we can update the .bashrc file of the user account. Another approach is to update /etc/profile file which works for all the accounts.
Approach A
Update .bashrc file of the user account.
Notes: Replace the android sdk path based on your installation directory.
Approach B
Update /etc/profile file.
Scroll down by pressing the Page Down button and add at the end of this file:
Make sure that you provide the correct path to the android-sdk directory.
Now press Ctrl + O and press Enter to write our change. Press Ctrl + X to exit the nano editor. The nano editor should look like Fig 7.
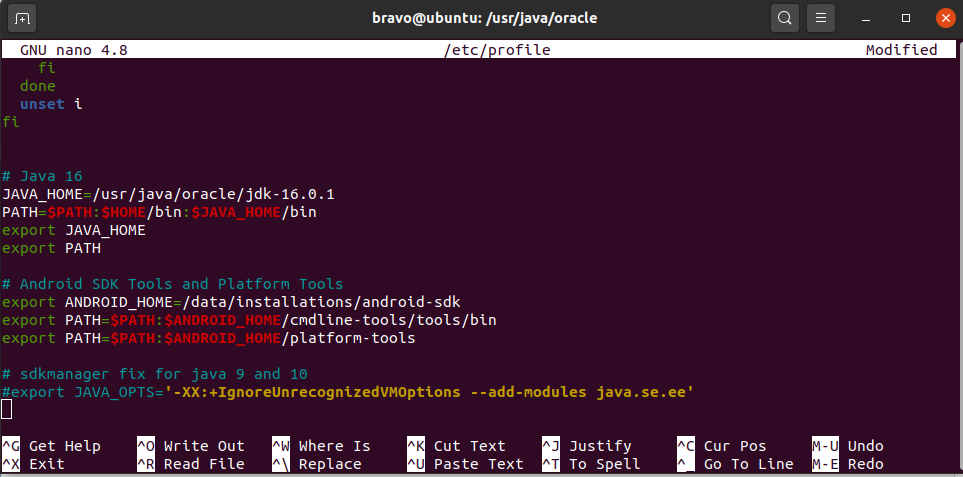
Notes: Approach B didn’t work for me.
Now test the Android SDK installed by us using the environment variables configured by us.
Using the SDK Manager
Update SDK Manager — Update the SDK manager using the below-mentioned command.
List — We can list the installed and available packages and images using the list command as shown below.
Install Platform — Use the below-mentioned command to install the Android 10 (API level 29) using the SDK manager.
It will ask to accept the terms and conditions. Enter y and hit Enter Key to accept the terms and conditions. This command creates the directories licenses and platforms within android-sdk and installs the package android-30 within the platforms directory having all the required files to run the emulator for Android 11.
If we again check the installed packages, the list command shows the installed options as shown below.
After installing the platforms, the directory structure should be:
Add System Image — We can add system image from available images shown by the list command using the SDK manager as shown below. We are adding the most recent default 64-bit system image.
Accept the License Agreement to complete the download. There are several projects which need Google Play Services. We need system images specific to Google Play Services as shown below.
Now again use the command list as shown below.
After installing the default system image, the directory structure should be:
Install Emulator — You might be required to install the emulator before creating the AVD using SDK Manager. The emulator gets installed while adding the system images in the previous steps.
Install Build Tools — Install the most recent build tool listed by the list command.
After installing the build tools, the directory structure should be:
Now again use the command list as shown below.
Using the Emulator and AVD Manager
Create AVD — Create the AVD using the system image downloaded in the previous step as shown below. Replace with actual name.
The above commands ask a bunch of questions to configure the AVD if we choose the custom hardware profile option. We have excluded the details of these options from this tutorial since these configuration details depend on the actual needs. After completing all the configurations, it creates the AVD using the name provided by us while configuring it.
List AVDs — Now go to the tools directory(only required in case you have omitted to add tools path to PATH while configuring environment variables) on the command line and check the installed platform as shown below.
It will list all the AVDs installed by us.
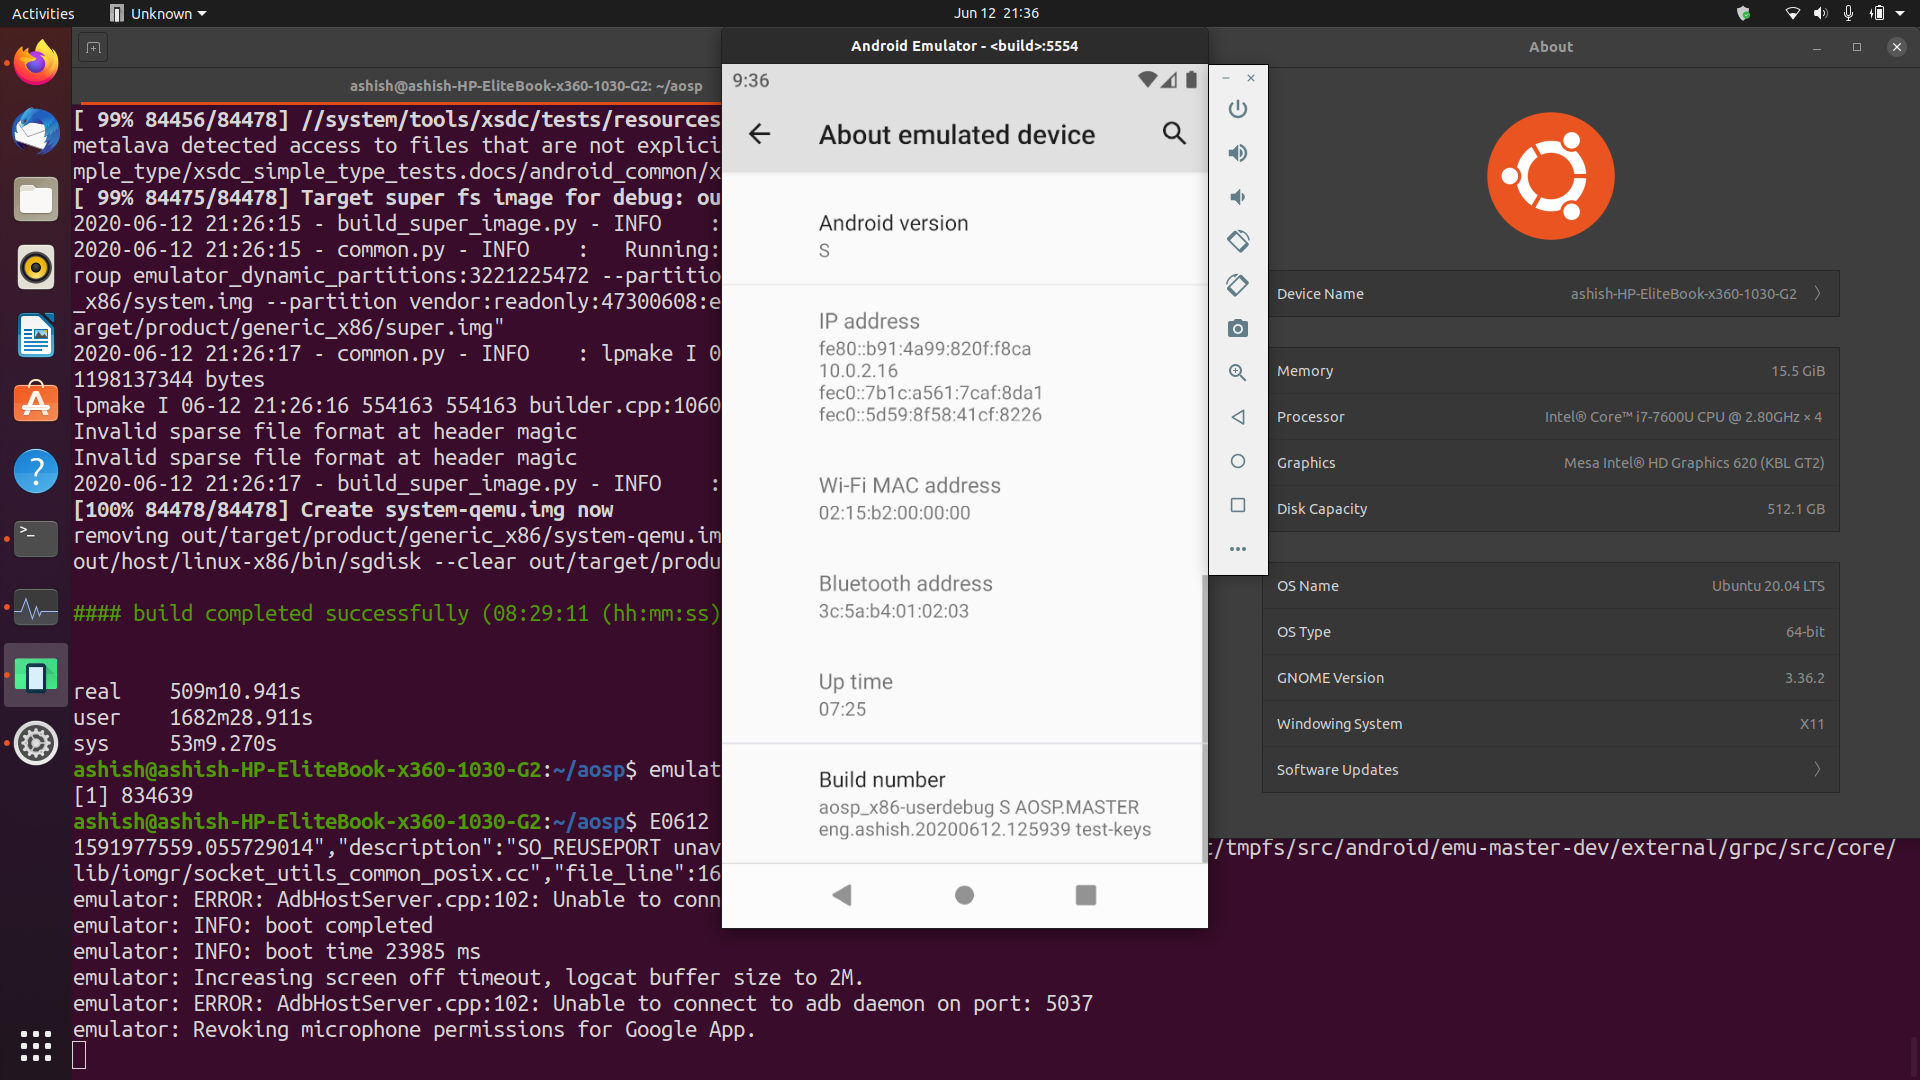
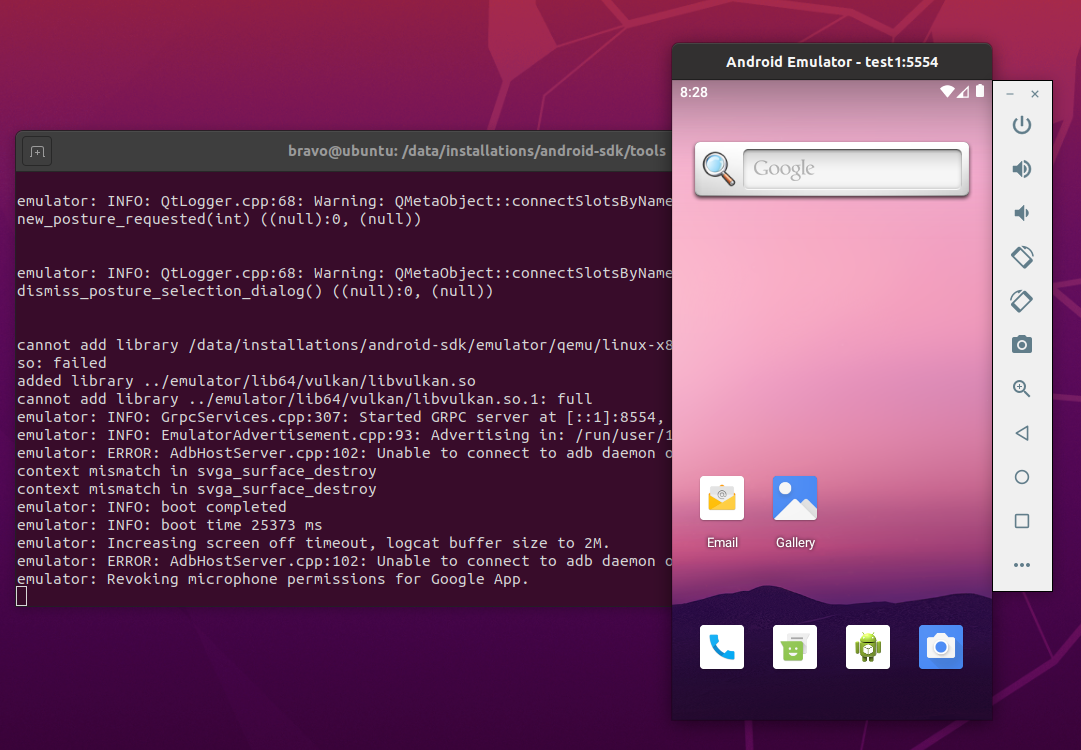
Launch AVD — We can launch the AVD using the emulator as shown below.
The emulator will take some time to completely launch the AVD. The final results should look similar to Fig 8.
Notes: I have used Ubuntu 20.04 LTS installed as VM using VMware Workstation Player, hence I have enabled the Virtualization for my Virtual Machine.
Delete Emulator — We can also delete an existing emulator as shown below.
Summary
This tutorial provided all the steps required to install Android SDK Tools and Android Platform Tools on Ubuntu 20.04 LTS. It also provided the steps required to launch the AVD using the Android Emulator.
Источник


