- Android разработка без android studio.
- How to install Android SDK and setup AVD Emulator without Android Studio
- Understanding the Android SDK
- Installing the Android SDK
- Step 1 — Download the tools package
- Step 2— You need Java 8!
- Step 3 — Download the essential packages
- Step 4 — Set your environmental variables
- Step 5 — Download the platform specific packages you want
- Step 5 — Create a AVD device
- Step 6 — Run the Android Emulator
- Create a Basic Android App without an IDE
- Break Down Your Android Studio Project
- Get Started with the Android SDK
- Initialize Gradle
- Create an Android Build
- Write the Java Application
- Add Authentication with Okta
- Why Okta?
- Authentication in Java
- Connect to Okta for Authentication
- Set Up Your Login Page
- Wire Up Login
- Learn More about Java and Secure App Development
Android разработка без android studio.
Есть опыт лет 15 в C++, под Android пытался лениво начать кодить пару раз, первый раз убила конски развесистая и тяжёлая IDE, где всё это предлагалось сделать. Второй раз убило то же самое — IDE стала ещё более конская и тяжёлая. Я фалломорфирую с того факта, что для простого белого окна с одной кнопкой мне надо видеть 100500 каких-то файлов в иерархии проекта, кучу кнопок в этой студии, запускать какую-то жирную систему сборки с .xml файлами т.п.
Не понимаю как можно начать с чего-то не базового. Такой подход, типа качните нашу IDE под 700 метров, запустите, он отожрёт пару гигов озу, создайте проект и т.п. — какая-то жопа, а не базовость. Базовое — это когда тебе дают голимый notepad, ты пишешь код, потом пишешь Makefile из 4 строк, запускаешь make и получаешь свою софтину. Далее накручиваешь. К IDE приходишь, когда понимаешь что накрутил так дохера, что уже тяжело через vim + mc на всё это смотреть, например.
В общем, хочется какого-то мануала/книги, где подразумевается, что ты можешь создать легитимное android-приложение из минимума говна и палок. Например имея только vim, adb, ещё там что-нибудь относительно редко меняющееся, желательно без всяких gradle систем сборки, а просто запуская java из консоли. И получая легальный современный нормальный .apk, который google play market не забанит ни за что.
Нахрена мне такое надо? А иначе основ не понять. Я бы хотел понимать что там в самых низах (ясно, что низами называется что-то вроде функции main в java, линковалки ресурсов и т.е., пакователя .apk файлов, Manifest.xml и т.п.). Т.е., чтобы, например, я смог собрать android-приложение, которое минимальное по размеру для данного функционала. Т.е. чтобы в него не было включено 100500 каких-то левых метафайлов, дескрипторов самой студии, всяких лицензий, копирайтов, ресурсов сотен иконок разного размера, прочей дефолтной ботвы. Мне не надо потребления лишних 4 КБ в .apk на то, что там для соблюдения этикета лежит какая-нибудь портянка про то, что это собрано такой-то, мать её, студией. И чтобы, скажем, я должен был руками всё это где-то прописывать, на каждом шагу огребая что чего-то не хватает и мог, разбираясь, понять нафига нужен каждый мелкий элемент процедуры.
Т.е. в идеале, среда разработки отсутствует, а есть набор файлов и утилит, а я пишу .sh — скрипты для оркестрации всех говен для получения легального .apk файла.
Источник
How to install Android SDK and setup AVD Emulator without Android Studio
If you are trying to develop to Android, you probably will end up installing the Android Studio to get the Android SDK and the AVD Emulator working properly.
But if you are using another code editor, like Sublime Text or VSCode, installing the Android Studio will just mess up with your setup and consume your precious RAM for no good reason.
I had a hard time figuring out how to properly do this setup due the lack of documentation about it, so i hope this article helps you. 🙂
Recommended previous knowledge:
- SDK (Standard Development Kit); Read about on Wikipedia;
- AVD (Android Virtual Device); Read about on docs;
- CLI (Command Line Interface); Read about on Wikipedia;
- Android API levels; Read about on Vanderbilt University;
- How to open, navigate and execute files in your OS terminal;
- Know what are environmental variables;
Understanding the Android SDK
Basically, the Android SDK is a bunch of packages necessary to develop for Android.
These packages stays in subfolders of a folder called “sdk” (or “android-sdk” sometimes). You do not need to know how these packages really work, just what they do.
The picture below is my Android SDK folder, these are the basic packages you will need in order to get everything working properly.
Here is a brief explanation of each package:
- tools: This package is mainly used to manage the other packages and to create AVD’s;
- emulator: As the name suggest, this is the Android emulator;
- platform-tools: Some tools to communicate with Android devices when you plug then in your computer;
- patcher: This package is automatically downloaded by the SDK. I didn’t find what exactly this is for, so just leave it as it is;
The folders bellow contain sub-folders with the packages for each Android API level.
- platforms: The platform packages are required to compile your app for the specified API level.
- system-images: These are the android images used in the emulator.
- build-tools: These are necessary to build your Android apps
Installing the Android SDK
In order to install the SDK we will use the Command Line Tools. These are some quite simple CLI’s used to manage the Android SDK. You can read the documentation here for more details.
Step 1 — Download the tools package
First, you need to download the tools package. And with this package you can download the others.
- First, go to the Android Studio download page: https://developer.android.com/studio;
- Then click in “ Download Options”;
- There you will find a table named “ Command line tools only”;
- This table contain some zip files. Download the appropriate file for your system ( Windows, Mac or Linux);
- Extract this zip and you will get a folder called tools: This is the tools package i explained earlier;
Create a folder anywhere you prefer to place your SDK. I recommend you to stick with one of these commonly used places:
- Globally: C:\Android\sdk or C:\android-sdk (this is not default, but i usually set my SDK here on Windows)
- One user only: C:\Users\ \AppData\Local\Android\sdk
- Globally: /Library/Android/sdk
- One user only: /Users/ /Library/Android/sdk
And move the tools folder to this new sdk folder. Make sure you have admin access to this folder and any sub-folders inside it, or the tools package will fail to download new packages.
Note: You can also download a pre-build package for your SO (like the one available on Ubuntu repository). But i do not recommend you do to so, because they probably will not be updated and will be harder to manage, since it was automatically installed.
Step 2— You need Java 8!
The Android SDK packages require Java 8. If you do not have it, you need to download. If you are using a newer version, you have to downgrade to Java 8 or you will eventually get some errors, because it is not compatible.
If you do not have the Java 8 SDK, here is how you can install it:
On Ubuntu run these commands:
- # sudo apt-get update
- # sudo apt-get install openjdk-8-jdk
Sorry for MacOS users, i don’t know how to install it on this OS.
Step 3 — Download the essential packages
Now, download the platform-tools and the emulator packages, because they contain some CLI binary files you will need later. I decided to download these packages first in order to set all the necessary environment variables at once and make the rest of the process easier.
Open a terminal window (you need to use a terminal, not the file explorer), go to your sdk folder and navigate to the /tools/bin directory.
This folder contain the SDKManager binary: this is a CLI used to list the available packages in the Google’s repository and download, update or remove them from your SDK folder.
The bellow command will list all packages installed (the first items on the list) and all packages available to download:
To download the packages, simply copy the package names and pass it as a parameter to the SDKManager CLI using the terminal:
# ./sdkmanager platform-tools emulator
If you open your sdk folder you should see these packages folders there.
Step 4 — Set your environmental variables
You need to set the below environmental variables containing the path to our SDK, so any running program can find it in your pc:
ANDROID_SDK_ROOT = Path to your SDK folder
ANDROID_HOME = The same as ANDROID_SDK_ROOT. This variable is now deprecated, but i recommend setting it because some programs still using it to locate your sdk.
And add these folders to the PATH variable, making their binary files accessible from everywhere:
To add the environment variables on WIndows, just follow these steps:
- Open the “Control Panel”;
- Go to “ System and Security” option in the side menu;
- In the window “ System Properties” open the tab “ Advanced”;
- Click in the button “ Environment Variables” in the bottom of the page;
- In the “ Environment Variables” window you will see two tables: “User Variables” and ” System Variables”.
- If you created your sdk folder for one user only, set the variables in the “ User Variables” table;
- But, if you create your sdk folder globally, set the variables in the “ System Variables” table instead;
On Linux, you can set your environment variables in many places. So i choose the ones I found the most appropriate:
- If you created your sdk folder for one user only, set your environment variables in the file
/.bashrc;
Here is how i set these variables in my Ubuntu, using the file /etc/environment:
And sorry again, no MacOS instructions for this task.
You can find more about these environmental variables in the oficial docs here.
Now your SDK is ready! If you do not need to run the emulator there’s no need to follow the next steps.
Step 5 — Download the platform specific packages you want
You need more three packages: The platform, the system-image and the build-tools. You can download these packages for any Android version you prefer. In this article, i will download the packages for the API Level 28.
Use the “ sdkmanager — list” command to find these packages and download them using the command “ sdkmanager
Here’s an example:
Step 5 — Create a AVD device
Creating a AVD device is a simple task: run the AVDManager command (this is a binary file located in the tools/bin folder of your sdk) with the create avd option, a name for the new AVD and the image you want to use.
Here is a example:
# avdmanager create avd — name android28 — package “system-images;android-28;default;x86”
You will be asked if you want to alter some configurations. You can also modify these configurations later in the file config.ini, located in the avd folder (this folder usually is created in your user folder, under the android directory). The currently active configurations can be find in the file hardware-qemu.ini (this file just will be created after the emulator runs for the first time).
Step 6 — Run the Android Emulator
Now you just need to run the emulator command (remember that we added this package to the environmental variables?):
The emulator take some time to init for the first time. But if you done everything correctly you should see this screen:
Источник
Create a Basic Android App without an IDE
Virtually every Android tutorial uses Android Studio to create and develop an app. This isn’t great for learning since you don’t see how things work, namely
- The components that make up an Android Studio project
- How builds are setup and configured
- What parts comprise the source
Software development is about files and in this tutorial we’re going to go through every file in a basic Android project – first by examining what Android Studio outputs and then by building up an Android project from scratch. We won’t assume any previous Android experience, just a little Java.
Note: I’ll be doing this on Windows but most instructions should work on other platforms.
Break Down Your Android Studio Project
This is what Android Studio creates when you start a completely bare project.
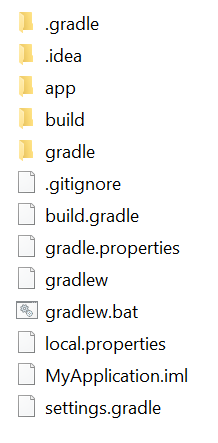
The first thing to notice is that most files involve Gradle, the system for configuring and executing builds. What do we have without any Gradle files ?
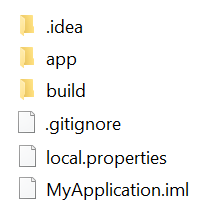
Only three folders and three files. Clearly the main complexity in Android projects is the build system.
Let’s look at what files are not included in source control by looking at .gitignore.
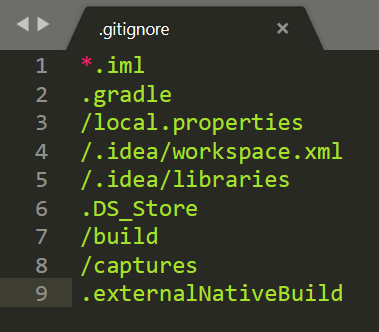
So MyApplication.iml isn’t important. If you Google what iml files are for you will see they are used by Android Studio and can be regenerated from the configurations in .idea/ .
Also, local.properties aren’t important either, as well as build/ . What does that leave us with? Just the app/ folder and some files in .idea/ which is where IntelliJ (which Android Studio is built on) stores configuration files.
Inside the app folder you’ll find two directories and three files:
- libs/ , which is empty
- src/ , which isn’t
- .gitignore
- build.gradle
- ProGuard
ProGuard helps shrink your final APK by removing unused libraries. You don’t need this file (it’s actually all commented out). The .gitignore is use for source control, if you didn’t know that already. So it’s just src/ and build.gradle that are important.
src/ contains your Java source code, the resources you use like layouts and configuration files, and the AndroidManifest which tells Android what your app is. And build.gradle tells Gradle how to convert your source into an APK using the Gradle Android plugin.
To see all of this in action, let’s get to building our code base from the ground up, first installing the SDK, then initializing gradle, onto converting to an Android build, and finally writing the app code.
Get Started with the Android SDK
For this project, you’ll need to download the Android SDK. This is just a ZIP file. Go to the normal install page and scroll right to the bottom at Command Line Tools. There you’ll find the zips which are only around 150MB. Extract and set your ANDROID_SDK_ROOT environment variable to the extracted location.
And that’s it! Gradle should pick this up automatically. (Note: Gradle stores the SDK location in the local.properties file, which as we saw before isn’t saved to source control).
Initialize Gradle
To start our project from scratch we initialize a folder using Gradle. First install Gradle. I downloaded the binary-only version from the Manual section and added the bin folder to my PATH .
The gradle command should now work from your command line. Note: you need to have Java 7 or higher installed as well. Here is what you see when you initialise an empty folder with gradle init .
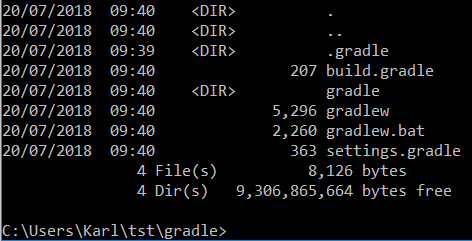
See how all these files are in the Android Studio project output ? For a great explanation of what these files are see the Gradle create build guide.
Create an Android Build
Next we need to set up our project to build Android. The first step is to change settings.gradle to simply include the app module (which is just a folder).
Next, put the following into your root build.gradle .
This primarily defines where to download our Gradle libraries from.
Next, create the /app directory and place the following into app/build.gradle .
This uses the Android Gradle plugin (com.android.application) and sets some values like the SDK version and Proguard (which optimizes our output size). Also, in the dependencies section it gives any libraries we want to import (here we import two, both used in building our interface later).
Now create app/src/main/res/values/styles.xml which we’ll use to set our app’s theme.
Finally put the following into app/src/main/AndroidManifest.xml :
This defines the package, label and main activity of our app.
Now when you run gradlew build you should see BUILD SUCCESSFUL. And in app/build/outputs/apk/debug you should see app-debug.apk . You’ve just set up an Android build from scratch!
To deploy this simply say gradlew installDebug with your phone plugged in (and USB Debugging enabled). You should then see a new app called Demo App. It will crash when you run it because you haven’t written any Java code yet!
Write the Java Application
With your build set up next we need to write the Java. We only need two files for this: the main activity Java file, and the layout XML.
Put the following into app/src/main/java/com/example/karl/myapplication/MainActivity.java .
It just creates a new Activity (a core process-like idea in Android) and sets the view to a layout in the Resources folder.
Put this into app/src/main/res/layout/activity_main.xml .
This just creates a “Hello World!” message center-screen.
Now run gradlew build and you should see BUILD SUCCESSFUL again. Use gradlew installDebug to install to your phone and you should see the following:
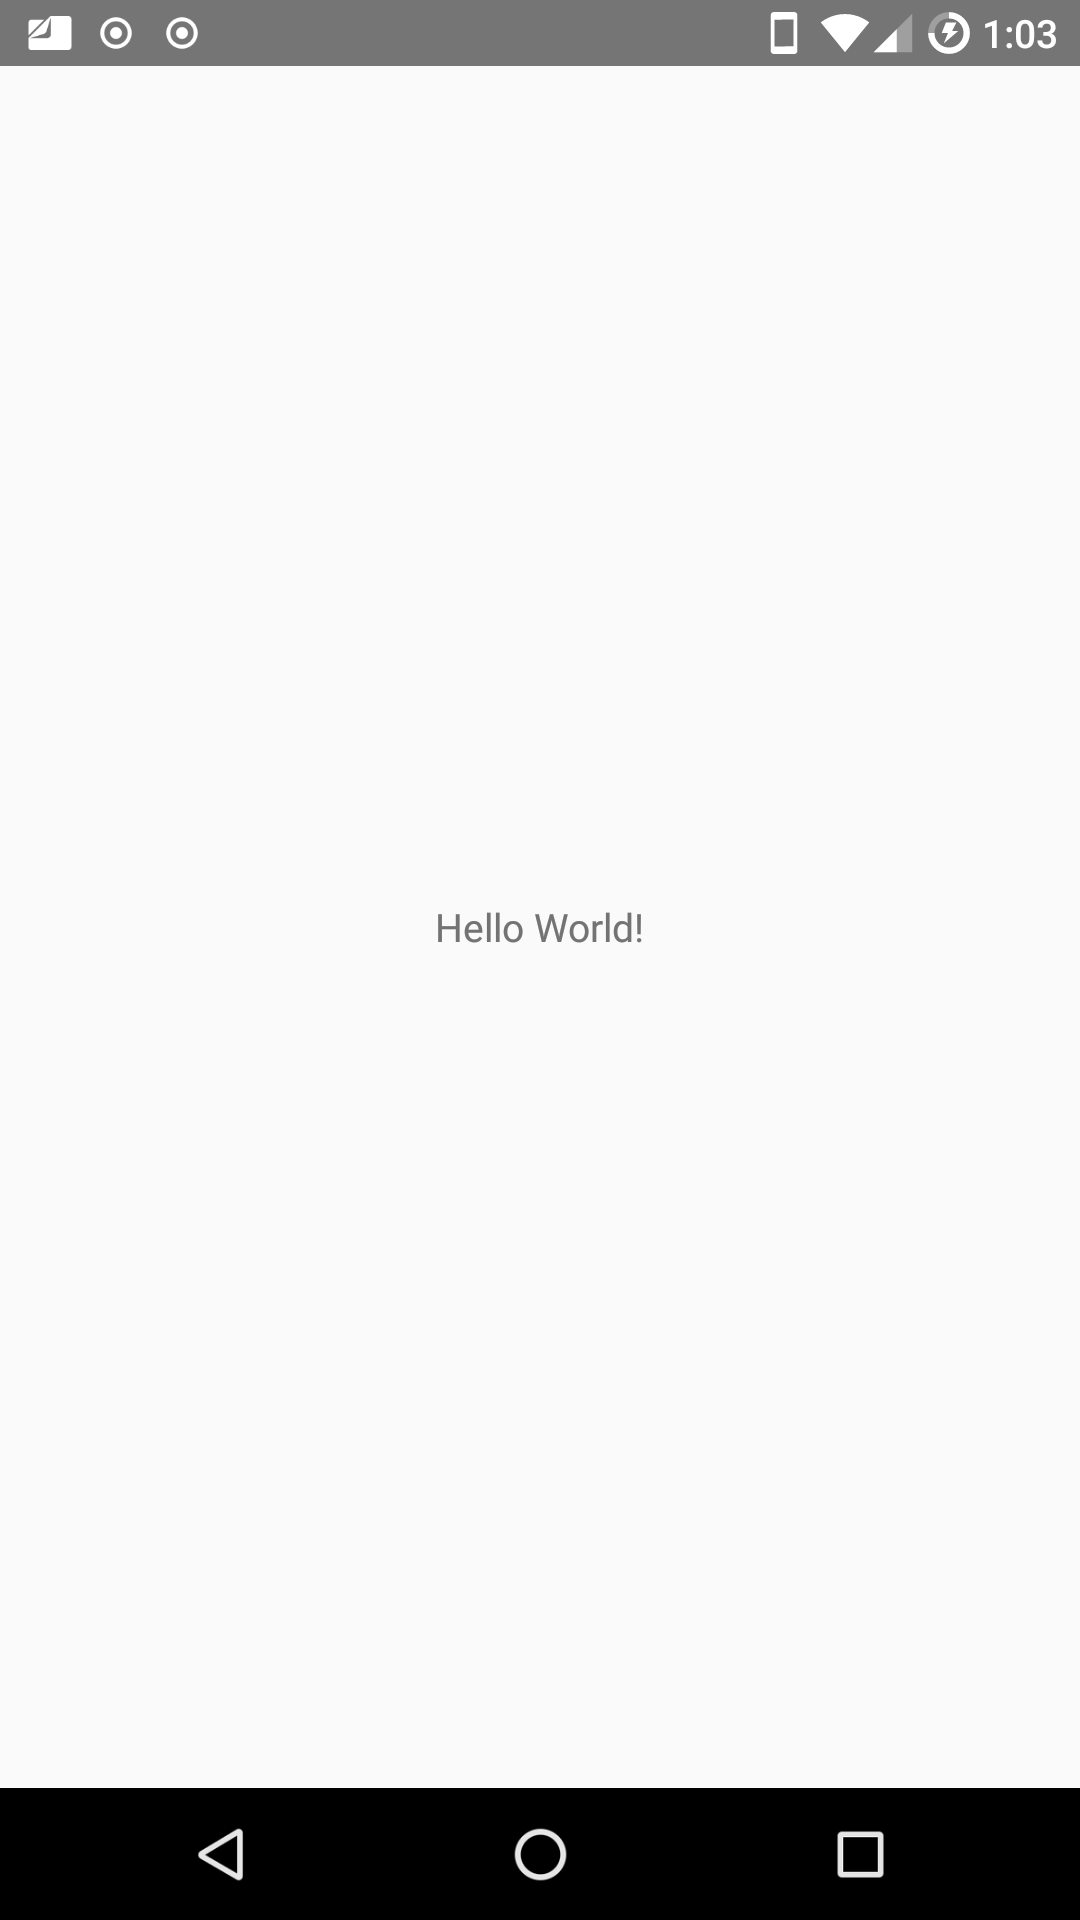
You’ve just made a working Android app with nothing but a text editor :).
Add Authentication with Okta
Most modern apps require some level of security, so it’s worthwhile to know how to build authentication simply and easily. For this, we’ll use the OktaAppAuth wrapper library.
Why Okta?
At Okta, our goal is to make identity management a lot easier, more secure, and more scalable than what you’re used to. Okta is a cloud service that allows developers to create, edit, and securely store user accounts and user account data, and connect them with one or multiple applications. Our API enables you to:
- Authenticate and authorize your users
- Store data about your users
- Perform password-based and social login
- Secure your application with multi-factor authentication
- And much more! Check out our product documentation
Are you sold? Register for a forever-free developer account, and when you’re done, come on back so we can learn more about building secure mobile apps!
Authentication in Java
Create a new Activity called LoginActivity.java and place it in the same folder as MainActivity.
This initializes the OktaAppAuth object and handles the Success or Failure conditions. Next, change AndroidManifest.xml to point to LoginActivity instead of MainActivity .
Now add the following to the defaultConfig section of app/build.config .
Finally, add the following to the same file’s dependencies:
That should build and deploy. You can use logcat to see what is happening in the background. Looking at the source code for the main library class we see the tag we need to use is “OktaAppAuth”.
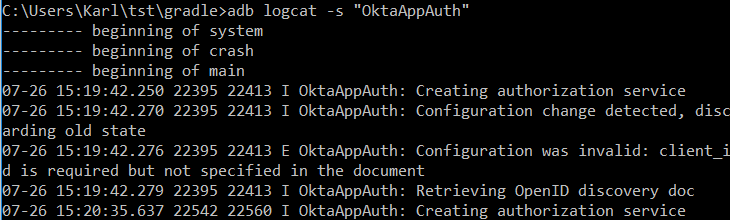
Right after trying to create the service we get a Configuration was invalid error. We need to connect our app to an Okta account.
Connect to Okta for Authentication
Since you already have an Okta developer account, you can move right on to configuration. From the developer console select the Applications tab and then New Application. Select Native and click next. The fields should auto-populate correctly. The most important part is the redirect URL. Click done.
On the Assignments tab, click the Assign dropdown and choose Assign to Groups. Click Assign next to the Everyone group. Now, anyone in your Okta organization will be able to authenticate to the application.
You now should have enough to populate app/src/main/res/raw/okta_app_auth_config.json .
Change the appAuthRedirectScheme field in app/build.gradle to the base of your redirect URI, e.g. «appAuthRedirectScheme»: «
Configuration should now be complete! If you gradlew installDebug and do the logcat as before you should no longer be seeing the error when you open the app, and should see a message saying Warming up browser instance for auth request .
Set Up Your Login Page
Let’s add a button and progress bar to our login page. Create app/src/main/res/layout/activity_login.xml.
Initially the button is hidden. We’ll show that (and hide the progress bar) once Okta has finished initializing. To do that put the following into the onSuccess() method in LoginActivity.java .
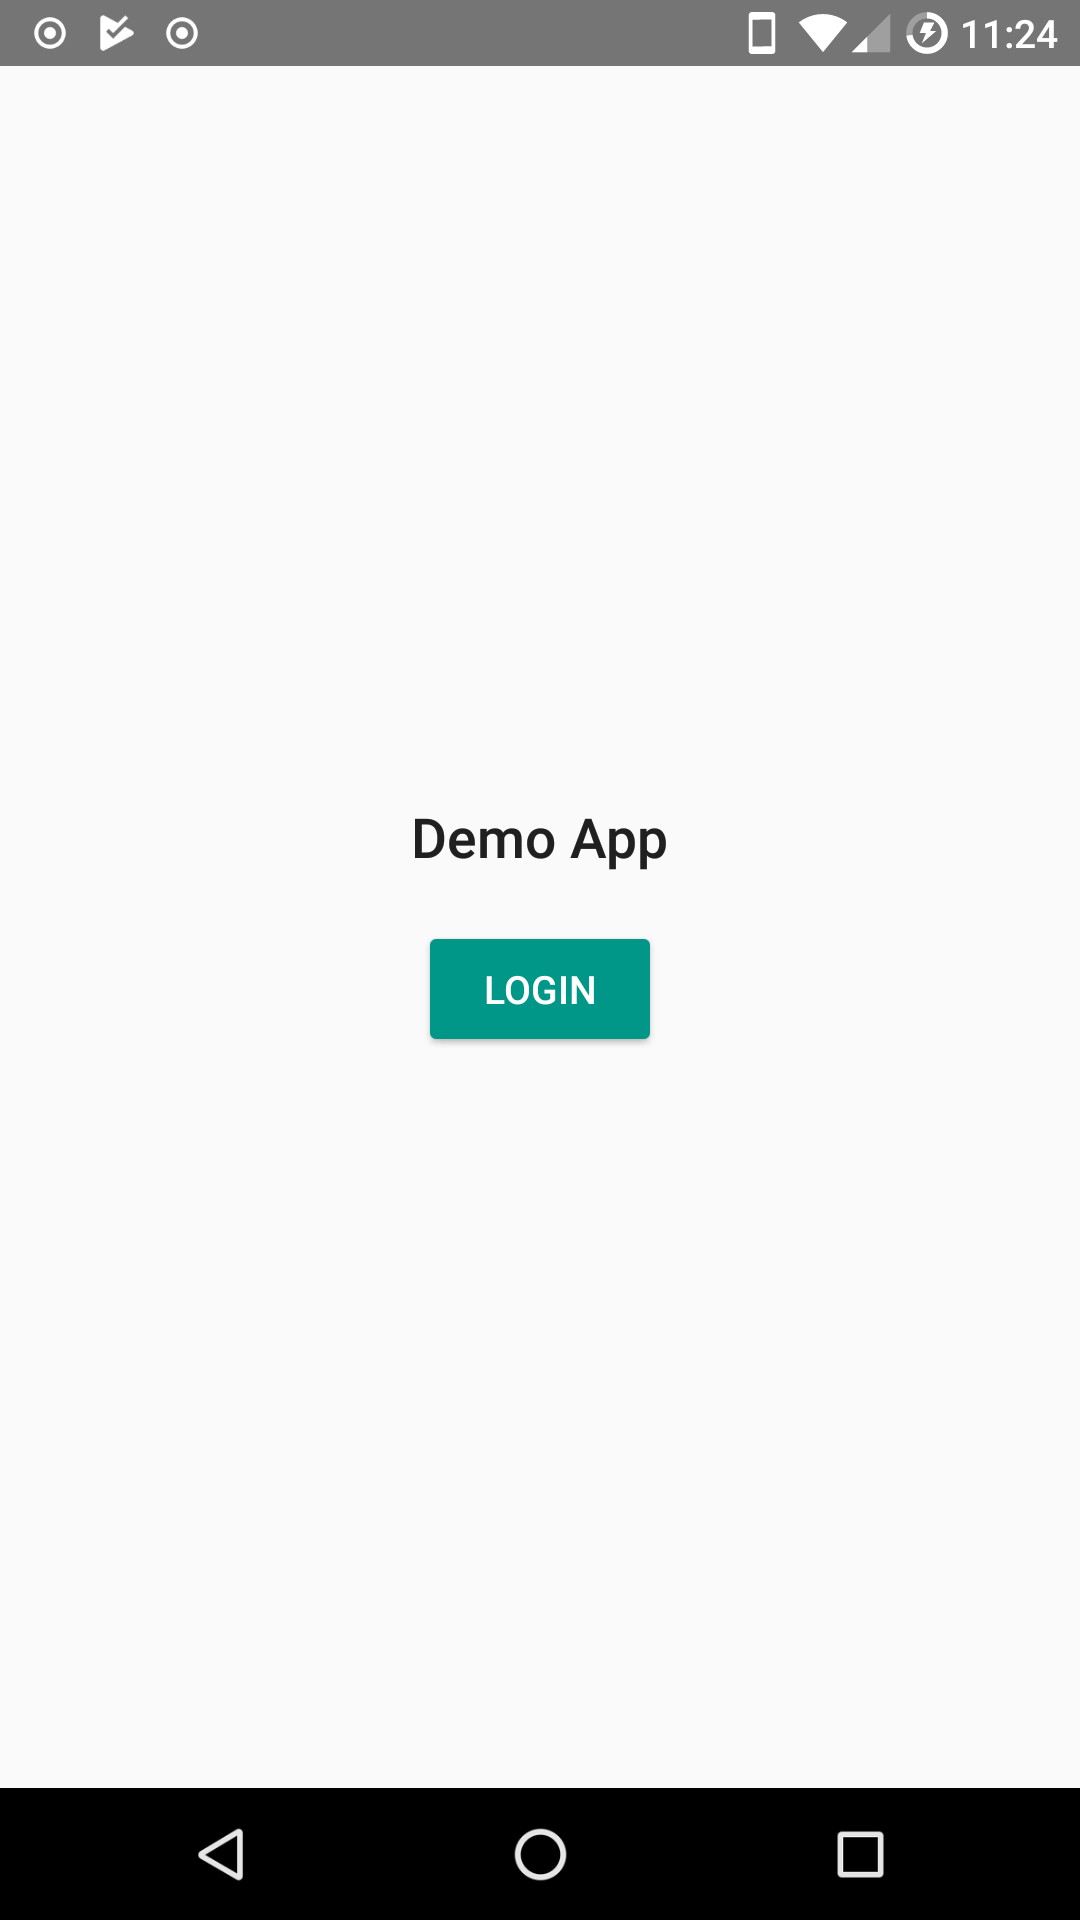
Lastly, before the Okta init set the layout to the XML we just created.
When you installDebug and run the app you should see a title with a login button.
Wire Up Login
To capture the login details, i.e. username/password, we can use a default page. First create the landing page for when we are authorized in AuthorizedActivity.java :
We attach a listener to the button logging us out and taking us back to the login page. Now in activity_authorized.xml put
As with the login page it’s just a title with a button. Wire up the login button in LoginActivity.java by placing the following at the end of the onCreate method.
Now when you click the Login button you should see an Okta login page asking for your details.
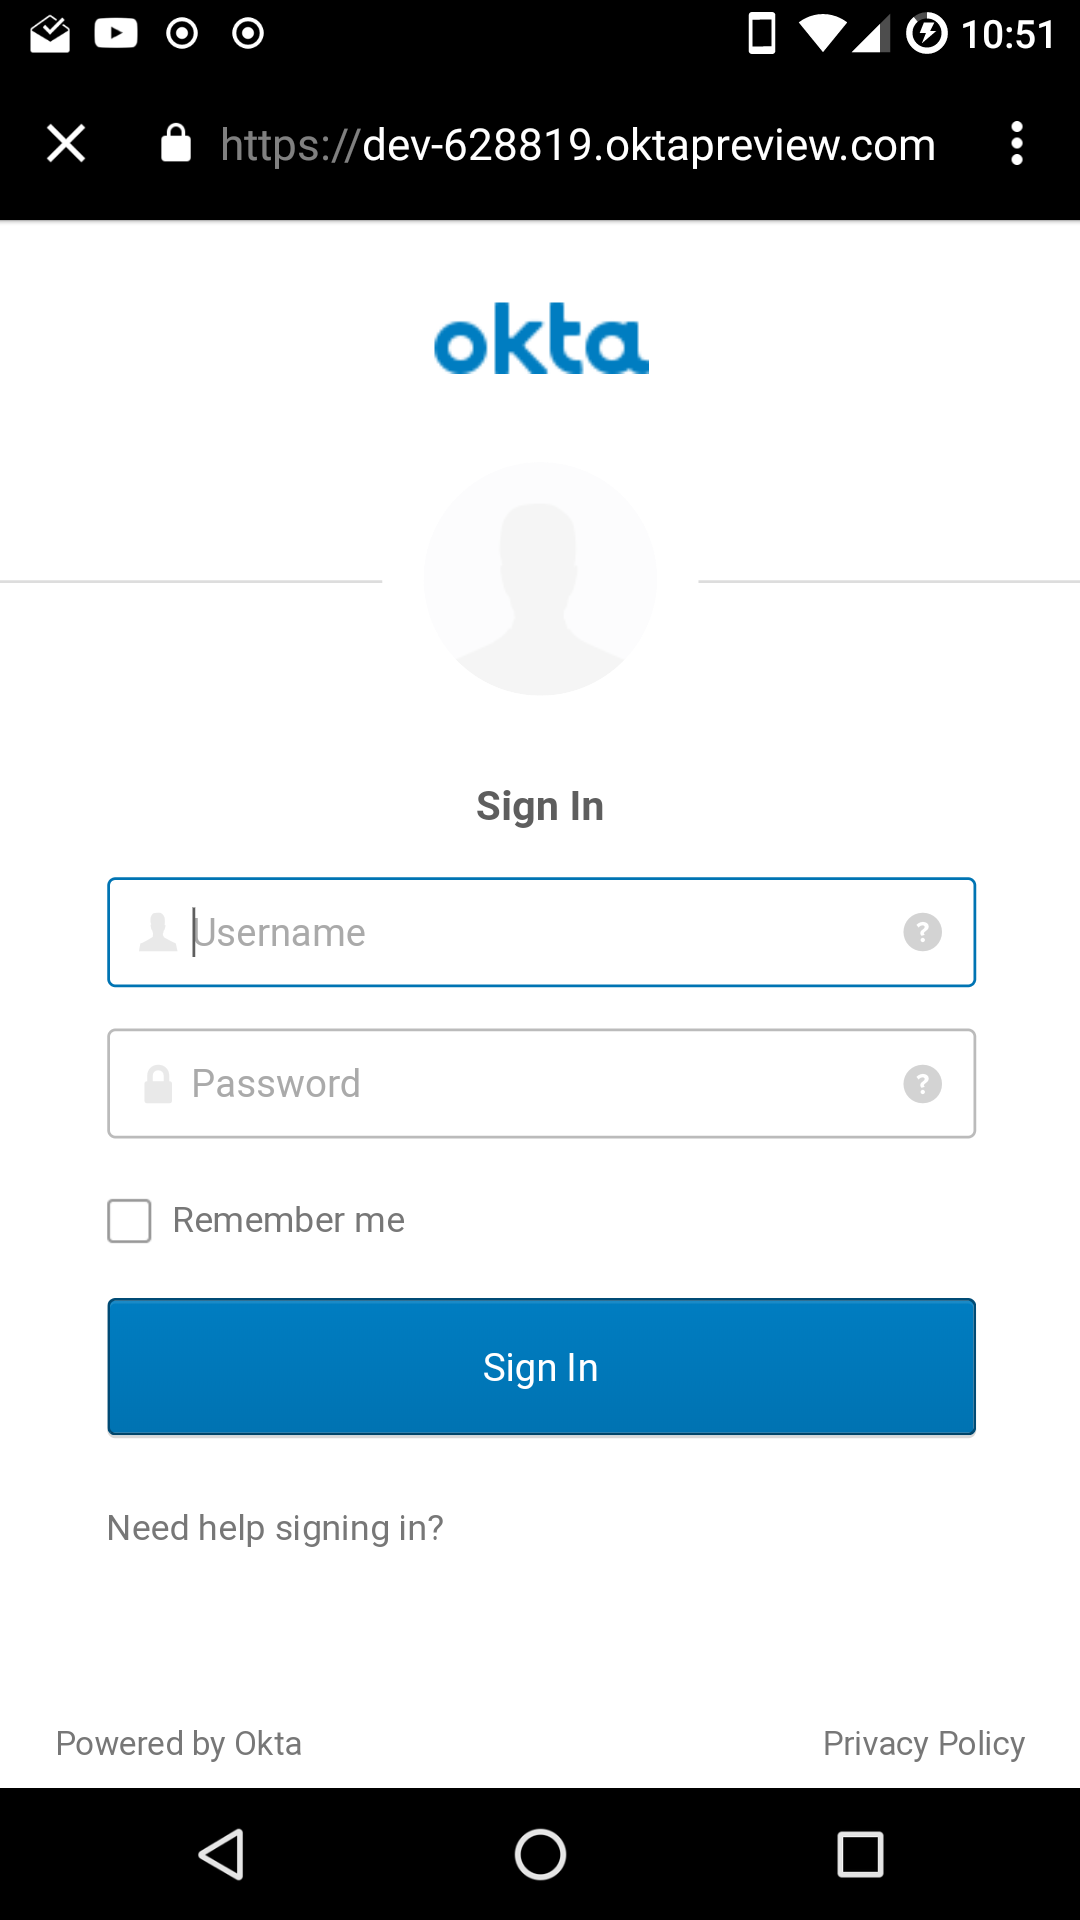
If you enter in user details which are correct for the Application we made previously (your Okta portal credentials should work) you are taken to an authorized page.

Clicking the logout button should take you back to our first screen.
And that’s it for authorization!
Most people think you need Android Studio to make an Android app. In this post, you shattered that notion and built an Android app from scratch. With some configuration and a little code, you integrated authentication into your app with the OktaAppAuth library. Then you created a view that only authenticated users can see. From here, you can build out the rest of your app safe in the knowledge that authentication is handled, thanks to Okta.
Learn More about Java and Secure App Development
I hope you’ve enjoyed this tutorial on how to build a basic Android app without an IDE. You can find the example created in this tutorial on GitHub at https://github.com/oktadeveloper/okta-android-example.
We’ve written some other cool Spring Boot and React tutorials, check them out if you’re interested.
If you have any questions, please don’t hesitate to leave a comment below, or ask us on our Okta Developer Forums. Follow us on Twitter @oktadev if you want to see more tutorials like this one!
Okta Developer Blog Comment Policy
We welcome relevant and respectful comments. Off-topic comments may be removed.
Источник


