- Building Android programs on the command line
- 1. Download Java
- 2. Download Android
- 3. Choose project name
- 4. Create development area
- 5. Create manifest
- 6. Select target platform
- 7. Define virtual device
- 8. Create keystore
- 9. Write code
- 10. Provide resources
- 11. Create R.java
- 12. Compile code
- 13. Create DEX file
- 14. Create APK file
- 15. Sign APK file
- 16. Zip-align APK file
- 17. Start emulator
- 18. Install in emulator
- 19. Install on device
- 20. Create documentation
- Building an Android App from the Command Line (4 January 2017)
- Table of Contents
- Installing the Development Tools
- The Hello World Program
- Building
- Running
- Using Native Code
Building Android programs on the command line
 Version 1.0, June 2011
Geotechnical Software Services
Copyright © 2011
This guideline shows how to build Android programs (apps) using a command line environment only.
Even though the Eclipse IDE (among others) can be a powerful development environment for Android programmers, there are several reasons why you could benefit from utilizing simple command line utilities and build scripts instead. Actually understanding what’s going on is one of them.
Using the stepwise approach outlined below might seem overwhelming, but there is a great educational value in performing these steps, and the information present is essential if you are setting up a build system based on make, SCons, Ant, or similar tools.
The setup below depends on a few environment variables identifying directory paths on the local system. The exact procedure for setting and accessing environment variables differs between operating systems and command shells. In the present guideline the simplest possible notation is being used. In practice these variables needs to be accessed using special notation like %JAVA_HOME%, $ or even "$
Color coding is used in the commands in order to easily indicate where local replacements needs to take place.
All commands are self-contained meaning that they can be executed from any directory.
1. Download Java
Default installation location will vary between Java versions and OS platforms, so create a pointer to its location:
| JAVA_HOME = C:/Program Files/Java/jdk1.6.0_26 |
2. Download Android
The Android Software Development Kit (Android SDK) is available from Google at http://developer.android.com/sdk.
Default installation location will vary between Android versions and OS platforms, so create a pointer to its location:
| ANDROID_HOME = C:/Program Files/Android/android-sdk |
The download includes the core parts of Android. In addition you need SDK(s) for the specific Android platforms you will develop for and test on. Launch the SDK manager GUI, select Available packages and open the Android Repository:
| ANDROID_HOME/tools/android |
Select the required platform/tool packages (all is fine) and hit the Install Selected button. After installation, the platform/ and platform-tools/ directories of ANDROID_HOME should have been populated.
3. Choose project name
At some disk location create a project directory that will hold the code, libraries and other files that constitutes the Android project. Create a pointer to this location:
| DEV_HOME = C:/Users/johnd/dev/ AndroidTest |
The project name in this context is simply a convenience in order to consistently name directories and files related to the application being created.
In the example AndroidTest is used as the project name. The term has been emphasized below so that it can be easily replaced.
4. Create development area
Beneath the project directory create sub directories as follows:
The src/ directory will hold java code and other source files in a package structure common for java projects. Using the reverse domain name system (Reverse DNS) for package names is optional but recommended.
The res/ directory will hold user provided resources like text strings, images, menues, layouts etc. The res/ sub directories have predefined names according to the Android resource documentation.
The obj/ directory will contain .class files and other secondary files produced by the Java tools as explained below.
The lib/ directory should hold 3rd-party .jar files the project depends on.
The bin/ directory will hold intermediate and final executables produced by the Android tools.
The docs/ directory will hold javadoc HTML documents for the project. If generated, the docs/index.html file will be the entry point.
5. Create manifest
The Android manifest file is used to specify application settings like name and version, as well as what permissions the application requires to run and what components it is comprised of. The file contains a single application tag inside the root manifest tag.
Put the manifest file in the project root directory: DEV_HOME/AndroidManifest.xml. Note that the file must be called AndroidManifest.xml and nothing else.
A typical manifest file is shown below:
The package attribute identifies the application and is also the destination location of the generated R.java file (see below). versionCode is a numeric version value for managing application updates. versionName is the application version in a human readable form.
The application tag contains the activities of the program, one of which should contain the main launcher activity as shown.
6. Select target platform
The different Android OS versions are known through target names like android-3, android-4, android-5 etc. All available platforms can be listed by the following command:
| ANDROID_HOME/tools/android list target |
For the examples below we use android-7 (Android OS 2.1) consistently. Replace this with a different target as required.
7. Define virtual device
An Android Virtual Device (AVD) defines the main characteristics of the target Android device. AVDs are used only when testing an Android program in the Android emulator. The typical approach is to define several AVDs in order to verify that a program behave correct across hardware platforms and OS versions.
Use the android tool to create AVDs:
This will create an AVD with the specified name and with a 1 GB memory card disk image. When the command is executed you are asked if you want to specify a custom hardware profile. By this the AVD can be tailored to a specific hardware device by identifying properties for features like screen, camera, memory, battery, audio, accelerometer, wi-fi, bluetooth, GPS, keyboard and so on.
If no longer needed, an AVD can be deleted as follows:
The actual AVD profiles are stored within the HOME/.android/avd/ directory.
8. Create keystore
A keystore is a database of private keys and their associated X.509 certificate chains authenticating the corresponding public keys. An Android program must be signed in order to execute on a device, and the program is signed by using a key from a keystore.
Use the keytool program to create a keystore:
Replace the distinguished name (dname) information with your own. Make sure to specify passwords as indicated. The key is accessed through the specified alias which can be any string.
The output of the command will be the DEV_HOME/ AndroidTest .keystore file which contains one key identified by the supplied alias.
9. Write code
Define a suitable package structure and put the Java code within the src/ tree of the project area.
The following minimal class can serve as an example. It should be located in DEV_HOME/src/ com/mycompany/package1/HelloAndroid .java:
The Android API documentation contains a complete reference to the Android packages and classes, including the ones provided by the Java SE.
10. Provide resources
Android programmers are advised to keep all non-logic data (text strings, images, animations, colors, layouts etc.) within the designated res/ directory of the project area. The res/ directory consists of a predefined set of sub directories with a naming structure that will simplify application localization and adoption to different hardware types.
The following minimal text resource can serve as an example. It should be located in DEV_HOME/res/values/strings.xml:
The manifest file refers to the myApplicationName entry, while the java class above refers to the helloText entry. The example manifest file above also refers to the drawable resource mylogo which is the icon image for the program. Put an image file in the res/ directory to serve this purpose: DEV_HOME/res/drawable/ mylogo .png.
11. Create R.java
In order for the application source code to be able to access the resources within the res/ directory, a class called R.java (for Resources) is created.
The destination location of R.java within the src/ tree is determined by the package attribute of the manifest file.
12. Compile code
Use the javac tool to compile java source code in a package:
The command must be applied for each existing package. 3rd-party .jar files from the lib/ directory must be listed in the -classpath entry. Note that on UNIX-like operating systems the classpath entry delimiter should be a colon («:»).
The output of the command is .class files in the obj/ tree.
Non-java files within the src/ tree must be copied to the associated location in the obj/ tree.
13. Create DEX file
DEX («Dalvik Executable») is the specific bytecode format understood by the Dalvik virtual machine (VM) present in all Android devices.
Use the dx tool to bundle the content of the obj/ directory as well as 3rd-party .jar files from the lib/ directory into a single .dex file:
This will create the classes.dex file in the bin/ directory. The content of a .dex file can be inspected using the ANDROID_HOME/platform-tools/dexdump tool.
14. Create APK file
The Android package format (APK) is the .jar equivalent for Android. The package contains the manifest file, the resources and the classes.dex file.
Use the aapt tool to create the .apk file:
This will create the AndroidTest .unsigned.apk file in the bin/ directory. Note that APK is an ordinary archive format that can be inspected by tools like WinZip or unzip -l.
15. Sign APK file
In order to execute on an Android device, the Android package needs to be signed.
Use the jarsigner tool and the key from the keystore created above to create a signed version of the package:
The signing process adds the META-INF/ directory to the APK archive including the signature (.SF) file and the associated PKSC file (.RSA).
The signed APK is stored as AndroidTest .signed.apk file in the bin/ directory.
16. Zip-align APK file
zipalign is an archive alignment tool that provides important optimization to Android packages. This step is optional, but recommended:
This will create the AndroidTest .apk which is the final product delivered in one self-contained unit.
17. Start emulator
In order to test the application, start the Android emulator and specify the virtual device (AVD) to use:
This will launch the emulator GUI. The wipe-data option ensures the emulator starts up clean. The initialization process may take some time, so don’t proceed until the emulator is ready.
18. Install in emulator
When the emulator is ready, use the Android Debug Bridge (adb) tool to install the Android package in the running emulator:
The program should eventually show up in the emulator and can be executed by selecting it.
The application can be uninstalled as follows:
Note that inside the emulator or device the APK is stored using its main package name (from the package attribute of the manifest file) with an .apk extension.
19. Install on device
Attach the Android device to the computer and install the program using the adb command:
The program should be ready for execution on the target device.
20. Create documentation
7Every well managed project should have up-to-date documentation available at any time. This step is of course optional, but strongly recommended.
Use the javadoc tool to create HTML documentation as follows:
Source from additional packages should be added to the last argument using «:» or «;» as delimiter (depending on platform).
Источник
Building an Android App
from the Command Line
(4 January 2017)
I have been learning a bit of Android programming recently (late to the party, I know). One thing that frustrated me was figuring out how to actually build an Android program.
Things are simple enough with C. As explained in the first section of K&R, one might write this as a first program:
and turn it into an executable by simply invoking the system compiler as below.
This diagram illustrates the full process:

For Android, however, the official way to write Hello World is to fire up Android Studio, use its wizard to create a new project, and the application will then be generated and built automagically in a few minutes.
This is of course intended as a convenience for the developer, but for someone who wants to know what’s going on, it makes things difficult instead. What actually happened? Which of all these files are really necessary for Hello World?
Others have expressed similar concerns:
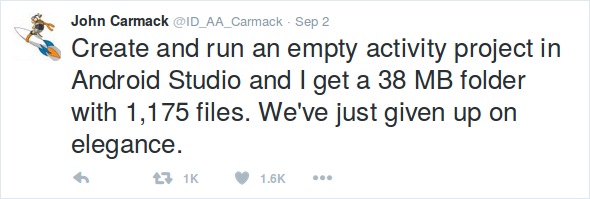
(For me, it generated a 50 MB directory containing 1,348 files spread across 630 subdirectories.)
Perhaps it is the control freak in me speaking (a good trait for programmers about their programs), but I simply don’t feel comfortable not understanding how to build my own program.
Below are my notes on how to build an Android application by hand from the command line. The instructions are for Linux, but they should be easy to adapt to Mac or Windows. The full source code and a build script is available in command_line_android.tar.gz .
Table of Contents
Installing the Development Tools
Android applications are usually written in Java, so building them requires having a Java Development Kit (JDK) installed. The current version of the Android tools require Java 8, which I downloaded from here, extracted and put on my PATH like so:
Android specific tools are provided in the Android Software Development Kit (SDK). Normally, this is installed when installing Android Studio, but we can also do it ourselves (see the «Get just the command line tools» section on the Android Studio download page):
Unfortunately, that file doesn’t contain everything we need, as explained in SDK Readme.txt :
What we need is build-tools (for aapt , dx and apksigner ), an Android Platform to target (I will use version 16) and platform-tools (for adb ).
Instead of using the SDK Manager as suggested above, we can install those directly ourselves (the filenames were found in repository-11.xml):
The Hello World Program
Our Hello World program consists of three files: an application manifest, a layout and an Activity.
The app manifest is shown below ( AndroidManifest.xml ). It specifies the name of the app, which Android API it targets, etc. The intent-filter element sets up MainActivity as the main entry point of the program.
Below is the layout file ( res/layout/activity_main.xml ). It defines UI elements to be used in our program.
Finally, the Activity is implemented like this: ( java/net/hanshq/hello/MainActivity.java )
Building
We will use shell variables to more conveniently refer to the SDK we installed before. All build artifacts will be put in subdirectories of the build directory which we create here.
The first build step is to generate the R.java file, which is used for referring to resources (such as R.id.my_text above). This is done using the Android Asset Packaging Tool, aapt :
which creates build/gen/net/hanshq/hello/R.java .
The -f flag causes aapt to overwrite any existing output file, -m causes it to create package directories under the output directory, and -J makes it generate the R.java file and sets the output directory. -S points out the resource directory, -M specifies the manifest, and -I adds the platform .jar as an «include file».
Now that all the Java code is ready, we can compile it using javac :
(The 1.7 and -bootclasspath ure used to emit Java 7 byte code, which the Android tools expect, despite using JDK version 8.)
The Java compiler created .class files containing byte code for the Java Virtual Machine. That then has to be translated to Dalvik byte code using the dx tool:
(There is a new set of Android tools, Jack and Jill, that compile Java code directly into Dalvik bytecode. Maybe that will become the way to do things in the future.)
We then package the contents of the build/apk/ directory together with the manifest and resources into an Android Application Package (APK) file, again using the aapt tool:
The application has now been built, but the APK file needs to be signed before any device will allow running it, even in debug mode, and zipaligned if we ever want to publish it in the Play Store.
First, we run the zipalign tool, which aligns uncompressed files in the APK on 4-byte boundaries for easier memory mapping:
Then we use the Java keytool to create a key store and key for signing:
(you may want to put in more proper values of course.)
and use that key to sign our application with apksigner :
Et voilГ , we have successfully built an Android application by hand from the command line! The diagram below illustrates the whole process.

(We skipped some common steps that aren’t strictly necessary: linting and ProGuard.)
Running
We can install our freshly built APK on a device (which must have USB debugging enabled) using the Android Debug Bridge:
and run it, either by starting it manually from the Launcher, or with adb :
Using Native Code
While Android applications are usually written in Java, they can also contain native code, that is, machine code to be run directly by the device’s processor. This is useful for performance, as it removes the overhead from running Java code, and for portability, as it opens the platform to code written in other languages.
Adding native code to our program makes it a little harder to build, but it turns out not to be too bad.
The Android Native Development Kit (NDK) provides compilers and libraries for building C and C++ code for Android. It can be installed like this:
We set more shell variables to point at the specific toolchains we’ll use: (if you’re not using Linux, you’ll want one of the other prebuilt directories)
We will update our Activity to use the Java Native Interface (see also Android JNI Tips) for a new method, getMessage() , and use that method to set the text of the TextView . The native method will be implemented by a library called hello , which we load with System.loadLibrary in a static initializer block:
The hello library must provide a native implementation of the getMessage method. To figure out what C function signature corresponds to the Java method, we use the javah tool:
We implement it like this, in hello.c :
The C file is compiled into the shared library libhello.so (note the extra lib prefix). We build one for ARMv7 and one for X86, to support most devices and emulators, and put them under the APK’s lib/ directory:
(See the ABI Management doc for which ABIs can be targeted with the NDK, and under which lib/ directory to put the .so file. The ARM compiler flags were inspired by $
To build the APK, we repeat the build steps from above ( aapt all the way to apksigner ). The contents of the APK can be inspected with the jar tool:
The file should contain the manifest, the Java classes converted to DEX format, our two native .so files, Application resources in raw ( activity_main.xml ) and binary ( resources.arsc ) form. The META-INF directory contains the JAR file manifest and cryptographic signatures.
When run, the application looks like this:

For a larger example, see the Othello project.
Источник


