- Building your first app bundle
- Android App Bundle is the new and official publishing format for Android applications.
- Building on the command line
- Building in Android Studio
- Uploading through the Play Console
- Exploring your Android App Bundle
- Download the app bundle and install locally
- Disabling optimizations
- My First App: How to Create Your First Android App Step by Step
- Prerequisites
- 1. Create a New Project
- 2. Create an Activity
- 3. Create a Layout
- 4. Implement Event Handlers
- Conclusion
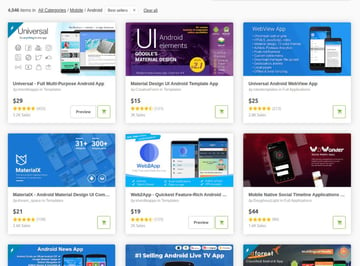
- Android App Templates and UI Kits From CodeCanyon
Building your first app bundle
Android App Bundle is the new and official publishing format for Android applications.

This article is available as a video and linked at the end of the post.
With the Android App Bundle we created a format that unlocks, amongst other things, shipping smaller apps to your users. Smaller apps are more likely to be installed and less likely to be uninstalled when disk space gets tight.
In this post we’ll take a closer look at how to build your first app bundle, how you can upload it using the Play Console and dive into some configuration options.
Getting started doesn’t require any changes to your existing codebase.
All you’ll need to do is create an Android App Bundle, using the command line or Android Studio.
Building on the command line
On the command line, you’ll run one of the bundle tasks like this:
Then locate the bundle in your application’s build directory. The default location is app/build/outputs/bundle/release .
This bundle needs to be signed. When using jarsigner , this is how you sign the bundle:
Once the variables are replaced with actual values and the keystore password is entered, the bundle will be signed and ready for upload.
Building in Android Studio
In Android Studio, select “Build => Generate Signed Bundle / APK” and follow the dialog.
Whether you use the command line or Android Studio, the process will leave you with a built and signed release bundle that’s ready for upload to the Play Store.
Uploading through the Play Console
To upload your app bundle to the Play Store, create a new release on a chosen release track. You can drag and drop the bundle into the “App bundles and APKs” section or use the Google Play Developer API.
Once the Bundle is uploaded, the Play Store can optimize the APKs it delivers to users’ devices based on their configuration. This in turn reduces download and installation size.
Exploring your Android App Bundle
To take a look at how the Play Store ships your app to a user’s device, you can click on the “Details” button at the end of the bundle’s row.
In the details screen you already see a lot of information on your app bundle such as version code, minSdk level, target SDK, required features, permissions, screen layouts, localizations and much more.
And you also can download signed APKs for your app, to see exactly what the Play Store delivers to a specific device. To navigate there, click on “Explore Bundle” and then open the “Downloads” tab.
You can either select a specific device or apply one or more of the many filters from the “Add filter” tab.
Download the app bundle and install locally
In the app bundle explorer, at the end of your screen, there is a “Download” button which provides a zip file, containing several APK, which are tailored to the specific device in question.
After you download and unzip the file, the containing APK can be installed on a local emulator or device by using `adb install — multiple *.apk` from the containing directory.
While each apk in this set is relevant to guarantee correct execution of your app, I want to point out that the base.apk always has to be installed on a device in order to provide your app’s core functionality. Next to code and resources the base module also contains the merged AndroidManifest and shared dependencies for the entire application.
Each feature module or configuration split provides its own resources and can contain code, but the base module is what ties it all together.
Disabling optimizations
You can disable the optimization in each module’s build.gradle file. All you have to do is edit the language , density or abi property and set enableSplit to false . This will tell the build system that it should not optimize this specific dimension.
Unless you have a good reason to, I recommend not touching this section as setting enableSplit to false can dramatically increase the on-device installation size of your app.
There could be exceptions, such as when your app has its own language selector built in and you want to have all potential languages available for selection at all times. But even then, using the Android App Bundle provides you with ways to load features on demand instead. This could be used to avoid to pre-install parts of your app that only a subset of users might need.
And since we enable you to download and install features in a programmatic way, we provide an unbundled API that you can use. It is part of the PlayCore library and is covered as part of the next post and this video in our Modern Android Development Skills series.
Источник
My First App: How to Create Your First Android App Step by Step
To create a native Android app, one that can directly use all the features and functionality available on an Android phone or tablet, you need to use the Android platform’s Java API framework. This is the API that allows you to perform common tasks such as drawing text, shapes, and colors on the screen, playing sounds or videos, and interacting with a device’s hardware sensors. Over the years, the Android API framework has evolved to become more stable, intuitive, and concise. As a result, being an Android developer today is easier than ever—even more so if you use Android Studio, the official tool for working with the framework.
In this tutorial, I’ll show you how to create your first Android app. While doing so, I’ll also introduce you to important Android-specific concepts such as views, layouts, and activities.
We’ll be starting from scratch to create a very simple app in this tutorial. If you prefer writing less code or need to develop your app as quickly as possible, however, consider using one of the native Android app templates available on CodeCanyon.


Using an app template, you can have a polished, ready-to-publish app in just a matter of hours. You can learn how to use an Android app template by referring to the following tutorial:


Prerequisites
To be able to follow along, you’ll need:
- the latest version of Android Studio
- a device or emulator running Android Marshmallow or higher
If you don’t have Android Studio, do refer to the following tutorial to learn how to install and configure it:


1. Create a New Project
You’ll need an Android Studio project to design, develop, and build your app. So launch Android Studio and click on the Start a new Android Studio project button.
On the next screen, choose Add No Activity because we don’t want to use any of the templates offered by Android Studio. Then press Next to proceed.


You’ll now see a form where you can enter important details about your app, such as its name and package name. The name is, of course, the name your users will see on their phones when they install your app.
The package name, on the other hand, is a unique identifier for your app on Google Play. You must follow the Java package naming conventions while specifying it. For example, if your app’s name is MyFirstApp and you work for an organization whose website address is example.com, the package name would ideally be «com.example.myfirstapp».
Next, you must decide the programming language you want to use while coding the app. For now, select Java and press Finish.


Android Studio will now take a minute or two to generate and configure the project.
2. Create an Activity
An activity is one of the most important components of an Android app. It is what allows you to create and display a user interface to your users. An app can have one or more activities, each allowing the user to perform an action. For example, an email client app can have three activities: one for the user to sign up, one to sign in, and one to compose an email.
To keep this tutorial simple, we’ll be creating an app with just one activity. To create the activity, in the Project panel of Android Studio, right-click on app and select New > Activity > Empty Activity.
In the dialog that pops up, type in MainActivity as the name of the activity, check the Launcher Activity option, and press Finish.
Checking the Launcher Activity option is important because it is what allows your users to open the activity using an Android launcher. As such, a launcher activity serves as an entry point to your app.


3. Create a Layout
Each activity usually has at least one layout associated with it. When you created your activity in the previous step, you also generated an empty layout for it. To take a look at it, open the activity_main.xml file.
An activity’s layout primarily consists of views and view groups. A view, sometimes referred to as a widget, is an individual component of your user interface. Buttons, text fields, labels, and progress bars are common examples of views. A view group is a component that can serve as a container for views. Usually, view groups also help you position and set the dimensions of your views.
ConstraintLayout is one of the most powerful and flexible view groups available today. By default, it is the root node of your activity’s layout XML file. It looks like this:
We’ll be creating a simple clock app in this tutorial. In addition to the local time, it will be able to show the current time in two different countries: India and Germany.
To allow the user to choose the country they’re interested in, our layout will have two Button views, one for Germany, and one for India. And to actually show the time, our layout will have a TextClock view.
Accordingly, add the following code inside the ConstraintLayout :
Note that each view must have the layout_width and layout_height properties. They decide how large the view is. Other properties such as layout_constraintBottom_toBottomOf and layout_constraintLeft_toLeftOf are necessary to position the view. With the above code, the TextClock view will be placed at the center of the screen, and both the Button views towards the bottom of the screen.
By default, the TextClock view only shows the hours and minutes. The format12Hour property, however, allows you to change that. In the above code, its value is set to h:mm:ss a . This tells the TextClock view that it should display the hours, minutes, seconds, and also an AM/PM suffix.
Also note that each Button view has an onClick property. This property is used to assign click event handlers to the buttons.
The handlers don’t exist yet, but you can ask Android Studio to generate them for you. To do so, hover over the name of the handler until you see a red light bulb appear beside it. Then click on the light bulb and select the second option, the one with the yellow light bulb.


At this point, you can try pressing Shift-F10 to run the app. If there are no errors in your XML code, you should see something like this on your phone or emulator:


Although the buttons don’t work yet, the TextClock view should show the local time, updating itself every second.
4. Implement Event Handlers
When you generated event handlers for the two buttons, Android Studio added two methods to your activity’s Java file, MainActivity.java. If you open it, you should find the following code in it:
Inside the event handlers, all we need to do is change the time zone of the TextClock view. But how do you reference a view that’s in your layout XML file from inside your Java file? Well, you just use the findViewById() method.
Once you have a reference to the TextClock view, you can call its setTimeZone() method to change its time zone. So add the following code inside the onClickGermany() method:
Similarly, add the following code inside the onClickIndia() method:
If you’re wondering what R is, it’s an auto-generated class that contains, among other things, the IDs of all the views you have in your layouts. The findViewById() method expects you to use this class while passing an ID to it.
At this point, you can press Shift-F10 again to re-run the app. You should now be able to click on the buttons to change the clock’s time zone.
Conclusion
You just created your first fully functional, native app for Android! I encourage you to make a few changes to it. For instance, you could try using other time formats or time zones. You could also try changing the positions of the buttons and the clock view.
There are dozens of views and view groups you can use to create your apps. Do refer to the official documentation to learn about them.
Android App Templates and UI Kits From CodeCanyon
You may have noticed that our app looks very plain and simple. That’s because we’re using the default theme, without applying any styles to our views. CodeCanyon is full of Android UI kits that offer beautiful, hand-crafted styles you can apply to your views.
The kits generally also have several custom views and layouts. You can refer to the following articles to learn more about them:
Источник


