- My First App: How to Create Your First Android App Step by Step
- Prerequisites
- 1. Create a New Project
- 2. Create an Activity
- 3. Create a Layout
- 4. Implement Event Handlers
- Conclusion
- Android App Templates and UI Kits From CodeCanyon
- Build Your First Android App in Java
- 1. Welcome!
- What you must know already
- What you’ll learn
- Use Android Studio and Java to write Android apps
- Note: This version of the codelab requires Android Studio 3.6 or higher.
- 2. Install Android Studio
- Note: This version of the codelab requires Android Studio 3.6 or higher.
- 3. Task: Create your first project
- What you’ll learn
- Step 1: Create a new project
- Step 2: Get your screen set up
- Step 3: Explore the project structure and layout
- Step 4: Create a virtual device (emulator)
- Step 5: Run your app on your new emulator
My First App: How to Create Your First Android App Step by Step
To create a native Android app, one that can directly use all the features and functionality available on an Android phone or tablet, you need to use the Android platform’s Java API framework. This is the API that allows you to perform common tasks such as drawing text, shapes, and colors on the screen, playing sounds or videos, and interacting with a device’s hardware sensors. Over the years, the Android API framework has evolved to become more stable, intuitive, and concise. As a result, being an Android developer today is easier than ever—even more so if you use Android Studio, the official tool for working with the framework.
In this tutorial, I’ll show you how to create your first Android app. While doing so, I’ll also introduce you to important Android-specific concepts such as views, layouts, and activities.
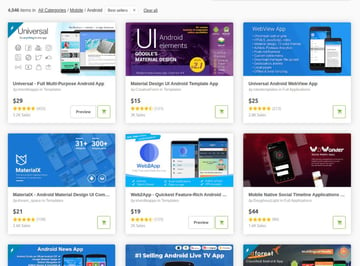
We’ll be starting from scratch to create a very simple app in this tutorial. If you prefer writing less code or need to develop your app as quickly as possible, however, consider using one of the native Android app templates available on CodeCanyon.


Using an app template, you can have a polished, ready-to-publish app in just a matter of hours. You can learn how to use an Android app template by referring to the following tutorial:


Prerequisites
To be able to follow along, you’ll need:
- the latest version of Android Studio
- a device or emulator running Android Marshmallow or higher
If you don’t have Android Studio, do refer to the following tutorial to learn how to install and configure it:


1. Create a New Project
You’ll need an Android Studio project to design, develop, and build your app. So launch Android Studio and click on the Start a new Android Studio project button.
On the next screen, choose Add No Activity because we don’t want to use any of the templates offered by Android Studio. Then press Next to proceed.


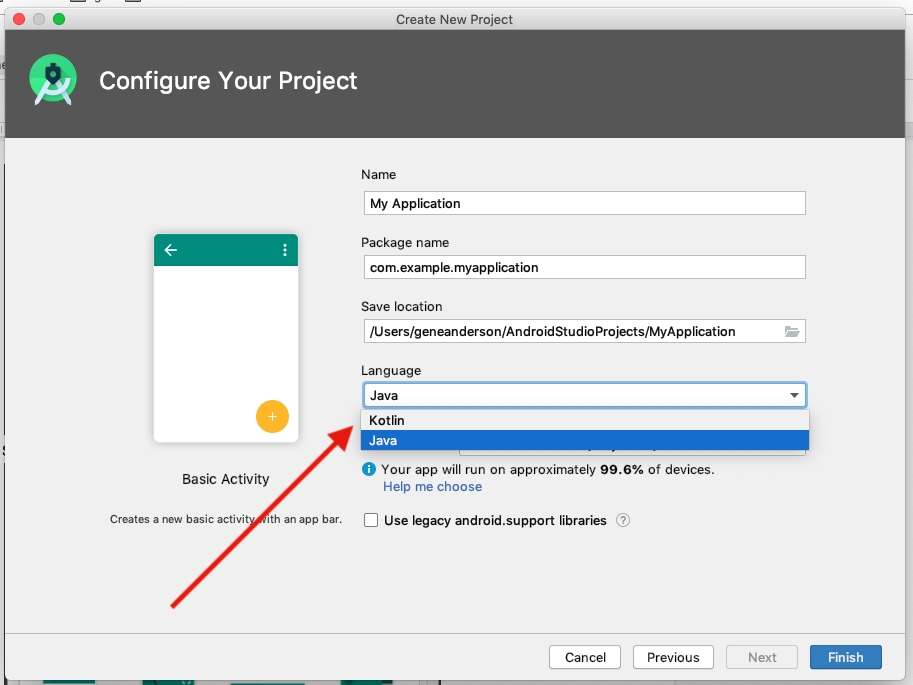
You’ll now see a form where you can enter important details about your app, such as its name and package name. The name is, of course, the name your users will see on their phones when they install your app.
The package name, on the other hand, is a unique identifier for your app on Google Play. You must follow the Java package naming conventions while specifying it. For example, if your app’s name is MyFirstApp and you work for an organization whose website address is example.com, the package name would ideally be «com.example.myfirstapp».
Next, you must decide the programming language you want to use while coding the app. For now, select Java and press Finish.


Android Studio will now take a minute or two to generate and configure the project.
2. Create an Activity
An activity is one of the most important components of an Android app. It is what allows you to create and display a user interface to your users. An app can have one or more activities, each allowing the user to perform an action. For example, an email client app can have three activities: one for the user to sign up, one to sign in, and one to compose an email.
To keep this tutorial simple, we’ll be creating an app with just one activity. To create the activity, in the Project panel of Android Studio, right-click on app and select New > Activity > Empty Activity.
In the dialog that pops up, type in MainActivity as the name of the activity, check the Launcher Activity option, and press Finish.
Checking the Launcher Activity option is important because it is what allows your users to open the activity using an Android launcher. As such, a launcher activity serves as an entry point to your app.


3. Create a Layout
Each activity usually has at least one layout associated with it. When you created your activity in the previous step, you also generated an empty layout for it. To take a look at it, open the activity_main.xml file.
An activity’s layout primarily consists of views and view groups. A view, sometimes referred to as a widget, is an individual component of your user interface. Buttons, text fields, labels, and progress bars are common examples of views. A view group is a component that can serve as a container for views. Usually, view groups also help you position and set the dimensions of your views.
ConstraintLayout is one of the most powerful and flexible view groups available today. By default, it is the root node of your activity’s layout XML file. It looks like this:
We’ll be creating a simple clock app in this tutorial. In addition to the local time, it will be able to show the current time in two different countries: India and Germany.
To allow the user to choose the country they’re interested in, our layout will have two Button views, one for Germany, and one for India. And to actually show the time, our layout will have a TextClock view.
Accordingly, add the following code inside the ConstraintLayout :
Note that each view must have the layout_width and layout_height properties. They decide how large the view is. Other properties such as layout_constraintBottom_toBottomOf and layout_constraintLeft_toLeftOf are necessary to position the view. With the above code, the TextClock view will be placed at the center of the screen, and both the Button views towards the bottom of the screen.
By default, the TextClock view only shows the hours and minutes. The format12Hour property, however, allows you to change that. In the above code, its value is set to h:mm:ss a . This tells the TextClock view that it should display the hours, minutes, seconds, and also an AM/PM suffix.
Also note that each Button view has an onClick property. This property is used to assign click event handlers to the buttons.
The handlers don’t exist yet, but you can ask Android Studio to generate them for you. To do so, hover over the name of the handler until you see a red light bulb appear beside it. Then click on the light bulb and select the second option, the one with the yellow light bulb.


At this point, you can try pressing Shift-F10 to run the app. If there are no errors in your XML code, you should see something like this on your phone or emulator:


Although the buttons don’t work yet, the TextClock view should show the local time, updating itself every second.
4. Implement Event Handlers
When you generated event handlers for the two buttons, Android Studio added two methods to your activity’s Java file, MainActivity.java. If you open it, you should find the following code in it:
Inside the event handlers, all we need to do is change the time zone of the TextClock view. But how do you reference a view that’s in your layout XML file from inside your Java file? Well, you just use the findViewById() method.
Once you have a reference to the TextClock view, you can call its setTimeZone() method to change its time zone. So add the following code inside the onClickGermany() method:
Similarly, add the following code inside the onClickIndia() method:
If you’re wondering what R is, it’s an auto-generated class that contains, among other things, the IDs of all the views you have in your layouts. The findViewById() method expects you to use this class while passing an ID to it.
At this point, you can press Shift-F10 again to re-run the app. You should now be able to click on the buttons to change the clock’s time zone.
Conclusion
You just created your first fully functional, native app for Android! I encourage you to make a few changes to it. For instance, you could try using other time formats or time zones. You could also try changing the positions of the buttons and the clock view.
There are dozens of views and view groups you can use to create your apps. Do refer to the official documentation to learn about them.
Android App Templates and UI Kits From CodeCanyon
You may have noticed that our app looks very plain and simple. That’s because we’re using the default theme, without applying any styles to our views. CodeCanyon is full of Android UI kits that offer beautiful, hand-crafted styles you can apply to your views.
The kits generally also have several custom views and layouts. You can refer to the following articles to learn more about them:
Источник
Build Your First Android App in Java
1. Welcome!
In this codelab, you’ll learn how to build and run your first Android app in the Java programming language. (If you’re looking for the Kotlin version of this codelab, you can go here.)
What you must know already
This codelab is written for programmers and assumes that you know either the Java or Kotlin programming language. If you are an experienced programmer and adept at reading code, you will likely be able to follow this codelab, even if you don’t have much experience with Java.
What you’ll learn
- How to use Android Studio to build your app.
- How to run your app on a device or in the emulator.
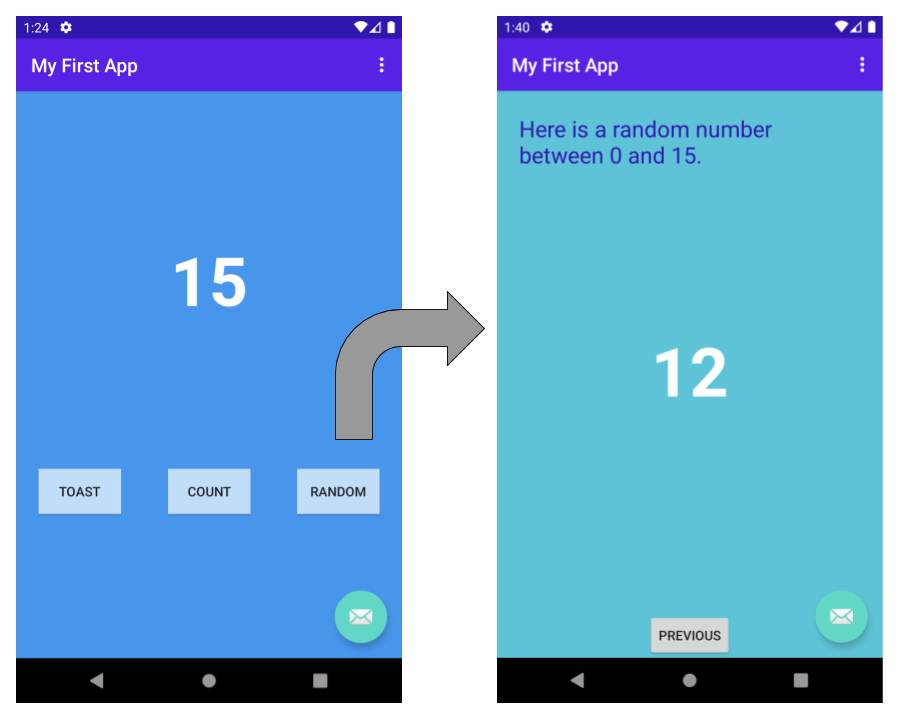
- How to add interactive buttons.
- How to display a second screen when a button is pressed.
Use Android Studio and Java to write Android apps
You write Android apps in the Java programming language using an IDE called Android Studio. Based on JetBrains’ IntelliJ IDEA software, Android Studio is an IDE designed specifically for Android development.
Note: This version of the codelab requires Android Studio 3.6 or higher.
To work through this codelab, you will need a computer that can run Android Studio 3.6 or higher (or already has Android Studio 3.6 or higher installed).
2. Install Android Studio
Note: This version of the codelab requires Android Studio 3.6 or higher.
You can download Android Studio 3.6 from the Android Studio page.
Android Studio provides a complete IDE, including an advanced code editor and app templates. It also contains tools for development, debugging, testing, and performance that make it faster and easier to develop apps. You can use Android Studio to test your apps with a large range of preconfigured emulators, or on your own mobile device. You can also build production apps and publish apps on the Google Play store.
Note: Android Studio is continually being improved. For the latest information on system requirements and installation instructions, see the Android Studio download page.
Android Studio is available for computers running Windows or Linux, and for Macs running macOS. The OpenJDK (Java Development Kit) is bundled with Android Studio.
The installation is similar for all platforms. Any differences are noted below.
- Navigate to the Android Studio download page and follow the instructions to download and install Android Studio.
- Accept the default configurations for all steps, and ensure that all components are selected for installation.
- After the install is complete, the setup wizard downloads and installs additional components, including the Android SDK. Be patient, because this process might take some time, depending on your internet speed.
- When the installation completes, Android Studio starts, and you are ready to create your first project.
Troubleshooting: If you run into problems with your installation, see the Android Studio release notes or Troubleshoot Android Studio.
3. Task: Create your first project
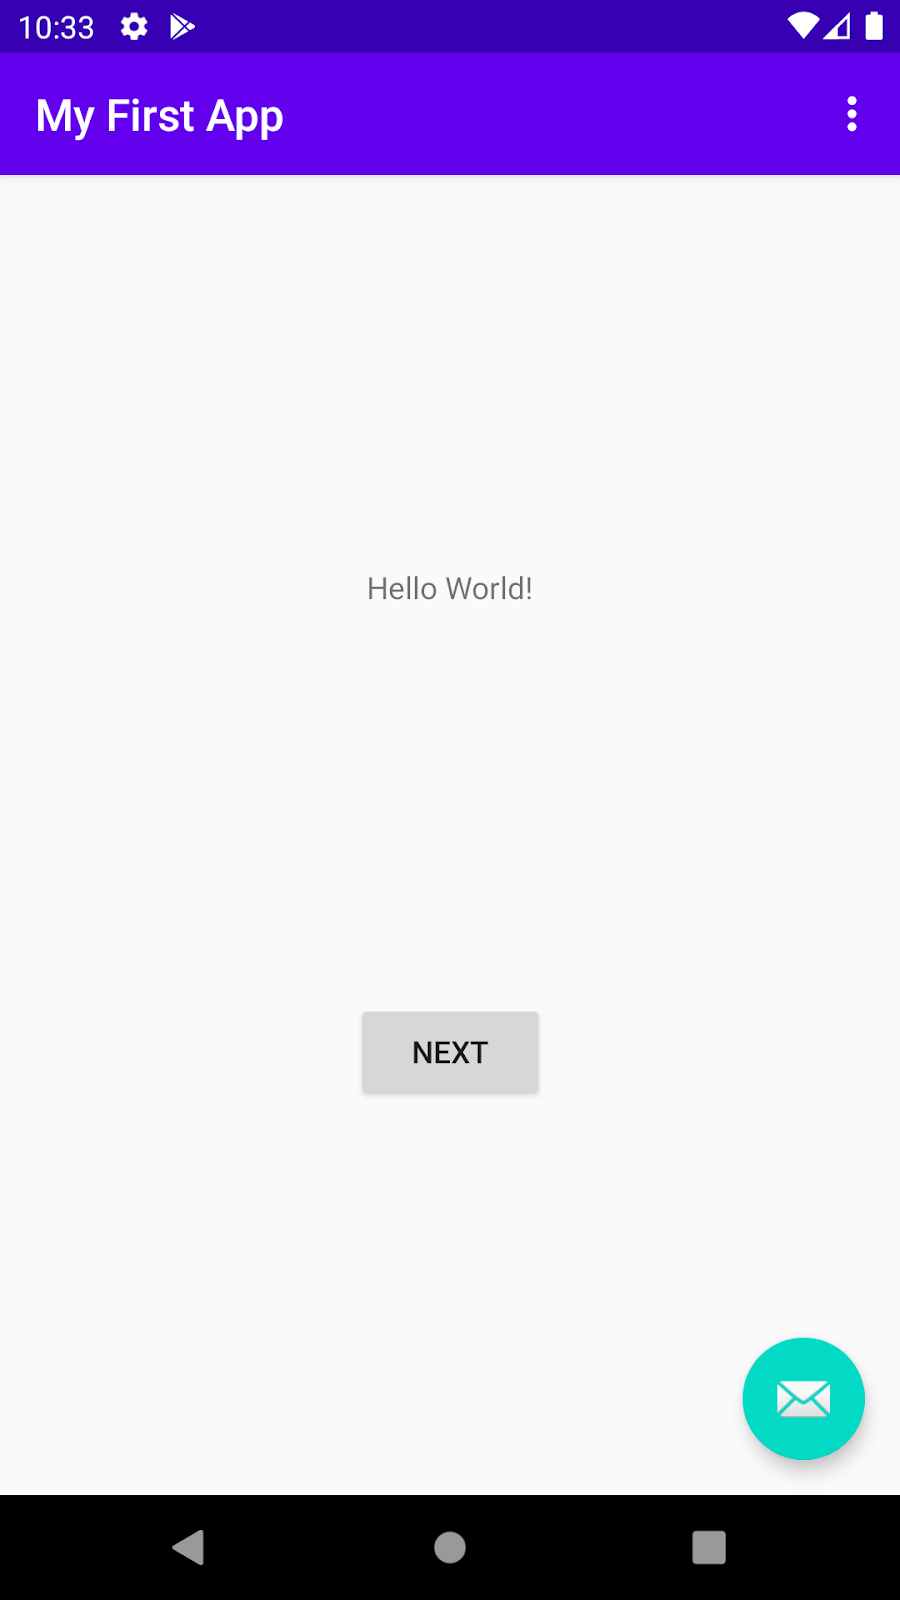
In this step, you will create a new Android project for your first app. This simple app displays the string «Hello World» on the screen of an Android virtual or physical device.
Here’s what the finished app will look like:
What you’ll learn
- How to create a project in Android Studio.
- How to create an emulated Android device.
- How to run your app on the emulator.
- How to run your app on your own physical device, if you have one.
Step 1: Create a new project
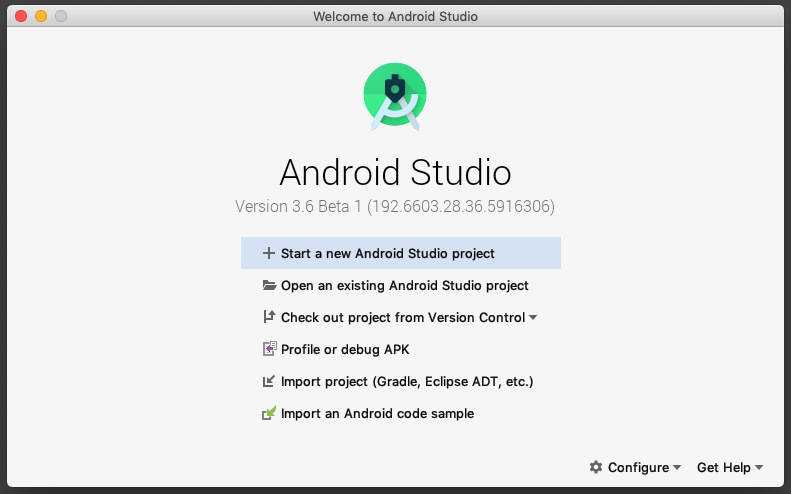
- Open Android Studio.
- In the Welcome to Android Studio dialog, click Start a new Android Studio project.

- Select Basic Activity (not the default). Click Next.
- Give your application a name such as My First App.
- Make sure the Language is set to Java.
- Leave the defaults for the other fields.
- Click Finish.

After these steps, Android Studio:
- Creates a folder for your Android Studio project called MyFirstApp. This is usually in a folder called AndroidStudioProjects below your home directory.
- Builds your project (this may take a few moments). Android Studio uses Gradle as its build system. You can follow the build progress at the bottom of the Android Studio window.
- Opens the code editor showing your project.
Step 2: Get your screen set up
When your project first opens in Android Studio, there may be a lot of windows and panes open. To make it easier to get to know Android Studio, here are some suggestions on how to customize the layout.
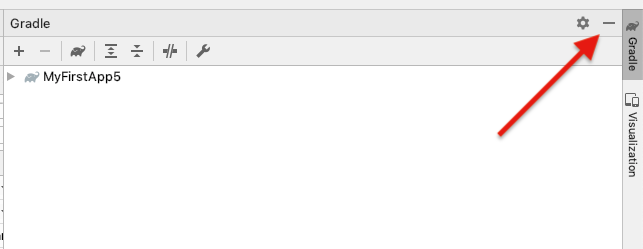
- If there’s a Gradle window open on the right side, click on the minimize button (—) in the upper right corner to hide it.
- Depending on the size of your screen, consider resizing the pane on the left showing the project folders to take up less space.
At this point, your screen should look a bit less cluttered, similar to the screenshot shown below.

Step 3: Explore the project structure and layout
The upper left of the Android Studio window should look similar to the following diagram: 
Based on you selecting the Basic Activity template for your project, Android Studio has set up a number of files for you. You can look at the hierarchy of the files for your app in multiple ways, one is in Project view. Project view shows your files and folders structured in a way that is convenient for working with an Android project. (This does not always match the file hierarchy! To see the file hierarchy, choose the Project files view by clicking (3).)
- Double-click the app (1) folder to expand the hierarchy of app files. (See (1) in the screenshot.)
- If you click Project (2), you can hide or show the Project view. You might need to select View > Tool Windows to see this option.
- The current Project view selection (3) is Project > Android.
In the Project > Android view you see three or four top-level folders below your app folder: manifests, java, java (generated) and res. You may not see java (generated) right away.
- Expand the manifests folder.
This folder contains AndroidManifest.xml . This file describes all the components of your Android app and is read by the Android runtime system when your app is executed. 2. Expand the java folder. All your Java language files are organized here. The java folder contains three subfolders:
com.example.myfirstapp: This folder contains the Java source code files for your app.
com.example.myfirstapp (androidTest): This folder is where you would put your instrumented tests, which are tests that run on an Android device. It starts out with a skeleton test file.
com.example.myfirstapp (test): This folder is where you would put your unit tests. Unit tests don’t need an Android device to run. It starts out with a skeleton unit test file. 3. Expand the res folder. This folder contains all the resources for your app, including images, layout files, strings, icons, and styling. It includes these subfolders:
drawable: All your app’s images will be stored in this folder.
layout: This folder contains the UI layout files for your activities. Currently, your app has one activity that has a layout file called activity_main.xml . It also contains content_main.xml , fragment_first.xml , and fragment_second.xml .
menu: This folder contains XML files describing any menus in your app.
mipmap: This folder contains the launcher icons for your app.
navigation: This folder contains the navigation graph, which tells Android Studio how to navigate between different parts of your application.
values: This folder contains resources, such as strings and colors, used in your app.
Step 4: Create a virtual device (emulator)
In this task, you will use the Android Virtual Device (AVD) manager to create a virtual device (or emulator) that simulates the configuration for a particular type of Android device.
The first step is to create a configuration that describes the virtual device.
- In Android Studio, select Tools >AVD Manager, or click the AVD Manager icon in the toolbar.
- Click +Create Virtual Device. (If you have created a virtual device before, the window shows all of your existing devices and the +Create Virtual Device button is at the bottom.) The Select Hardware window shows a list of pre-configured hardware device definitions.
- Choose a device definition, such as Pixel 2, and click Next. (For this codelab, it really doesn’t matter which device definition you pick).
- In the System Image dialog, from the Recommended tab, choose the latest release. (This does matter.)
- If a Download link is visible next to a latest release, it is not installed yet, and you need to download it first. If necessary, click the link to start the download, and click Next when it’s done. This may take a while depending on your connection speed.

Note: System images can take up a large amount of disk space, so just download what you need.
- In the next dialog box, accept the defaults, and click Finish.
The AVD Manager now shows the virtual device you added.
- If the Your Virtual Devices AVD Manager window is still open, go ahead and close it.
Step 5: Run your app on your new emulator
- In Android Studio, select Run > Run ‘app’ or click the Run icon in the toolbar. The icon will change when your app is already running.
 The icon will change when your app is already running.
If you get a dialog box stating «Instant Run requires that the platform corresponding to your target device (Android N. ) is installed» go ahead and click Install and continue.
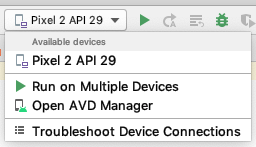
- In Run > Select Device, under Available devices, select the virtual device that you just configured. This menu also appears in the toolbar.
The emulator starts and boots just like a physical device. Depending on the speed of your computer, this may take a while. You can look in the small horizontal status bar at the very bottom of Android Studio for messages to see the progress.
Messages that might appear briefly in the status bar
Gradle build running

Waiting for target device to come on line
Источник


