- Building your first app bundle
- Android App Bundle is the new and official publishing format for Android applications.
- Building on the command line
- Building in Android Studio
- Uploading through the Play Console
- Exploring your Android App Bundle
- Download the app bundle and install locally
- Disabling optimizations
- Bundle in Android with Example
- Using the Bundle in the Android App
- Android Bundle Example
- 1. Create a New Android Application Project
- 2. Creating the layout of the main AndroidBundleExample
- 3. Creating the layout of the main AndroidSecondActivity
- 4. Creating the source code of the main AndroidBundleExample
- 5. Creating the source code of the main AndroidSecondActivity
- 6. Android Manifest
- 7. Build, compile and run
- Download the Eclipse Project
- Android App Bundles: Getting Started
- Version
- How Are App Bundles Useful?
- Getting Started
- Exploring the CountOnMe Structure
- Generating an App Bundle
- Creating a Signed App Bundle From Android Studio
- Creating an App Bundle From the Command Line
- Publishing an App Bundle in the Play Store
- Testing App Bundles
- Using Bundletool
- A Closer Look at Bundletool Output
- Dynamic Delivery
- Backwards Compatibility
- Where to Go From Here?
Building your first app bundle
Android App Bundle is the new and official publishing format for Android applications.

This article is available as a video and linked at the end of the post.
With the Android App Bundle we created a format that unlocks, amongst other things, shipping smaller apps to your users. Smaller apps are more likely to be installed and less likely to be uninstalled when disk space gets tight.
In this post we’ll take a closer look at how to build your first app bundle, how you can upload it using the Play Console and dive into some configuration options.
Getting started doesn’t require any changes to your existing codebase.
All you’ll need to do is create an Android App Bundle, using the command line or Android Studio.
Building on the command line
On the command line, you’ll run one of the bundle tasks like this:
Then locate the bundle in your application’s build directory. The default location is app/build/outputs/bundle/release .
This bundle needs to be signed. When using jarsigner , this is how you sign the bundle:
Once the variables are replaced with actual values and the keystore password is entered, the bundle will be signed and ready for upload.
Building in Android Studio
In Android Studio, select “Build => Generate Signed Bundle / APK” and follow the dialog.
Whether you use the command line or Android Studio, the process will leave you with a built and signed release bundle that’s ready for upload to the Play Store.
Uploading through the Play Console
To upload your app bundle to the Play Store, create a new release on a chosen release track. You can drag and drop the bundle into the “App bundles and APKs” section or use the Google Play Developer API.
Once the Bundle is uploaded, the Play Store can optimize the APKs it delivers to users’ devices based on their configuration. This in turn reduces download and installation size.
Exploring your Android App Bundle
To take a look at how the Play Store ships your app to a user’s device, you can click on the “Details” button at the end of the bundle’s row.
In the details screen you already see a lot of information on your app bundle such as version code, minSdk level, target SDK, required features, permissions, screen layouts, localizations and much more.
And you also can download signed APKs for your app, to see exactly what the Play Store delivers to a specific device. To navigate there, click on “Explore Bundle” and then open the “Downloads” tab.
You can either select a specific device or apply one or more of the many filters from the “Add filter” tab.
Download the app bundle and install locally
In the app bundle explorer, at the end of your screen, there is a “Download” button which provides a zip file, containing several APK, which are tailored to the specific device in question.
After you download and unzip the file, the containing APK can be installed on a local emulator or device by using `adb install — multiple *.apk` from the containing directory.
While each apk in this set is relevant to guarantee correct execution of your app, I want to point out that the base.apk always has to be installed on a device in order to provide your app’s core functionality. Next to code and resources the base module also contains the merged AndroidManifest and shared dependencies for the entire application.
Each feature module or configuration split provides its own resources and can contain code, but the base module is what ties it all together.
Disabling optimizations
You can disable the optimization in each module’s build.gradle file. All you have to do is edit the language , density or abi property and set enableSplit to false . This will tell the build system that it should not optimize this specific dimension.
Unless you have a good reason to, I recommend not touching this section as setting enableSplit to false can dramatically increase the on-device installation size of your app.
There could be exceptions, such as when your app has its own language selector built in and you want to have all potential languages available for selection at all times. But even then, using the Android App Bundle provides you with ways to load features on demand instead. This could be used to avoid to pre-install parts of your app that only a subset of users might need.
And since we enable you to download and install features in a programmatic way, we provide an unbundled API that you can use. It is part of the PlayCore library and is covered as part of the next post and this video in our Modern Android Development Skills series.
Источник
Bundle in Android with Example
It is known that Intents are used in Android to pass to the data from one activity to another. But there is one another way, that can be used to pass the data from one activity to another in a better way and less code space ie by using Bundles in Android. Android Bundles are generally used for passing data from one activity to another. Basically here concept of key-value pair is used where the data that one wants to pass is the value of the map, which can be later retrieved by using the key. Bundles are used with intent and values are sent and retrieved in the same fashion, as it is done in the case of Intent. It depends on the user what type of values the user wants to pass, but bundles can hold all types of values (int, String, boolean, char) and pass them to the new activity.
The following are the major types that are passed/retrieved to/from a Bundle:
putInt(String key, int value), getInt(String key, int value)
putString(String key, String value), getString(String key, String value)
putStringArray(String key, String[] value), getStringArray(String key, String[] value)
putChar(String key, char value), getChar(String key, char value)
putBoolean(String key, boolean value), getBoolean(String key, boolean value)
Using the Bundle in the Android App
The bundle is always used with Intent in Android. Now to use Bundle writes the below code in the MainActivity.
Источник
Android Bundle Example
Posted by: Chryssa Aliferi in os September 9th, 2014 0 Views
As we have seen in our previous example Android StartActivityForResult Example, in Android, the Intent describes the activity to be executed. An Intent contains certain header, action and type, but also can contain data.
The data of the Intent is described as a Bundle. The Bundle object is used to pass data between activities. This data can be retrieved from the Intent through the getExtras() method. A Bundle object is actually a hash control that stores key and value pairs. The full documentation and the public methods that this class contains are summarized in the Developers Reference for the Android Bundle.
In this example, we are going to show a basic Android Bundle Example, that passes certain values from the main AndroidBundleExample Activity to the AndroidSecondActivity via Android Bundle.
In order to achive this, will use the following tools in a Windows 64-bit platform:
- JDK 1.7
- Eclipse 4.2 Juno
- Android SDK 4.4.2
Let’s take a closer look:
1. Create a New Android Application Project
Open Eclipse IDE and go to File → New → Project → Android Application Project.
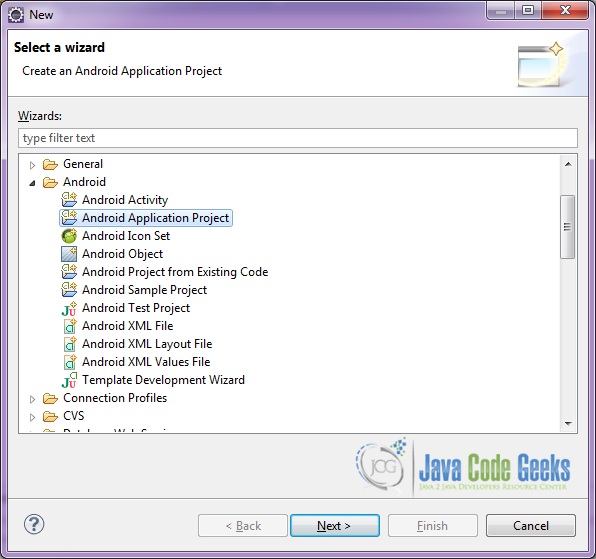
Figure 1. Create a new Android project
Specify the name of the application, the project and the package and then click Next.
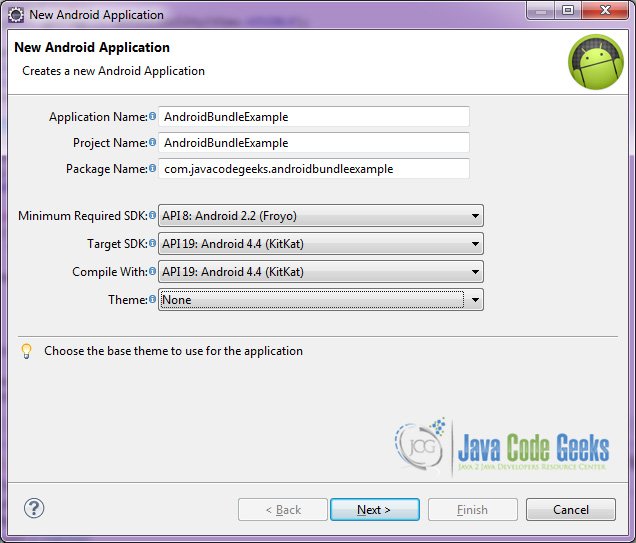
Figure 2. Create a new Android project name
In the next window, the “Create Activity” option should be checked. The new created activity will be the main activity of your project. Then press Next button.
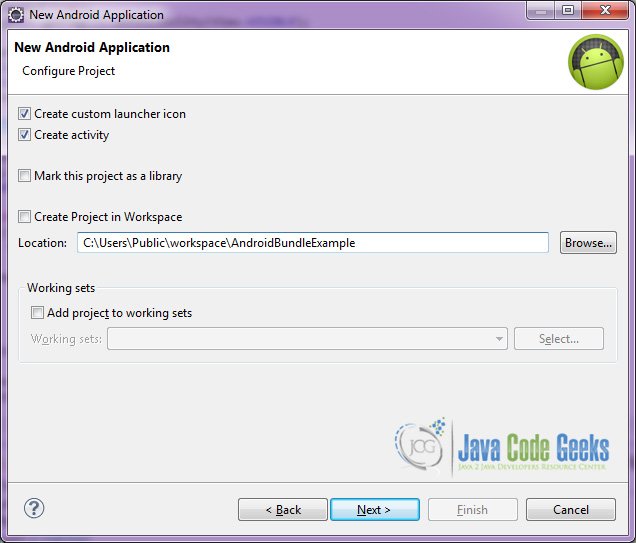
Figure 3. Configure the project
In “Configure Launcher Icon” window you should choose the icon you want to have in your app. We will use the default icon of android, so click Next.
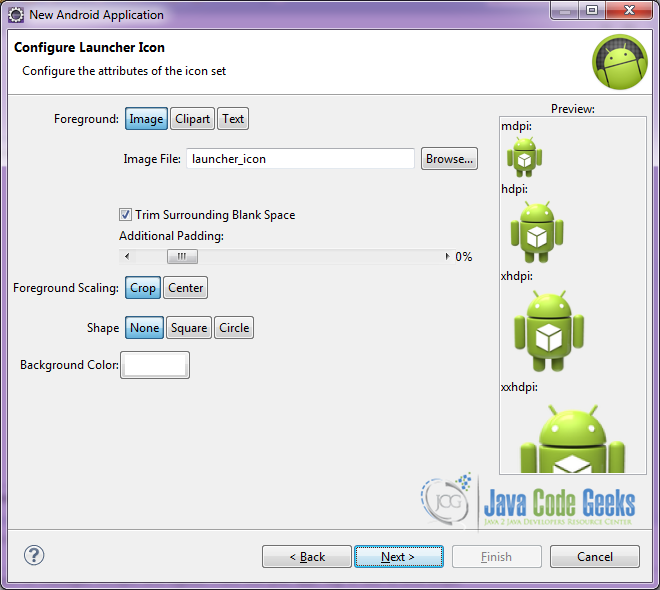
Figure 4. Configure the launcher icon
Select the “Blank Activity” option and press Next.
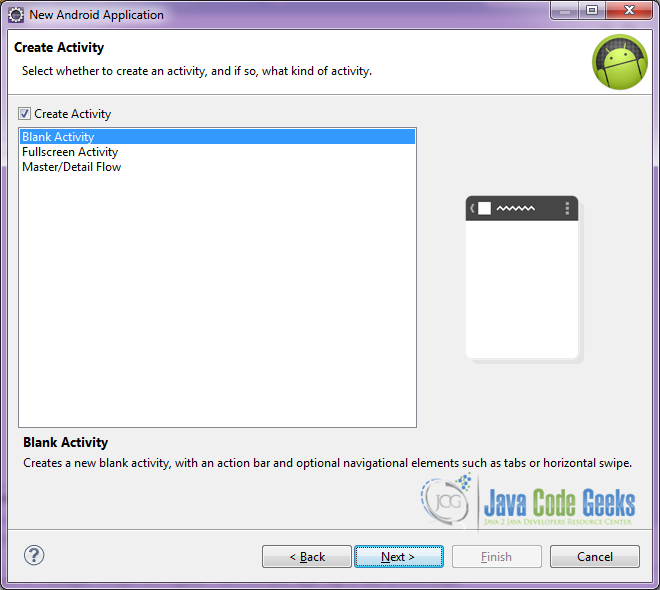
Figure 5. Create the activity and select its type
You have to specify a name for the new Activity and a name for the layout description of your app. The .xml file for the layout will automatically be created in the res/layout folder. It will also be created a fragment layout xml, that we are not going to use in this project and you can remove it if you want. Then press Finish.
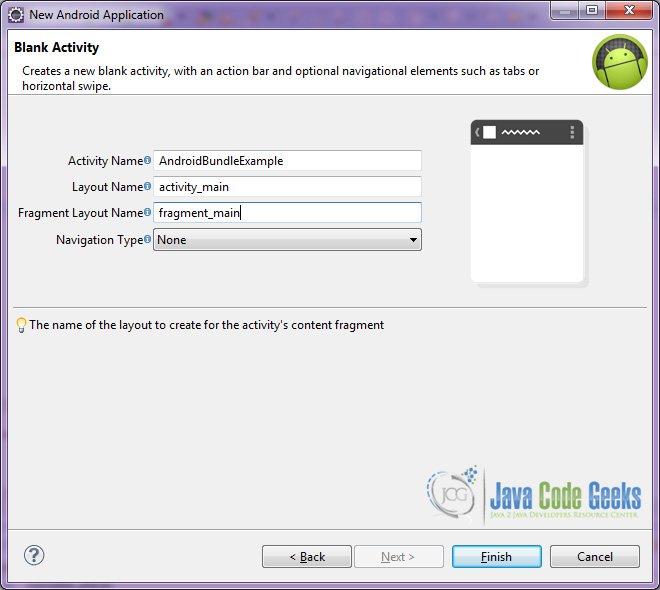
Figure 6. Create a new blank activity
Here you can see, how will the structure of the project become when finished:
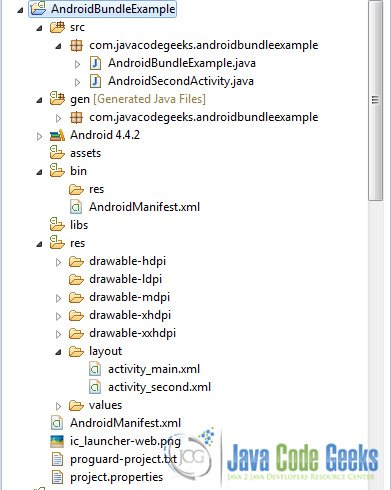
Figure 7. The tree of the project
As you have noticed, for the purpose of this example, we are going to have two Activities, and two layouts for these Activities.
2. Creating the layout of the main AndroidBundleExample
We are going to make a very simple layout xml for the AndroidBundleExample.class , that only consists of a LinearLayout that contains the necessary textviews and buttons.
Open res/layout/activity_main.xml , go to the respective xml tab and paste the following:
3. Creating the layout of the main AndroidSecondActivity
We are also going to make a very simple layout xml for the AndroidSecondActivity.class , that only consists of a LinearLayout that contains the necessary textviews and buttons.
Open res/layout/activity_second.xml , go to the respective xml tab and paste the following:
4. Creating the source code of the main AndroidBundleExample
Open src/com.javacodegeeks.androidbundlexample/AndroidBundleExample.java file and paste the code below.
Let’s see in detail the code above.
We set the activity_main.xml layout and we initialize our main layout by:
In this code snippet, we can get the data from the EditText and Checkbox View for the activity_main of AndroidBundleExample .
We will now create the Bundle object that will pass to the AndroidSecondActivity. We will store data into the bundle with the code:
Here we create an Intent and we put an extra Bundle in order to pass it to the AndroidSecondActivity.
5. Creating the source code of the main AndroidSecondActivity
Open src/com.javacodegeeks.androidbundlexample/AndroidSecondActivity.java file and paste the code below.
Let’s see in detail the code above.
We set the activity_second.xml layout and we initialize our main layout by:
We will get the Intent that started this Activity and the Bundle that holds the data of this Intent.
In the code that follows, we “extract” the data from the Bundle.
Right after, we are going to show the data in the layout of AndroidSecondActivity.
6. Android Manifest
The AndroidManifest.xml of our project is simple and basic:
7. Build, compile and run
When we build, compile and run our project, the main AndroidBundleExample should look like this:

Figure 8. This is the main Activity that launches the app. Here we can fill the form for the AndroidSecondActivity.
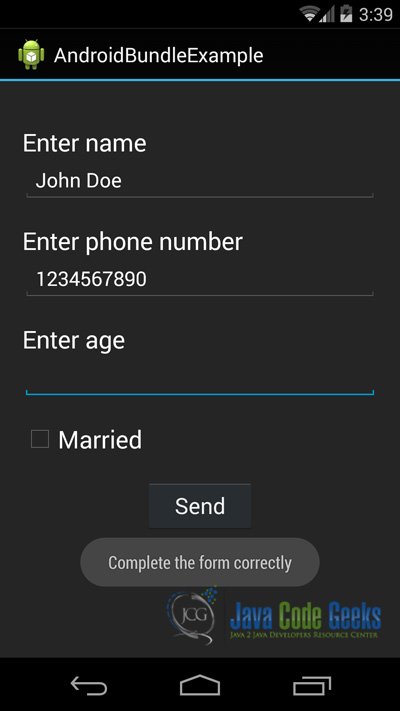
Figure 9. Here we can see, if we have completed correctly the form. If not a toast message will appear.
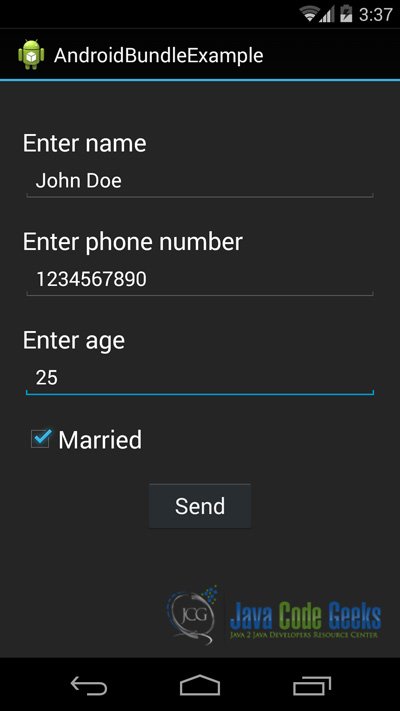
Figure 10. This is the ActivityBundleExample. Here we can see the form when we have completed the form.
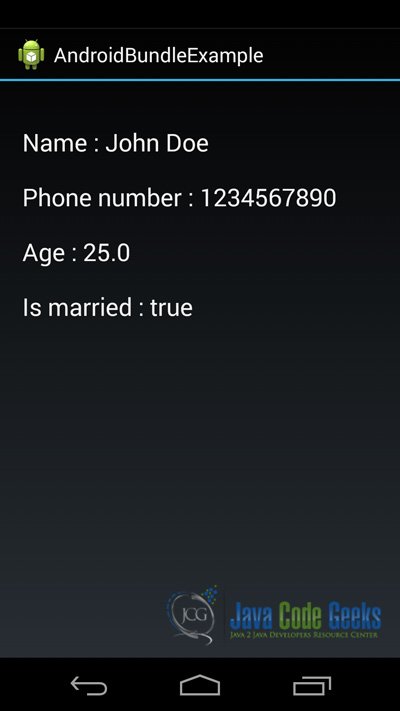
Figure 11. This is the AndroidSecondActivity that shows the values that have been passed with the Bundle.
Download the Eclipse Project
This was an example of Android Bundle Example.
Источник
Android App Bundles: Getting Started
See how to use App Bundles to reduce the size of the app your user downloads to their device, saving them precious data and storage!

Version
- Kotlin 1.2, Android 5.0, Android Studio 3

The App Bundle is a new delivery format for Android apps that helps to deliver an optimized version of your APK by just including what your users need, reducing your app size and making your users happier. :]
Normally, when users download your app, they get what is called a universal APK. This is a file that contains all resources for all device configurations, like images, strings, layouts, and more. Users will not need all of them, which wastes space and leaves less room for apps or games. 😿
With App Bundles, your users will receive a special version of your APK that only includes the language, screen density and resources they need per unique user configuration.
Imagine one of your users has selected English as their default language, and that their device supports extra-extra-high-density (aka xxhdpi). Using App Bundles, the Google Play Store is only going to download an APK file with value-en/strings.xml and xxhdpi resources, reducing the required space and cost of the app.
How Are App Bundles Useful?
Space is one major reason why a user will install or uninstall your app. When users download a new app, they have to take two things into consideration: data and storage consumption.
If your app is too big, users may have to uninstall one or more other apps in order to install yours.

Another trade-off is how much data your app is going to cost them, depending on their data plan. Users often have limited mobile data plans, which means that downloading your app may put users in a tricky situation. They will need to decide what’s more important: streaming videos or downloading your app.
You don’t want to be the app that increases their phone bill, right?

Having a light APK will help you to attract new users to your app and keep existing users. :]
Getting Started
CountOnMe is an app that displays a number from 1 to 10, every time you swipe. You’re going to use it to see how to use App Bundles in practice, by generating and evaluating the content of different APKs.

Download the CountOnMe project using the Download Materials button at the top or bottom of this tutorial. Open the project in Android Studio 3.2 or later by selecting Open an existing Android Studio project on the Android Studio welcome screen:
There is no final project for this tutorial, since you’ll simply use CountOnMe to explore the App Bundle tools in Android Studio.
Before continuing with the tutorial, take a look at the project.
Exploring the CountOnMe Structure
The source code is structured as follows:

- MainActivity.kt
This is the entry point of the app. - values
default resources in English strings, dimens etc . - values-es
default resources in Spanish strings, dimens etc . - values-fr
default resources in French strings, dimens etc .
As you can see in the above image, there are many more files that weren’t mention for brevity. But the main idea is that you can see the different resources that the app has. When you use App Bundles, you’re going to generate different APK versions that only include some of these resources.
Generating an App Bundle
App Bundle is a new format called .aab (Android App Bundle), that you upload to the Play Store instead of the traditional apk . With this new format, the Play Store will generate many different variations of your APK, depending on your user’s device configuration.
App Bundles take advantage of a concept called split APK. As its name suggests, a split APK is similar to a normal .apk . The difference is that a split APK file can be broken into separate small pieces, one containing the base code and other small APKs containing the app resources that can be installed later.
The beauty of splits is that the Android operating system treats the app as a whole, and each split is a small fraction that can be added independently. It’s like one app with small Lego blocks to add on.
To see how an App Bundle is structured, you’ll generate one for the CountOnMe app.
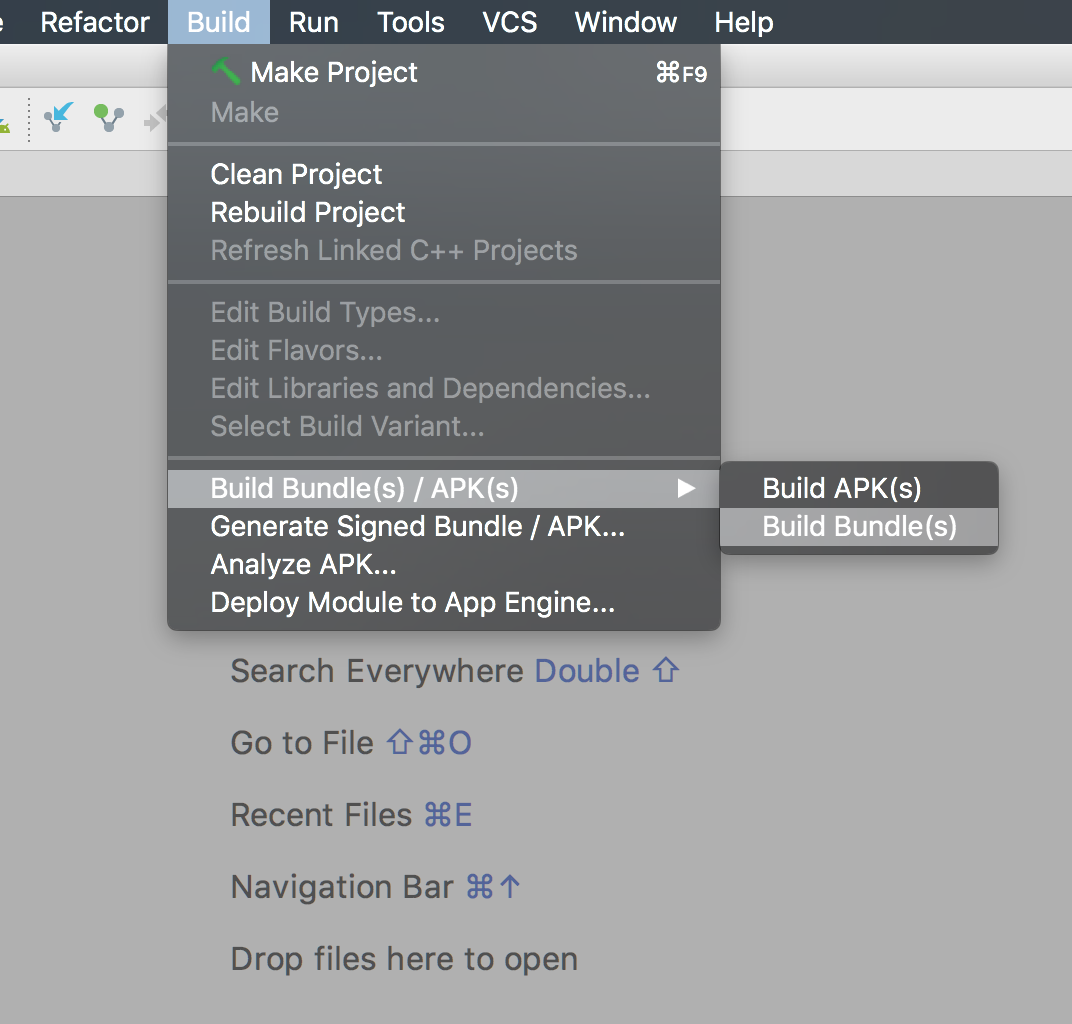
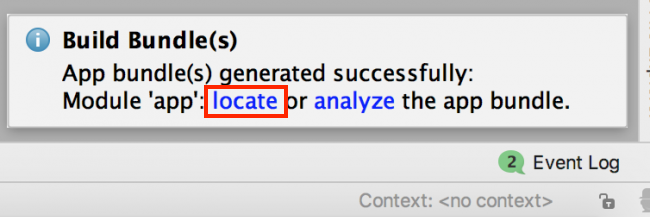
Go to Build ▸ Build Bundle(s) / APK(s) ▸ Build Bundle(s) in the Android Studio menu.
Android Studio will show you a prompt for where to find the file. Press locate to open the file location in your file system viewer, e.g., the Finder on macOS.
Since an .aab file is just a compressed file, uncompress it to take a look at its content. 
In this case, you’ll use the tool unzip , but you can use any similar tool you like. Open Terminal and navigate to the directory containing the app.aab file. Run the following.
Alright, now you can see the structure of an .aab .

- base/, feature1/, and feature2/
Top level folder that contains each module of your app. In the case of CountOnMe, you only have one base directory, because you just have one module. The base directory always contains the main module of your app. Each dynamic feature module will have it’s own feature directory. - BUNDLE-METADATA/
Metadata files that may include ProGuard mappings and the list of your app’s DEX files. This directory is only going to be available when proguard is enabled. - Module Protocol Buffer (*.pb) files
Provides metadata that describes the contents of each app module to the Play Store. For instance, BundleConfig.pb provides information about the bundle itself, like which version of the build tools were used to build the App Bundle. - dex
Contains the DEX files for each module in a separate directory. - res, lib, and assets
These folders are used in the same way as a typical APK, except that for an App Bundle, they’re used by Google Play to package only the files that satisfy the target device configuration. - root
This directory stores files that are later relocated to the root of the APK(s) that include the corresponding module.
The only thing you have to do to use an App Bundle is create an .aab and upload it to the Google Play Store. The Play Store will handle everything from creating multiples version of your APK, to selecting the right one for your users.
Creating a Signed App Bundle From Android Studio
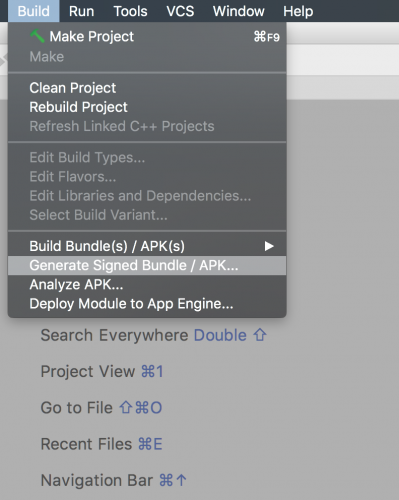
Go to Android Studio ▸ Build ▸ Generate Signed Bundle / APK.
Select Android App Bundle and click Next. 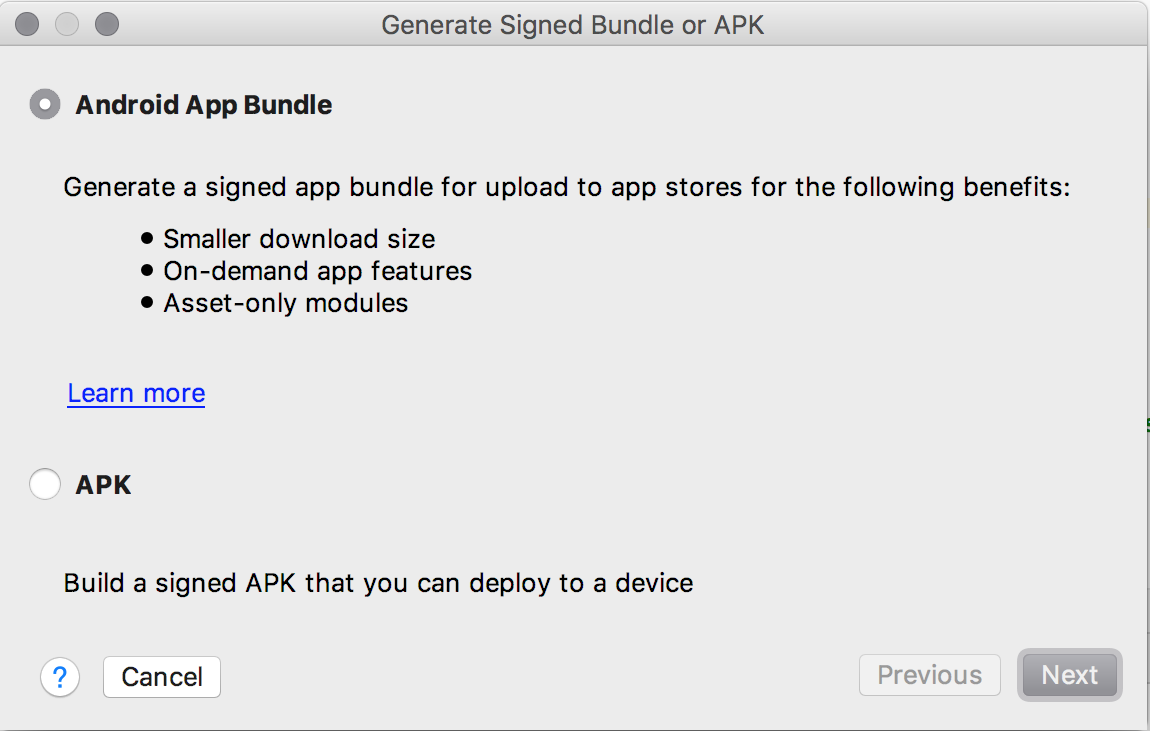
Introduce your app signing configuration and click Next.

On the next screen, choose a Destination Folder and Build Type, and then click Finish. Simple. :]

Creating an App Bundle From the Command Line
With the availability of App Bundles, you now have some new Gradle tasks to produce an .aab :
Run the bundle task for CountOnMe, from the project root folder, in this case countonme-starter:
You will see that the app.aab file is generated at the following path.
You can use the following commands to create the app bundle for a specific build variant.
Here buildVariant could be the buildDebug or buildRelease task.
The location of the output file will be:
The same signing process used for traditional APKs is compatible with App Bundles.
Publishing an App Bundle in the Play Store
To publish your App Bundle to the Play Store, the first thing you need do is enroll in App Signing by Google Play. After enrolling, you can manage your releases as you did with APKs.

After uploading your App Bundle, you have the opportunity to review your release.
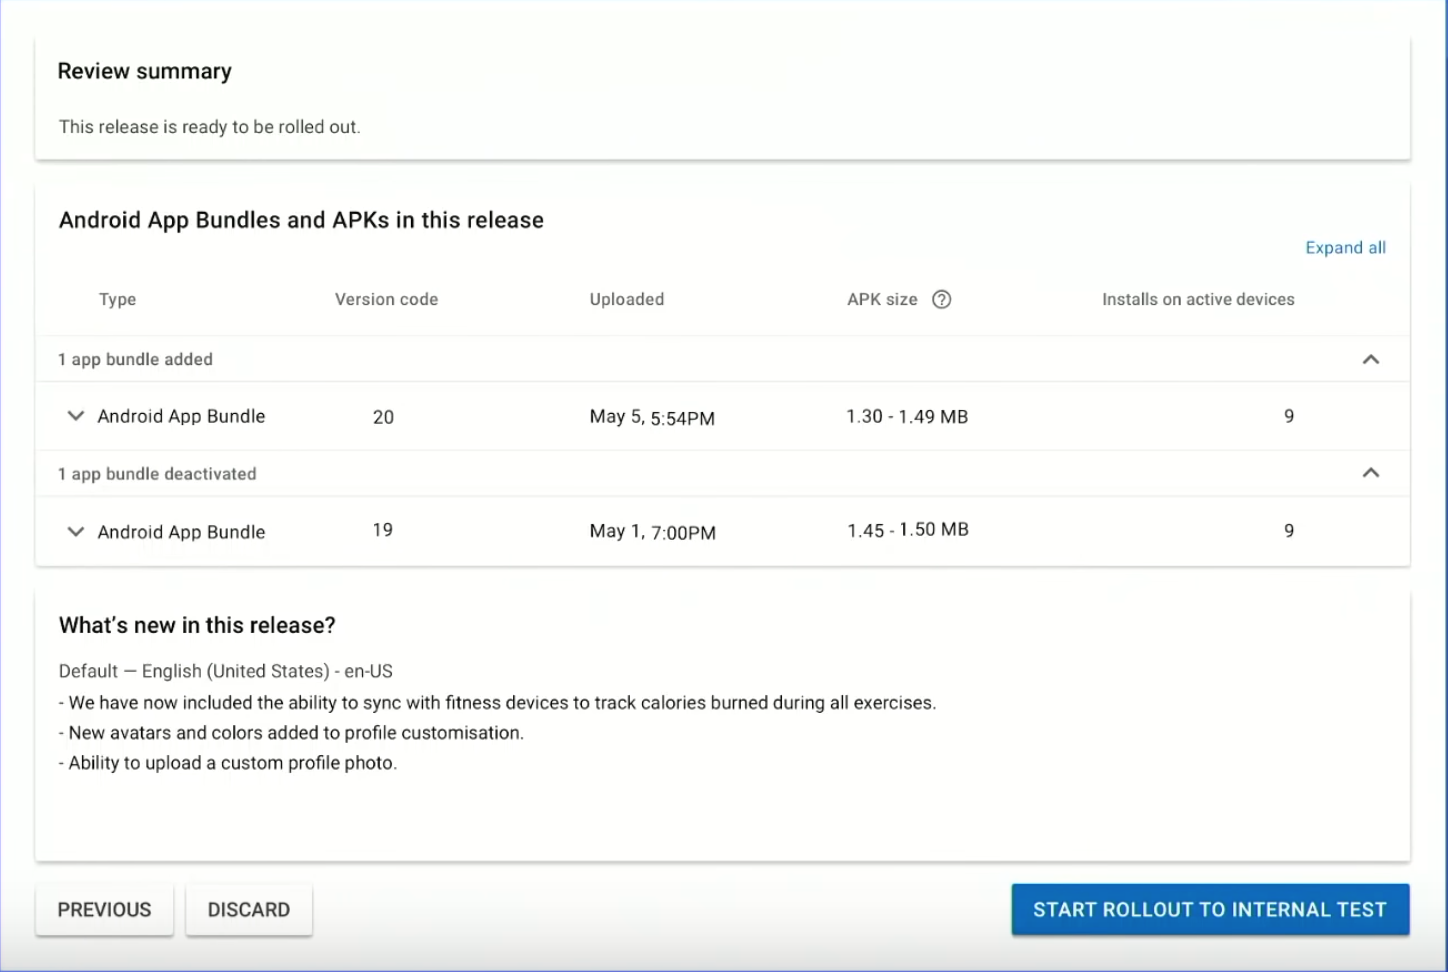
The Google Play console will generate all the APKs for your user configurations. A nice tool for visualizing all those APKs is Bundle Explorer.
Go to Release Management ▸ Artifact library, then select one of the bundles that you have uploaded and click EXPLORE
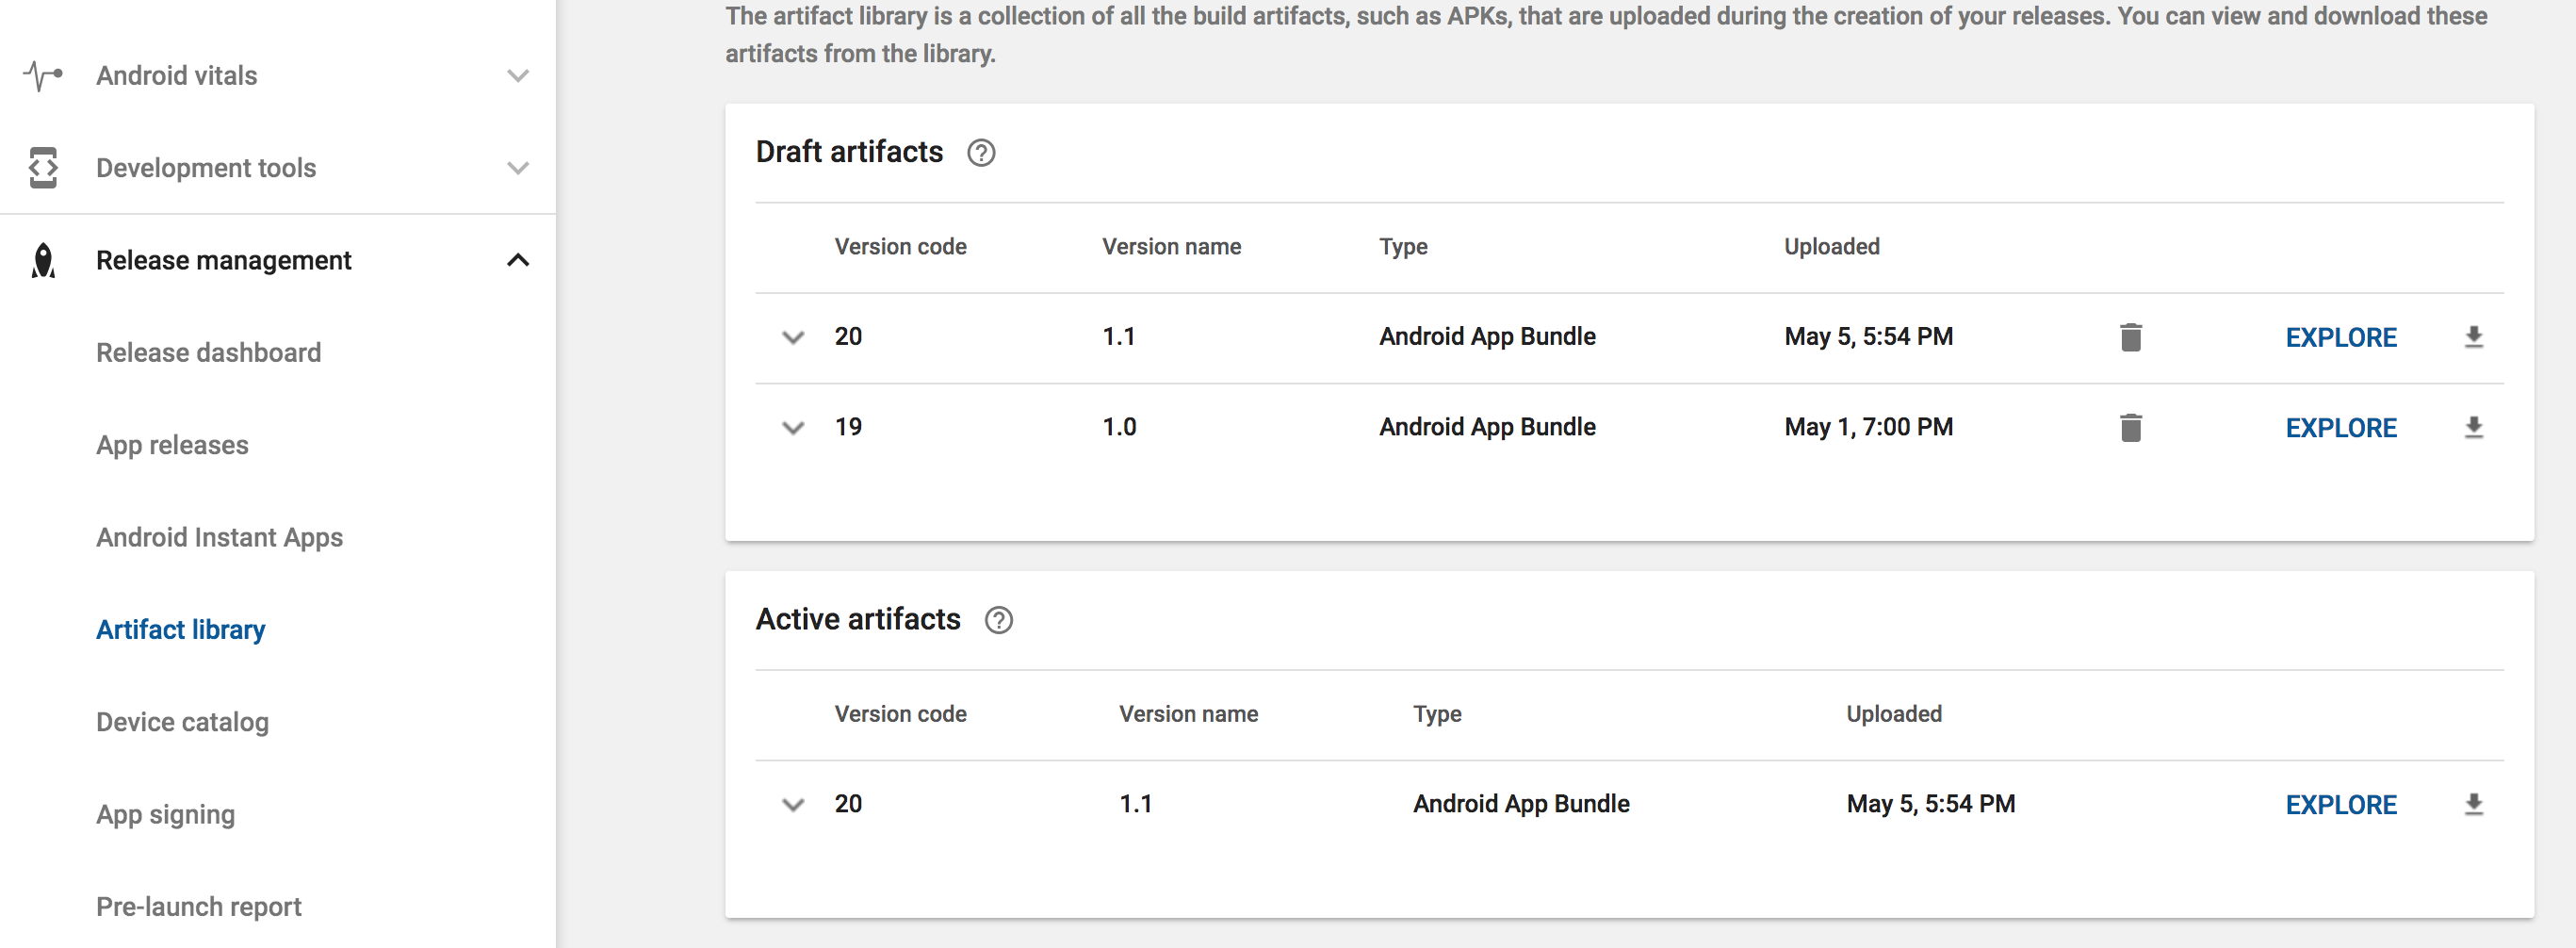
Now you can see all the savings that an App Bundle provides, and all the APK files that it generated.
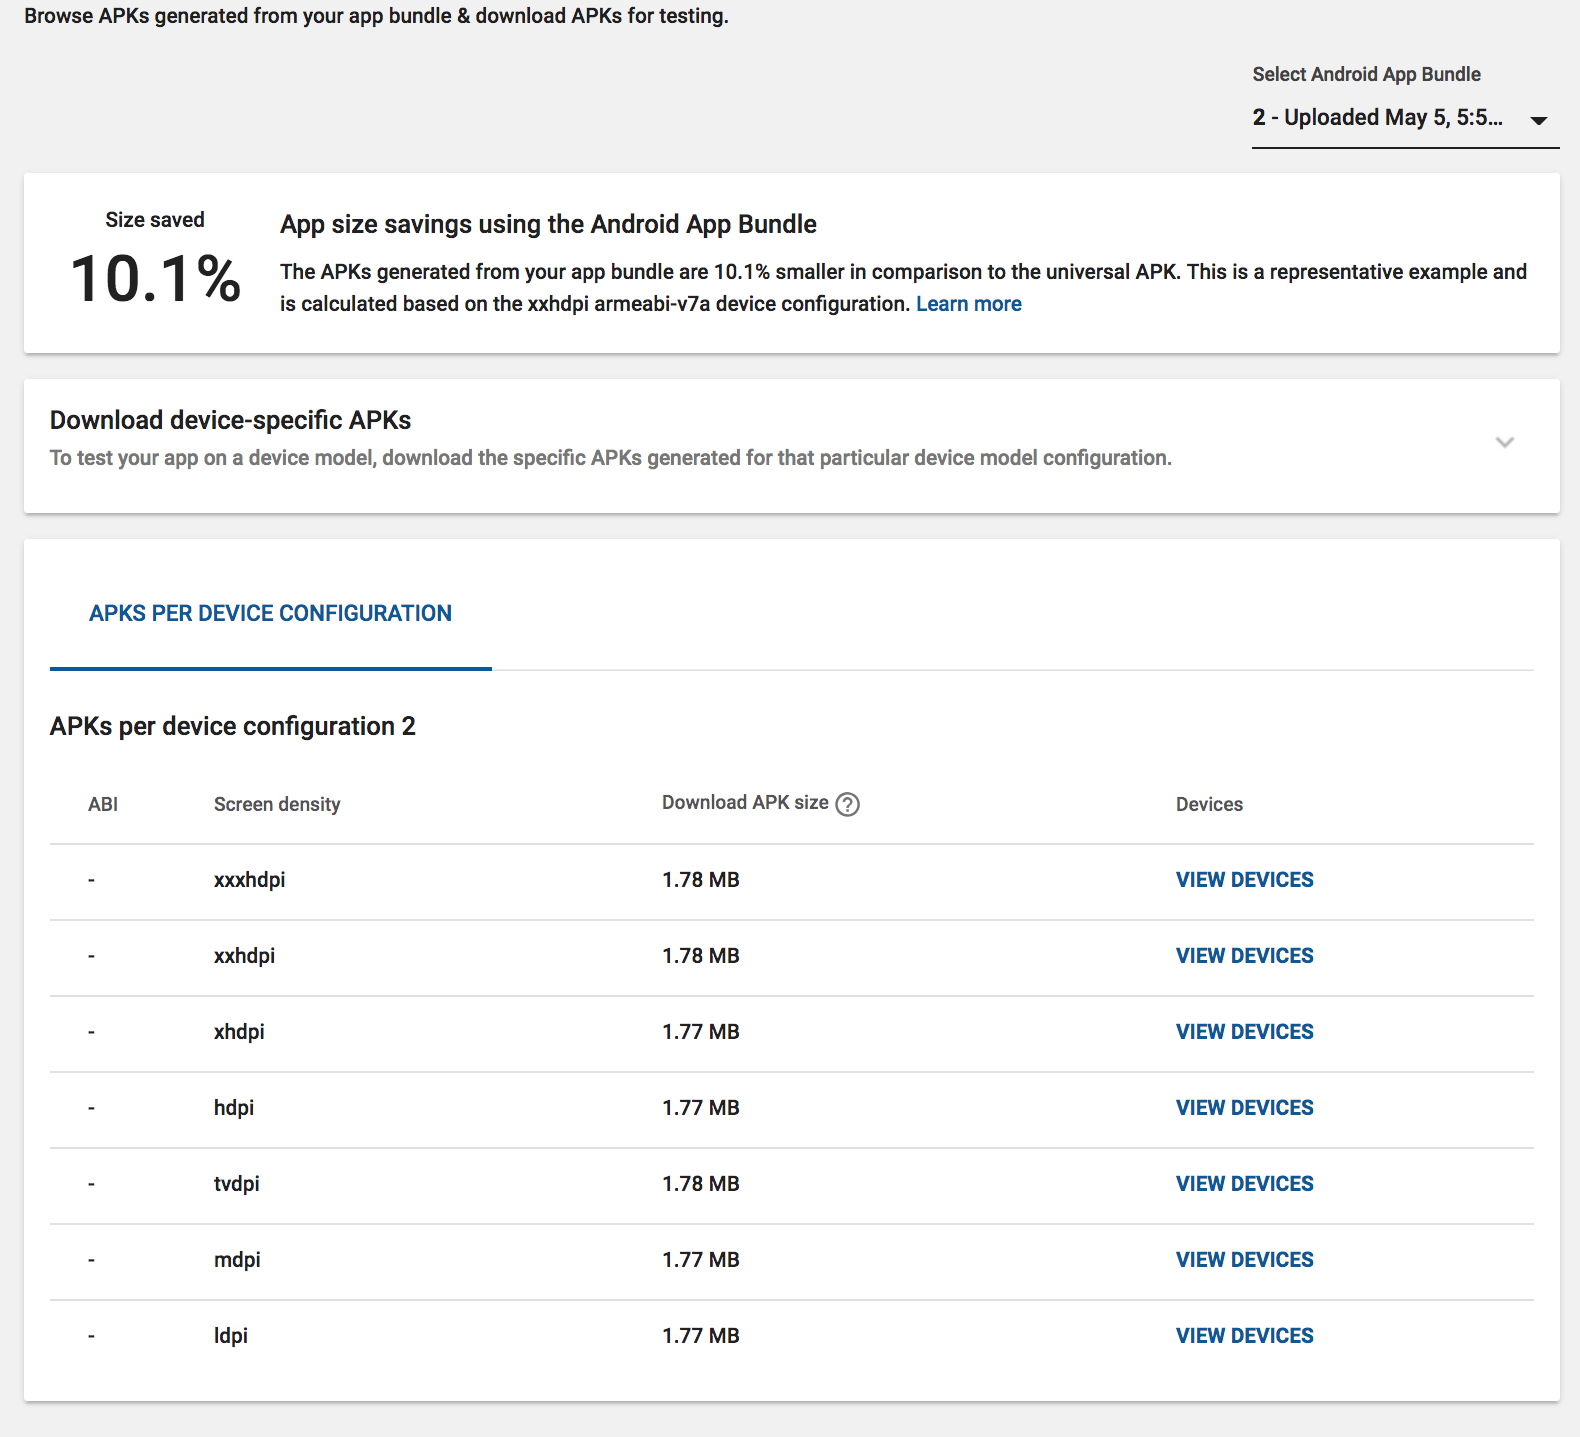
You can go even deeper by clicking VIEW DEVICES, and see the specific devices that an APK is going to be delivered to.

The Bundle Explorer can be a great tool while debugging, when you want to know the exact file that a user received on their device.
App Bundles are also available in the Publishing API for automation.
Testing App Bundles
The Google Play Store provides a convenient way to test your App Bundle called Internal Test Track. This is a special track wherein you can invite a closed list of users to test your app.
The Internal Test Track is similar to the Alpha and Beta tracks. The difference is that you don’t have to wait very long with the Internal Test Track, because it’s available almost instantly after you upload your App Bundle file. That helps to ensure that what your users are going to receive is the same as what your QA team is testing.
In the Play Store console, go to Release Management ▸ App Releases ▸ Internal test track 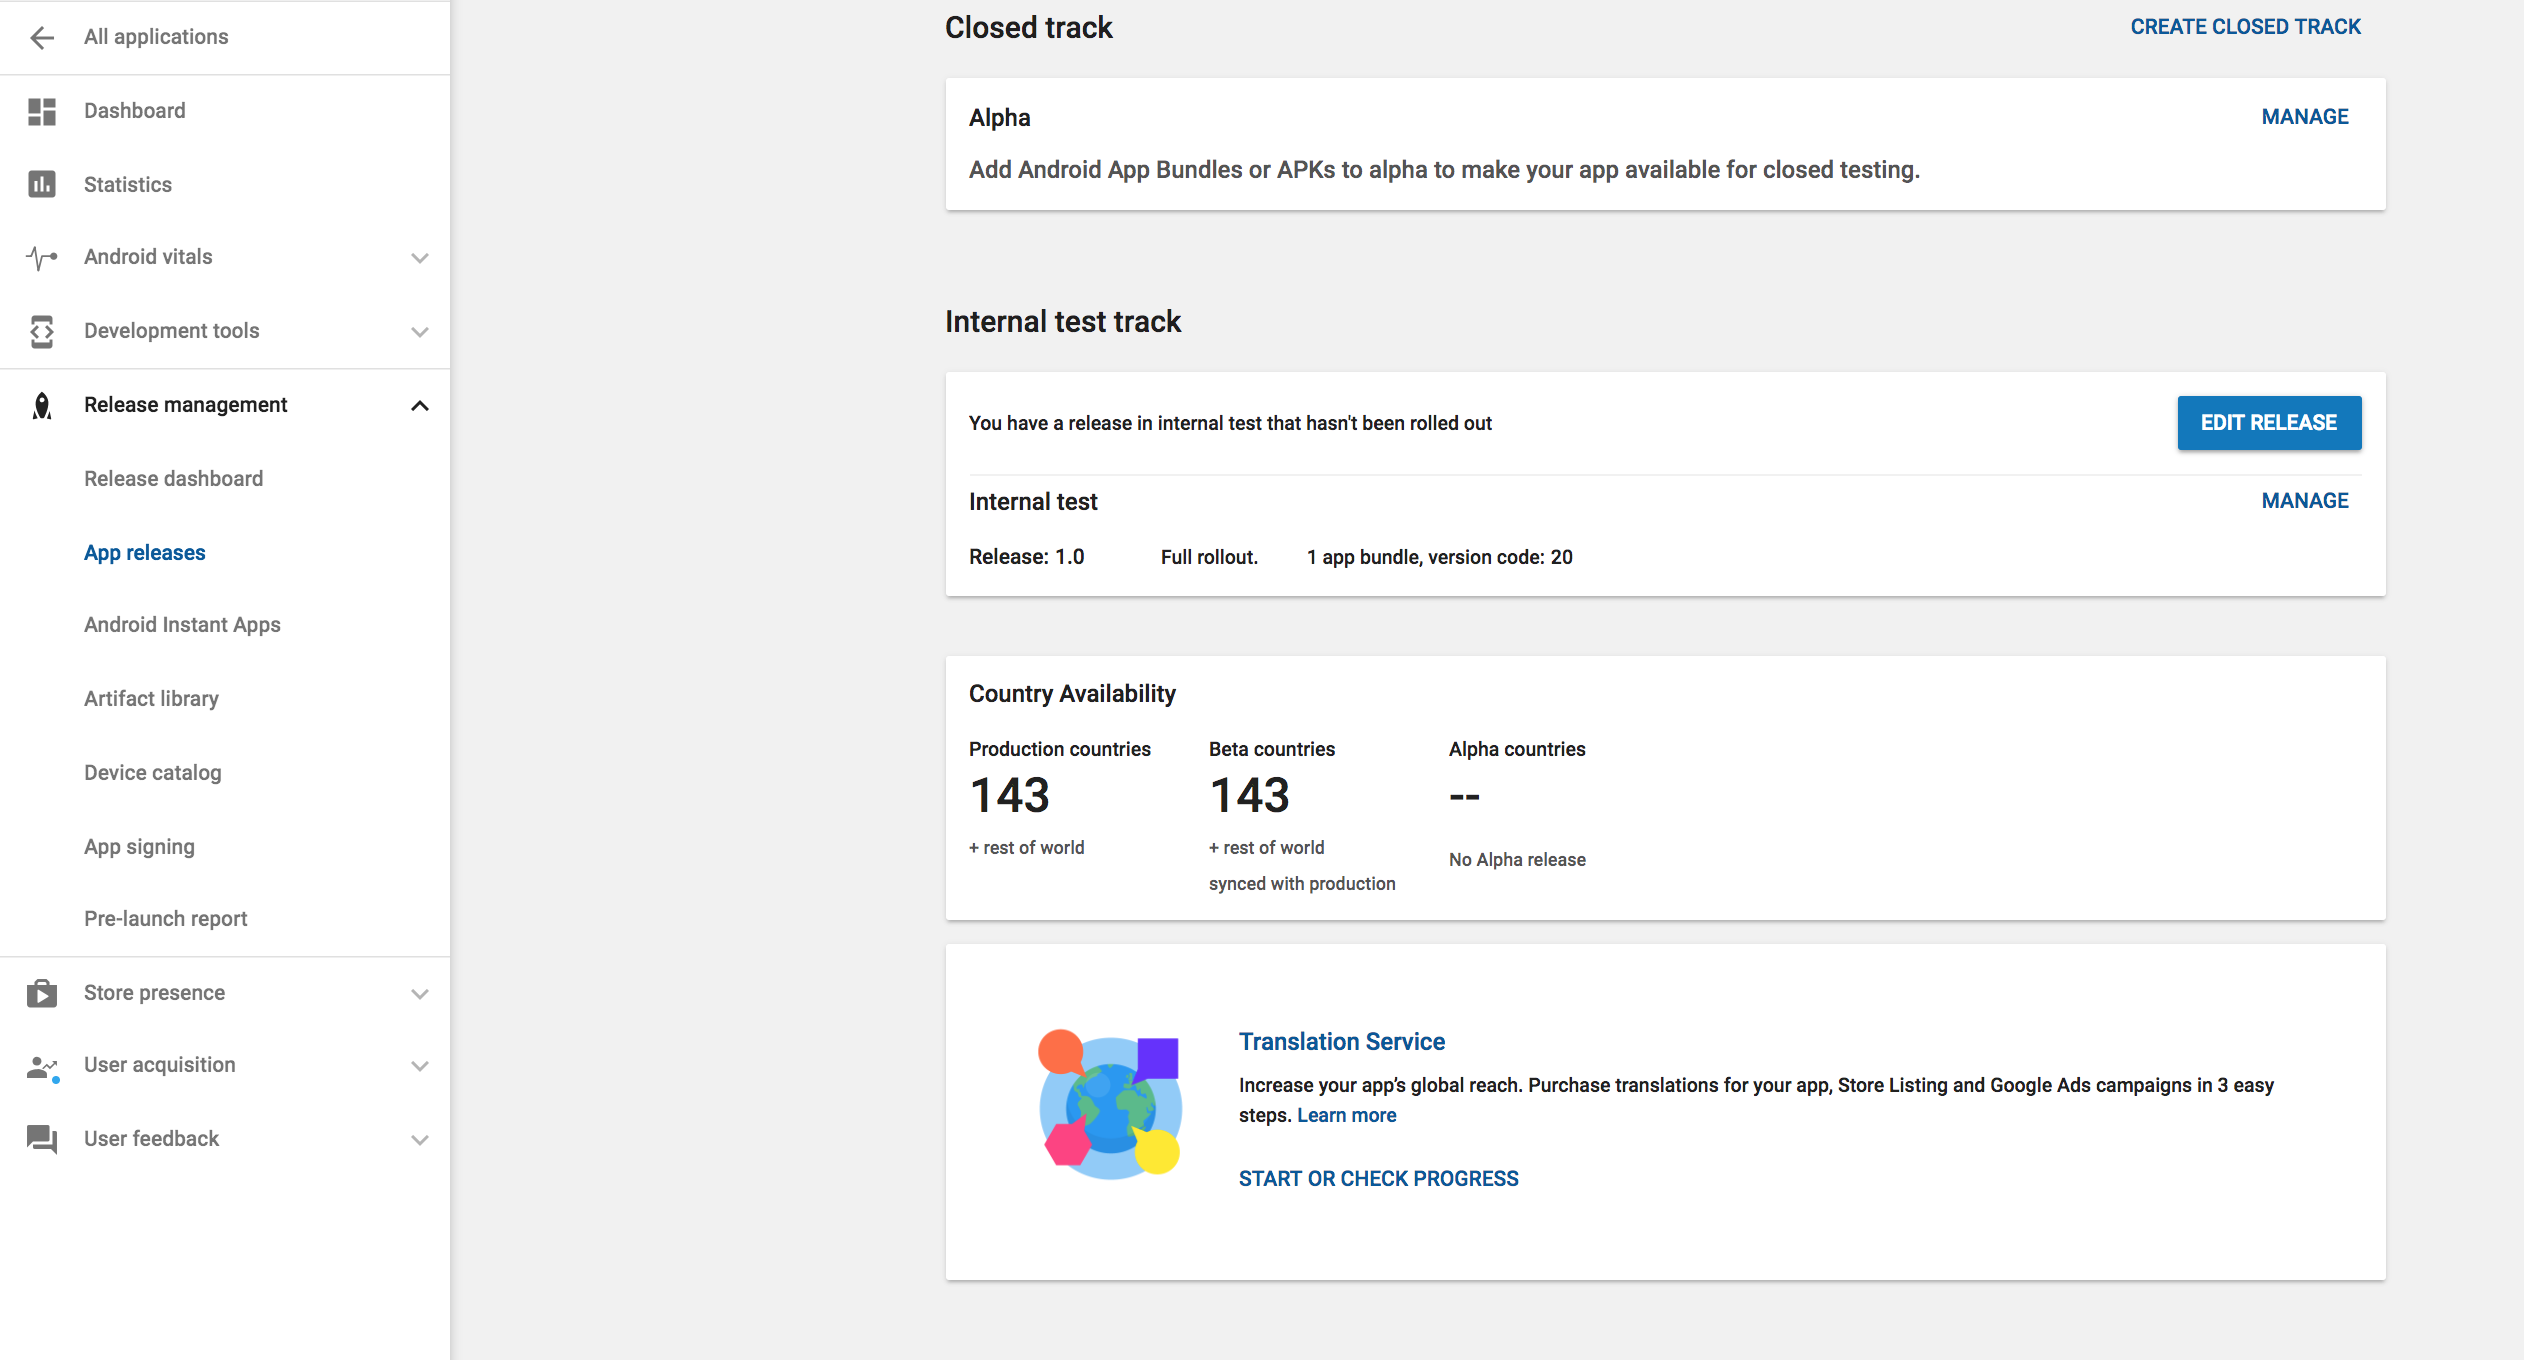
There you can create a list of up to 100 testers.

You can then share the Opt-in URL link with your testers. This link allows the users on the test list to download your app.
Using Bundletool
Bundletool is a command-line tool that helps you to manipulate Android App Bundles. This is the same tool that the Play Store uses to generate .apk files from a .aab file. Additionally, the source code of Bundletool is available as an open source project on GitHub, in case you want to take a deeper look at its ins and outs.
Bundletool allows you to test locally and simulate the same process that Google Play does to serve your App Bundle to users, in case you don’t want to test through the Play Store.
It’s your turn to play a bit with Bundletool. :]
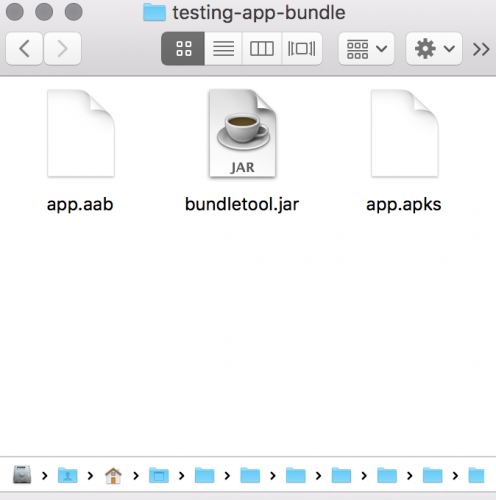
Go to the Bundletool release page and download the bundletool-all-[LAST-VERSION].jar file into a new directory called testing-app-bundle. Then rename the jar to bundletool.jar, and copy the debug .aab file that you previously generated to this same directory.
After that, you should have a directory similar to this one:

To execute Bundletool from the command line, you need to use java -jar bundletool.jar followed by any command that you want Bundletool to execute.
Try this with build-apks . This command takes an App Bundle ( .aab ) file and outputs a set of APKs. To indicate the bundle, you use the argument —bundle , and output is identified with the argument —output .
Open Terminal, navigate to the testing-app-bundle directory and run the following:
After executing the command above, you have a file app.apks:
Pro-tip: If you use the flag —connected-device , you can generate APKs just for the devices connected to your development machine.
To install your app on a device, you use the command install-apks , which takes an APK set as an input with the argument —apks , then extracts it and installs the corresponding APK on a connected device.
Internally, Bundletool will read the configuration of the connected device and will select the APK that matches the configuration in order to install it on the device. This is the same matching process that the Google Play Console does when a user requests an app.
Using Bundletool, you can replicate the same process that Google Play uses. This is a great tool for testing locally.
You’ve seen just a small set of things you can do with Bundletool. You can find more in the complete reference.
A Closer Look at Bundletool Output
You’ll now take a closer look at the APK set file app.apks in the testing-app-bundle folder. Change the extension of app.apks to app.zip and uncompress it using your favorite unzipping tool.
Now you have an app directory. Inside this directory there’s a sub-folder called splits. In there, you can find all the APK variations.

Now, try a small experiment, taking one of these split APKs and comparing it with a traditional APK.
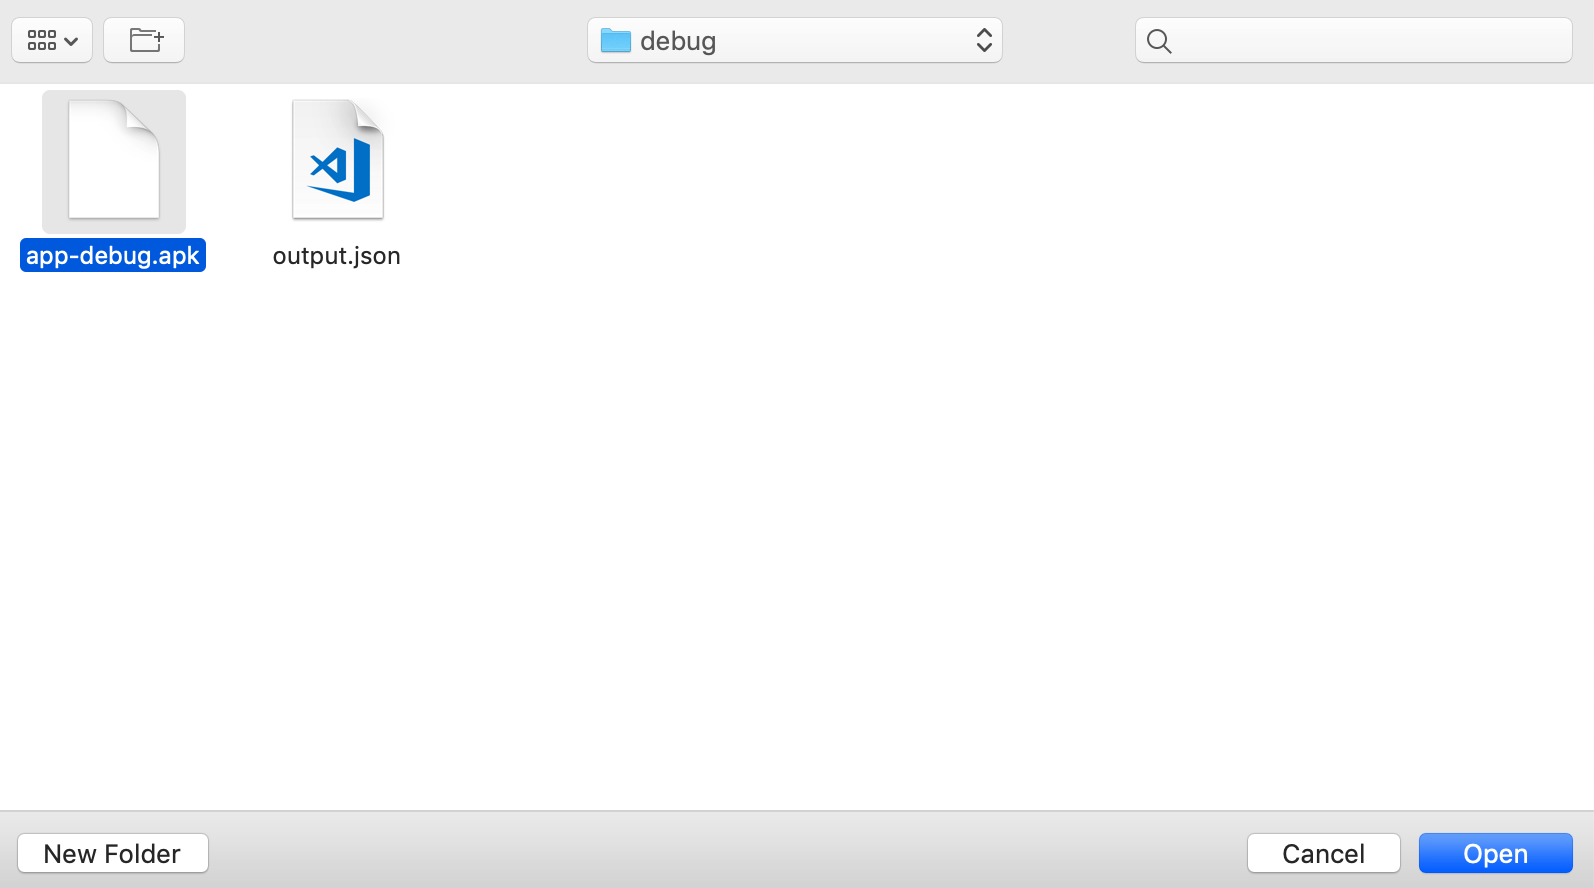
You’ll take the base-es.apk file and open it with the APK Analyzer tool in Android Studio, by going to Build ▸ Analyze APK.
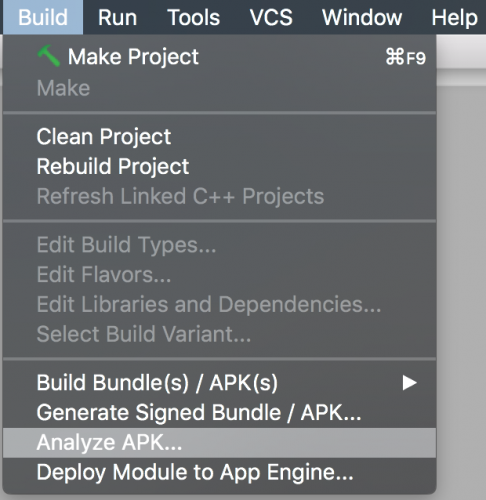
Navigate to the splits folder in the test-app-bundle directory you made, choose base-es.apk and click OK.


base-es.apk is a small file of just 5.3 KB, and it only contains the string resources for the Spanish language.
Now for the other side of the coin, a traditional (universal) APK file. A universal APK contains all the resources for every possible device configuration your app supports, and it’s the traditional way to distribute an app.
Go to Build ▸ Build Bundle(s) / APK(s) ▸ Build APK(s):

Then choose the APK file in app/build/outputs/apk/debug:

As you can see above, the universal APK has everything in it! It’s a much bigger 2.6 MB vs 5.3 KB file, like comparing an 🐜 versus an 🐘.
APK Analyzer allows you to diff two APKs, by going to the upper right corner and clicking the Compare with previous APK button, then navigating to and choosing the base-es.apk file:

Here’s the diff between the universal APK and base-es.apk:

Now you see the real power of App Bundles in action!
Dynamic Delivery
Another great feature of App Bundles is dynamic delivery, which helps your apps get even smaller!
The idea is that you can split your apps by feature modules in such a way that parts of your app that are not as popular can be downloaded on-demand, only when the user needs them and not as part of your main APK. It’s the same idea as that of downloading resources, but with code instead. Pretty cool! :]
This feature of App Bundles is currently in Beta, so to be used in production you have to opt-in.
Backwards Compatibility
Devices on Android 4.4 (API level 19) and lower do not support split APKs, which are the foundation of delivering multiple APK files to devices. Google Play serves a single APK version that includes resources for all languages that your app supports on those Android versions. For backwards compatibility, you don’t have to take any additional steps, since Google Play takes care of everything for you.
Where to Go From Here?
Now that you’ve gotten started with App Bundles, you should try using App Bundles with your own apps and publish an Internal track on the Google Play Store. You can also test your App Bundles locally using Bundletool.
To learn more about App Bundles, take a look at the official reference. You can also learn more about App Bundles and Dynamic Delivery with feature modules here.
I hope you enjoyed this introduction to App Bundles. If you have any comments or questions, please join in on the forum discussion below!
Источник


