- Installing Burp’s CA Certificate in an Android Device
- Configuring an Android Device to Work With Burp
- Configure the Burp Proxy listener
- Configure your device to use the proxy
- Test the configuration
- Configuring an Android Device to Work With Burp Suite
- Setup A Proxy Listener on the Burp Suite
- Configure the Device to use the proxy of Burp Suite
- Installing and Configuring Burp Suite’s CA Certificate in an Android Device
Installing Burp’s CA Certificate in an Android Device
Before you start:
- Ensure you have configured your Android device to work with Burp.
- Ensure your Android device is able to receive email, and that your email filter does not block .cer files.
Note: Android Nougat no longer trusts user or admin supplied CA certificates. We recommend that you use an older version of Android for your testing. If you must use Android Nougat then you will need to install a trusted CA at the Android OS level on a rooted device or emulator.
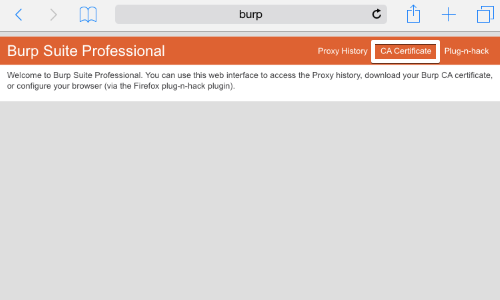
On your computer with Burp running, visit http://burpsuite and click the «CA Certificate» link. Save the certificate file on your computer.
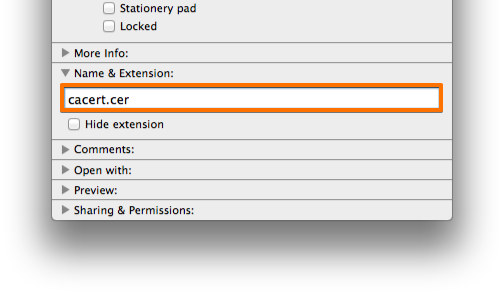
On your computer, rename the file with the .cer file extension, and send the file as an email attachment to an account that you can access from your Android device.
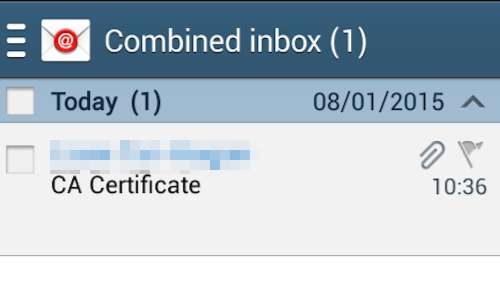
Check your email on the Android device.
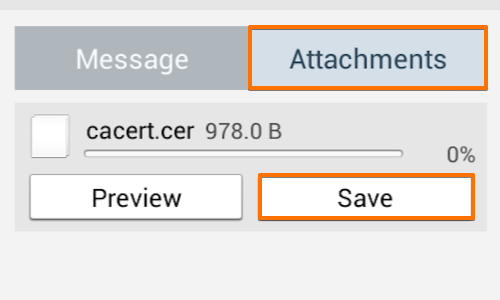
Open the email and tap the attachments button.
Then tap the save button. This should save the certificate file to your Android device’s “Download» folder.
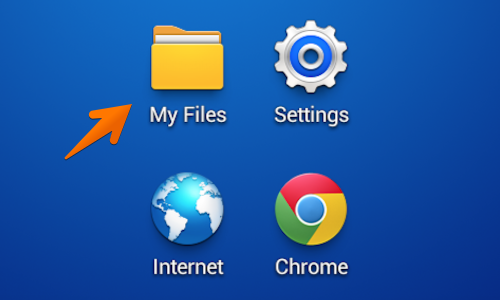
Find your “My Files” folder. This may be located in the “Apps” menu or on one of the device’s home screens.

In “My Files” tap the “All Files” folder.
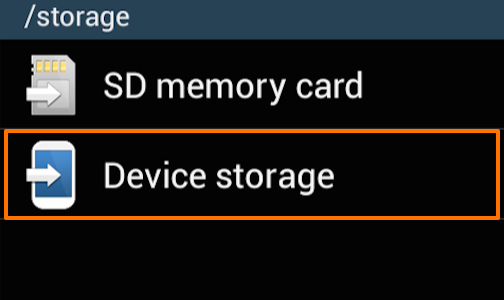
In the “All Files” folder tap “Device storage”.
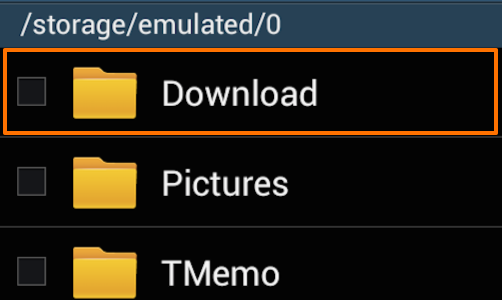
Open the “Download” folder and check that your certificate is correctly located in this folder.
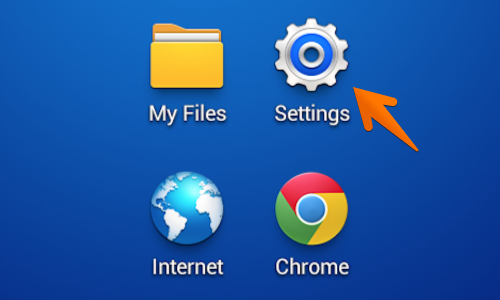
Next locate and tap the «Settings” icon. This may be located in the “Apps” menu or on one of the device’s home screens.
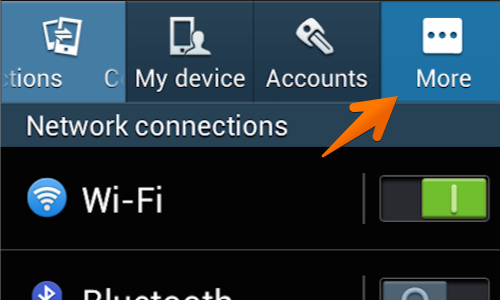
Tap the “More” button.
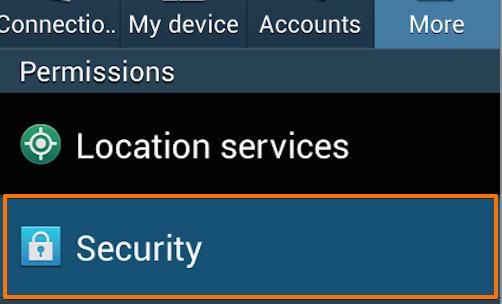
Beneath the “Permissions” header tap the “Security” button.
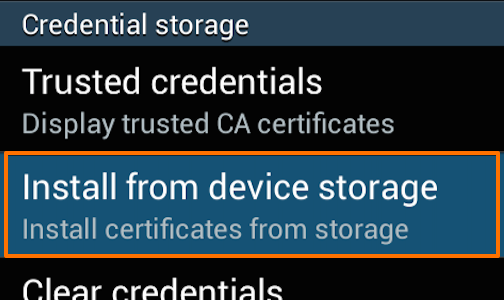
In the “Security” menu select the “Install from device storage” from beneath the «Credential storage» header.
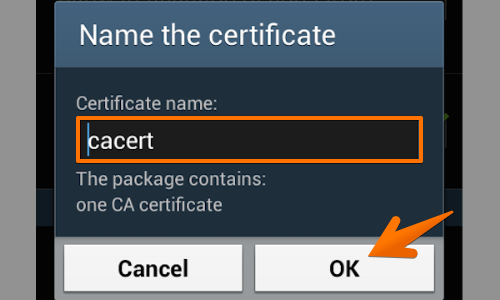
You will now be asked to “Name the certificate”, leave the certificate name as it is and tap “OK”.
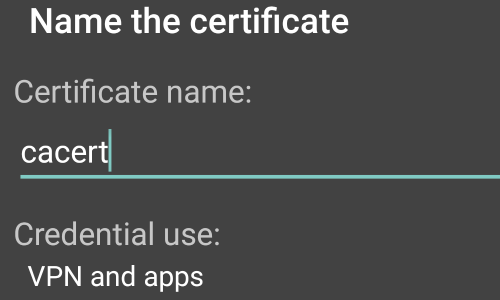
In some versions of Android, your device will ask if you want to use the certificate for «VPN and apps» or «WiFi».
In the «Credential use:» options, you should select «VPN and apps».

The phone will revert to the security menu and will inform you via a small pop up that the certificate is installed.
You can check the Certificate is installed by tapping the “Trusted credentials» button.
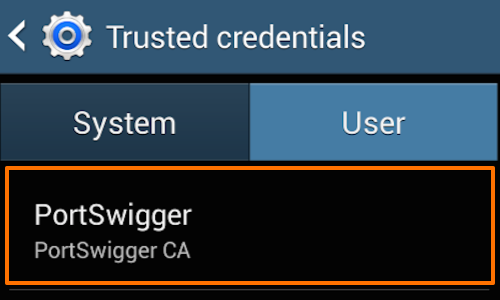
Tap the «User» tab in the “Trusted credentials” window to show the PortSwigger CA certificate.
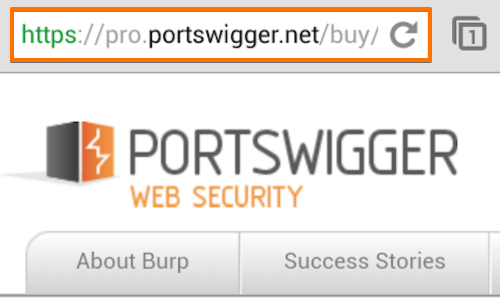
You should now be able to visit any HTTPS URL via Burp without any security warnings.
Note: It is also possible to import the Burp CA Certificate using a micro SD card. Ensure that you move the Burp CA Certificate from the micro SD card to the phones own storage before using the certificate install function in the “Security” menu.
This article is based on Android version 4.2.2 running on a Samsung mobile device.
Источник
Configuring an Android Device to Work With Burp
To test web applications using an Android device you need to configure your Burp Proxy listener to accept connections on all network interfaces, and then connect both your device and your computer to the same wireless network. If you do not have an existing wireless network that is suitable, you can set up an ad-hoc wireless network.
Configure the Burp Proxy listener
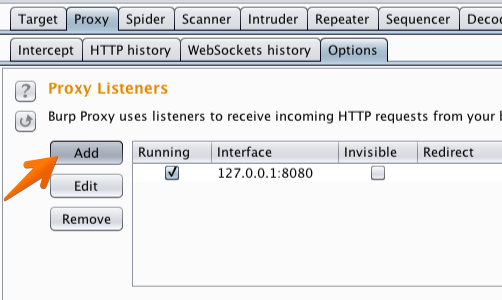
In Burp, go to the “Proxy” tab and then the “Options” tab.
In the “Proxy Listeners» section, click the “Add” button.

In the «Binding» tab, in the “Bind to port:” box, enter a port number that is not currently in use, e.g. “8082”.
Then select the “All interfaces” option, and click «OK».
Note: You could alternatively edit the existing default proxy listener to listen on all interfaces. However, using different listeners for desktop and mobile devices enables you to filter these in the Proxy history view.
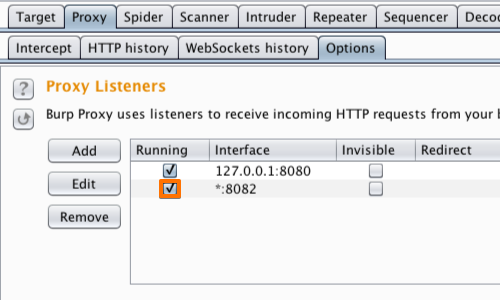
The Proxy listener should now be configured and running.
Configure your device to use the proxy
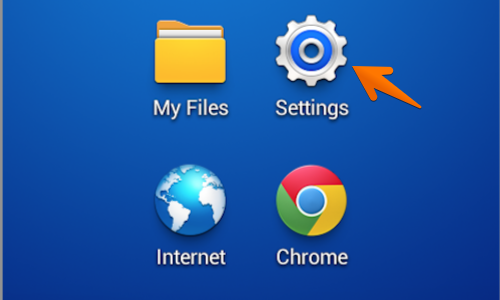
In your Android device, go to the“Settings” menu.
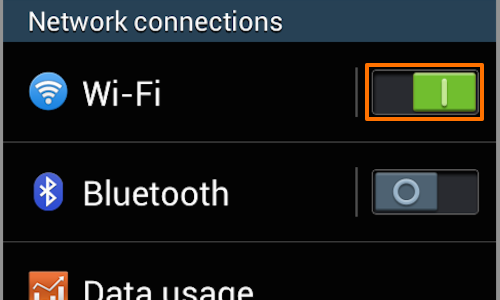
If your device is not already connected to the wireless network you are using, then switch the «Wi-Fi» button on, and tap the “Wi-Fi” button to access the «Wi-Fi» menu.
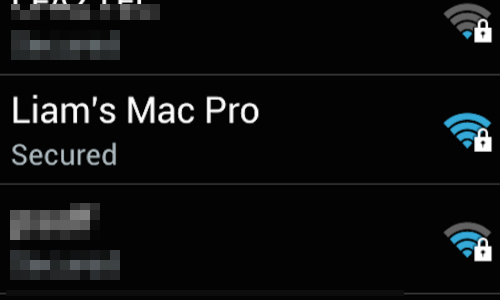
In the «Wi-Fi networks» table, find your network and tap it to bring up the connection menu.

If you have configured a password, enter it and continue.
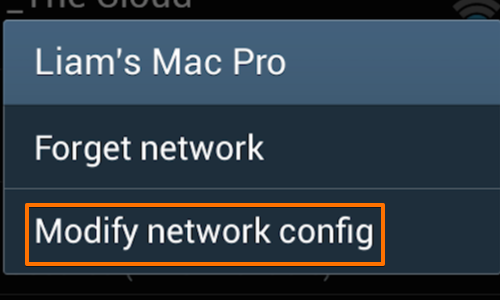
Once you are connected hold down on the network button to bring up the context menu.
Tap “Modify network config”.
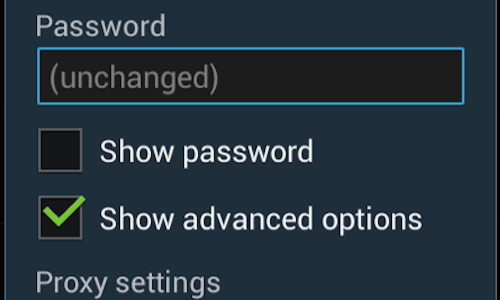
Ensure that the “Show advanced options” box is ticked.
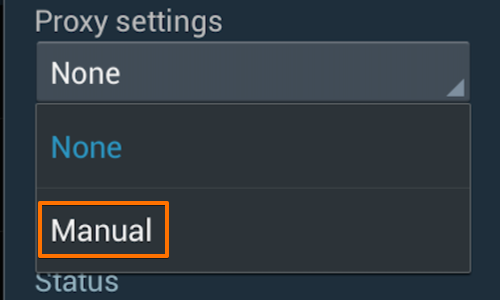
Change the “Proxy settings” to “Manual” by tapping the button.
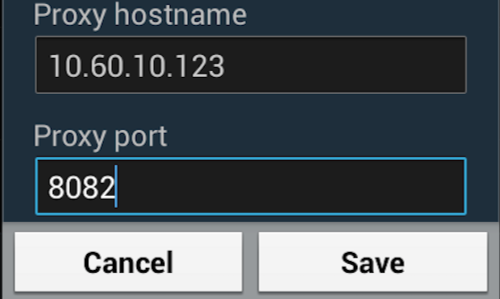
Then enter the IP of the computer running Burp into the “Proxy hostname”.
Enter the port number configured in the “Proxy Listeners” section earlier, in this example “8082”.
Test the configuration

In Burp, go to the «Proxy Intercept» tab, and ensure that intercept is “on” (if the button says “Intercept is off» then click it to toggle the interception status).
Open the browser on your Android device and go to an HTTP web page (you can visit an HTTPS web page when you have installed Burp’s CA Certificate in your Android device.)
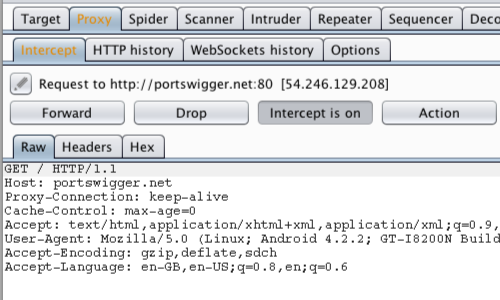
The request should be intercepted in Burp.
Note: On some Android emulators you will need to add the proxy details from the emulator settings menu rather than the native Network / Wifi settings on the emulated device.
Источник
Configuring an Android Device to Work With Burp Suite
In this article, I will show you how you can set up the Burp Suite to capture the proxy from the android device. For Android application dynamic testing, we need to capture all the data from the application to be intercepted and monitored. We will set up an android device proxy to throw all the data to the burp suite listener on some specific network port.
Table of contents
Setup A Proxy Listener on the Burp Suite
First of all, let’s start a proxy listener on the burp suite to capture the traffic via a wireless network or ethernet cable.
Navigate to “Proxy -> Options -> Proxy Listeners” and observe the default proxy listener running on localhost IP address 127.0.1.1 and 8080 port.

Now click on the “Add” button remaining on the left side. On popup will appear.

Enter 8181 as port number in the “Bind to port” field and Select “All Interfaces” for the “Bind to address” option. You can select the “Specific address” option if you want to listen for some specific address or interface.
Click on Ok button.
Now observe the list of proxy listeners, the Burp suite has started the listener on 8181 port for all interfaces.

Configure the Device to use the proxy of Burp Suite
We will set up a manual network proxy through the android device to the burp suite. Currently, my Android device and the machine that has the burp suite running are connected to the same network. Try to connect it to the same network so both can interact with each other via a single gateway. Or if you can create an Ad-hoc network.
For that just open your “Settings” app of the android device.

Enter into the “Wi-Fi” settings.

Observe the Wi-Fi SSID network in which the device is connected.

Press and hold that option, you will get a popup. Click on “Modify Network” from the available items.

Click on the “Advanced Options” drop down menu.
You will get two options,

Click on the dropdown arrow of Proxy settings and select “Manual proxy”. Some extra options will arrive for manual proxy settings.
Enter the IP address of the machine that has the Burp Suite running, in “Proxy Hostname”. Enter the IP “8181” that is configured in the burp suite proxy listener.

Click on the “Save” button.
So, from now, our android device will send all the data from the burp suite.
But here didn’t complete everything! We have not installed the certificate of the burp suite on the android device.
Installing and Configuring Burp Suite’s CA Certificate in an Android Device
The android device will flag a warning for every request is intercepted by the malicious proxy server. This is because new android OS versions have upgraded their security.
As per the Android Officials and Port swigger Document
Android Nougat no longer trusts user or admin supplied CA certificates. We recommend that you use an older version of Android for your testing. If you must use Android Nougat then you will need to install a trusted CA at the Android OS level on a rooted device or emulator.
Try to open any website that uses “HTTPS” for a secure connection. The browser will throw the security warning “ There are problems with the security certificate for this site. “.

The browser will throw the warning, but it might be possible that the other apps will not give any type of warning and the request will be blocked in the background.
The Burp Suite will also flag the warning “ The client failed to negotiate a TLS connection to www.example.com:443: Received fatal alert: certificate_unknown “.

Let’s resolve this issue by installing Burp Suite’s CA Certificate on the android device.
We have two methods to get the CA trusted certificate of the Burp suite.
- Just navigate to “Proxy -> Options -> Export CA certificate” and extract the certificate. Transfer it to the android device and install it.
- Download the CA certificate on the android from the Burp’s local URL and then install it.
Here we will use the second method, which is to directly download the Burpsuite’s CA certificate from the android device browser from Burp’s local URL.
For that follow the below steps,
Open up the browser in the android device and type “http://burp/”. Burp suite’s page will open. Now click on the “CA Certificate” button remains in the top right corner.

CA certificate will be downloaded on the android device.

The default format of Burp’s CA certificate will be in the “.der” format, but, the android not support the “.der” format for certificate installation.
So, just navigate to the downloaded file and rename it to “cacert.cer“.

Click on SAVE button.

After the successful rename process, let’s install the “.cer” certificate on the android device.
Open up “Settings” app in the android and navigate to “Security” tab.

Click on “Install from SD card” option.

Browse to the Download directory and choose the Burp certificate.

Give any preferred name and click on the OK button. In some cases, you will get the selection for the “Credential use” type. Select “VPN and apps” and proceed further.

If it ask to setup the PIN or Patter for your android device then setup it and procced further.
After the process we will get the the message “ Certificate is installed “.

The CA certificate for the Burp Suite is now installed. To verify that, just navigate to “Settings -> Security -> Trusted credentials -> USER” and observe the “PortSwigger CA” is installed successfully.

Now you should be able to visit any HTTPS URLs via Burp Suite without any security warnings on an android device or Burp Suite itself.

Also, observe in the android browser, the HTTPS URLs will be open without any type of warning. Now you can also Intercept the traffic for other applications.

Thanks for reading. Share the article if you found this helpful.
Источник


