- Configuring Burp Suite With Android Nougat
- Table of Contents
- Background
- Install Burp CA as a system-level trusted CA
- Mofiying and repackaging an app
- Intercepting Android apps with burp suite
- . bypassing the certificate pinning!
- Certificate pinning
- Replace the embedded certificate
- Repack the app
- Sign the apk
- Test it!
- Анализ трафика Android-приложений: обход certificate pinning без реверс-инжиниринга
- Что такое certificate pinning?
- Обход certificate pinning
- Installing Burp’s CA Certificate in an Android Device
Configuring Burp Suite With Android Nougat
Table of Contents
This last weekend I started testing a new Android app for fun, and ran into some trouble getting Burp Suite working properly. I burned a whole afternoon troubleshooting the issue, and decided to write up what I found out and two different ways I got it working.
Background
I’ve done quite a bit of Android testing in the past and my setup usually involves a Genymotion VM or my old rooted Nexus Tablet. I run Burp Suite locally, install the User Cert as outlined in Portswigger’s documentation, configure a WiFi proxy and I’m off the races.
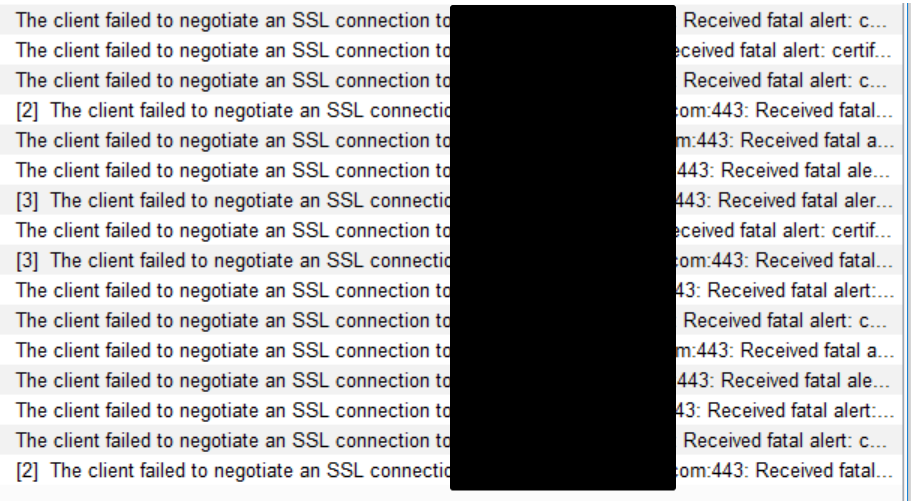
This particular app I wanted to test, however, required a minimum API level 24 (Android 7.0 — “Nougat”) and suddenly it wasn’t working. I followed the steps I always do but saw nothing but “connection reset” errors in Burp:
After a few frustrating hours of troubleshooting, I finally figured out the issue lied with the latest versions of Android (API >= 24). Before I go any further, all the information I needed was found in these great write-ups:
Starting with Nougat, Android changed the default behavior of trusting user installed certificates. It’s no longer possible to just install the Burp CA from the sdcard to start intercepting app traffic. Unless otherwise specified, apps will now only trust system level CAs. The failure happens “invisibly” and is responsible for all the alerts I saw in Burp Suite.
There’s two ways to bypass this, and I’ll walk through them both.
- Install the Burp CA as a system-level CA on the device. My recommendation for the easiest solution, but does require a rooted device. Also added benefit of not having to set a lockscreen PIN 🙂
- Modify the manifest and repackage the app. Slightly more work, but doesn’t require root privileges.
Note: I did all this with Burp Suite Pro on my Windows 10 machine and am using an Android 7.1 (API25) Genymotion VM, but the steps should be applicable to any setup.
Install Burp CA as a system-level trusted CA
Since the “traditional” way of installing a user certificate doesn’t work anymore in Nougat and above, for me the easiest solution is to install the Burp CA to the system trusted certificates. You can see all the system CAs that are bundled with an Android device by going to Settings -> Security -> Trusted Credentials and viewing system CAs. You’ll see the similar CAs you’d see in a browser bundle.
Trusted CAs for Android are stored in a special format in /system/etc/security/cacerts . If we have root privileges, it’s possible to write to this location and drop in the Burp CA (after some modification).
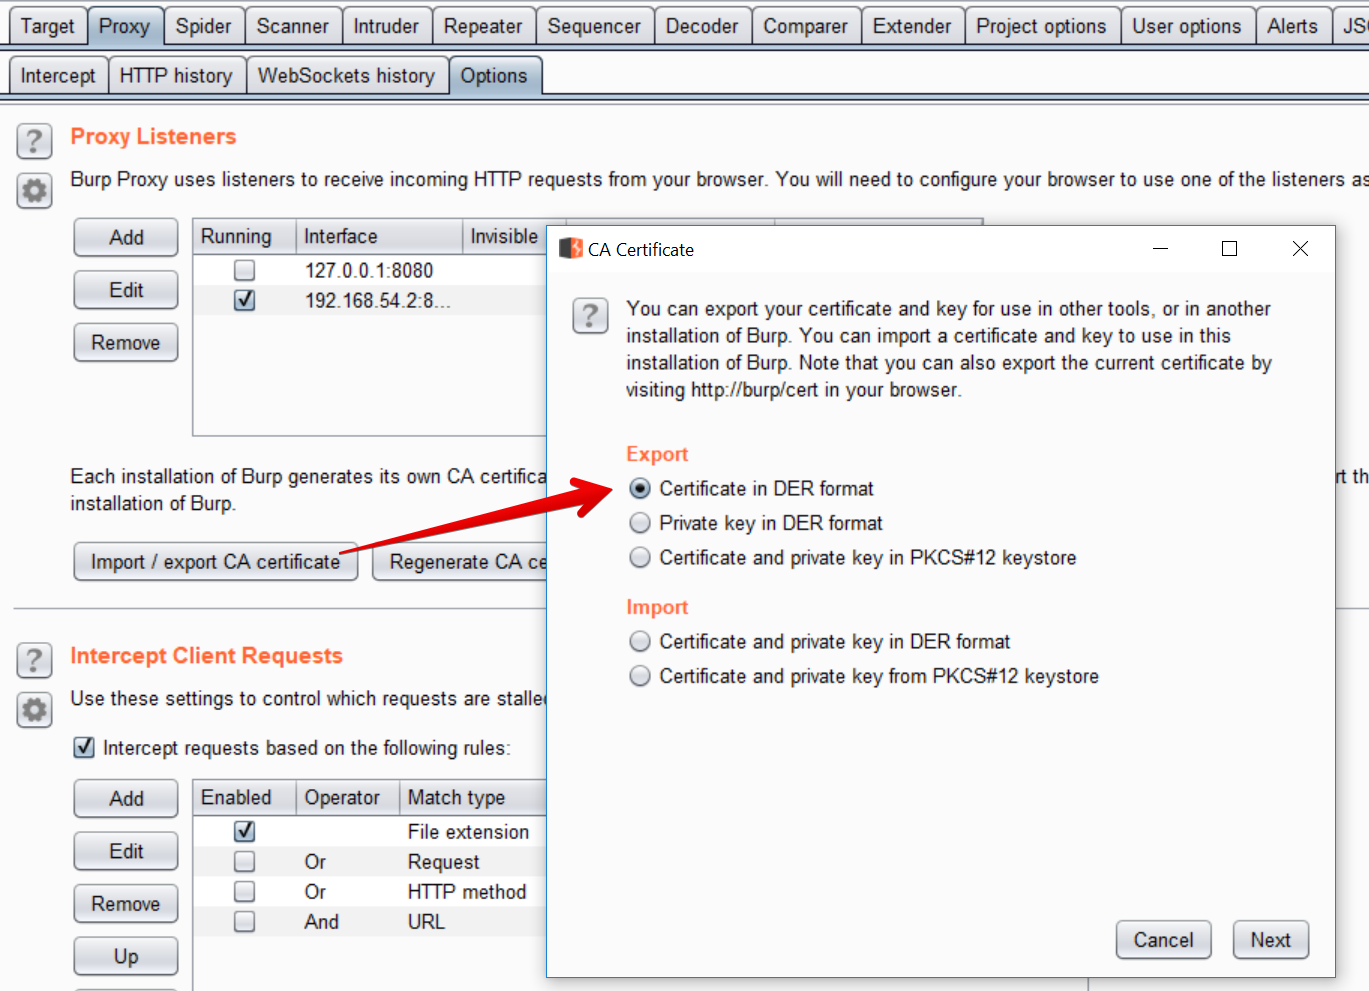
Export and convert the Burp CA The first step is to get the Burp CA in the right format. Using Burp Suite, export the CA Certificate in DER format. I saved it as cacert.der
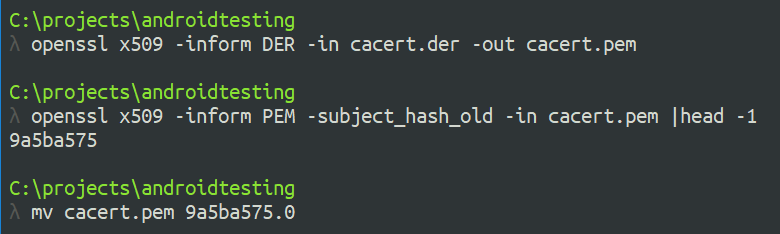
Android wants the certificate to be in PEM format, and to have the filename equal to the subject_hash_old value appended with .0 .
Note: if you are using OpenSSL subject_hash , not the “old” one
Use openssl to convert DER to PEM, then output the subject_hash_old and rename the file:
For example, with my certificate:
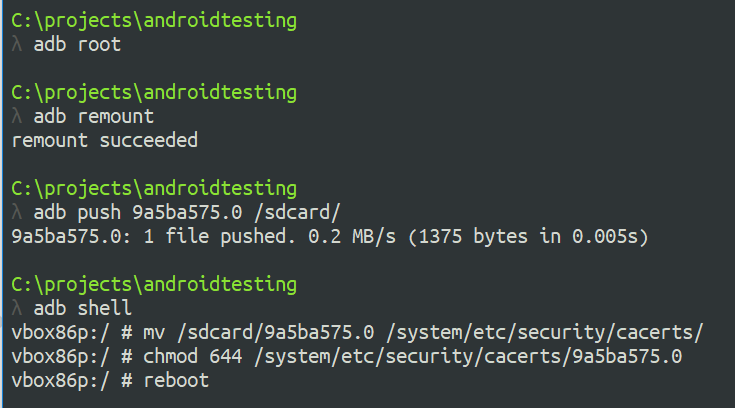
Copy the certificate to the device We can use adb to copy the certificate over, but since it has to be copied to the /system filesystem, we have to remount it as writable. As root, this is easy with adb remount .
The just drop into a shell ( adb shell ) and move the file to /system/etc/security/cacerts and chmod it to 644:
Lastly, we have to full reboot the device with either adb reboot or a power cycle.
After the device reboots, browsing to Settings -> Security -> Trusted Credentials should show the new “Portswigger CA” as a system trusted CA.

Now it’s possible to set up the proxy and start intecepting any and all app traffic with Burp 🙂
Mofiying and repackaging an app
If you don’t have root or don’t want to modify the system trusted certificates, you can install the Burp CA as a user cert and then modify the specific APK you want to MitM.
Starting with Nougat, apps will ignore user-installed certificates by default. This is evident by looking at logcat output when launching the app:

Without a network security config, the app will only trust system CAs and will not honor the user installed Burp certificate.
To get around this, it involves:
- Disassembling the APK
- Adding a new XML resource to define a network security profile
- Modifying AndroidManifest.xml
- Repackaging and self-signing the APK
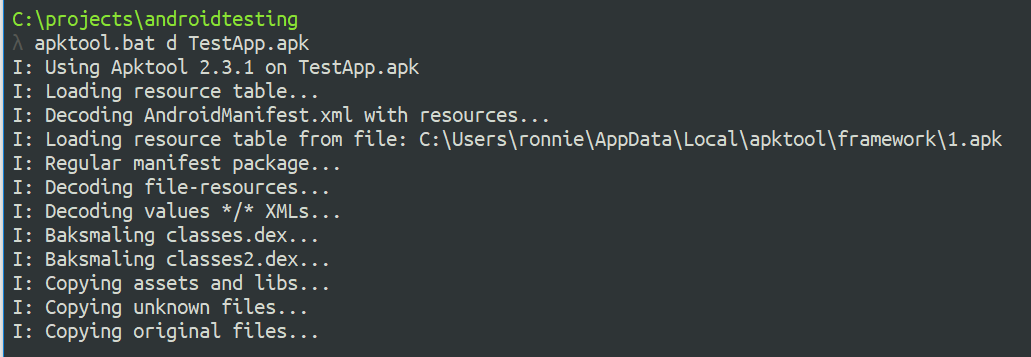
Disassemble and modify the APK Start by using apktool to disassemble the APK
Next, add a new network security config by creating the file network_security_config.xml in the res/xml directory:
The config needs to explicitly state that trusting user certs is acceptable. The entire contents should be:
Finally, we have to define the network security config in AndroidManifest.xml . In the tag, add the android:networkSecurityConfig attribute pointing to the new XML file:
Reassemble and Sign Finally, the APK must now be rebuilt and signed in order to be installed. Using apktool b , a new build will be created in the dist/ directory:
To self-sign the app, use keytool to create a new keystore and key, then jarsigner to sign the new APK:

Lastly, install the new APK with adb :
Now, when we start the application, the logcat output will indicate a new network security config is being used:

With the Burp CA installed to user certificates, we can now MitM the application traffic!
Источник
Intercepting Android apps with burp suite
. bypassing the certificate pinning!
Certificate pinning
What happens when an android app connects to a remote https server?
So, by default the app match the certificate provided by the server with the device’s trust store and check that the certificate has been generated for the expected hostname. It doesn’t do additional checks, and this of course can be a security hole as any unsafe certificate can be installed by mistake by the user or by malicious apps, allowing man-in-the-middle attacks.
The solution adopted by developers is the certificate pinning, which consists in embed and forcing the app to use a specific certificate, which match the one used by the server, ignoring the device’s trust store and thus allowing the mobile application to successfully connect only to the legitimate server.
This is a very good practice but unfortunately it prevents to debug or reverse engineer the app using tools such Burp Suite.
Replace the embedded certificate
For the demostration I will use Dyson Link, andoid app from Dyson, which I was interested to reverse engineer.
The app uses a series of embedded certificates to verify the authenticity of the remote API server. So let’s start decompiling the app using apktool.
The result will be the folder DysonLink_v3.3.1 containing the decompiled code and the app resources. The folder DysonLink_v3.3.1/assets/ contains our SSL certificates.
Now let’s fire up Burp Suite, export the CA certificate using the GUI or pointing the browser to http://burp/. The certificate is in DER format, which we need to convert to PEM.
We will use the new generated certificate to replace all the pem files in the assets folder.
Repack the app
Recreate the apk from the sorce folder:
Sign the apk
Generate a new keytore for the signing procedure:
Sign the forged apk:
Test it!
Now we are ready to install it in our emulator. First let’s start it, with the correct proxy settings to point to Burp Suite:
Install the forged apk (remember to uninstall the original one before):
And… as soon we will try to open the app we will see the https traffing passing through Burp Suite!
Источник
Анализ трафика Android-приложений: обход certificate pinning без реверс-инжиниринга
Иногда нужно исследовать работу бэкенда мобильного приложения. Хорошо, если создатели приложения не заморачивались и все запросы уходят по «голому» HTTP. А что, если приложение для запросов использует HTTPS, и отказывается принимать сертификат вашего корневого удостоверяющего центра, который вы заботливо внедрили в хранилище операционной системы? Конечно, можно поискать запросы в декомпилированом приложении или с помощью реверс-инжиниринга вообще отключить применение шифрования, но хотелось бы способ попроще.

Что такое certificate pinning?
Даже при использовании HTTPS пользователь не защищен от атак «Человек посередине», потому что при инициализации соединения злоумышленник может подменить сертификат сервера на свой. Трафик при этом будет доступен злоумышленнику.
Справиться с такой атакой поможет certificate pinning. Эта защитная мера заключается в том, что разработчик «зашивает» в приложение доверенный сертификат. При установке защищенного соединения приложение проверяет, что сертификат, посылаемый сервером, совпадает с (или подписан) сертификатом из хранилища приложения.
Обход certificate pinning
В качестве подопытного выберем приложение Uber. Для анализа HTTP-трафика будем использовать Burp Suite. Также нам понадобится JDK и Android SDK (я использую все последней версии). Из Android SDK нам понадобится только утилита zipalign, так что при желании можно не скачивать весь SDK, а найти ее на просторах интернета.
Заранее облегчим себе жизнь, добавив следующие пути к нужным утилитам в переменную окружения PATH:
Открываем Burp, заходим в Proxy – Options – Add и добавляем Proxy Listener на интерфейсе, который будет доступен подопытному Android-устройству (или эмулятору). На устройстве в свою очередь настраиваем используемую Wi-Fi сеть на использование только что включенного прокси.
Скачаем apk-файл через apkpure.com, установим приложение на устройство и попытаемся войти в свой аккаунт – приложение зависнет на этапе аутентификации.
В логах Burp Suite (вкладка Alerts) при этом мы увидим множественные отчеты о неудачных SSL-рукопожатиях. Обратите внимание на первую строчку – именно через сервер cn-geo1.uber.com в моем случае осуществляется аутентификация, поэтому и не удается войти в приложение.
Дело в том, что Burp Suite при перехвате HTTPS-соединений (а мы помним, что все соединения устройства проксируются через него) подменяет сертификат веб-сервера на свой, который, естественно, не входит в список доверенных. Чтобы устройство доверяло сертификату, выполняем следующие действия. В Burp заходим в Proxy – Options и нажимаем Import/export CA certificate. Далее в диалоге выбираем Export Certificate. Копируем сертификат на устройство, переходим в Настройки – Безопасность – Установить сертификаты и устанавливаем наш сертификат в качестве сертификата для VPN и приложений.
Опять пытаемся войти в свой аккаунт. Сейчас приложение Uber сообщит нам только о неудачной попытке аутентификации – значит прогресс есть, осталось только обойти certificate pinning.
Откроем приложение в вашем любимом архиваторе как zip-архив. В папке res/raw можно заметить файл с говорящим названием ssl_pinning_certs_bk146.bks.
По его расширению можно понять, что Uber использует хранилище ключей в формате BouncyCastle (BKS). Из-за этого нельзя просто заменить сертификат в приложении. Сначала нужно сгенерировать BKS-хранилище. Для этого качаем jar для работы с BKS.
Теперь генерируем BKS-хранилище, которое будет содержать наш сертификат:
На вопрос о доверии сертификату отвечаем «yes». Опять открываем apk в архиваторе и заменяем оригинальное хранилище на наше (сохраняем при этом оригинальное название).
Но на этом все не заканчивается. Каждый apk должен быть подписан сертификатом разработчика. К счастью, это делается не для обеспечения безопасности, а для идентификации приложений, поэтому для наших исследовательских целей мы вполне можем использовать и недоверенный сертификат.
Удаляем из apk папку META-INF со старой подписью приложения и приступаем к генерации новой.
Создаем хранилище ключей и генерируем в нем ключ для подписи apk:
Подписываем только что сгенерированным ключом наш APK:
Теперь осталось выровнять данные в архиве по четырехбайтной границе:
Источник
Installing Burp’s CA Certificate in an Android Device
Before you start:
- Ensure you have configured your Android device to work with Burp.
- Ensure your Android device is able to receive email, and that your email filter does not block .cer files.
Note: Android Nougat no longer trusts user or admin supplied CA certificates. We recommend that you use an older version of Android for your testing. If you must use Android Nougat then you will need to install a trusted CA at the Android OS level on a rooted device or emulator.
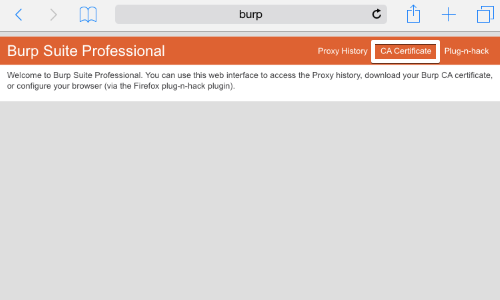
On your computer with Burp running, visit http://burpsuite and click the «CA Certificate» link. Save the certificate file on your computer.
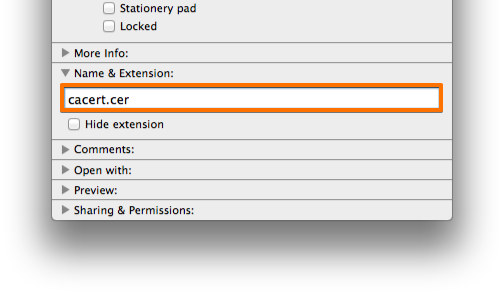
On your computer, rename the file with the .cer file extension, and send the file as an email attachment to an account that you can access from your Android device.
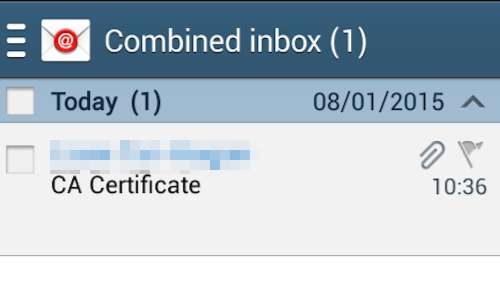
Check your email on the Android device.
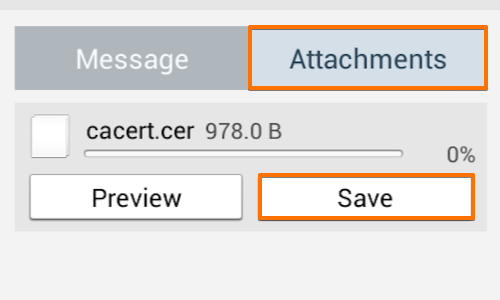
Open the email and tap the attachments button.
Then tap the save button. This should save the certificate file to your Android device’s “Download» folder.
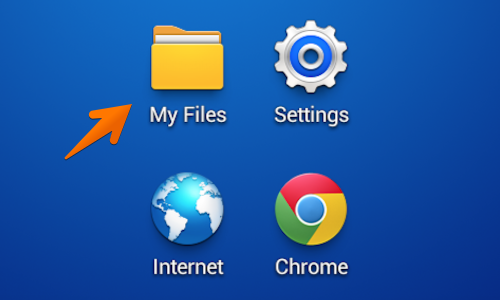
Find your “My Files” folder. This may be located in the “Apps” menu or on one of the device’s home screens.

In “My Files” tap the “All Files” folder.
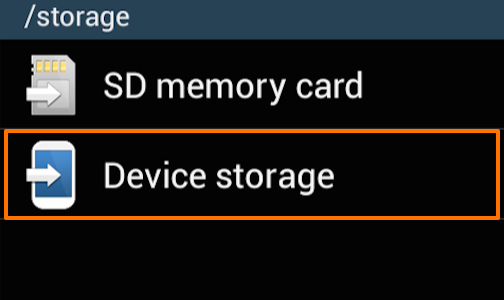
In the “All Files” folder tap “Device storage”.
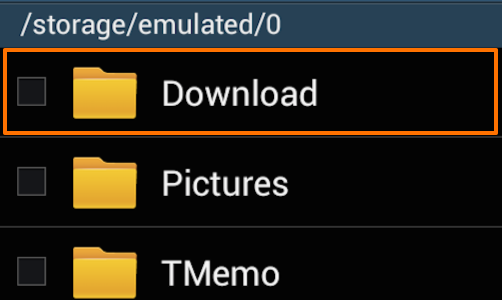
Open the “Download” folder and check that your certificate is correctly located in this folder.
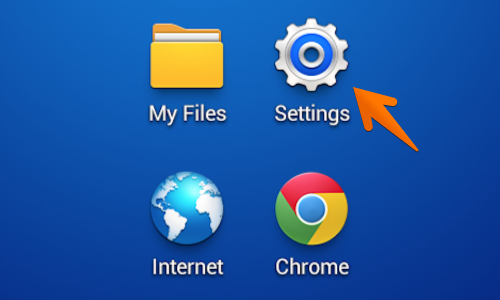
Next locate and tap the «Settings” icon. This may be located in the “Apps” menu or on one of the device’s home screens.
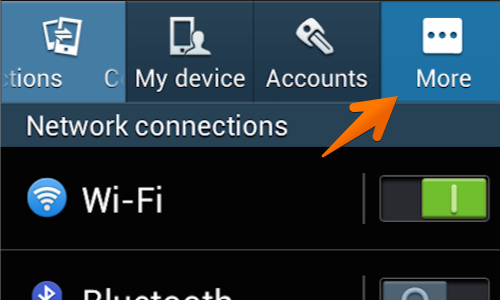
Tap the “More” button.
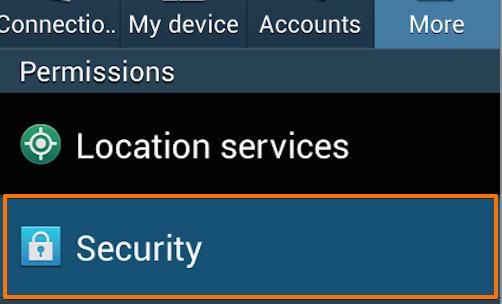
Beneath the “Permissions” header tap the “Security” button.
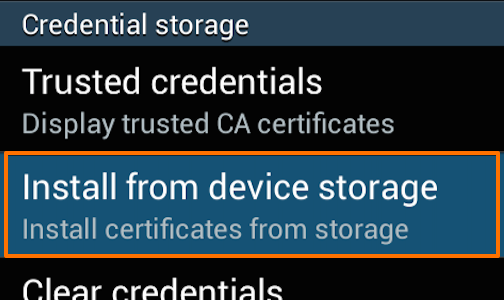
In the “Security” menu select the “Install from device storage” from beneath the «Credential storage» header.
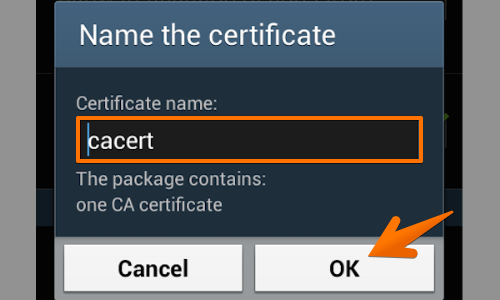
You will now be asked to “Name the certificate”, leave the certificate name as it is and tap “OK”.
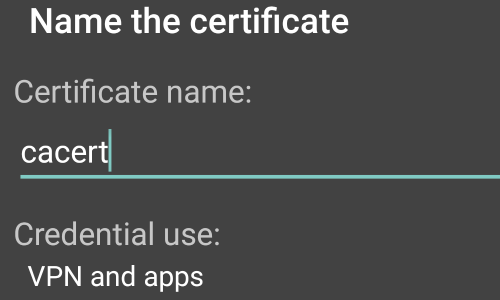
In some versions of Android, your device will ask if you want to use the certificate for «VPN and apps» or «WiFi».
In the «Credential use:» options, you should select «VPN and apps».

The phone will revert to the security menu and will inform you via a small pop up that the certificate is installed.
You can check the Certificate is installed by tapping the “Trusted credentials» button.
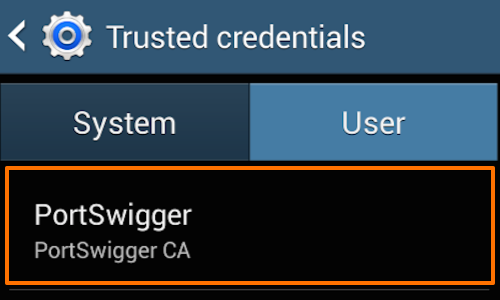
Tap the «User» tab in the “Trusted credentials” window to show the PortSwigger CA certificate.
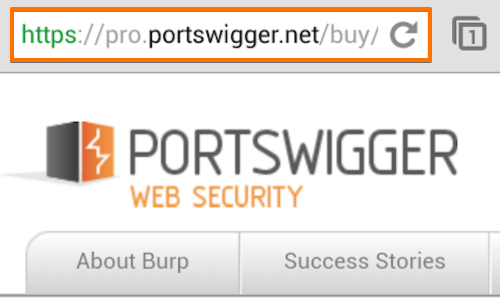
You should now be able to visit any HTTPS URL via Burp without any security warnings.
Note: It is also possible to import the Burp CA Certificate using a micro SD card. Ensure that you move the Burp CA Certificate from the micro SD card to the phones own storage before using the certificate install function in the “Security” menu.
This article is based on Android version 4.2.2 running on a Samsung mobile device.
Источник


