- CameraX+ML Kit для распознавания номера карты в действии
- Почему мы решили заменить card.io?
- Что такое ML Kit?
- Получаем фреймы с камеры для анализа
- GMS ML Kit
- HMS ML Kit
- Результаты тестов распознавания
- Попытка использовать on-cloud распознавание
- Последний шанс
- Getting Started with CameraX
- 1. Before you begin
- Prerequisites
- What you’ll do
- What you’ll need
- 2. Create the project
- Add the Gradle dependencies
- Create the viewfinder layout
- Set up MainActivity.kt
- 3. Request camera permissions
- 4. Implement Preview use case
- 5. Implement ImageCapture use case
- View the photo
- 6. Implement ImageAnalysis use case
- 7. Congratulations!
CameraX+ML Kit для распознавания номера карты в действии
Привет, меня зовут Виталий Беляев, я Android-разработчик в red_mad_robot. В этой статье я расскажу про опыт интеграции CameraX с ML Kit на замену библиотеки card.io, и что в итоге из этого получилось.
В приложении над которым я работаю, есть экран добавления банковской карты. Там можно заполнить всю информацию руками, а можно нажать «Сканировать», и с помощью камеры телефона распознать номер карты. Для этого у нас используется библиотека card.io.
Почему мы решили заменить card.io?
мы хотели заменить third-party library, которая уже находится в архиве, на что-то более актуальное от крупных компаний;
card.io использует подход с созданием отдельной activity, а мы стараемся придерживаться single-activity подхода;
мало возможностей кастомизации UI в card.io ;
интересно было попробовать CameraX и ML Kit ;
card.io тянет много нативных библиотек. Если вы не используете App Bundle, то выпиливание card.io уменьшит ваш APK на 12 MB в размере.

Что такое ML Kit?
Сразу уточню, что такое ML Kit . По сути это библиотека, которая предоставляет API для использования ML под разные задачи, такие как маркировка изображений, считывание штрихкода, распознавание текста, лиц, объектов, перевод текста, text to speech и так далее.
Всё это делается с помощью обученных моделей и может происходить как локально(on-device), так и удаленно на сервере(on-cloud).
И у Google, и у Huawei есть свой ML Kit , которые очень похожи. Google ML Kit зависит от GMS, а Huawei ML Kit , соответственно, зависит от HMS.
Для задачи по распознаванию номера банковской карты нам подходит та часть ML Kit , что связана с распознаванием текста. В обоих ML Kit она называется Text Recognition . В обоих ML Kit данный Text Recogniton может работать локально(on-device).
Используя on-device Text Recognition мы получаем более высокую скорость работы, независимость от наличия интернета и отсутствие платы за использование, по сравнению с on-cloud решением.
В качестве входа, Text Recognition принимает изображение, которое он обрабатывает и затем выдаёт результат в виде текста, который он распознал. Чтобы обеспечить Text Recognition входными данными, нам нужно получить эти изображения(фреймы) с камеры устройства.
Получаем фреймы с камеры для анализа
Для этой задачи нам необходимо работать с Camera API, чтобы показывать preview и передавать с него фреймы на анализ в ML Kit .
Google сделал CameraX — библиотеку для работы с камерой, часть Jetpack, которая инкапсулирует в себе работу с Camera1 и Camera2 API и предоставляет удобный lifecycle-aware интерфейс для работы с камерой.
В CameraX есть так называемые use cases, их всего три:
По названию нетрудно догадаться, что и зачем используется. Нас интересуют Preview и ImageAnalysis .
Не будем вдаваться в подробности каждой строчки, про это можно почитать хорошую документацию по CameraX или пройти codelab. Сейчас же мы конфигурируем use cases , и стоит отметить, что это довольно удобно и компактно выглядит.
Далее мы всё это привязываем к lifecycle и запускаем.
Здесь мы получаем так называемый cameraProvider — часть CameraX интерфейса. Затем один раз выполняем bindToLifecycle и всё. Далее, когда приложение уходит в background, CameraX сама обрабатывает эти ситуации и релизит камеру, а когда приложение возвращается в foreground, запускает наши use cases . И это очень круто: те, кто хоть раз сталкивался с Camera1 / Camera2 API, меня поймут.
При создании ImageAnalysis use case мы передали ему framesAnalyzer — это тоже сущность из CameraX , по сути, это просто SAM-интерфейс ImageAnalysis.Analyzer с одним методом analyze() , в котором нам приходит картинка в виде ImageProxy .
Вот таким образом мы получили картинку, которую можно передавать в ML Kit на распознавание.
GMS ML Kit
У Google раньше была библиотека ML Kit for Firebase, где были собраны все ML-related вещи: те, что работают on-device (сканирование штрихкодов например) и те, что работают on-cloud (Image Labeling например).
Потом они вынесли все те части, которые можно использовать on-device, в отдельный артефакт и назвали его ML Kit.
Все части, которые используют on-cloud обработку, поместили в библиотеку Firebase ML.
Вот, как раз новый ML Kit , который работает on-device и который полностью бесплатен, мы и будем использовать для распознавания номера карты.
Часть, отвечающая за распознавания текста в ML Kit , называется Text Recognition, и подключается она таким образом:
В манифест внутри application tag нужно добавить:
Это нужно, чтобы модели для ML Kit скачались при установке вашего приложения. Если этого не сделать, то они загрузятся при первом использовании распознавания.
Далее всё достаточно просто, делаем всё по документации и получаем результат распознавания:
Библиотека отдаёт достаточно детализированный результат в виде Text объекта, который содержит в себе список TextBlock . Каждый TextBlock , в свою очередь, содержит список Line , а каждый Line содержит список Element .
Для наших тестовых целей, пока что подойдёт просто работать со списком строк, поэтому мы используем RecognizedLine — это просто:
Отдельный класс нам нужен для того, чтобы иметь общую сущность, которую можно возвращать из GMS и из HMS ML Kit .
HMS ML Kit
Так как наше приложение распространяется также в Huawei App Gallery, нам нужно использовать ML Kit от Huawei.
В общем и целом, в HMS все составляющие имеют похожий на GMS интерфейс, ML Kit в этом плане не исключение.
Но Huawei не делали никакой разбивки ML библиотек по признаку on-device и on-cloud, поэтому, с этим SDK можно запустить как on-device распознавание, так и on-cloud.
Подключаем HMS ML Kit Text Recognition SDK согласно документации:
И аналогично с GMS ML Kit добавляем в манифест:
Руководствуясь документацией обрабатываем фрейм с камеры и получаем результат:
Результаты тестов распознавания
Я был удивлён результатами — оказалось, что распознавание работает не так хорошо и стабильно, как я думал.
При дневном естественном освещении у меня получилось распознать номер карты длинной в 16 цифр на своей VISA, но на это ушло около минуты разного кручения, отдаления и приближения карты. При этом одна из цифр была неверной.
При искусственном освещении, а также при тусклом освещении со включеной вспышкой, мне вообще не удалось получить что-то вменяемое, похожее на номер карты.
В то же время, сard.io даже в очень тёмном помещении со включенной вспышкой рапознаёт номер карты в среднем за 1-2 секунды.
Попытка использовать on-cloud распознавание
Раз on-device распознавание выдаёт неприемлемые результаты, то появилась идея попробовать on-cloud распознавание.
Сразу нужно понимать, что это будет платно, как в случае с GMS, так и в случае с HMS.
Как я ранее писал, Google разбил библиотеки на on-device и on-cloud. Поэтому вместо ML Kit нам, нужно использовать Firebase ML . Но не всё так просто, так как использовать его можно только если у вас Blaze-план для проекта в Firebase.
Поэтому я решил, что проще будет потестить on-cloud распознавание на HMS ML Kit . Для этого нам нужен проект в App Gallery Connect.
Нужно подключить agconnect плагин:
Также нужно скачать agconnect-services.json и положить его в app-папку вашего проекта.
Text Recognition SDK в данном случае тот же, и нам нужно использовать другой Analyzer , в который необходимо передать apiKey для вашего проекта из App Gallery Connect.
Создаём MLTextAnalyzer согласно документации:
Далее обработка фрейма очень похожа на on-device:
Нужно отметить, что мы здесь используем Bitmap , а не Image для создания MLFrame , хоть мы и видели в случае с on-device, что можно создать MLFrame из Image . Мы это делаем потому, что MLTextAnalyzer кидает NPE с сообщением от том, что внутренний Bitmap null, если передавать ему MLFrame , созданный из Image . Если создавать из Bitmap , то всё работает.
Так как on-cloud Text Recognition платный (хоть и с бесплатным лимитом), я решил, что лучше перестрахуюсь и буду делать фото, то есть использовать ImageCapture use case вместо ImageAnalysis для on-cloud распознавания.
Результаты распознавания в этом случае неудовлетворительные: из трёх фото в отличном качестве (я их сохранял в память приложения и посмотрел после съемки) с ествественным дневным освещением, ни на одном номер карты не распознался корректно.
При этом, стоит ометить, что с платным on-cloud распознаванием не получится использовать тот же подход, который мы использовали с on-device распознаванием— то есть, передавать фреймы камеры с максимально доступной нам скоростью и пытаться на каждом из них распознать номер карты.
На каждом дейвайсе будет по-разному: на Pixel 3 XL это в среднем 5 fps, на Huawei Y8p — это 2 fps, но главное, что в среднем в секунду этих фреймов будет больше 1, и они будут передаваться на распознавание сразу, как пользователь откроет экран, даже если он ещё не навёл камеру на карту.
Получается весьма значительное количество запросов, поэтому придётся отдать немалую сумму денег.
Последний шанс
После неудач с on-device и on-cloud распознаванием текста, я решил поискать, может есть более специфичные части в ML Kit , именно про распознавание номера карты. В GMS ML Kit ничего такого не нашёл, а вот в HMS ML Kit нашёл Bank Card Recognition.
Но есть 3 проблемы:
Он сам работает с камерой, нужно только передать ему Activity и callback для получения результатов. Соответственно, мы не можем использовать CameraX .
У GMS ML Kit такого нет и соответственно, работать это будет только для приложений в Huawei App Gallery, а мы хотим, чтобы работало для всех.
Не очень понятна цена для этой фичи: для on-device написано Free in the trial period, а для on-cloud N/A.
Источник
Getting Started with CameraX
1. Before you begin
In this codelab, you’ll learn how to create a camera app that uses CameraX to show a viewfinder, take photos, and analyze an image stream from the camera.
To achieve this, we will introduce the concept of use cases in CameraX, which you can use for a variety of camera operations, from displaying a viewfinder to analyzing frames in real time.
Prerequisites
- Basic Android development experience.
What you’ll do
- Learn how to add the CameraX dependencies.
- Learn how to display the camera preview in an activity. (Preview use case)
- Build an app that can take a photo and save it to storage. (ImageCapture use case)
- Learn how to analyze frames from the camera in real time. (ImageAnalysis use case)
What you’ll need
- An Android device. Android Studio’s emulator works too. We recommend using an AVD that is based on Android 11 or higher.
- Minimum supported API level is 21.
- Android Studio 3.6 or above.
2. Create the project
- Using the Android Studio menu, start a new project and select Empty Activity when prompted.
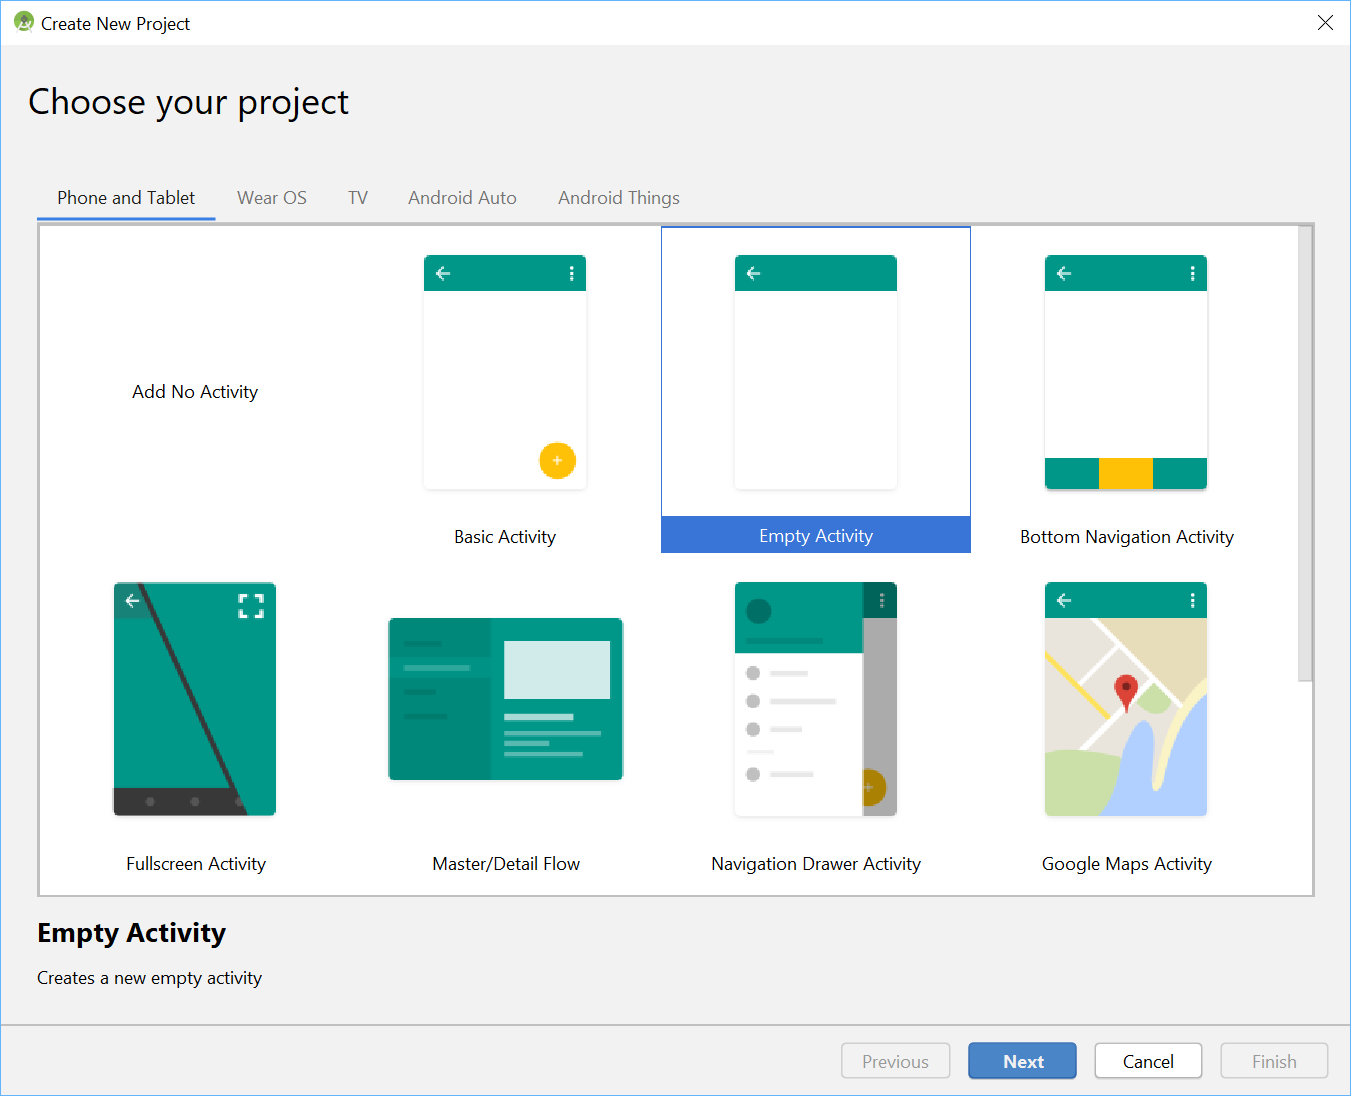
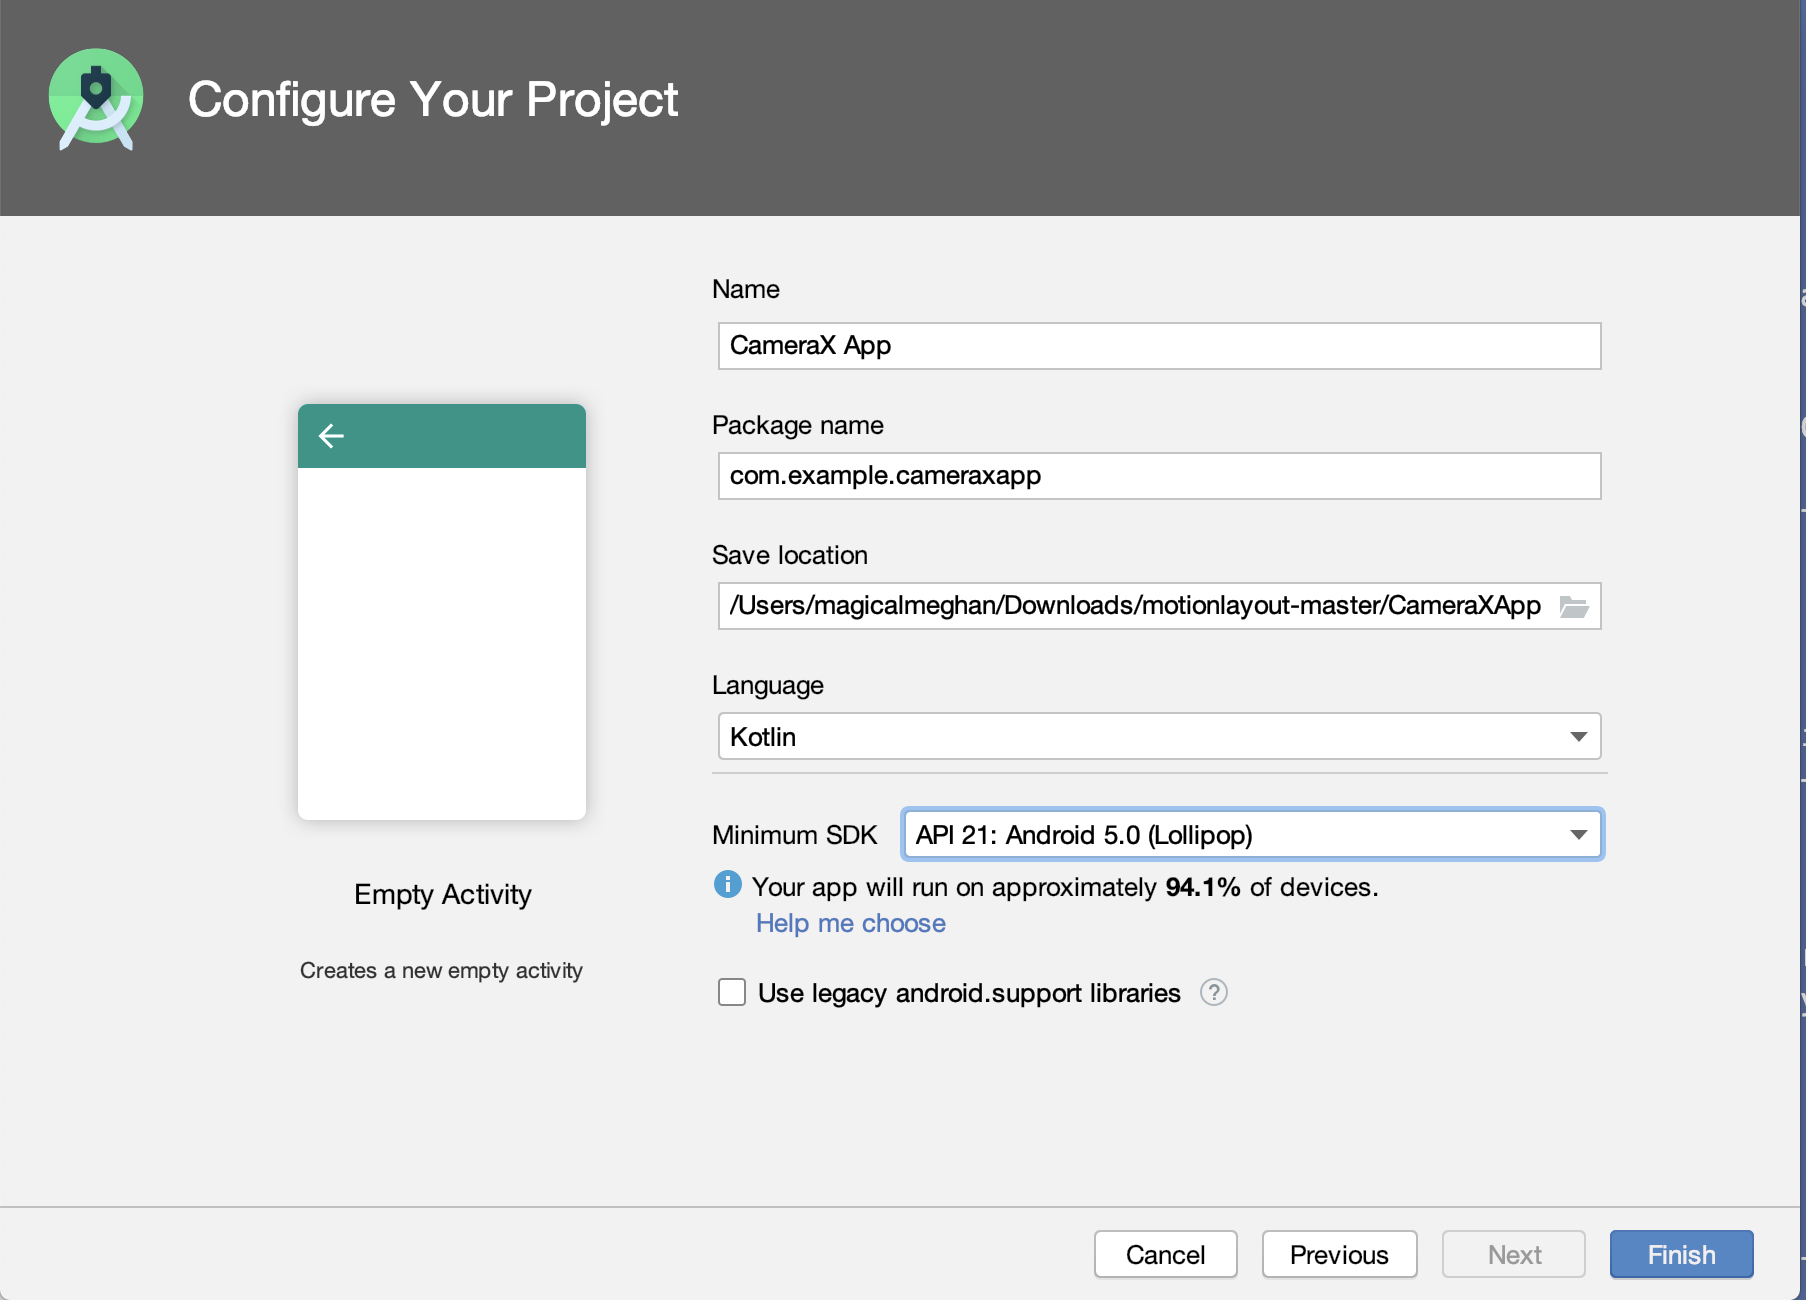
- Next, name the app «CameraX App.» Make sure that the language is set to Kotlin, the minimum API level is 21 (which is the minimum required for CameraX) and that you use AndroidX artifacts.
Add the Gradle dependencies
- Open the build.gradle(Module: app) file and add the CameraX dependencies to our app Gradle file, inside the dependencies section:
- CameraX needs some methods that are part of Java 8, so we need to set our compile options accordingly. At the end of the android block, right after buildTypes , add the following:
- If it is not already added, add this plugin at the top. Depending on your version of Android Studio, you’ll need to apply one of the following:
When prompted, click Sync Now, and we will be ready to use CameraX in our app.
Create the viewfinder layout
Let’s replace the default layout with this code:
- Open the activity_main layout file and replace it with this code.
Set up MainActivity.kt
- Replace the code in MainActivity.kt , with this. It includes import statements, variables you will instantiate, functions you will implement, and constants.
onCreate() has already been implemented for you to check for camera permissions, start the camera, set the onClickListener() for the photo button, and implement the outputDirectory and cameraExecutor . Even though the onCreate() is implemented for you, the camera will not work yet until you implement the methods in the file.
3. Request camera permissions
Before the app opens the camera, it needs permission from the user to do so. In this step, you’ll implement camera permissions.
- Open AndroidManifest.xml and add these lines before the application tag.
Adding android.hardware.camera.any makes sure that the device has a camera. Specifying .any means that it can be a front camera or a back camera.
If you use android.hardware.camera without .any , it will not work if you have a device without a back camera, such as most Chromebooks. The second line adds the permission to access that camera.
- Copy this code into MainActivity.kt. The bullet points below will break down the code you just copied.
- Check if the request code is correct; ignore it otherwise.
- If the permissions are granted, call startCamera() .
- If permissions are not granted, present a toast to notify the user that the permissions were not granted.
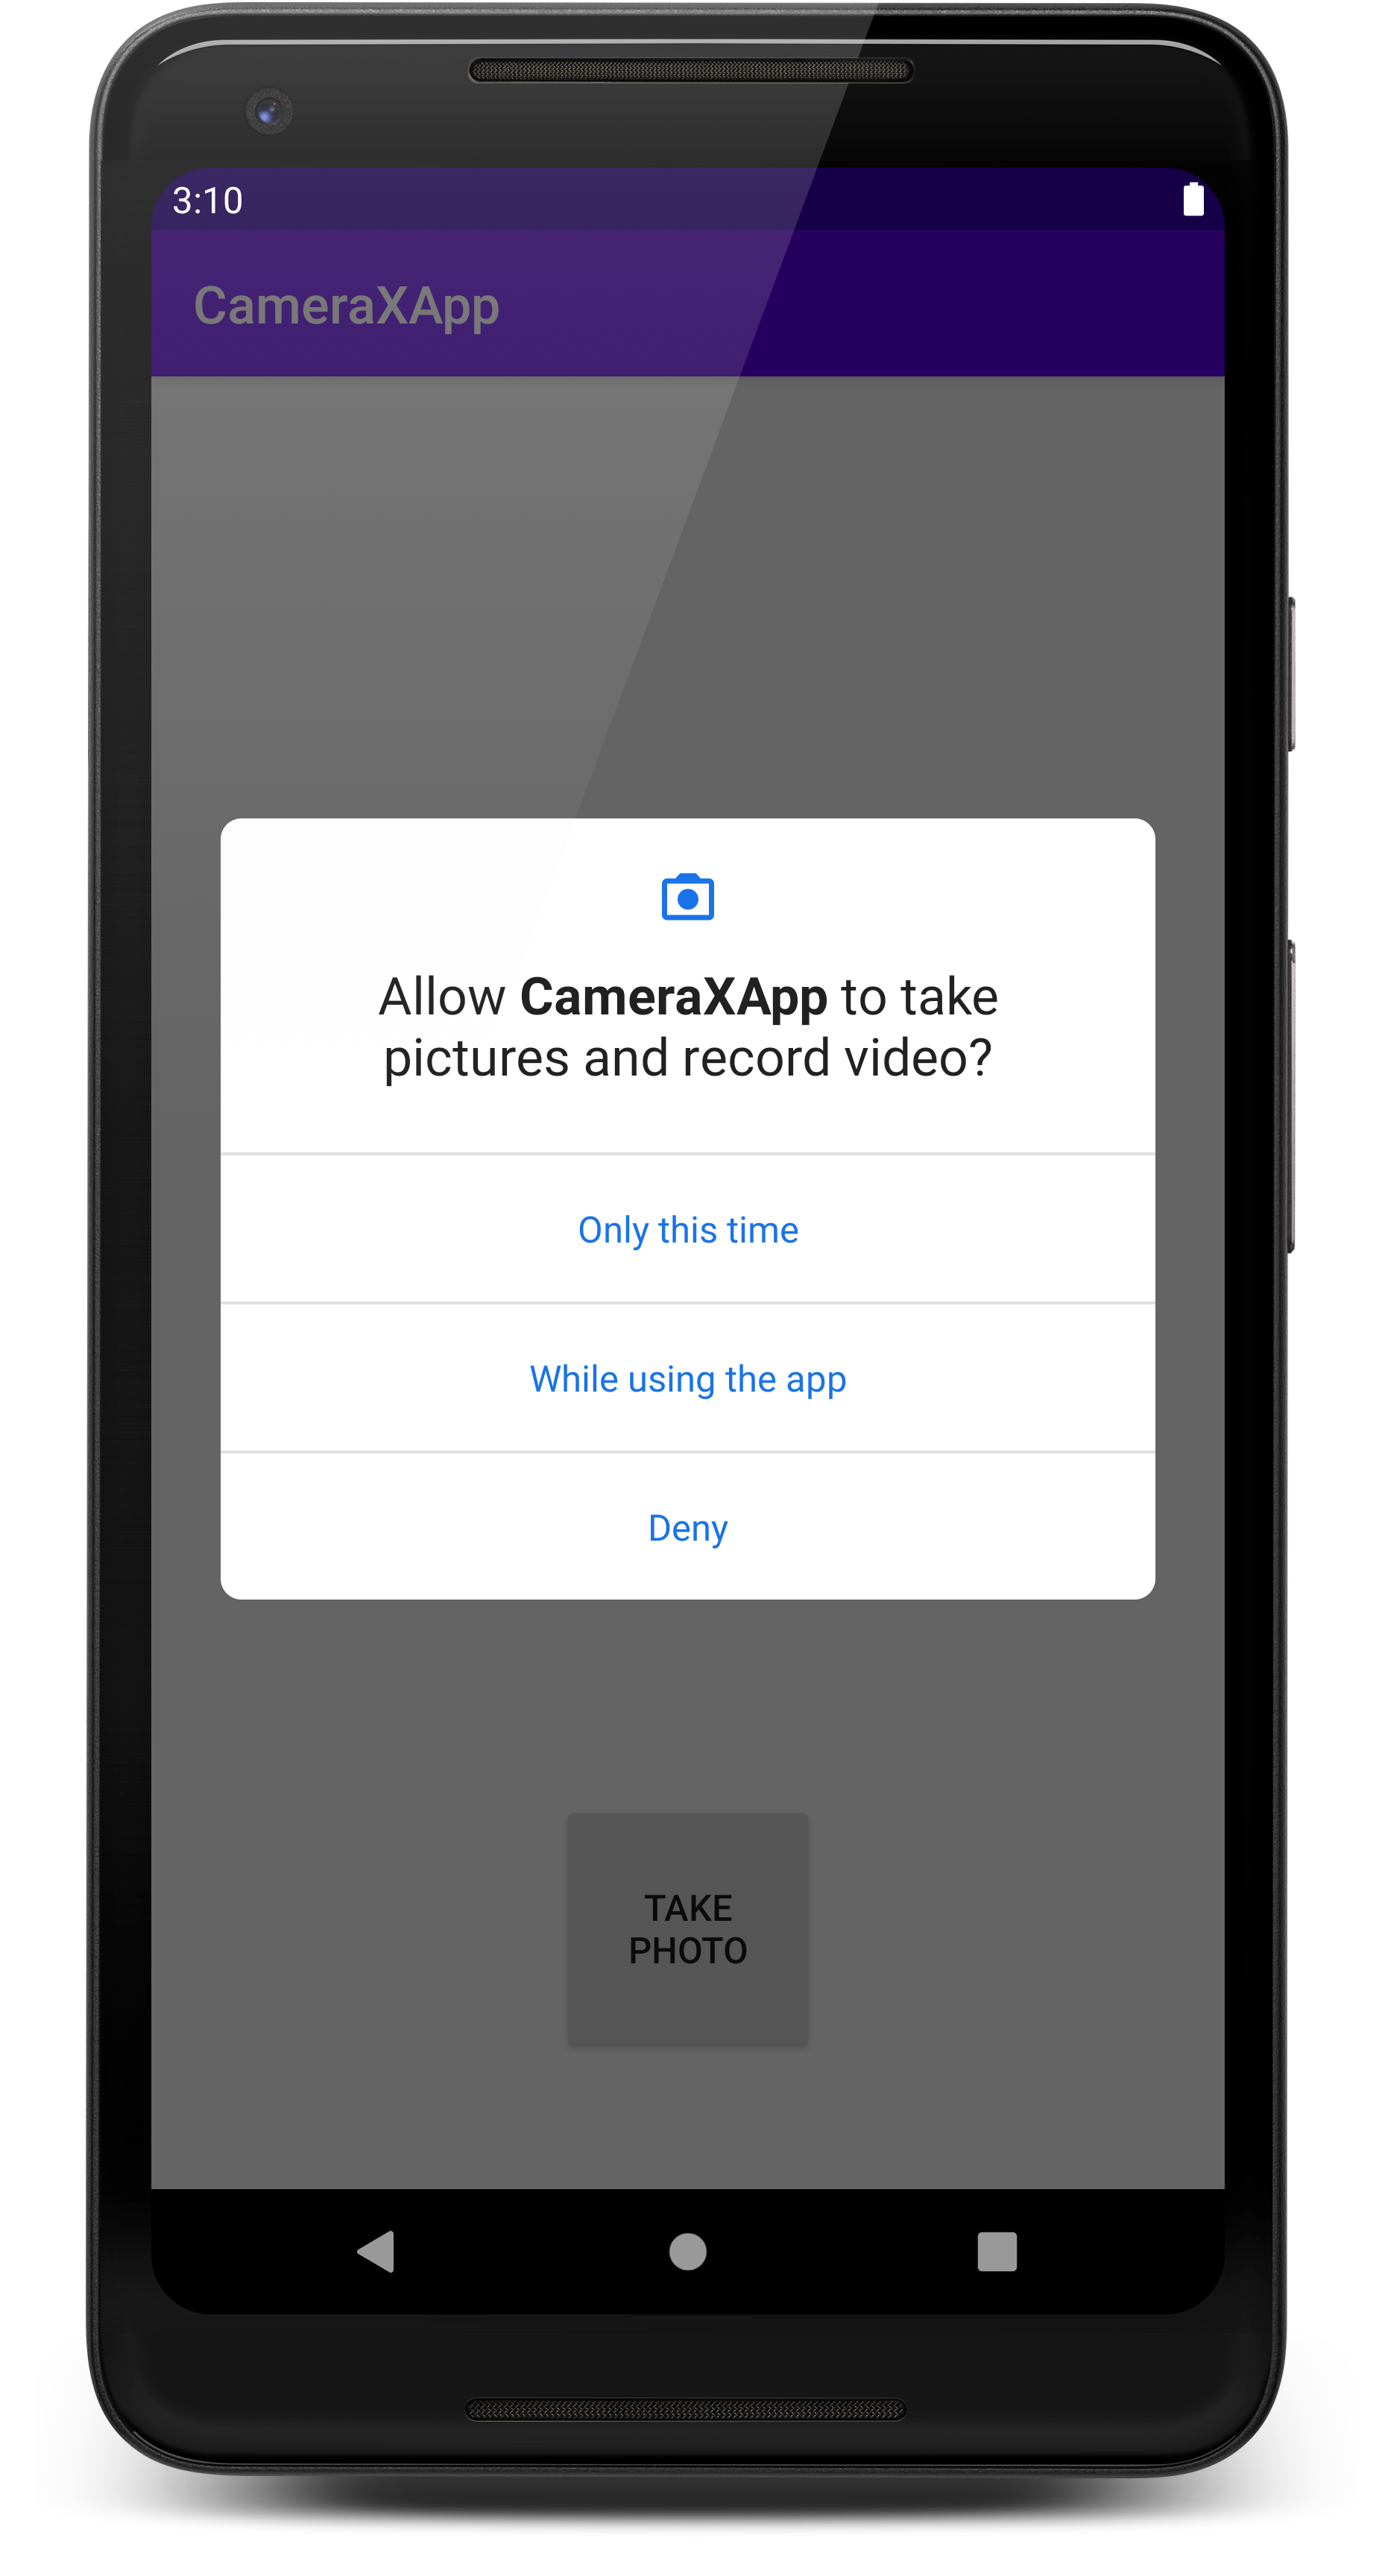
- Run the app.
It should now ask permission to use the camera:
4. Implement Preview use case
In a camera application, the viewfinder is used to let the user preview the photo they will be taking. You can implement a viewfinder using the CameraX Preview class.
To use Preview , you’ll first need to define a configuration, which then gets used to create an instance of the use case. The resulting instance is what you bind to the CameraX lifecycle.
- Copy this code into the startCamera() function.
The bullet points below will break down the code you just copied.
- Create an instance of the ProcessCameraProvider . This is used to bind the lifecycle of cameras to the lifecycle owner. This eliminates the task of opening and closing the camera since CameraX is lifecycle-aware.
- Add a listener to the cameraProviderFuture . Add a Runnable as one argument. We will fill it in later. Add ContextCompat .getMainExecutor() as the second argument. This returns an Executor that runs on the main thread.
- In the Runnable , add a ProcessCameraProvider . This is used to bind the lifecycle of your camera to the LifecycleOwner within the application’s process.
- Initialize your Preview object, call build on it, get a surface provider from viewfinder, and then set it on the preview.
- Create a CameraSelector object and select DEFAULT_BACK_CAMERA .
- Create a try block. Inside that block, make sure nothing is bound to your cameraProvider , and then bind your cameraSelector and preview object to the cameraProvider .
- There are a few ways this code could fail, like if the app is no longer in focus. Wrap this code in a catch block to log if there’s a failure.
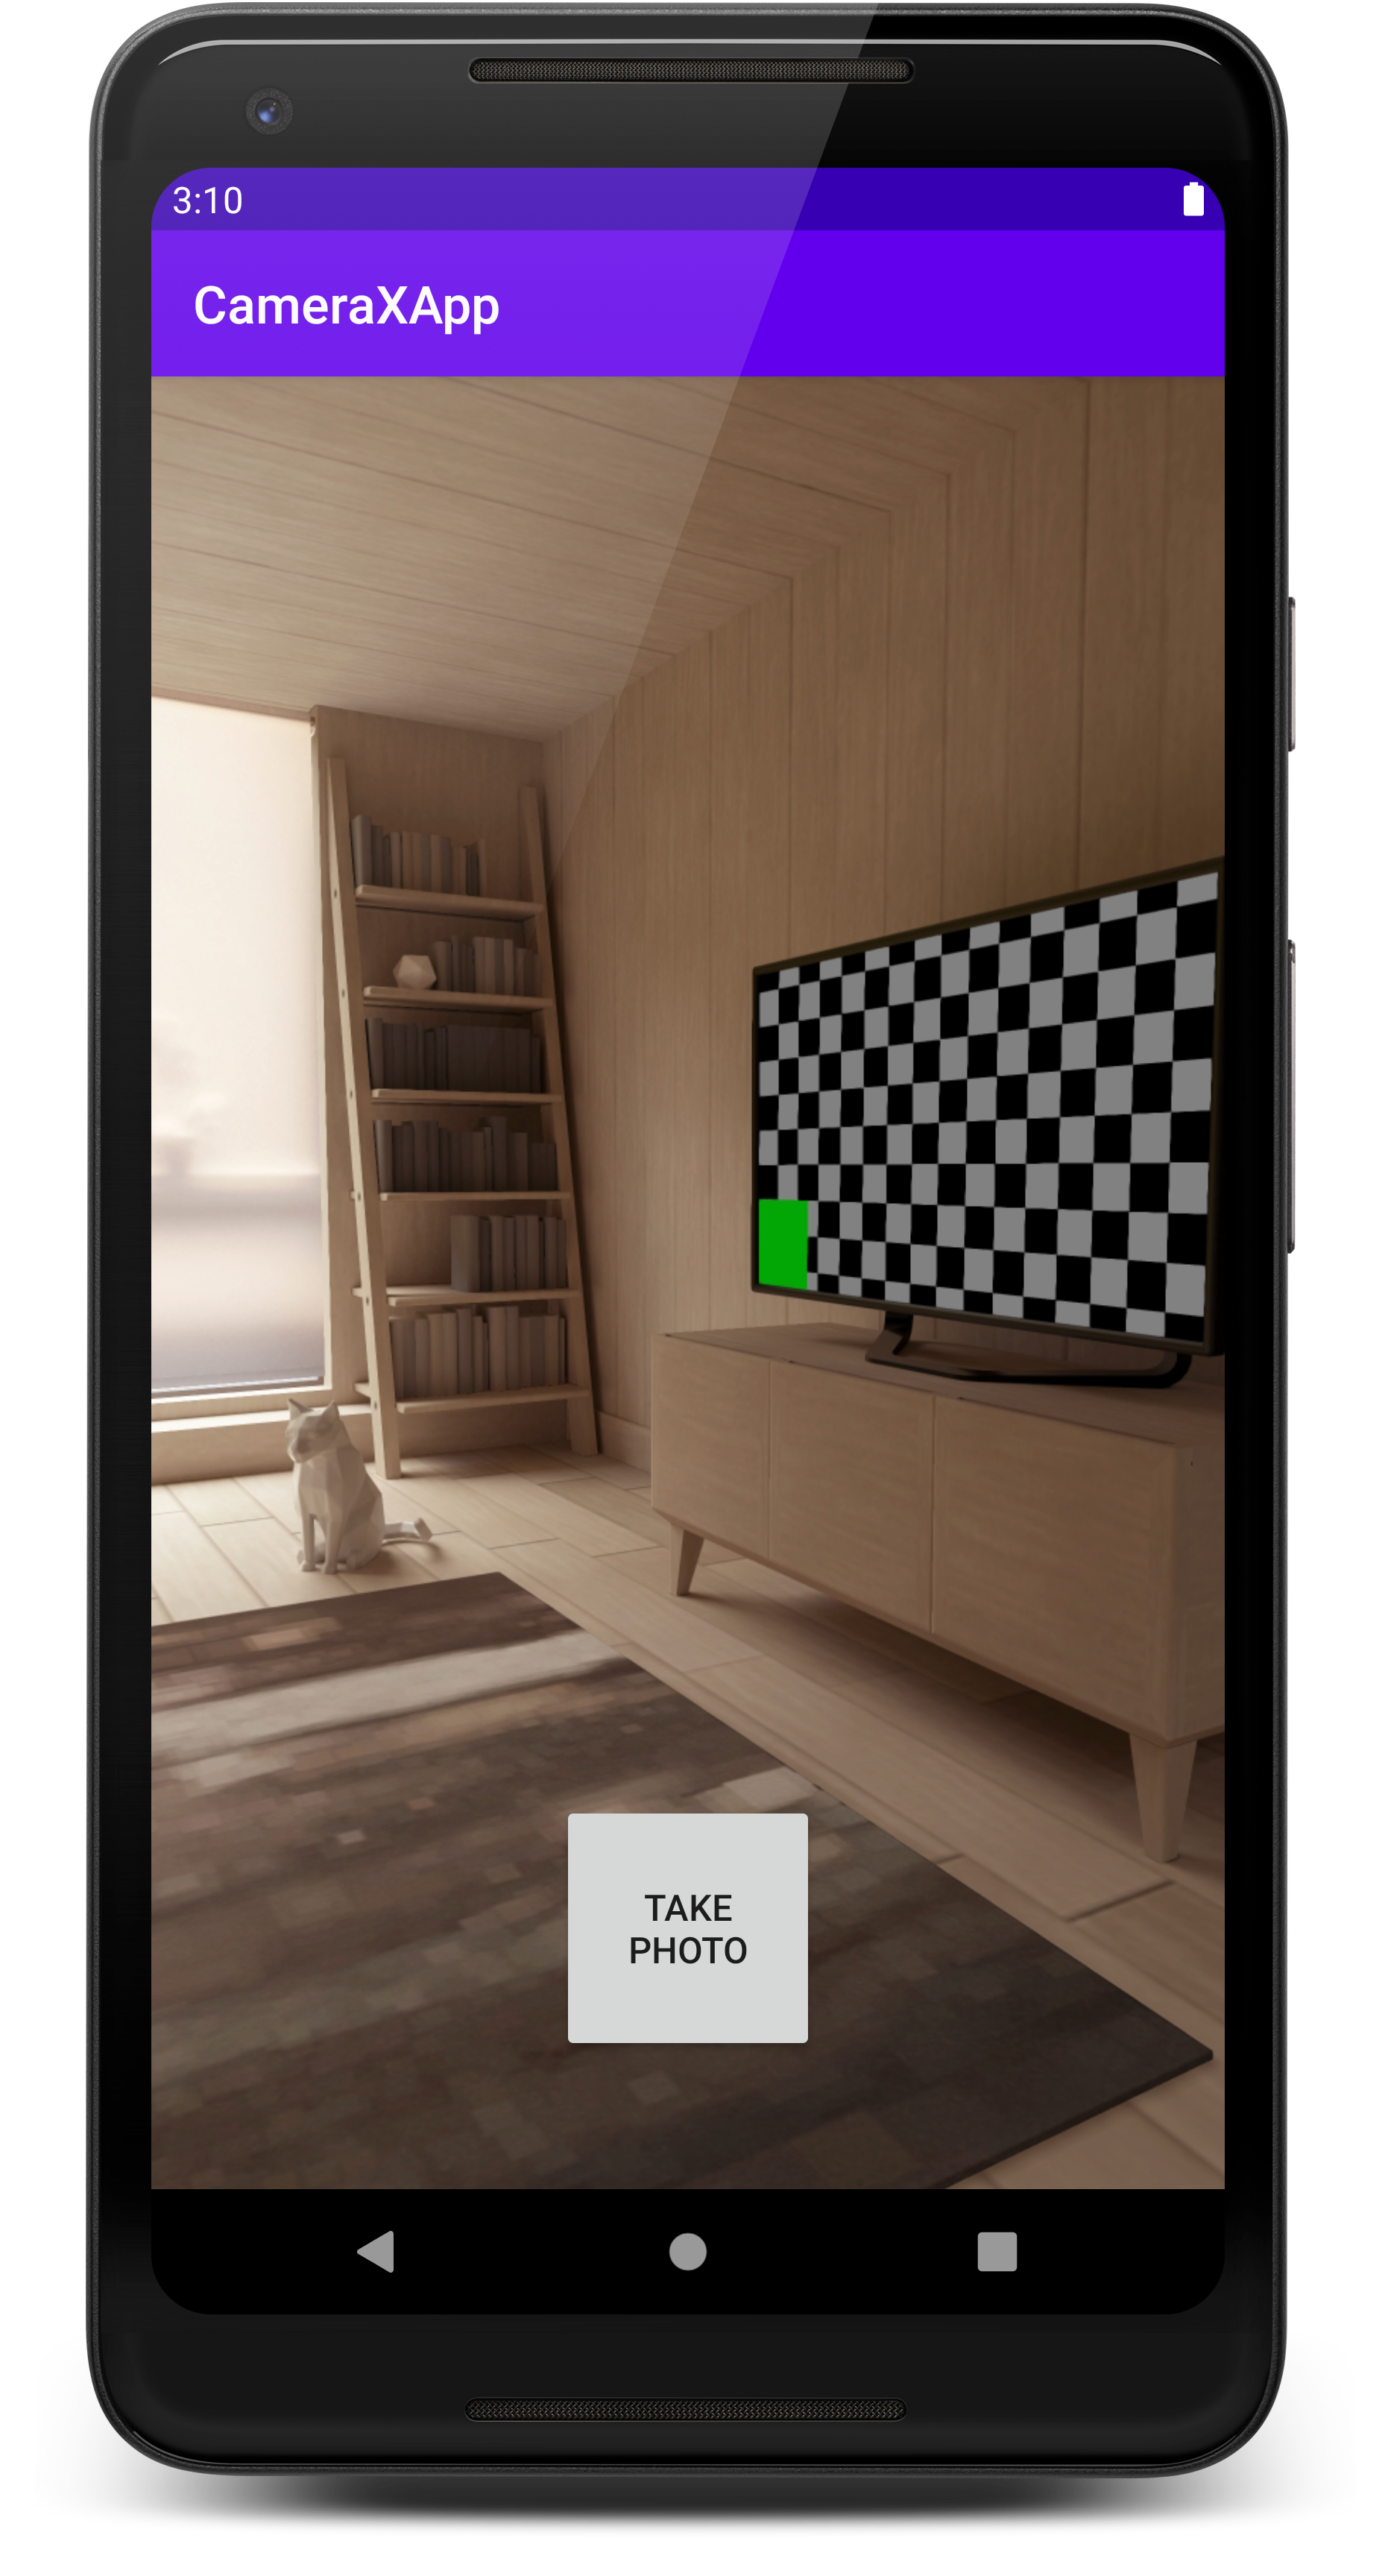
- Run the app. You should see a camera preview!
5. Implement ImageCapture use case
Other use cases work in a very similar way as Preview . First, you define a configuration object that is used to instantiate the actual use case object. To capture photos, you’ll implement the takePhoto() method, which is called when the Take photo button is pressed .
- Copy this code into the takePhoto() method.
The bullet points below will break down the code you just copied.
- First, get a reference to the ImageCapture use case. If the use case is null, exit out of the function. This will be null If you tap the photo button before image capture is set up. Without the return statement, the app would crash if it was null .
- Next, create a file to hold the image. Add in a time stamp so the file name will be unique.
- Create an OutputFileOptions object. This object is where you can specify things about how you want your output to be. You want the output saved in the file we just created, so add your photoFile .
- Call takePicture() on the imageCapture object. Pass in outputOptions , the executor, and a callback for when the image is saved. You’ll fill out the callback next.
- In the case that the image capture fails or saving the image capture fails, add in an error case to log that it failed.
- If the capture doesn’t fail, the photo was taken successfully! Save the photo to the file you created earlier, present a toast to let the user know it was successful, and print a log statement.
- Go to the startCamera() method and copy this code under the code for preview.
- Finally, update the call to bindToLifecycle() in the try block to include the new use case:
The method will look like this at this point:
- Rerun the app and press Take Photo. You will see a toast presented on the screen and a message in the logs.
View the photo
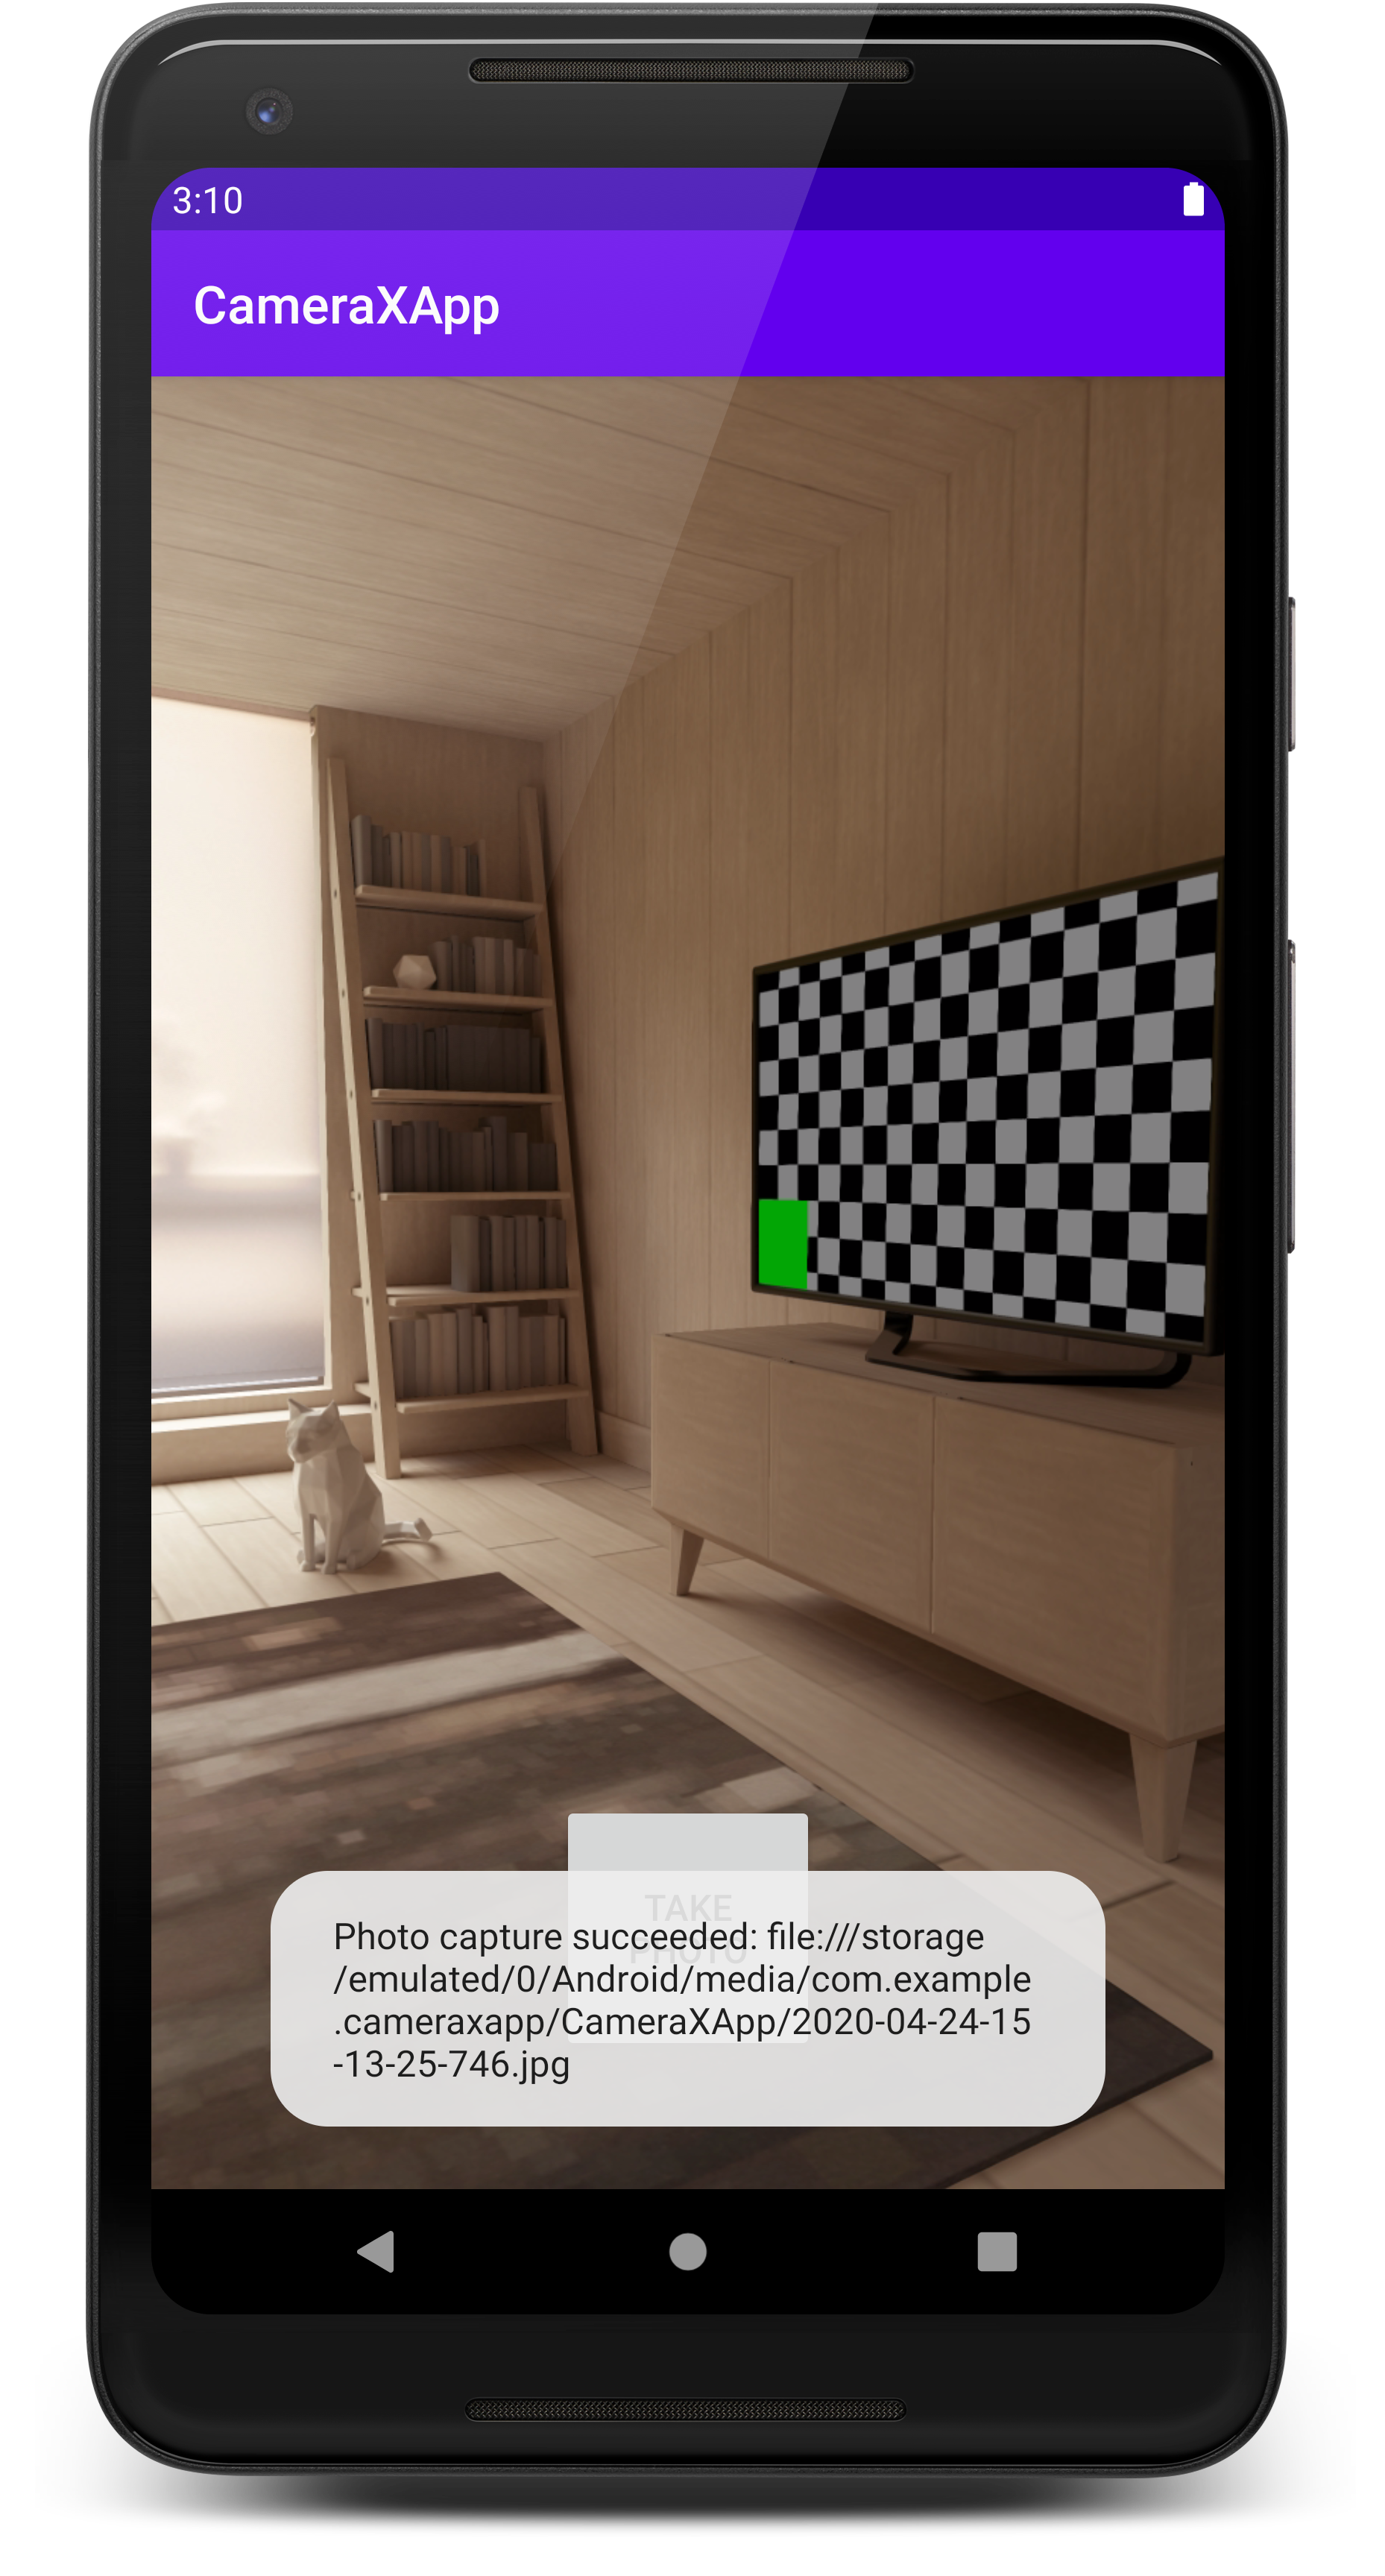
- Check the log statements. You will see a log announcing that the photo capture succeeded.
- Copy the file where the photo is stored, omitting the file:// prefix .
- In the Android Studio terminal, run these commands:
- Run this ADB command, and then exit the shell:
- You can review the photo saved in the file named photo.jpg in your current folder.
If you are looking for a simple camera app, you are done. It’s really that simple! If you are looking to implement an image analyzer, read on!
6. Implement ImageAnalysis use case
Implementing preview, image capture, and image analysis concurrently will not work for Android Studio’s device emulator if you are running Android 10 or lower. We recommend using a physical device to test this portion of the codelab.
A great way to make your camera app more interesting is using the ImageAnalysis feature. It allows you to define a custom class that implements the ImageAnalysis.Analyzer interface, and which will be called with incoming camera frames. You won’t have to manage the camera session state or even dispose of images; binding to our app’s desired lifecycle is sufficient, like with other lifecycle-aware components.
- Add this analyzer in as an inner class in MainActivity.kt . The analyzer logs the average luminosity of the image. To create an analyzer, you override the analyze function in a class that implements the ImageAnalysis.Analyzer interface.
With our class implementing the ImageAnalysis.Analyzer interface, all we need to do is instantiate an instance of LuminosityAnalyzer in the ImageAnalysis, similar to other use cases, and update the startCamera() function once again, before the call to CameraX.bindToLifecycle() :
- In the startCamera() method, add this code under the imageCapture() code.
- Update the bindToLifecycle() call on the cameraProvider to include the imageAnalyzer .
The full method will now look like this:
- Run the app now! It will produce a message similar to this in logcat approximately every second.
7. Congratulations!
You’ve successfully implemented the following into a new Android app from scratch:
- Included CameraX dependencies into your project.
- Displayed a camera viewfinder (using Preview use case)
- Implemented photo capture, saving images to storage (using ImageCapture use case)
- Implemented analysis of frames from the camera in real time (using ImageAnalysis use case)
If you are interested in reading more about CameraX and the things that you can do with it, checkout the documentation or clone the official sample.
Note: If you want to stay up to date with the CameraX developer community, join our developer forum at g.co/camerax/developers.
Except as otherwise noted, the content of this page is licensed under the Creative Commons Attribution 4.0 License, and code samples are licensed under the Apache 2.0 License. For details, see the Google Developers Site Policies. Java is a registered trademark of Oracle and/or its affiliates.
Источник


