- Cardview with Recyclerview Android Example [beginners]
- Cardview XML attribute
- Cardview android example with Recyclerview
- Step 1 — Adding dependencies
- CardView using RecyclerView in Android with Example
- Example
- Step by Step Implementation
- Начало работы с RecyclerView и CardView на Android
- Предварительные требования
- 1. Поддержка старых версий
- 2. Создание CardView
- 3. Создание RecyclerView
- Шаг 1. Его определение в макете
- Шаг 2. Использование LayoutManager
- Шаг 3. Определение данных
- Шаг 4. Создание адаптера
- Шаг 5. Использование адаптера
- Шаг 6. Сборка и запуск
- Заключение
- A Guide to Android RecyclerView and CardView
- RecyclerView: Introduction
- CardView
- RecyclerView: Adapter
Cardview with Recyclerview Android Example [beginners]


Cardview Android is a new widget for Android, which can be used to display a card sort of a layout in android. Cardview was introduced in Material Design in API level 21 (Android 5.0 i.e Lollipop).
Since, Cardview is part of material design.It’s such a view which has all material design properties, most importantly showing shadows according to the elevation.
The best part about this view is that it extends FrameLayout and it can be displayed on all the platforms of Android since it’s available through the Support v7 library.
The design of the cardview will be looks like,

In the above picture, every boxes made with cardview in android.
Before jumping into the coding part, Let’s see the Cardview XML attribute, that makes the cardview looks beautiful.
Cardview XML attribute
CardView_cardBackgroundColor : ColorStateList: The new ColorStateList to set for the card background
CardView_cardCornerRadius : float: The radius in pixels of the corners of the rectangle shape
CardView_cardElevation : float: The backward compatible elevation in pixels.
CardView_cardMaxElevation : float: The backward compatible maximum elevation in pixels.
CardView_cardPreventCornerOverlap : boolean: Whether CardView should add extra padding to content to avoid overlaps with the CardView corners.
CardView_cardUseCompatPadding : boolean: true> if CardView should add padding for the shadows on platforms Lollipop and above.
CardView_contentPadding : Sets the padding between the Card’s edges and the children of CardView.
CardView_contentPaddingBottom : int: The bottom padding in pixels
CardView_contentPaddingLeft : int: The left padding in pixels
CardView_contentPaddingRight : int: The right padding in pixels
Done with explanation about the android cardview. Let get into the coding part.
Cardview android example with Recyclerview
In this post, I am going to create cardview with recyclerview in android to list the movies with the image and the movie title.
example application demo,
Step 1 — Adding dependencies
In this example, I am using recyclerview with cardview. But I am not going deeper into recyclerview. I am already have a post on recyclerview in android.
Источник
CardView using RecyclerView in Android with Example
RecyclerView is an extended version of ListView and GridView. It works on the ViewHolder design pattern. With the help of RecyclerView, we can add many extra features to our list of data. Before starting our example on implementation of CardView in RecyclerView. We should know what CardView and RecyclerView mean.
- CardView: CardView is an extended version of Framelayout which can be used to show items inside the card format. With the help of CardView, we can add radius, elevation to our items of RecyclerView. CardView gives a rich look and feels to our list of data.
- RecyclerView: RecyclerView is an extended version of ListView. in RecyclerView we can load a large amount of data and items of RecyclerView can have a custom design. RecyclerView works on ViewHolder design pattern so we have to create a Data class that holds data for RecyclerView and a ViewHolder class which will set data to each item of RecyclerView.
RecyclerView is divided into 3 sections:
- Card Layout.
- Modal Class.
- ViewHolder class.
Now we will move towards the implementation of our RecyclerView.
Example
A sample image is given below to get an idea about what we are going to do in this article. Note that we are going to implement this project using the Java language.
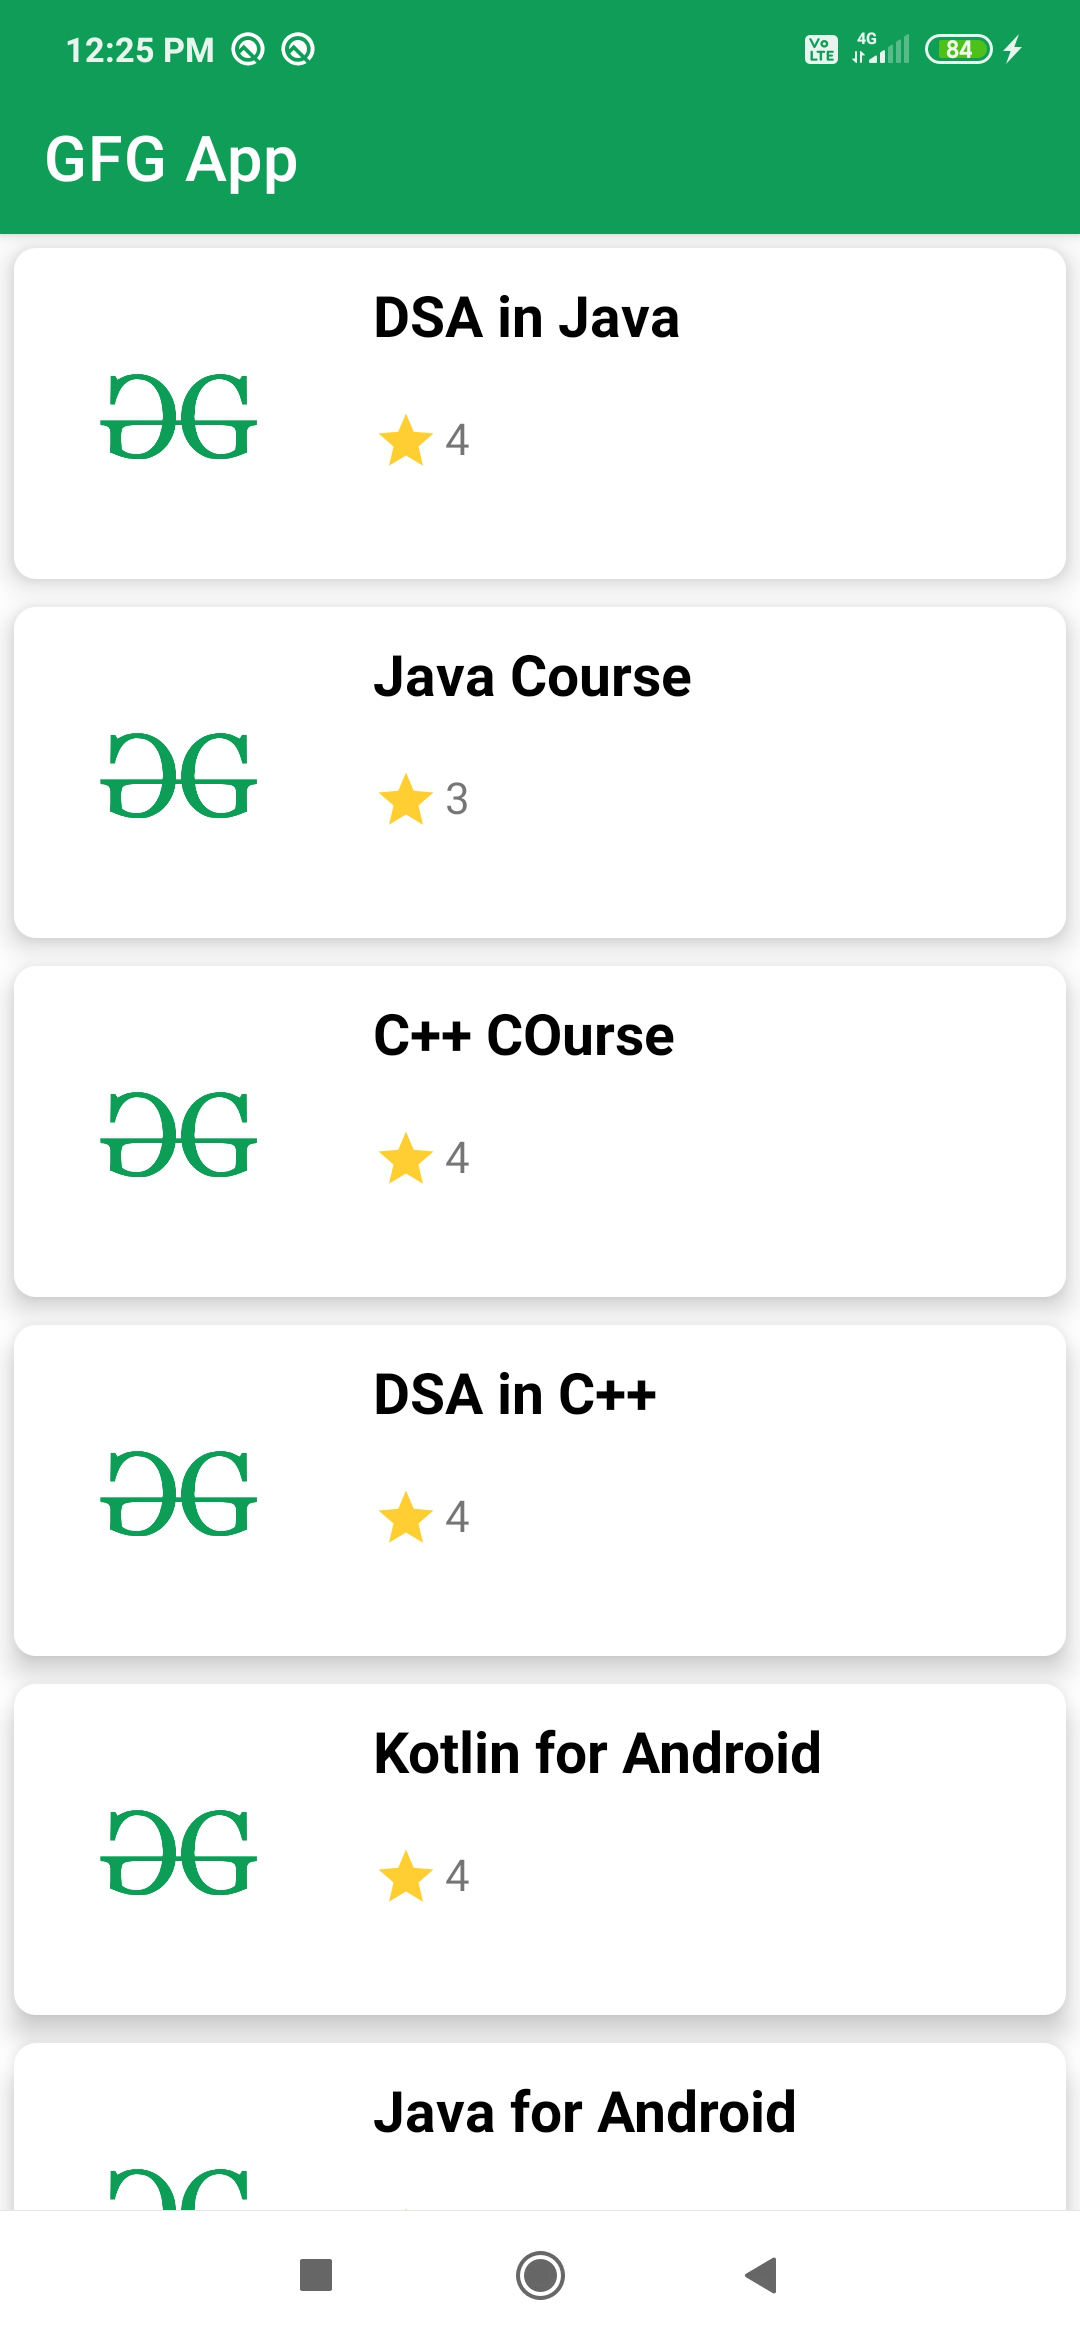
So we are creating a simple example for displaying various courses available on GFG in the RecyclerView using a Card Layout.
Step by Step Implementation
Step 1: Create a New Project
To create a new project in Android Studio please refer to How to Create/Start a New Project in Android Studio. Note that select Java as the programming language.
Step 2: Add dependency for creating CardView and RecyclerView
Navigate to the Gradle Scripts > build.gradle(Module:app) and add below dependency in the dependency section.
Step 3: Create RecyclerView Card Layout
Источник
Начало работы с RecyclerView и CardView на Android
Russian (Pусский) translation by Yuri Yuriev (you can also view the original English article)
Если вам интересно создание приложения для Android, использующего списки для отображения данных, Android Lollipop предлагает два новых виджета, чтобы сделать вашу жизнь проще, RecyclerView и CardView . Эти виджеты приведут внешний вид вашего приложения в соответствие с рекомендациями, указанными в спецификации дизайна Google.
Предварительные требования
Для продолжения используйте последнюю версию Android Studio. Можете взять на Android Developer website.
1. Поддержка старых версий
На момент написания статьи менее 2% Android-устройств работали на Android Lollipop. Однако, благодаря v7 Support Library, вы можете использовать виджеты RecyclerView и CardView на устройствах более ранних версий Android, добавив следующие строки раздела dependencies в файле build.grade вашего проекта:
2. Создание CardView
CardView это ViewGroup . Как любую ViewGroup , её можно добавить в Activity или Fragment через файл XML.
Чтобы создать пустой CardView , вам необходимо добавить следующий код в макет XML:
Для более реалистичного примера давайте создадим LinearLayout и поместим в него CardView . CardView может представлять, например, человека и содержать следующее:
- TextView с именем человека
- TextView с возрастом человека
- ImageView с его фотографией
Так будет выглядеть XML:
Если этот XML будет макетом Activity и в полях TextView и ImageView значимые показатели, так он будет отображаться на устройстве Android:


3. Создание RecyclerView
Шаг 1. Его определение в макете
С экземпляром RecyclerView немного сложнее. Однако определить его в макете XML достаточно просто. Вы можете определить его в макете следующим образом:
Чтобы получить к нему доступ в Activity , возьмите следующий фрагмент:
Если вы уверены, что размер RecyclerView не изменится, можете добавить следующее для повышения производительности:
Шаг 2. Использование LayoutManager
В отличие от ListView , RecyclerView требуется LayoutManager для управления позициями пунктов. Можете определить свой LayoutManager путём расширения RecyclerView.LayoutManager класса. Хотя, можете использовать один из предопределённых подклассов LayoutManager :
- LinearLayoutManager
- GridLayoutManager
- StaggeredGridLayoutManager
В этом уроке я пользуюсь LinearLayoutManager . LayoutManager подкласс, по умолчанию, сделает ваш RecyclerView похожим на ListView .
Шаг 3. Определение данных
Подобно ListView , RecyclerView нужен адаптер для доступа к своим данным. Но прежде, чем мы создадим адаптер, давайте создадим данные, с которыми будем работать. Создайте простой класс для представления лица, а затем напишите метод инициализации объектов List of Person :
Шаг 4. Создание адаптера
Создавая адаптер для RecyclerView , надо расширить RecyclerView.Adapter . Адаптер следует модели view holder , что означает определение пользовательского класса для расширения RecyclerView.ViewHolder . Эта модель минимизирует количество вызовов метода findViewById .
Ранее в этом уроке мы уже определили XML для CardView , который представляет человека. Будем использовать этот макет повторно. Внутри конструктора нашего ViewHolder инициализируйте представления, относящиеся к элементам нашего RecyclerView .
Затем добавьте конструктор в пользовательский адаптер, чтобы он имел доступ к данным, отображаемым RecyclerView . Поскольку наши данные представлены в виде объектов List of Person , используйте следующий код:
RecyclerView.Adapter имеет три абстрактных метода, которые мы должны переопределить. Начнём с метода getItemCount . Это вернёт количество элементов, присутствующих в данных. Поскольку наши данные в List , назначаем метод size на объект List :
Затем переопределите метод onCreateViewHolder . Как следует из названия, этот метод вызывается для инициализации пользовательского ViewHolder . Мы указываем макет, который должен использовать каждый элемент RecyclerView . Это выполняется путем раздувания компоновки с помощью LayoutInflater , передавая результат конструктору ViewHolde r.
Переопределите onBindViewHolder , чтобы указать содержимое каждого элемента RecyclerView . Этот метод похож на метод getView адаптера ListView ‘. В нашем примере, здесь вы должны установить значения имени, возраста и фотографии в CardView .
Наконец, переопределим onAttachedToRecyclerView метод. Сейчас мы можем использовать реализацию этого метода в суперклассе, как показано ниже.
Шаг 5. Использование адаптера
Теперь, когда адаптер готов, добавьте следующий код в Activity , чтобы инициализировать и использовать адаптер, вызывая конструктор адаптера и метод setAdapter в RecyclerView :
Шаг 6. Сборка и запуск
При запуске примера RecyclerView на устройстве Android вы увидите нечто похожее.


Заключение
Из урока вы узнали, как использовать виджеты CardView и RecyclerView , которые были представлены в Android Lollipop. Вы увидели примеры того, как ими пользоваться в приложениях Material Design. Несмотря на то, что RecyclerView может делать почти всё, что может ListView , для небольших наборов данных ListView по-прежнему предпочтительнее, так как требует меньше строк кода.
Для получения дополнительной информации о классах CardView и RecyclerView обратитесь к Android Developers Reference .
Источник
A Guide to Android RecyclerView and CardView
The new support library in Android L introduced two new UI widgets: RecyclerView and CardView. The RecyclerView is a more advanced and more flexible version of the ListView.
This new component is a big step because the ListView is one of the most used UI widgets. The CardView widget, on the other hand, is a new component that does not “upgrade” an existing component.
In this tutorial, I’ll explain how to use these two widgets and show how we can mix them. Let’s start by diving into the RecyclerView.
RecyclerView: Introduction
As I mentioned, RecyclerView is more flexible that ListView even if it introduces some complexities. We all know how to use ListView in our app and we know if we want to increase the ListView performances we can use a pattern called ViewHolder.
This pattern consists of a simple class that holds the references to the UI components for each row in the ListView. This pattern avoids looking up the UI components all the time the system shows a row in the list. Even if this pattern introduces some benefits, we can implement the ListView without using it at all.
RecyclerView forces us to use the ViewHolder pattern. To show how we can use the RecyclerView, we can suppose we want to create a simple app that shows a list of contact cards.
The first thing we should do is create the main layout. RecyclerView is very similar to the ListView and we can use them in the same way:
- xmlns:android = «http://schemas.android.com/apk/res/android»
- xmlns:tools = «http://schemas.android.com/tools»
- android:layout_width = «match_parent»
- android:layout_height = «match_parent»
- android:paddingLeft = «@dimen/activity_horizontal_margin»
- android:paddingRight = «@dimen/activity_horizontal_margin»
- android:paddingTop = «@dimen/activity_vertical_margin»
- android:paddingBottom = «@dimen/activity_vertical_margin»
- tools:context = «.MyActivity» >
- android:id = «@+id/cardList»
- android:layout_width = «match_parent»
- android:layout_height = «match_parent»
- />
As you’ll notice from the layout shown above, the RecyclerView is available in the Android support library, so we have to modify build.gradle to include this dependency:
Now, in the onCreate method we can get the reference to our RecyclerView and configure it:
- @Override
- protected void onCreate ( Bundle savedInstanceState ) <
- super . onCreate ( savedInstanceState );
- setContentView ( R . layout . activity_my );
- RecyclerView recList = ( RecyclerView ) findViewById ( R . id . cardList );
- recList . setHasFixedSize ( true );
- LinearLayoutManager llm = new LinearLayoutManager ( this );
- llm . setOrientation ( LinearLayoutManager . VERTICAL );
- recList . setLayoutManager ( llm );
- >
If you look at the code above, you’ll notice some differences between the RecyclerView and ListView. RecyclerView requires a layout manager. This component positions item views inside the row and determines when it is time to recycle the views. The library provides a default layout manager called LinearLayoutManager .
CardView
The CardView UI component shows information inside cards. We can customise its corners, the elevation and so on. We want to use this component to show contact information. These cards will be the rows of RecyclerView and we will see later how to integrate these two components. By now, we can define our card layout:
As you can see, the CardView is very simple to use. This component is available in another android support library so we have to add this dependency too:
- dependencies <
- compile ‘com.android.support:cardview-v7:21.0.0-rc1’
- compile ‘com.android.support:recyclerview-v7:21.0.0-rc1’
- >
RecyclerView: Adapter
The adapter is a component that stands between the data model we want to show in our app UI and the UI component that renders this information. In other words, an adapter guides the way the information are shown in the UI. So if we want to display our contacts, we need an adapter for the RecyclerView. This adapter must extend a class called RecyclerView.Adapter passing our class that implements the ViewHolder pattern:
public class MyAdapter extends RecyclerView.Adapter
We now have to override two methods so that we can implement our logic: onCreateViewHolder is called whenever a new instance of our ViewHolder class is created, and onBindViewHolder is called when the SO binds the view with the data — or, in other words, the data is shown in the UI.
In this case, the adapter helps us combine the RecyclerView and CardView. The layout we defined before for the cards will be the row layout of our contact list in the RecyclerView. Before doing it, we have to define our data model that stands at the base of our UI (i.e. what information we want to show). For this purpose, we can define a simple class:
- public class ContactInfo <
- protected String name ;
- protected String surname ;
- protected String email ;
- protected static final String NAME_PREFIX = «Name_» ;
- protected static final String SURNAME_PREFIX = «Surname_» ;
- protected static final String EMAIL_PREFIX = «email_» ;
- >
And finally, we are ready to create our adapter. If you remember what we said before about Viewholder pattern, we have to code our class that implements it:
- public static class ContactViewHolder extends RecyclerView . ViewHolder <
- protected TextView vName ;
- protected TextView vSurname ;
- protected TextView vEmail ;
- protected TextView vTitle ;
- public ContactViewHolder ( View v ) <
- super ( v );
- vName = ( TextView ) v . findViewById ( R . id . txtName );
- vSurname = ( TextView ) v . findViewById ( R . id . txtSurname );
- vEmail = ( TextView ) v . findViewById ( R . id . txtEmail );
- vTitle = ( TextView ) v . findViewById ( R . id . title );
- >
- >
Look at the code, in the class constructor we get the reference to the views we defined in our card layout. Now it is time to code our adapter:
- public class ContactAdapter extends RecyclerView . Adapter ContactAdapter . ContactViewHolder ><
- private List ContactInfo > contactList ;
- public ContactAdapter ( List ContactInfo > contactList ) <
- this . contactList = contactList ;
- >
- @Override
- public int getItemCount () <
- return contactList . size ();
- >
- @Override
- public void onBindViewHolder ( ContactViewHolder contactViewHolder , int i ) <
- ContactInfo ci = contactList . get ( i );
- contactViewHolder . vName . setText ( ci . name );
- contactViewHolder . vSurname . setText ( ci . surname );
- contactViewHolder . vEmail . setText ( ci . email );
- contactViewHolder . vTitle . setText ( ci . name + » » + ci . surname );
- >
- @Override
- public ContactViewHolder onCreateViewHolder ( ViewGroup viewGroup , int i ) <
- View itemView = LayoutInflater .
- from ( viewGroup . getContext ()).
- inflate ( R . layout . card_layout , viewGroup , false );
- return new ContactViewHolder ( itemView );
- >
- public static class ContactViewHolder extends RecyclerView . ViewHolder <
- .
- >
- >
In our implementation, we override onBindViewHolder where we bind the data (our contact info) to the Views. Notice that we don’t look up UI components but simply use the references stored in our ContactViewHolder. In onCreateViewHolder we return our ContactViewHolder inflating the row layout (the CardView in our case).
Run the app and you’ll get the results shown below:
Источник


