- How to set up or change an Android email signature
- Android email signature in the Gmail app
- Email signature in the Android email app
- Company-wide HTML email signatures on Android devices
- How to Set Up Email on Your Android Phone
- Keep your email with you wherever you go
- What to Know
- How to Set Up Gmail on Android
- How to Set Up Yahoo Email on Android
- How to Set Up Outlook on Android
- Set up email in Android email app
- Choose your built-in Android email app:
How to set up or change an Android email signature
If you have an Android mobile device that you use for sending business emails, you can create or update your Android email signature. This is especially important if it reads: “Sent from my Sony Xperia smartphone” or something equally generic. Obviously, this is not the signature you would want to use in business emails, but you may find it out of place in personal online conversations as well. So, depending on the email app you use on your Android device, follow the instructions below to create or change your email signature in the Gmail app or in the Android email app.
- Android email signature in the Gmail app
- Email signature in the Android email app

Android email signature in the Gmail app
If you are using the Gmail app on your Android device, follow the instruction below to set up or update your mobile signature:
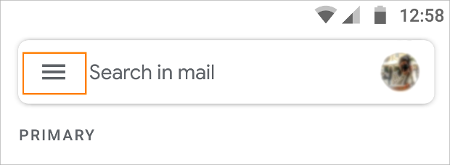
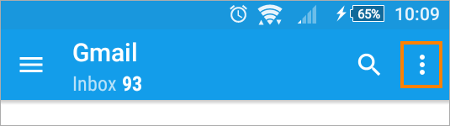
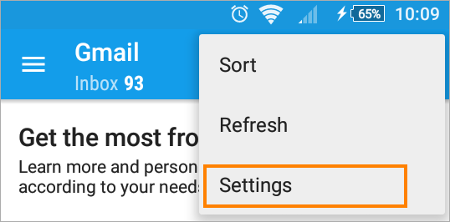
- Open the Gmail app on your Android device and click the More icon in the left top corner.

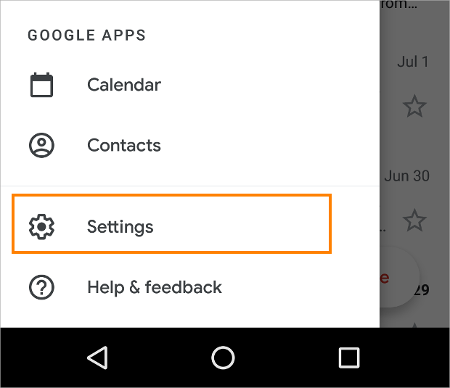
- Go to Settings.
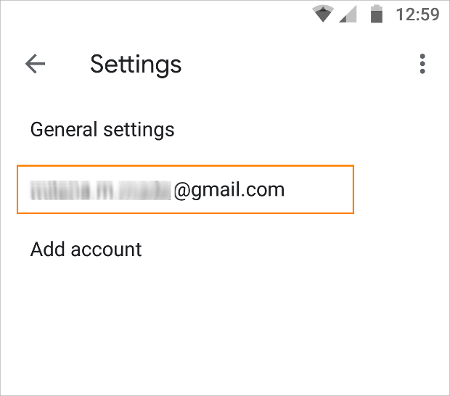
- In the Settings menu, tap the account for which you want to set up your mobile signature.
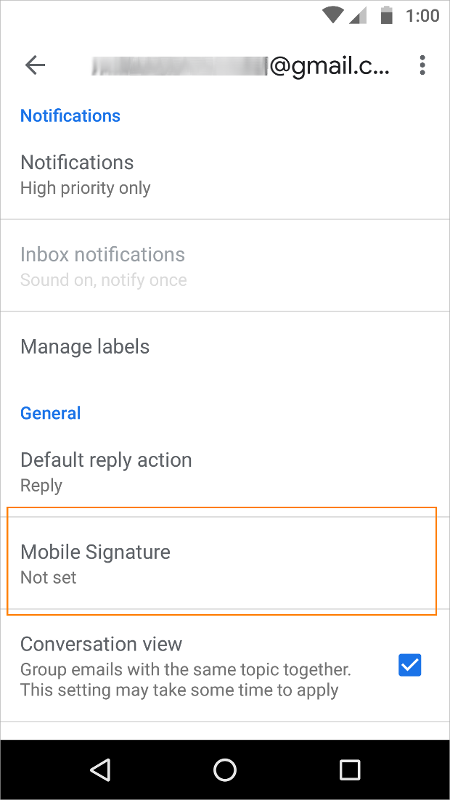
- In the General section, tap Mobile Signature.
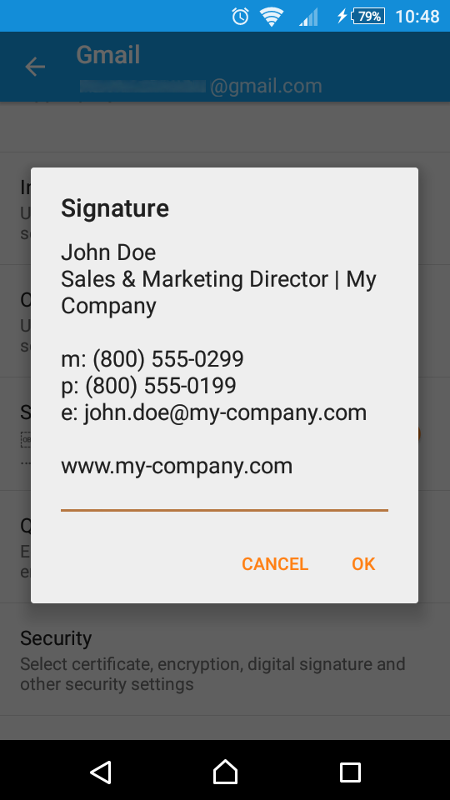
- Add your Android email signature in the Signature window. Once it is ready, tap OK.
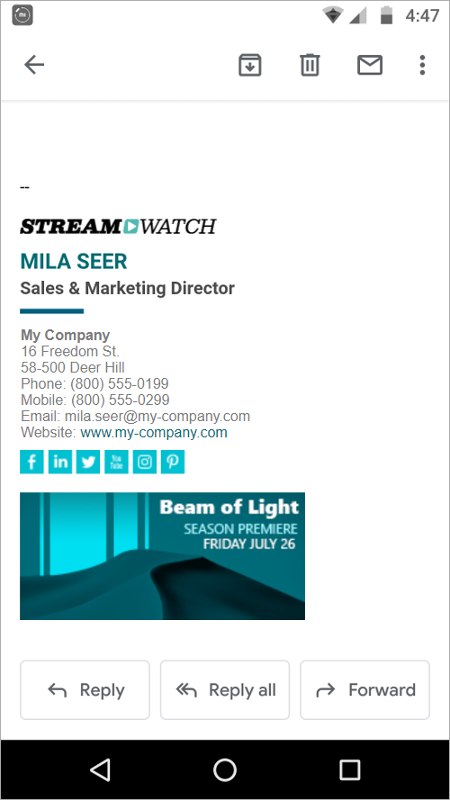
Note: The Gmail app for Android only lets you create a signature in the Plain Text format. In other words, you will not be able to add any HTML elements like hyperlinks, images and social media icons to your Android signature. You can overcome these limitations and add feature-rich email signatures to emails sent from Android devices by using a third-party email signature software.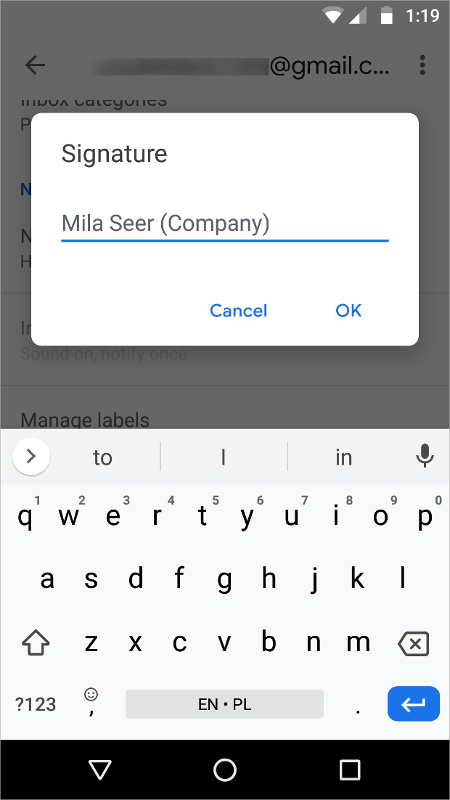
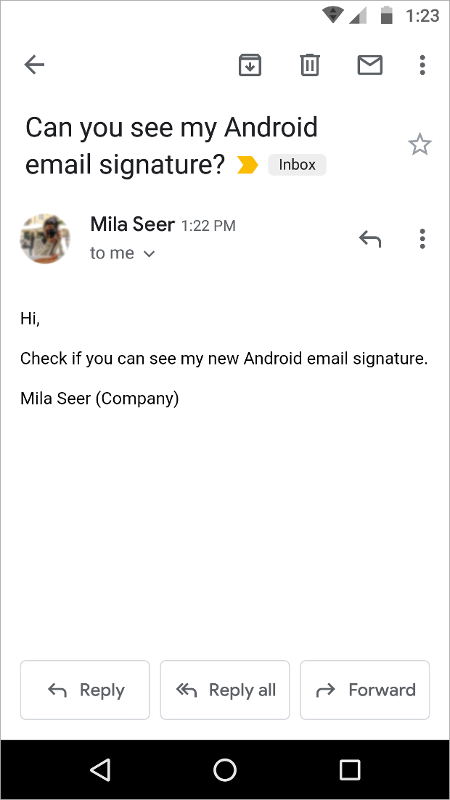
That’s it. Now you have your email signature ready for use whenever sending an email from the Gmail app on your Android device.
Email signature in the Android email app
If you are using a native email app available on your Android device, setting up your email signature may look a little different depending on your mobile device model. However, the steps should be similar to these:
- Open the Android email app on your mobile device and tap More.
- Go to Settings.
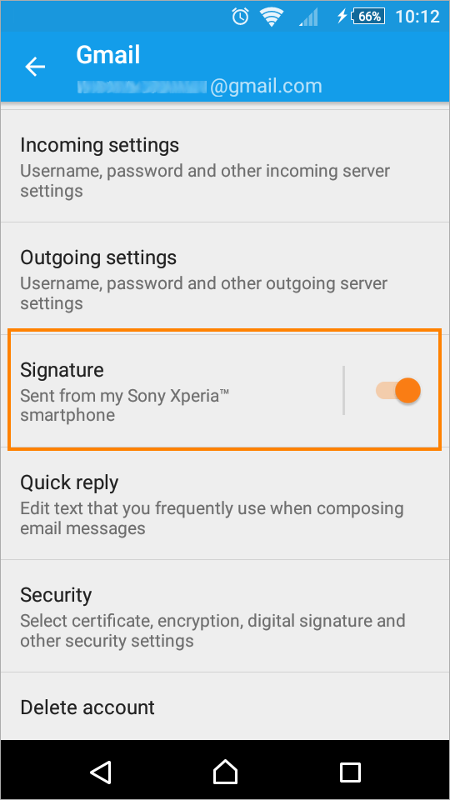
- In the Settings menu, go to Signature.
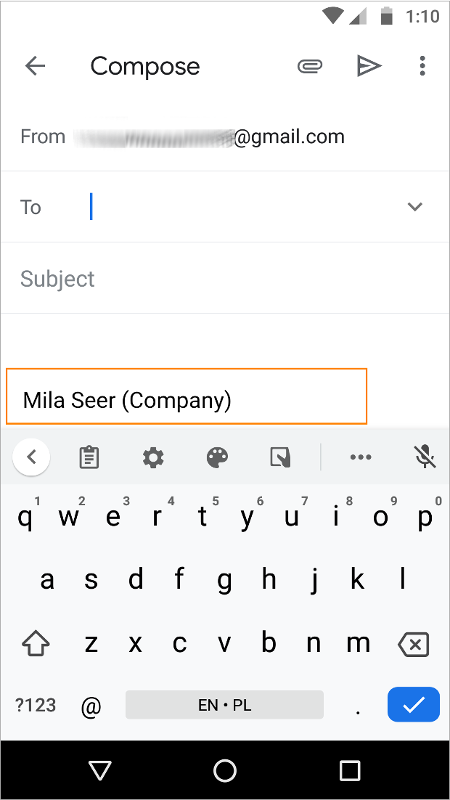
- Enter your Android email signature in the Signature window. Once it is ready, click OK.
- Check if your mobile signature works correctly by sending a test message.
Company-wide HTML email signatures on Android devices
The above instructions for setting up the Android signature are mainly helpful when you need to create or change a simple email signature for yourself or for a few coworkers. However, if you would like to set up an advanced HTML email signature for company emails sent by tens, hundreds, or even thousands of users, this will not suffice. When managing email signatures for a company, you need to meet different expectations and requirements such as e.g. using email signatures with company logo, user photos, links to the company’s website, or social media icons. Your business email signatures should be unified at a company level, but at the same time, they must be personalized. They should work correctly no matter what email client or mobile device is used ensuring visual consistency at all times.
So, when you need to provide the same email signature experience to all users and their different mobile devices (with either Android or iOS), you might want to consider investing in third-party solutions like CodeTwo Email Signatures for Office 365 or CodeTwo Exchange Rules Pro, which are designed to give you control over email signatures in your company.
If you ever experienced problems with mobile signatures like:
- trouble with setting up a decent HTML email signature
- difficulties in adding images to email signatures and displaying them correctly
- inability to add a legal disclaimer with links to your company’s privacy policy
- use of different mobile signatures that don’t even look like they originate from the same company (affecting brand awareness)
- no centralized control over email signatures for all users or the inability to quickly deploy new signatures company-wide
then CodeTwo solutions are here to take the burden of email signature management off your shoulders and make the process less stressful and more effective.
Источник
How to Set Up Email on Your Android Phone
Keep your email with you wherever you go
:max_bytes(150000):strip_icc()/JordanBarabnowski-e55f2c3b35c64e889d021e40bba56799.jpg)
What to Know
- Gmail: Go to Settings >Accounts >AddAccount >Google. Set up a new account or sign in to an existing one.
- Outlook: Install the app, then select GetStarted for a new account. For an existing one, go to Settings >AddAccount >Outlook.
- Yahoo: Go to Settings >AddAccount >Email >Yahoo. Sign in or create a new account.
One of the best benefits of your Android smartphone is being able to keep track of your email wherever you go. We take a look at the three most common email providers: Gmail, Outlook, and Yahoo. Keep reading to learn how to set them up.
If you are setting up an email account with additional security (like a work or school email), make sure you contact your IT department to see what additional steps you’ll need to go through to verify your account.
How to Set Up Gmail on Android
Gmail is the easiest email provider to set up on your Android device, since it comes preinstalled. All you will need to do is sign in to your account. Here’s what you do:
Tap Settings > Accounts.
Depending on your phone, you may have to hunt through the Settings to find Accounts. Sometimes, it’s located under the Personal section.
Tap Add Account > Google.
:max_bytes(150000):strip_icc()/001_how-to-set-up-email-on-android-4690320-72b3365e6b3d4c0594c38fd3c6b0b79d.png)
This will bring you to the Add Account screen. From here, you can either set up a new Gmail account or enter your existing email address and password.
Tap Accept on the Terms of Service page that follows, and your account should be ready.
How to Set Up Yahoo Email on Android
Setting up Yahoo email on your Android device follows a similar process.
Tap Settings > Add Account.
Tap Email, then tap Yahoo mail. If you don’t see the option for it, you can download the app free from the Google Play Store.
Enter your existing Yahoo email address and password or choose to set up a new email.
You will be given a few options, like adjusting how often your email syncs and what you’d like your display name to be with outgoing mail.
After you’ve chosen the options you would like, tap Next to finish your account setup.
How to Set Up Outlook on Android
Open the Google Play Store and download the Outlook for Android app. It’s a free download.
If you’re setting up a new account, tap Get Started. It will automatically detect some of your account information.
If you’re accessing an existing email, open your phone’s Settings, then tap Add Account > Outlook.
Enter your email address and password. If it requires additional information, it will inform you what is needed.
Источник
Set up email in Android email app
Android mail apps may look different across different devices, and these directions may not exactly match the options you see. Use these steps as a guide or consult the manufacturer’s help for your particular device.

For easy email and calendar management, we recommend you set up email in the Outlook for Android mobile app.
Are you using AOL mail? If so, this page can’t help you! Please contact AOL support for help. This page and the settings available on this page are for Outlook.com and Microsoft 365 for business users only.
Choose your built-in Android email app:
Before you begin, update the Gmail app to the latest version:
Open the Google Play Store app on your phone or tablet.
Type «Gmail» into the search bar and then select Update.
Note: If the update option is not available, you’re already on the latest version.


Open the Gmail app.
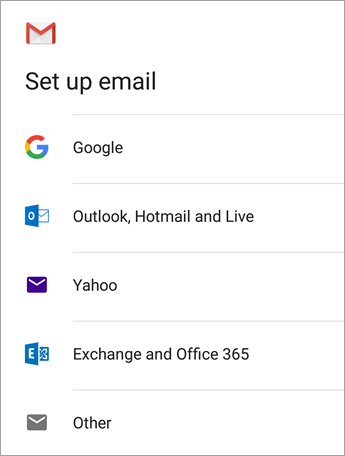
Tap the menu icon in the upper left corner > Settings > Add account > Exchange and Microsoft 365.
Important: Do NOT choose «Outlook, Hotmail, and Live» unless you want to sync email only and not calendar/contacts.


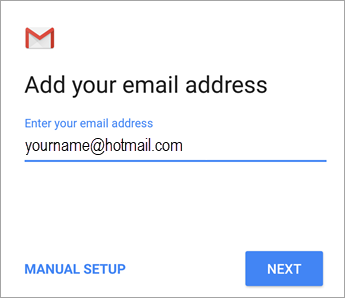
Enter your full email address and tap Next.
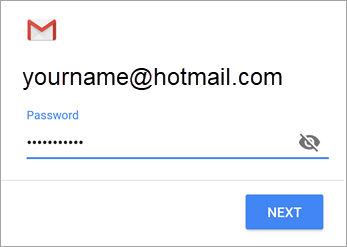
Enter your password and tap Next.

Follow steps for your account type:
Outlook.com users: skip this step
Exchange or other accounts: you may have to ask your IT admin or email provider for server settings and set up your account manually
Microsoft 365 work or school: you may see a Redirect request screen. Tap OK.

On the Incoming server settings screen, change your server to outlook.office365.com.

Follow any prompts you may get for security or device permissions, sync settings, and more.
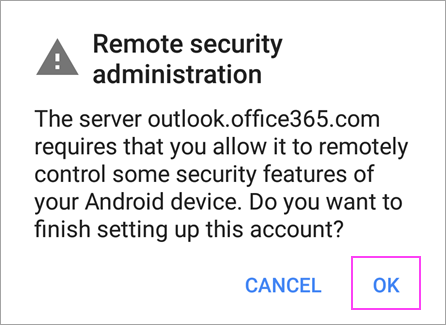
If you have a Microsoft 365 work or school account, you may also be asked to confirm Remote security administration and approve additional security measures. In this case, choose OK or Activate.

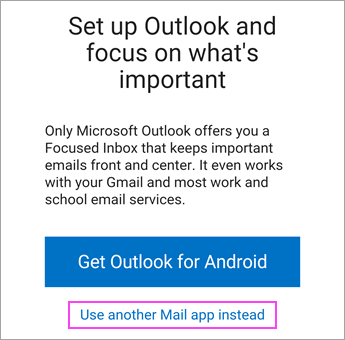
Go to the inbox you just set up. If you see an email that says » Action Required to Sync Email,» open it and tap Use another Mail app instead.
If you don’t see this message and emails are syncing, skip this step.

Pull down the Android notification bar by swiping down from the top of your screen.
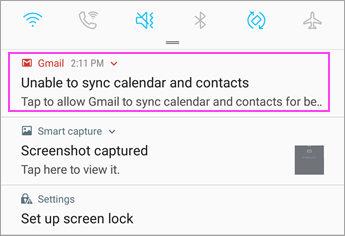
If you see a notification that reads » Unable to sync calendar and contacts,» tap it. Then tap Allow to give access and you’re done!
Note: If you don’t see a sync error, verify your calendar and contacts are syncing.
If you’re unable to add your email account to the Gmail app, try the Manual Setup steps below:
Open the Gmail app. Go to Settings > Add account > Other.
Enter your full email address and then tap Manual Setup > Exchange.


Enter your password and tap Next.
For server settings, set the following if available:
Incoming Server Settings
Domain\Username
Make sure your full email address appears. For example, yourname@outlook.com.
Password
Use the password that you use to access your email.
Enter eas.outlook.com for any email account ending with @outlook.com, @hotmail.com, @msn.com, or @live.com, including any other accounts hosted on Outlook.com.
Use outlook.office365.com for any work or school accounts hosted on Microsoft 365 for business.
Note: If you’re setting up an Exchange-based account and you don’t know the name of your Exchange Server, contact your administrator.
Security type
Select SSL/TLS or make sure the Use secure connection (SSL) checkbox is checked, then tap Next.
Outgoing SMTP Server Settings
Use smtp-mail.outlook.com if you’re using an Outlook.com account.
Use smtp.office365.com if you have a Microsoft 365 for business account.
For Exchange email accounts, contact your email provider or system administrator.
Security Type
Choose TLS.
Port Number
Enter 587. Tap Next.
Follow any prompts you may get, including security permissions. You may also be asked to set your sync settings and a display name.
Note: If you useMicrosoft 365 for business you may also be asked to give additional security control. In this case, choose Activate.
Now go to your inbox. If you see a message that says «Action Required,» follow these steps:
Note: If you don’t see a message like this and all your emails are syncing, there is no need to complete this step.
Tap the email message to open it.
Tap the Use another Mail app instead link to enable sync with the Gmail app.
Are you trying to sync calendar and contacts?
Depending on your version of Android, additional steps may be needed to properly sync your calendar and contacts:
Pull down the Android notification bar by swiping down from the top of your device’s screen.
If you see a notification that reads » Unable to sync calendar and contacts,» tap it.
Note: If you don’t see a sync error notification, your calendar and contacts should be syncing.
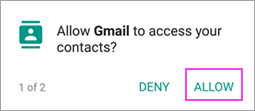
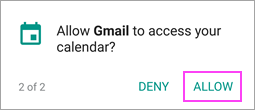
Gmail will ask for access. Tap Allow and follow the prompts and you’re done!
Note: Syncing email, calendar, contacts, and tasks may take a few minutes. If your device can’t connect to your email account, make sure your email address and password are typed correctly.
You can set up your email account manually using IMAP or POP instead of Exchange ActiveSync. This means that only your email will sync to your phone, not calendar or contacts. What are POP and IMAP?
Open the Gmail app. Go to Settings > Add account > Other.
Enter your full email address, such as yourname@hotmail.com and then tap Manual Setup.
Choose Personal (IMAP) or Personal (POP3).
Enter your password and tap Next.
Important: If you get a security error, close the Gmail app and then go through the steps again.
If you’re prompted to enter settings, use these for the options available:
Incoming Server Settings
Domain\Username
Make sure your full email address appears. For example, yourname@outlook.com.
Password
Use the password that you use to access your email.
Use imap-mail.outlook.com for Outlook.com IMAP accounts.
Use pop-mail.outlook.com for Outlook.com POP accounts.
Use outlook.office365.com for any work or school accounts on Microsoft 365 for business.
For Exchange email accounts, contact your email provider or system administrator.
Use 993 for IMAP.
Use 995 for POP.
Security type
Select SSL/TLS or make sure the Use secure connection (SSL) checkbox is checked, then tap Next.
Outgoing SMTP Server Settings
Use smtp-mail.outlook.com if you’re using an Outlook.com account.
Use smtp.office365.com if you have a Microsoft 365 for business account.
For Exchange email accounts, contact your email provider or system administrator.
Security Type
Choose TLS.
Port Number
Enter 587. Tap Next.
Follow any prompts you may get, including security permissions and setting a display name.
You’re now ready to use your email in the Android Gmail app!
Open the Samsung Email app and tap Add Account if it’s your first time.
Or, go to Settings in the app > Add account.
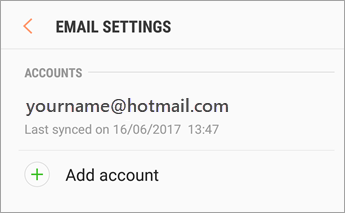 Add account» loading=»lazy»>
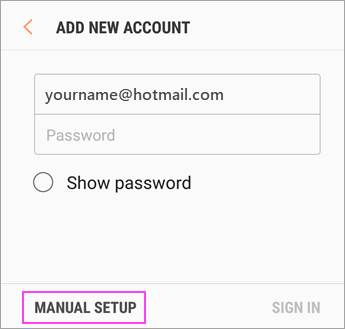
Enter your email address and password. Tap Sign in.
Note: If the email app detects your provider, you may be redirected to a different sign in screen.

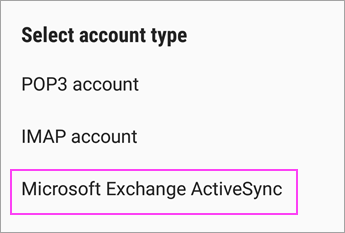
If you’re prompted to select account type, choose Microsoft Exchange ActiveSync to sync contacts and calendars.
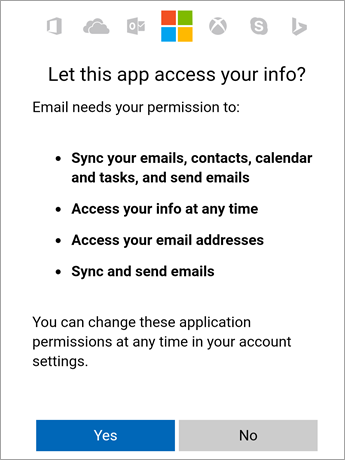
Tap Yes or Ok to confirm settings and permissions. What you see may vary depending on what kind of account you’re setting up.
If you’ve turned on two-step verification, you’ll verify your identity with your chosen method.
Syncing email, calendar, contacts, and tasks may take a few minutes.
If you see an email that says » Action Required to Sync,» open it and tap Use another Mail app instead. If you don’t see this message, skip this step.

If you’re still unable to set up your email, try the Manual Setup for Samsung Email app steps below:
Open the Samsung email app. Go to Settings > Add Account.
Enter your full email address and password. Tap Manual Setup.
Select Microsoft Exchange ActiveSync.
For server settings, set the following if available:
Incoming Server Settings
Domain\Username
Make sure your full email address appears. For example, yourname@outlook.com.
Password
Use the password that you use to access your email.
Enter eas.outlook.com for any email account ending with @outlook.com, @hotmail.com, @msn.com, or @live.com, including any other accounts hosted on Outlook.com.
Use outlook.office365.com for any work or school accounts hosted on Microsoft 365 for business.
Note: If you’re setting up an Exchange-based account and you don’t know the name of your Exchange Server, contact your administrator.
Security type
Select SSL/TLS or make sure the Use secure connection (SSL) checkbox is checked, then tap Next.
Outgoing SMTP Server Settings
Use smtp-mail.outlook.com if you’re using an Outlook.com account.
Use smtp.office365.com if you have a Microsoft 365 for business account.
For Exchange email accounts, contact your email provider or system administrator.
Security Type
Choose TLS.
Port Number
Enter 587. Tap Next.
Follow any prompts you may get, including security permissions. You may also be asked to set your sync settings and a display name.
If you use Microsoft 365 for business you may also be asked to give additional security control. In this case, choose Activate.
Источник


