- A simple way to detect if browser is on a mobile device with Javascript
- Discussion (16)
- Implementing Internet Connectivity Checker in Android Apps
- Enough talk!
- Back to our business
- That’s it!
- JavaScript to APK. Подводные камни разработки под Android для тех, кого задолбал PhoneGap. Построение мостов из Java в JavaScript
- Перейдем к сути
- Check if android javascript
- About
A simple way to detect if browser is on a mobile device with Javascript
Sometimes we need a little Javascript code snippet to detect if user use mobile device, the simplest way is detecting its browser user agent.
We use the regular expression test to detect if browser is a mobile device like:
demo is on codepen:
Discussion (16)

Hey,
this is very very unreliable. UserAgent can be changed and as far as I know, iPads want to be treated as desktops now and thus send the same UA in Safari as the Desktop Safari.
Mozilla is of a similar opinion:
developer.mozilla.org/en-US/docs/W.
Hope that helps 🙂

I didn’t read your link, if you provided a solution using that link, my apologies. Otherwise, do you have a better solution? I’m thinking you do 😉
That link shows that using UserAgent is unreliable. If you trust my comment you don’t need to read the source 🙂
In one of our projects, we have a workaround that checks for screen size, pixel density, touch and other features only available on mobile devices. It seems to work reliably, but it is an Angular module, that I can’t share at the moment. Unfortunately, we don’t have a plain JS solution yet. That’s also the reason why I did search for a simpler way again (for a non-angular project) and found your solution. At first, I was amazed, but then I realized that we have tried this approach in the past and it was not reliable enough for what we needed. So I just wanted to leave this comment here, so people know about it. For this project, I’m back to simple breakpoints considering the width of the screen.
Источник
Implementing Internet Connectivity Checker in Android Apps

Dec 31, 2020 · 4 min read
W orking on an Android chat app? social media app? or any other internet-based app that you want to check if there is an internet connection in order to continue a process or even notify the user about their network state? This guide comes to the rescue!
You may say: “ Hey! There is already an API which gets this job done.”
Yes, there is! Well, although Android SD K provides API that you can use to get network state of user’s device like ConnectivityManager, it does not actually check whether there is an active internet connection. Concretely, try establishing a hotspot from mobile device “A” but do not turn on mobile data or WiFi, then connect mobile device “B” to that hotspot of “A”.
Using device “B”, when you try to search, say, on Google this won’t work as there is no internet connection although you are connected to a network. ConnectivityManager APIs work the same. They just tell whether you are connected to a network or not — regardless of having an active internet connection or not.
So, the bottom line is:
“How do we check if there is an active internet connection?”
Basically, we can ping or connect to any server to see whether this ping or connection is successful or not.
If you have your own back-end server, you may prefer to try to connect your app to the server to make sure that the device has an internet connection and your server is not down at the same time.
We can also connect to Google’s servers as they are unlikely to be down (or for a long time).
To optimize our class implementation (we’ll call it NetworkConnectivity), it’s good to check a device’s network connection using ConnectivityManager so that if WiFi or mobile data is turned off or even WiFi is turned on but there is no network the device is connected to, we don’t have to make requests to any servers.
Enough talk!
First of all, add internet and network state permissions in your app manifest:
Now, create a function to check network availability using ConnectivityManager:
Here we used getAllNetworkInfo() to return an array of objects of all networks and then we check whether any of them is connected.
But this method is deprecated since API 23. For later APIs, we used getAllNetworks() which is added in API 21. But yea, getNetworkInfo() is also deprecated since API 29 🙂
Back to our business
To ping Google’s server, basically, we can do that with a few lines of code:
This approach works synchronously so that you just wait for the response to tell whether you have a connection or not and it takes no time. However, in some mobile devices for specific brands, the framework does not allow performing this process in Runtime, so you can not eventually rely on it.
Instead, we can make a normal HTTP connection request to the server.
Start by creating a method called checkInternetConnection which checks first if WiFi or mobile data are connected to any network by using the above method. Then it starts establishing an HTTP URL connection:
ConnectivityCallback is an inner interface having an abstract function which we’ll use to communicate with our UI classes when the server’s response comes back.
In the above checkInternetConnection function we used: “ http://clients3.google.com/generate_204” instead of Google’s normal URL “ http://www.google.com” since the first is a bit more efficient so that we don’t have to grab the whole web page.
For a successful request, the response code must be equals to 204 and no content is returned back.
We used “ setRequestProperty()” to set headers (some information the server needs to know) for the request for the server. Also, we specified the connection timeout to be one second which is a reasonable time.
But wait! Android framework does not allow network operations on the main thread so we need to use the above code on another thread. Consequently, we’ll have to post the result on the main thread again. You can use whatever is convenience for you to perform both of these operations. I would use a singleton AppExecutors class which provides executor threads for both of our cases.
postCallback() is a helper method that posts our result to the interface on the main thread.
That’s it!
To check internet connectivity in an activity:
In recent devices, Android may produce a security exception due to using HTTP URL connection. To fix this, add android:usesCleartextTraffic=”true” in your app manifest within application tag or use HTTPS instead of HTTP connections. So, pay attention to exception handling in your checkInternetConnection method.
Источник
JavaScript to APK. Подводные камни разработки под Android для тех, кого задолбал PhoneGap. Построение мостов из Java в JavaScript
Я люблю игры на JavaScript и стараюсь сделать их код пуленепробиваемыми для портирования на все платформы. Полгода назад я уже писал о сборке Android приложений и сегодня хотел бы раскрыть тему более подробно.
Сразу предупрежу, что мне пришлось отказаться от PhoneGap, т.к. опыт использования его в двух проектах меня огорчил. Он отлично справляется с «Hello World» приложениями, но при конвейерной сборке всего подряд всплывают нюансы.
Почему PhoneGap не пошел:
1. Он изначально пустой. Постоянно приходится подключать все новые и новые модули.
2. Многие модули написаны криво. Они либо берут много лишнего, либо ведут себя неожиданно. Например, из двух модулей под Android для отправки SMS, один не работал, второй — отправлял true при любых условиях.
3. Не решены элементарные вещи, вроде получения EMEI телефона. Нужно постоянно допиливать.

Я так и не понял сути PhoneGap. Изначально ожидал одну кнопку «сделать хорошо», а не деле он ничего не делает. Под каждую платформу мне все равно надо ставить SDK. Под каждую задачу — искать и ставить модуль. Сами модули тоже ограничены. Они могут делать что-то только под часть платформ, а если нужно под другие — то приходится снова искать модули, которые смогу сделать это на других девайсах. Много мусора и ненужных вещей, а ведь хочется собирать билды с минимумом затрат. Все эти факторы заставляют писать нативно. И вот тут начинают вылезать подводные камни.
Почему CocoonJS не пошел:
С CocoonJS работал мало, поэтому никаких особых вопросов не возникло. Билды с canvas действительно работают быстрее. Но в общем — смысла работать с CocoonJS не увидел, т.к. он платный.
Что касается сборки под другие платформы и прочие нюансы — про это будет отдельная статья, и дальнейшее обсуждение по этой теме или теме PhoneGap выходит за рамки этой.
Перейдем к сути
Для начала начнем с основы — WebView с запущенной HTML страничкой на весь экран. В onCreate MainActivity пишем:
Все спорные ситуации будем решать в Java. Помните, пишите вы для Bada или SmartTV — всегда есть какой-то стандартный функционал, который позволяет кидать мосты в JavaScript. В нашем случае для Android`а мы кинули экземпляр класса WebAppInterface, а сам класс будет выглядеть так:
Подводный камень: Работа с такими мостами обычно может быть асинхронна или непредсказуема и полна сюрпризов.
Если у вас возникла необходимость из Java сообщить JavaScript`у какое-либо событие на ровном месте, самый простой способ достучаться до него — это стучать в URL:
Подводный камень: В Android`ах > 4 от Samsung`а при тач-событии DOM элементы могут подсвечиваться синим цветом.

Обратите внимание на этот нюанс. Типичная «защита» вам не поможет:
Чтобы обойти багу, надо добавить:
Но это не всегда решает проблему. Возможно, на проблему влияет сама верстка. Например, возьмем два приложения: Судоку и Тест. В судоку доска сверстана таблицей, и для таблицы такое решение помогло. В Тесте же кнопки это. Вроде бы все по стандартам семантики HTML5, и все должно быть более чем прекрасно, но на деле приходиться добивать таким CSS комбо:
Так же заметил, что синее выделение не появляется, если тач-событие пришлось точно на текст кнопки (текст при этом должен быть очень большим).
Источник
Check if android javascript
JsEvaluator library for running JavaScript in Android apps

JsEvaluator may help you run JavaScript in an Android app and get the results. This is an alternative to evaluateJavascript method of the WebView. Supports Android version 4.0 (Ice Cream Sandwich) and newer.
There are two ways your can add JsEvaluator to your project:
- From a remote Maven repository.
- From a local .aar or .jar file.
1. Setup from Maven repository in Android Studio
- Add maven < url "https://jitpack.io" >into allprojects/repositories section of your project build.gradle file. For example:
- Add compile ‘com.github.evgenyneu:js-evaluator-for-android:v5.0.0’ into dependencies section of your module build.gradle file. For example:
For less information, see Gradle/Maven setup instructions on JsEvaluator jitpack.io page.
2. Setup from local .aar file
Download jsevaluator-1.0.aar. You can also build it yourself into jsevaluator/build/outputs/aar/ directory in Android Studio with this command:
Add aar file to Android Studio project
To add JsEvaluator to your app in Android Studio:
- Copy the jsevaluator-1.0.aar to your app/libs folder.
- Add compile(name:’jsevaluator-1.0′, ext:’aar’) to dependencies block of your module build.gradle file.
- Add the following code to the allprojects/repositories block of your project build.gradle file.
Add jar file to Eclipse project
- Unzip the jsevaluator-1.0.aar and get the classes.jar from it. You may want to rename it to jsevaluator.jar.
- Open properties for your app project.
- Select Libraries tab in Java Build Path .
- Click Add JARs. button and select the .jar file.
- In your project properties click Order and export tab.
- Tick the .jar file.
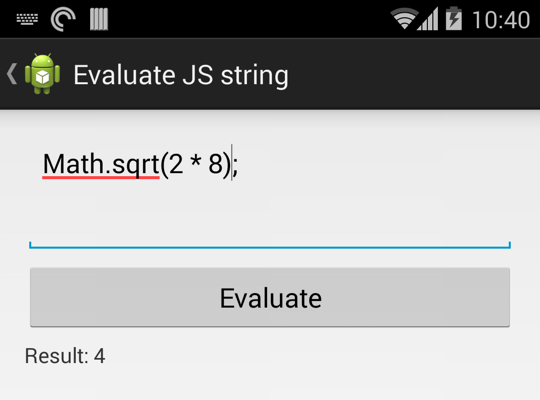
Create evaluator instance variable in your activity:
this is a reference to your activity.
Note: make sure to call evaluate method in UI thread.
Call a JavaScript function
Any number of string, int or double parameters can be supplied.
Note: make sure to call callFunction method in UI thread.
JavaScript is evaluated asynchronously
JavaScript is evaluated asynchronously without blocking UI thread. Result is returned in the UI thread. It is required to call evaluate and callFunction in UI thread.
JavaScript is evaluated in new context
Each time the JavaScript is evaluated in the new context. It can not access the result of a previous evaluation. Please concatenate all your JavaScript to one string and evaluate it in one go.
For example, if you need to load jQuery libary and then use it:
Destroying the evaluator
Calling the destroy() method will destroy the Web View used by JsEvaluator and clear the memory. JsEvaluator can not be used after it is destroyed.
Accessing the WebView
Here is how to get the instance to the web view used by the JsEvaluator.
This library is suitable for evaluating only small amounts of JavaScript within hundreds of KB. It has been reported that the library can not evaluate a megabyte of JavaScript. If you run into similar problems you can try ericwlange/AndroidJSCore library instead.
Behind the scenes it creates a WebView and feeds it JavaScript code for evaluation:
The result of evaluation is sent back into Android activity:
Catching JavaScript errors
This library catches errors by wrapping the whole JavaScript code in a try-catch block. The errors are then returned to Java in the onError method of the callback object.
Please note that this method only catches runtime JavaScript errors, like undefined variables or properties. It will not, however, catch errors resulted from malformed JavaScript code, like missing a > bracket.
Using with ProGuard
If you are using ProGuard ( minifyEnabled true ) you can add these rules to your proguard-rules.pro file.
You will most likely not need to modify your proguard file because JSEvaluator uses consumer proguard rules.
Tests are located in app module of this project. The app can be run for manual testing as well.
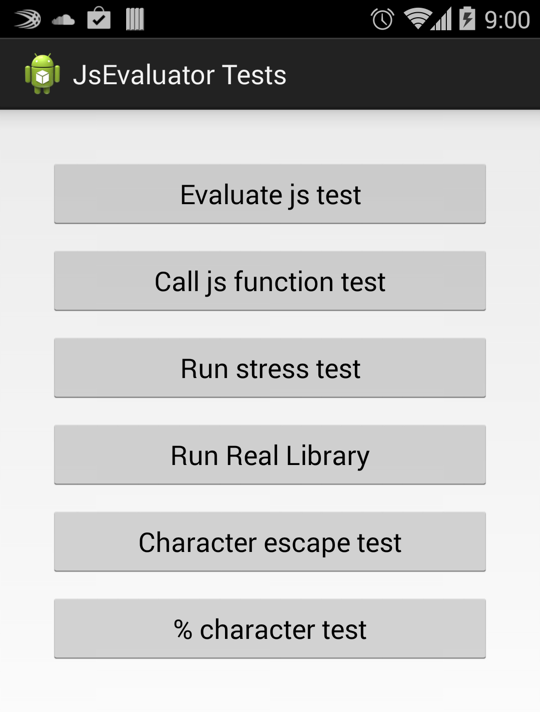
Or run as Android JUnit Test for unit testing.
Android versions tested:
- 4.0.3 (Ice Cream Sandwich)
- 4.1.2, 4.2.2, 4.3 (Jelly Bean)
- 4.4.2 (KitKat)
- 5.0, 5.1 (Lollipop)
- 6.0 (Marshmallow)
- 8.0 (Oreo)
- codebymikey for adding error handling.
- xbao for adding a Gradle file.
- clydzik for fixing a memory leak and simplifying the code.
Feedback is welcome
If you have any issues or need help please do not hesitate to create an issue ticket.
About
A library for running JavaScript in Android apps.
Источник


