- Question: Q: iPhone connects and disconnects from Mac
- Helpful answers
- If your computer doesn’t recognize your iPhone, iPad, or iPod
- Additional steps for Mac
- Use iTunes to sync your iPhone, iPad, or iPod with your computer
- What you can sync with iTunes
- Sync or remove content using iTunes
- Sync your content using Wi-Fi
- How can I tether an iPhone to a PC via USB?
- How to Connect iPhone with PC
- Method 1: Best Way to connect/share iPhone with PC
- Wondershare TunesGo — Phone Manager
- Method 2: Connect iPhone with PC with iTunes
- Method 3: Connecting iPhone with PC through Plug and Play Alone
- Method 4: How to connect iPhone to PC over Wi-Fi
Question: Q: iPhone connects and disconnects from Mac
When I plug in my iPhone to my Macbook pro, it repetitively connects and disconnects. Therefore I cannot charge my phone through my computer anymore.
I own this iPhone since decembre 2018, and this issue only appeared this week. However when I plug in my iPhone to a wall outlet, it charges perfectly. I also noticed that there is a lag time before my phone starts charging when connected to my Macbook (before disconnecting right away, and then reconnecting etc).
I tried to connect my iPhone to both USB ports of my Macbook, with many different Apple lightning cables and also my Anker cable (MFI certified), but the issue substains. I plugged in my mother’s iPhone 6 to my Macbook and it charged perfectly. I plugged in my iPhone to my brother’s former Macbook pro (15″ from 2008) and my iPhone could charge normally.
Here everything I tried to resolve this issue (which failed by the way) :
— I shut down and turned on my computer and my phone.
— I also restored my phone.
Could anyone tell me a solution?
I specify that I have a 256Go iPhone X under IOS 11.2.5 and a 13″ retina Macbook pro (mid 2014) under High Sierra 10.13.3.
[Re-Titled by Moderator]
iPhone X, iOS 11.2.5
Posted on Feb 10, 2018 1:34 PM
Helpful answers
Connect your iphone to your Mac.
Go to Activity Monitor —> Search for usbd —> Force quit it.
Sep 11, 2018 8:27 AM
sudo killall -STOP -c usbd
. worked like a charm for me.
Sep 22, 2018 8:00 PM
I had same issue on my iphone 6, ios 9.3.2. After searching through the web i found following solution that helped me:
You need to reset your privacy and location info and then trust your iphone with itunes again.
1. Disconnect your iphone from cable.
2. On your iphone: ->Settings -> General -> Reset -> Reset Location & Privacy (accept all things).
3. Connect your iphone back to cable. (iphone will reconnecting again, don’t worry, it will be soon over).
4. iTunes will ask about trust, accept all this.
After that your iphone should stop reconnecting repeatedly and start to charging normally.
May 31, 2018 3:29 AM
But I do think I solved my problem, by something similar.
On the hunch that the computer was trying to set up a network connection via the phone while the phone was trying to do something else, I went into the network settings and found that in the list of services I had an entry for «Thunderbolt Bridge.» I thought it was off, because it was listed as Inactive and the configuration I could see said «Configure IPv4: Off». But to make sure it was really completely disabled I pushed the «Advanced» button to change the configuration details (after clicking the lock icon and authenticating, of course). I changed «Configure IPv6» from «Automatically» to «Manually» and saved that.
After that, connecting my phone to the laptop finally worked. I was just now able to get some pictures off my phone onto the laptop.
Apr 22, 2018 6:29 PM
I think I found a solution after much research.
On the mac, go to settings>Network> iphone USB> then uncheck the box that says «Disable unless needed»
This worked for my iphone 7
I hope this helps!
Sep 20, 2018 1:12 PM
I have an iPhone X and MacBook Air. I have done everything and nothing fixed it. Tried this and seems right. I hope Apple figure it out and fix it in new updates, however, I’ve seen that people have had this problem from 2013.
I just wanted everyone to have the solution here that way when others experience it, they can hopefully find this solution quickly. Luckily several of you like ( MrArifFikri ) touched on the solution already, I’ll just specify the reason for clarity.
It comes down to power, or more importantly «current». Specifically, with an iPad, USB power consumption is very finicky. So in order for the USB direct connection to your PC, USB hub, or laptop you need to make sure your iPad is charged to over 51% . This will reduce the power draw the iPad will attempt to pull from the USB connection. This should give you flawless charging and syncing capabilities. Now you can sidestep this in some cases by using USB ports on your hub, PC or laptop that are closer to the power supply, or series on the circuit board.
If your iPad is below 51%, you need to use the «cube» or power block that came with your iPad. (The smaller one for your iPhone is not recommended as it lacks the internal transformer that the iPad power block has) The reason for this is that your iPad is attempting to draw too much current from the USB connection through a substrate, i.e. the PC, USB hub or laptop connection. They are only designed to allow a limited amount of current through those connections, thus your iPad continues to «trip» the charging circuit in the device because the power draw is too low.
I hope this helps stop the «doodledee. deeedledoo» beeping madness you’re experiencing! 🙂
Источник
If your computer doesn’t recognize your iPhone, iPad, or iPod
If you connect your device to your computer with a USB cable and your computer doesn’t recognize your iPhone, iPad, or iPod, learn what to do.
If your computer doesn’t recognize your connected device, you might see an unknown error or a «0xE» error. Follow these steps and try to connect your device again after each step.
- Make sure that your iOS or iPadOS device is turned on, unlocked, and on the Home screen.
- Check that you have the latest software on your Mac or Windows PC. If you’re using iTunes, make sure you have the latest version.
- If you see a Trust this Computer alert, unlock your device and tap Trust. If you can’t unlock your device because you forgot your passcode, find out what to do.
- Unplug all USB accessories from your computer except for your device. Try each USB port to see if one works. Then try a different Apple USB cable.*
- Restart your computer.
- Restart your iPhone, iPad, or iPod touch.
- Follow these additional steps for your Mac or Windows PC.
- Try connecting your device to another computer. If you have the same issue on another computer, contact Apple Support.
Additional steps for Mac
- Connect your iOS or iPadOS device and make sure that it’s unlocked and on the Home screen.
- On your Mac, choose Finder > Preferences from the Finder menu bar, then click Sidebar at the top of the preferences window. Make sure that «CDs, DVDs and iOS Devices» is checked.
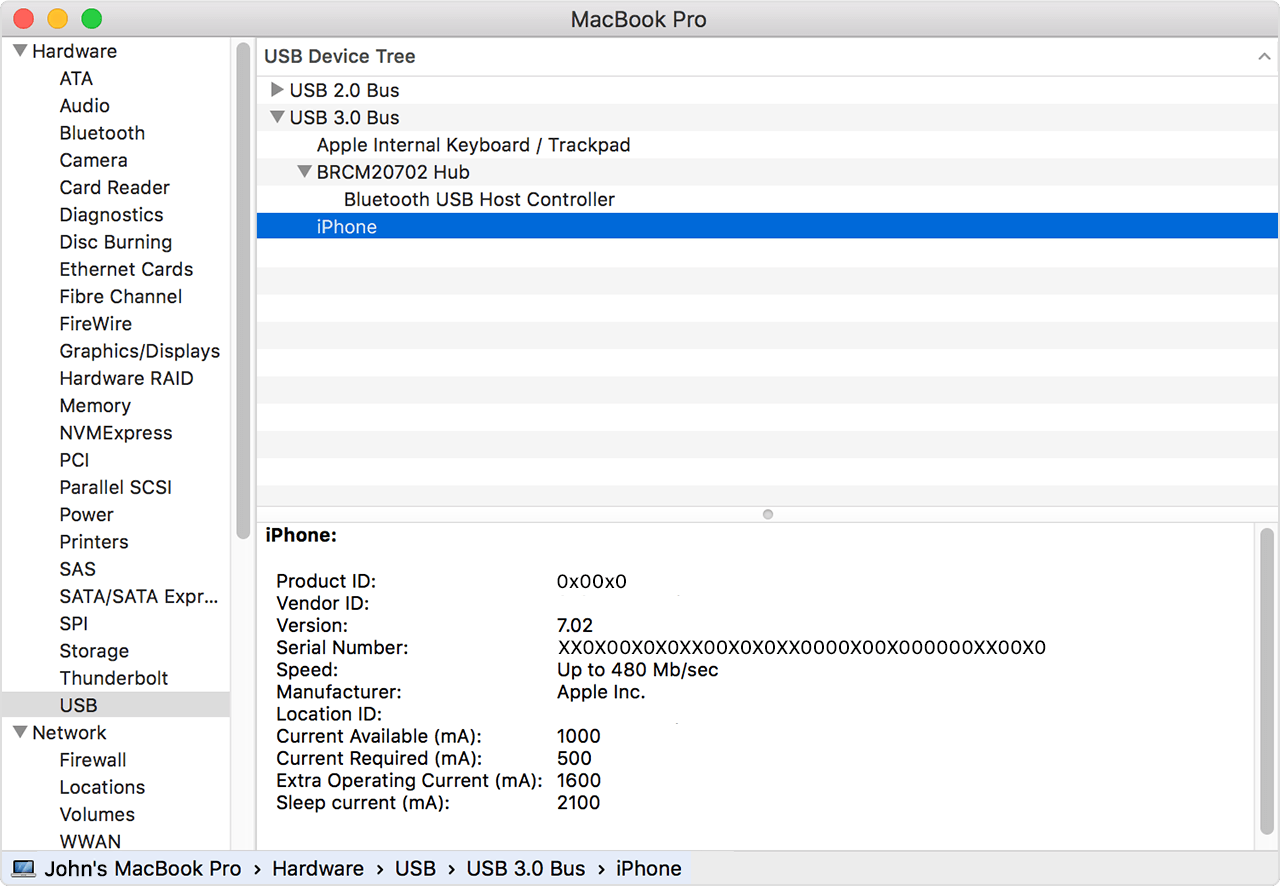
- Press and hold the Option key, then choose System Information from the Apple menu . From the list on the left, select USB.
- If you see your iPhone, iPad, or iPod under USB Device Tree, get the latest macOS or install the latest updates. If you don’t see your device or still need help, contact Apple Support.


Information about products not manufactured by Apple, or independent websites not controlled or tested by Apple, is provided without recommendation or endorsement. Apple assumes no responsibility with regard to the selection, performance, or use of third-party websites or products. Apple makes no representations regarding third-party website accuracy or reliability. Contact the vendor for additional information.
Источник
Use iTunes to sync your iPhone, iPad, or iPod with your computer
Learn how to sync music, movies, and more using iTunes on your Mac or PC.
If you’re using macOS Mojave or earlier or a Windows PC, use iTunes to sync content to your devices. Before you use iTunes to sync content to your iOS or iPadOS device, consider using iCloud, Apple Music, or similar services to keep content from your Mac or PC in the cloud. This way, you can access your music, photos, and more on your devices when you aren’t near your computer. Learn more about using Apple Music or iCloud Photos instead of iTunes.
If you use iCloud or other services like Apple Music to keep your content up-to-date across all of your devices, some syncing features through iTunes might be turned off.
What you can sync with iTunes
- Albums, songs, playlists, movies, TV shows, podcasts, and audiobooks.
- Photos and videos.
- Contacts and calendars.
iTunes features might vary by country or region.
Sync or remove content using iTunes
- Open iTunes and connect your device to your computer with a USB cable.
- Click the device icon in the upper-left corner of the iTunes window. Learn what to do if you don’t see the icon.
- From the list under Settings on the left side of the iTunes window, click the type of content that you want to sync or remove. * To turn syncing on for a content type, select the checkbox next to Sync.
- Select the checkbox next to each item that you want to sync.
- Click the Apply button in the lower-right corner of the window. If syncing doesn’t start automatically, click the Sync button.


* You can only sync your device with one iTunes library at a time. If you see a message that your device is synced with another iTunes library, your device was previously connected to another computer. If you click «Erase and Sync» in that message, all content of the selected type on your device will be erased and replaced with content from this computer.
Sync your content using Wi-Fi
After you set up syncing with iTunes using USB, you can set up iTunes to sync to your device with Wi-Fi instead of USB.
- Connect your device to your computer with a USB cable, then open iTunes and select your device. Learn what to do if your device doesn’t appear on your computer.
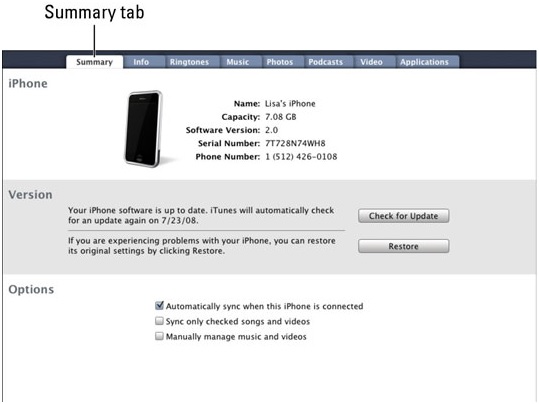
- Click Summary on the left side of the iTunes window.
- Select «Sync with this [device] over Wi-Fi.»
- Click Apply.
When the computer and the device are on the same Wi-Fi network, the device appears in iTunes. The device syncs automatically whenever it’s plugged in to power and iTunes is open on the computer.
Источник
How can I tether an iPhone to a PC via USB?
Sometimes it’s more convenient to use your iPhone’s Internet connection and share it with your PC. This article will show you the steps to connect your PC to an iPhone using a USB cable.
Step 1: Download the latest version of iTunes for Windows on your PC, install the program and run it.
Step 2: Activate the Personal Hotspot on your iPhone.
To do this, tap Settings from your home screen and go to Personal Hotspot.
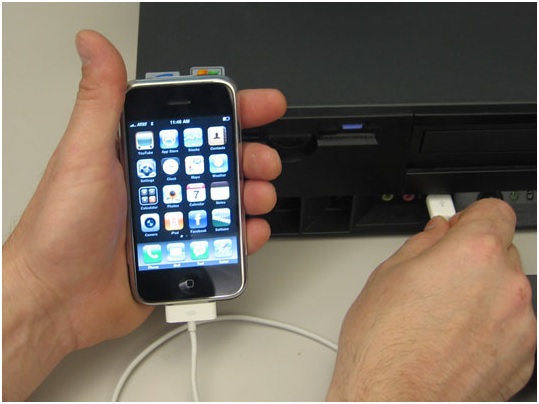
S tep 3: Connect your iPhone to your PC via the USB cable.
You should see the iPhone listed on the left side of the iTunes window, under «Devices».

If your iPhone is not detected, on your PC open Device Manager > Other Devices/Portable Devices > iPhone. Right click on it and choose «Update Driver» > Search Automatically. Windows will install the latest driver.

If after the installation iTunes still doesn’t detect the iPhone, restart your PC and try again.
Step 4: Make sure your PC connected successfully to your tethered iPhone.
On your computer, the tethered connection will appear as a wired connection, having a computer icon in the lower right section of the taskbar (systray). Click on that computer icon and you should see a wired connection named “Network X” which should be connected. That is your tethered iPhone.
Источник
How to Connect iPhone with PC
Want to connect iPhone to a Windows? Luckily! This artilces will introduce top 4 easy ways to connect iPhone to your PC, no matter your PC is win 10 or others. It is simple to share music, videos, photos, and contacts between PC and iDevice using these ways, including using built-in way, software, or wifi.
These methods will now be discussed with a clear view and wording so that the user can understand. It will also ensure that if there is a next time the implementation becomes too easy for the user. The overall usage of the resources is also too easy. Hence there is no burden at all when it comes to the system and the smooth running is enjoyed.
Method 1: Best Way to connect/share iPhone with PC
TunesGo is the best phone manager which can easily connect and transfer iPhone with PC. To sync your iPhone with pc, you can use TunesGo which can transfer data without any iTunes limitations. It is easy to use and user friendly. It support all the iOS devices and Android device. It is the best iTunes alternative and better than iTunes itself.
Wondershare TunesGo — Phone Manager

- Transfer between iOS/Android devices directly
- Transfer audio and video from Device to iTunes and PC
- Make any photos or video PC to GIF images
- Delete photos/videos by batch with a single click
- De-duplicate the repeated contacts
- Selectively transfer exclusive files
- Fix & optimize ID3 tags,covers,song information
- Export & Backup contact, text messages, MMS
- Transfer music, photos without iTunes restrictions
- Perfectly backup/restore iTunes library
- No iTunes needed
- Fully compatible with iOS 11
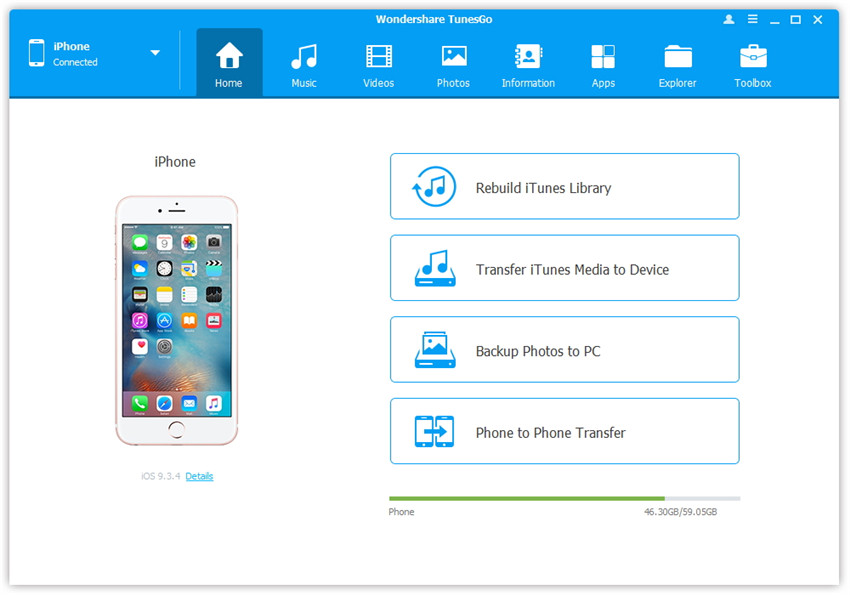
Step 1 Download and install TunesGo on your computer. After installing, launch it.
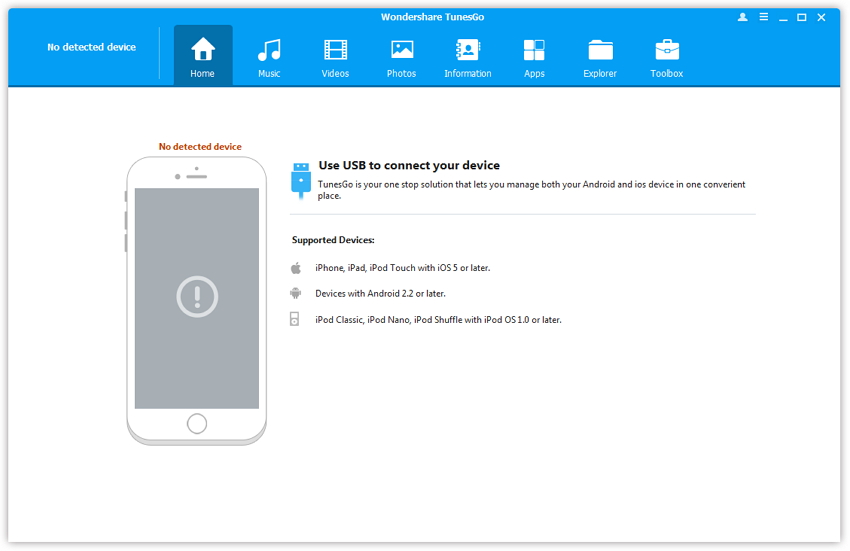
Step 2 Use a USB cable to connect your iPhone and PC. TunesGo will detect iPhone immediately. Then you can transfer the files you want to pc or add the data from PC.
Method 2: Connect iPhone with PC with iTunes
You can also use iTunes to connect iPhone with PC, but it is hard. So follow the steps below carefully.
Step 1 The user needs to connect the iPhone to the PC with a USB cable to begin.
Step 2 The iPhone will be detected and the iTunes will be launched automatically.
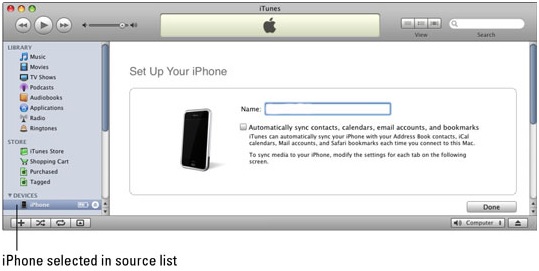
Step 3 Within the summary tab, the user needs to select the option “Automatically Sync when this phone is connected”. The iPhone can then be accessed using the PC to transfer the contents. This also completes the process in full.
Method 3: Connecting iPhone with PC through Plug and Play Alone
It is by far the easiest method to transfer content. This is also a process which requires a user to do nothing out of the ordinary. The results that are obtained using this process are awesome and the user can get the work done without any issue.
Step 1 The user needs to connect the iPhone with the PC through data cable. If the iTunes open, just close it.
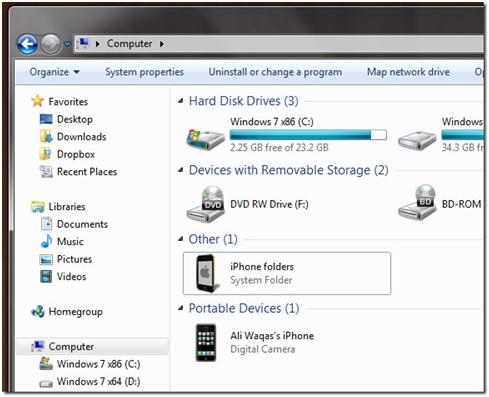
Step 2 The path to be followed is My computer > portable devices. Here the user can see the iPhone listed under the portable devices. The user then needs to right click the icon and select the option “import pictures and videos” to confirm the connection.
Method 4: How to connect iPhone to PC over Wi-Fi
To follow the best process the user need not to work very hard. There are tens of thousands of programs connect iPhone to PC over wifi. The requirements as well as the setup are also too easy. The user just needs to follow the simple steps to get the work done.
- Active Wi-Fi connection
- PC/Laptop
- iPhone
The steps that are included in this regard are described as follows.
Step 1 First of all, from the URL https://itunes.apple.com/us/app/wireless-transfer-app/id543119010 the user has to download wireless transfer app to begin. Launch it and click the send button on the app. This will generate a URL at the bottom of the app.

Step 2 Fill in the same url in the browser to continue.
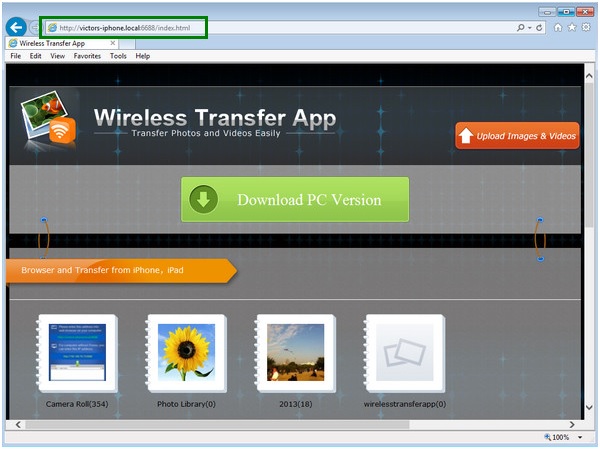
Step 3 The browser will let you download all the photos from the iPhone once the address is detected.
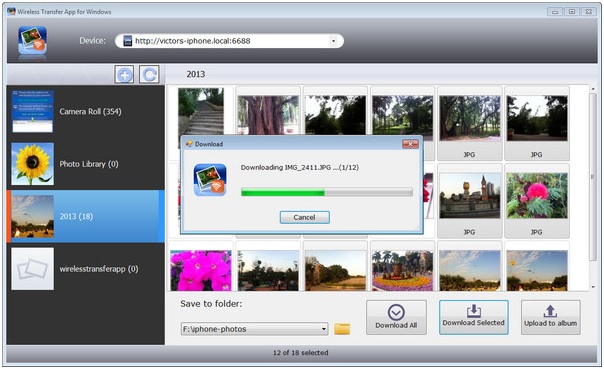
With all the processes mentioned, it is up to the user to choose the best. He can either choose to get a Wi-Fi or wireless connection or wired instead.
Источник


