- Apple Butter Pie
- Tips for making a flaky pie crust
- Tips for a smooth and creamy filling
- Topping and garnishing your pie
- Frequently Asked Questions
- Can you freeze this pie?
- Can I use any fruit butter?
- A couple more great pie recipes
- Apple Butter
- Apple Butter
- Learn how to make apple butter and fill your house with the aroma of cooking apples, cinnamon, allspice, and cloves. Our apple butter recipe is great on toast or spooned into oatmeal!
- What is Apple Butter?
- Don’t Throw Away Your Apple Cores!
- The Difference Between Applesauce and Apple Butter
- Alternatives to Stovetop Cooking
- The Best Apples for Apple Butter
- Swaps and Suggestions for Homemade Apple Butter
- To Can or Not to Can?
- Storing and Freezing Apple Butter
- Ways to Use Your Apple Butter
Apple Butter Pie
Share with your friends!
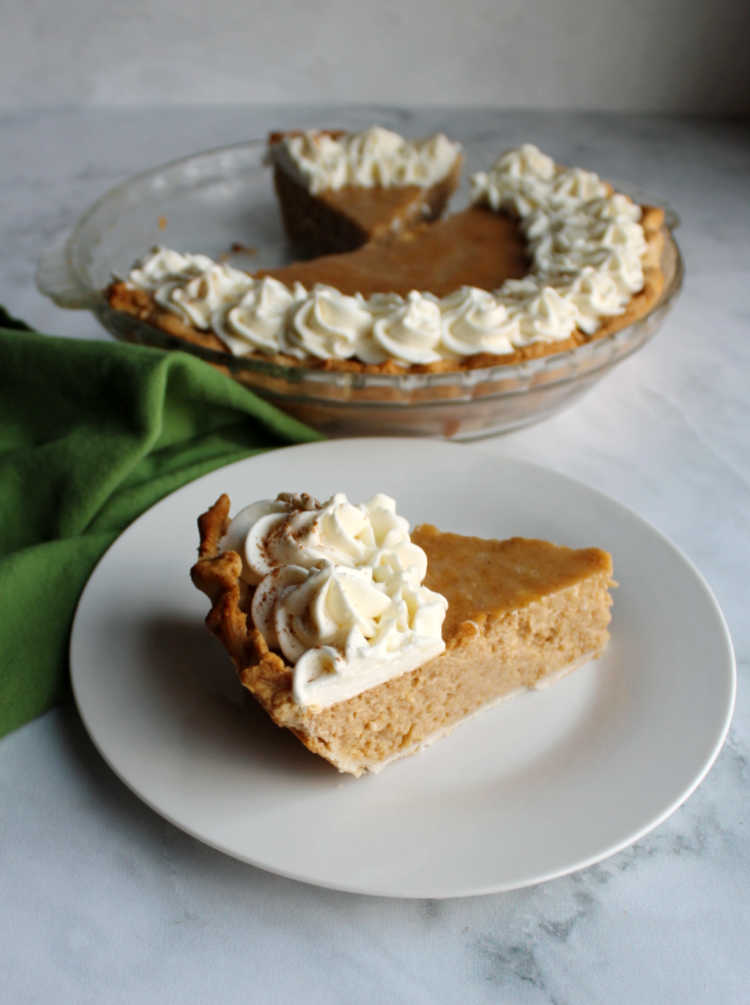
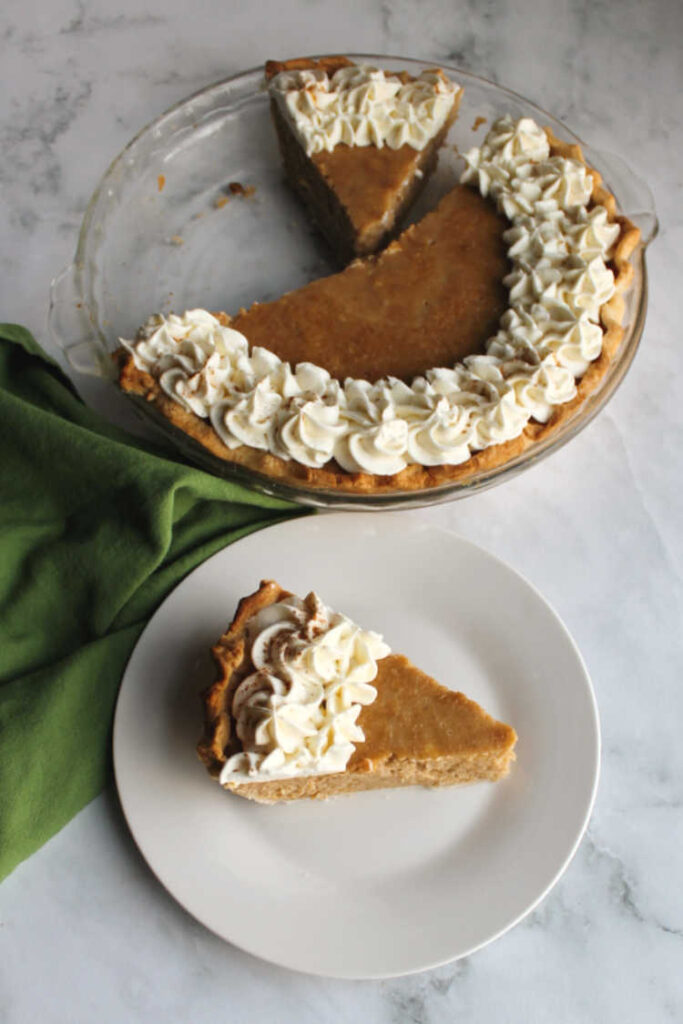
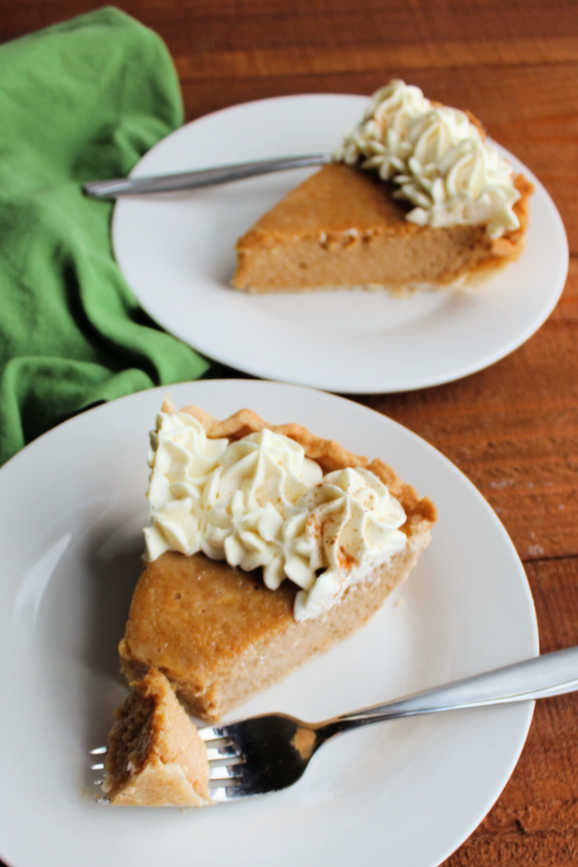
Creamy apple butter pie is silky and delicious. It has the texture of pumpkin pie, but with the flavor of apples and goodness of sweetened condensed milk instead!
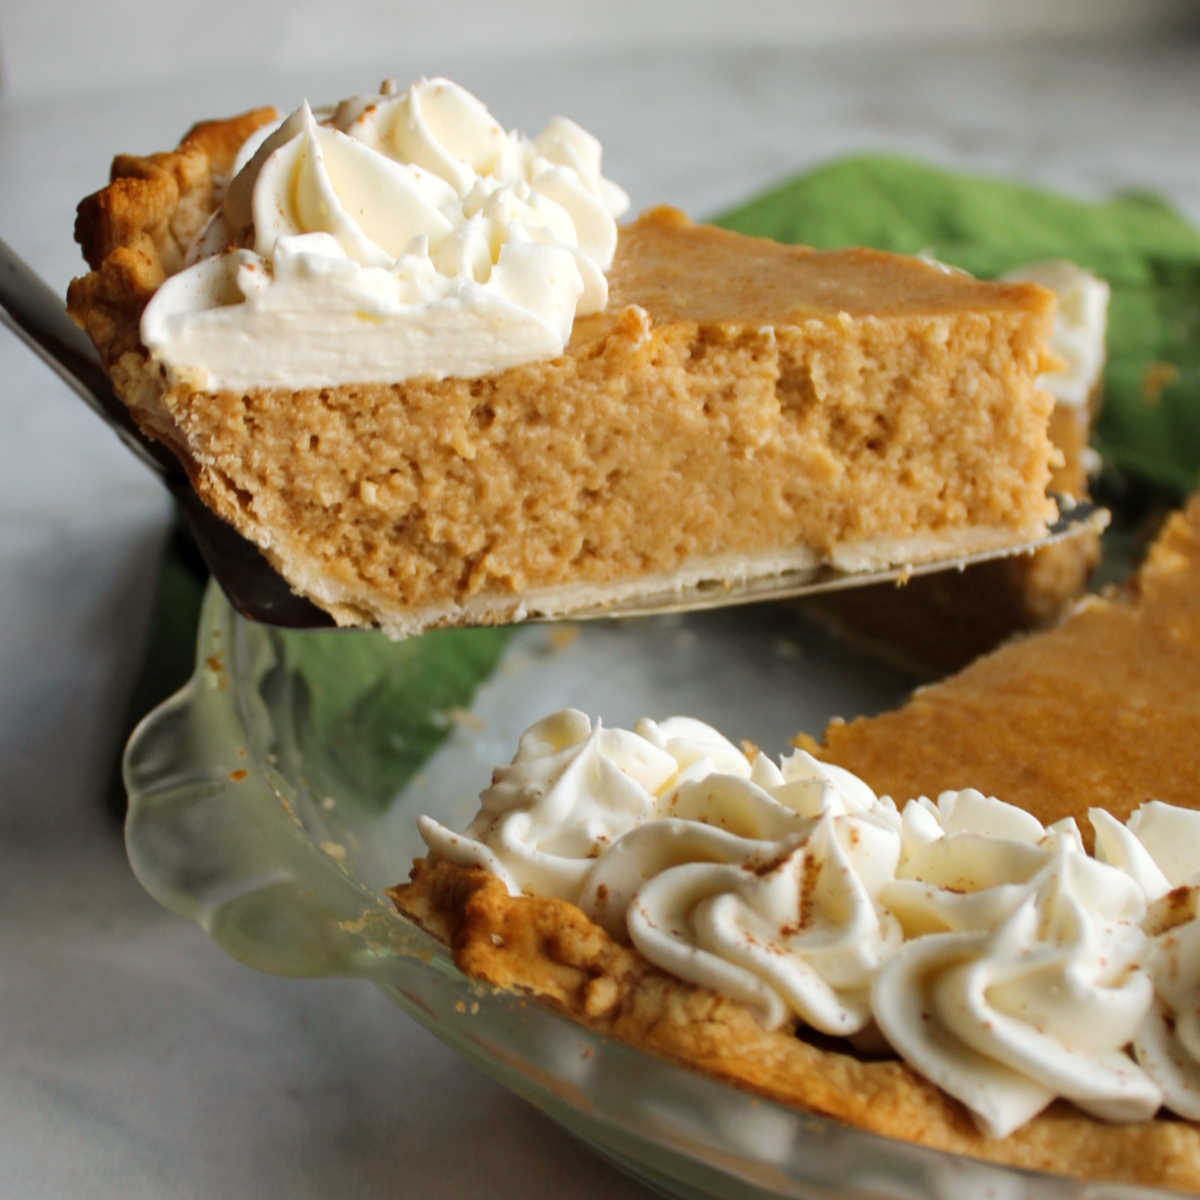
This may just become your new favorite fall pie! It is easy to make and tastes amazing. The apple butter gives it such a wonderful apple flavor and the cream cheese and sweetened condensed milk bring that silky smooth creaminess.
The combination is sure to win over your taste buds. Make one for a fall gathering and be sure to have on your Thanksgiving dessert table too!
Aren’t fall baked goods the best? All of the apple and pumpkin goodies are just so much fun to make and they smell so good while they bake too.
I have been wanting to share this pie with you for a while. It is the best of both worlds, the flavors of apples and cinnamon with the texture of the pumpkin pie we all know and love.
Ok, I know pumpkin pie is love or hate. I happen to love, my husband happens to hate.
So this pie is a great way to get that feeling, but give him something he’ll love too. Little Dude was a big fan and my brother was as well.

We dropped him off a couple of slices and reported back that he agreed that it was all of the things you like about pumpkin pie, only better. Apple butter pie for the great big win!
I used a batch of homemade apple butter for the pie. It was great because the batch makes three cups.
That gave us two cups to stir into the pie filling and an extra cup to spread over toast for breakfast. Such a tasty way to start the day!
Or use that extra cup to make an absolutely amazing apple butter cheesecake. The texture on that cheesecake is amazing and the apple butter adds such great flavor.
Tips for making a flaky pie crust
If you want to make your own crust, try MiMi’s recipe for flaky pie crust. If you want to use store bought, I will certainly not judge!
Just make sure you have a deep dish pie plate, this makes a full pie. If you have a smaller pan or a crust in a tinfoil pan, you may not have enough room for all of the filling.
One of the keys for having a tender flaky crust is to not overwork the dough. Then once you have it fit in your pie plate, chill it for at least a half hour before you bake it.
This recipe calls for par baking the crust a bit before you put the filling in. That helps to ensure you don’t have a soggy bottom.
We don’t want Paul Hollywood and Prue getting upset with you for that! Just poke a few holes in the bottom of the crust, line it with aluminum foil or parchment and fill it with pie weights for dry beans (you can keep using the beans over and over, just don’t try to use them for cooking later!)
Once the crust is partially baked, you remove the weights and you are ready to fill it up!
Tips for a smooth and creamy filling
Whenever a recipe calls for cream cheese, it is best to get it super smooth and creamy before you add the other ingredients. That will help keep you from getting little chunks of cream cheese in the finished product.
Just make sure the cream cheese is good and softened and whip it up. Be sure to scrape the sides of the bowl a couple of times as well.
Once the cream cheese is super smooth, add the just a bit of whatever is going in it to start out. Either a couple of tablespoons of liquid or one egg or whatever you are adding.
Again, beat the mixture well. This will help lighten up the cream cheese and make it easier to mix everything else in.
After that, you can usually add whatever you’d like without having any issues of the cream cheese clumping. It really only takes a few extra seconds and is worth it for a super smooth finished product.
Because I had homemade apple butter, I know there was plenty of spice in it. If your apple butter doesn’t have a fair amount of cinnamon and nutmeg in it, feel free to add a little extra to the mixture.
The sweetened condensed milk and apple butter lend all of the sweetness you need, so there is no worry about getting a grainy texture from sugar. Just mix it all up and pour it in the prepared crust.
Because the crust is already partly baked, you will want to protect the edges. You can do this with strips of foil, but I like to use a pie shield.
The pie shield makes it so much easier because it’s just one piece that fits down over the rim of the pie plate. That way you don’t have to worry about knocking off a piece of foil when putting the pie into the oven.
Plus the pie shield is reusable, takes up almost no space in storage and can be purchased for under ten dollars. It really is a worthwhile purchase if you ask me!
Topping and garnishing your pie
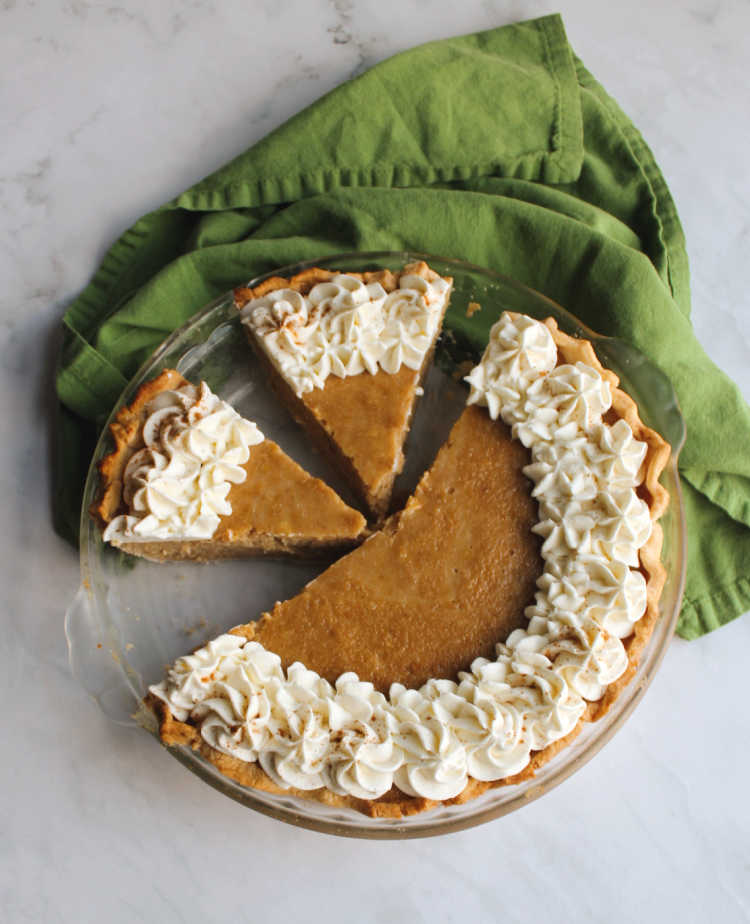
This pie is fabulous on its own, but that doesn’t mean you can’t jazz it up a bit. If you are making it for guests or a holiday, going the extra mile is really worth it!
You could very easily cut any scraps of pie dough into leaves or apples and bake them until they are golden brown. Then arrange them over the pie after it is done baking.
Or you could do what I did and pipe on a border of whipped cream. I used cream cheese whipped cream for this particular pie but maple whipped cream would be amazing as well!
A little sprinkle of cinnamon or grate of nutmeg adds a little added flare and flavor too. That’s really all it takes to rocket the pie to the next level!
Frequently Asked Questions
Can you freeze this pie?
Yes! Let the pie cool completely and then put in the freezer for an hour or two to firm up. Then tightly wrap in plastic wrap and freeze for up to 3 months. Take out of the freezer the day before you plan to serve it, remove the wrapping and allow to slowly thaw in the refrigerator over night. You can also freeze individual slices for later as well.
Can I use any fruit butter?
Yes! You can easily change the flavor of the pie by using different fruit butters. Just make sure it is nice and thick. If your apple butter is thin, cook it down to remove any excess liquid before using it.
A couple more great pie recipes
If you are looking for more fun twists on classic pie recipes, I have some wonderful ideas for you. Why not try a maple pumpkin pie this year for instance?
Or for another fun variation, why not whip of a streusel topped carrot pie. It’s another one that will remind you in a lot of ways of pumpkin pie, but with a noticeable difference in flavor.
If you like the flavor of apple pie, but don’t have apples, whip up an almost apple pie. It tastes just like the real deal, but there isn’t a single apple in it!
Or whip up something a little different with your apple butter. An apple spice gooey butter cake is another delicious fall treat with a cakey base and gooey filling.
Don’t believe me that this pie is good? Watch Jim make it on YouTube!
Love this recipe? Give it a ⭐⭐⭐⭐⭐ review in the recipe card below!
Источник
Apple Butter
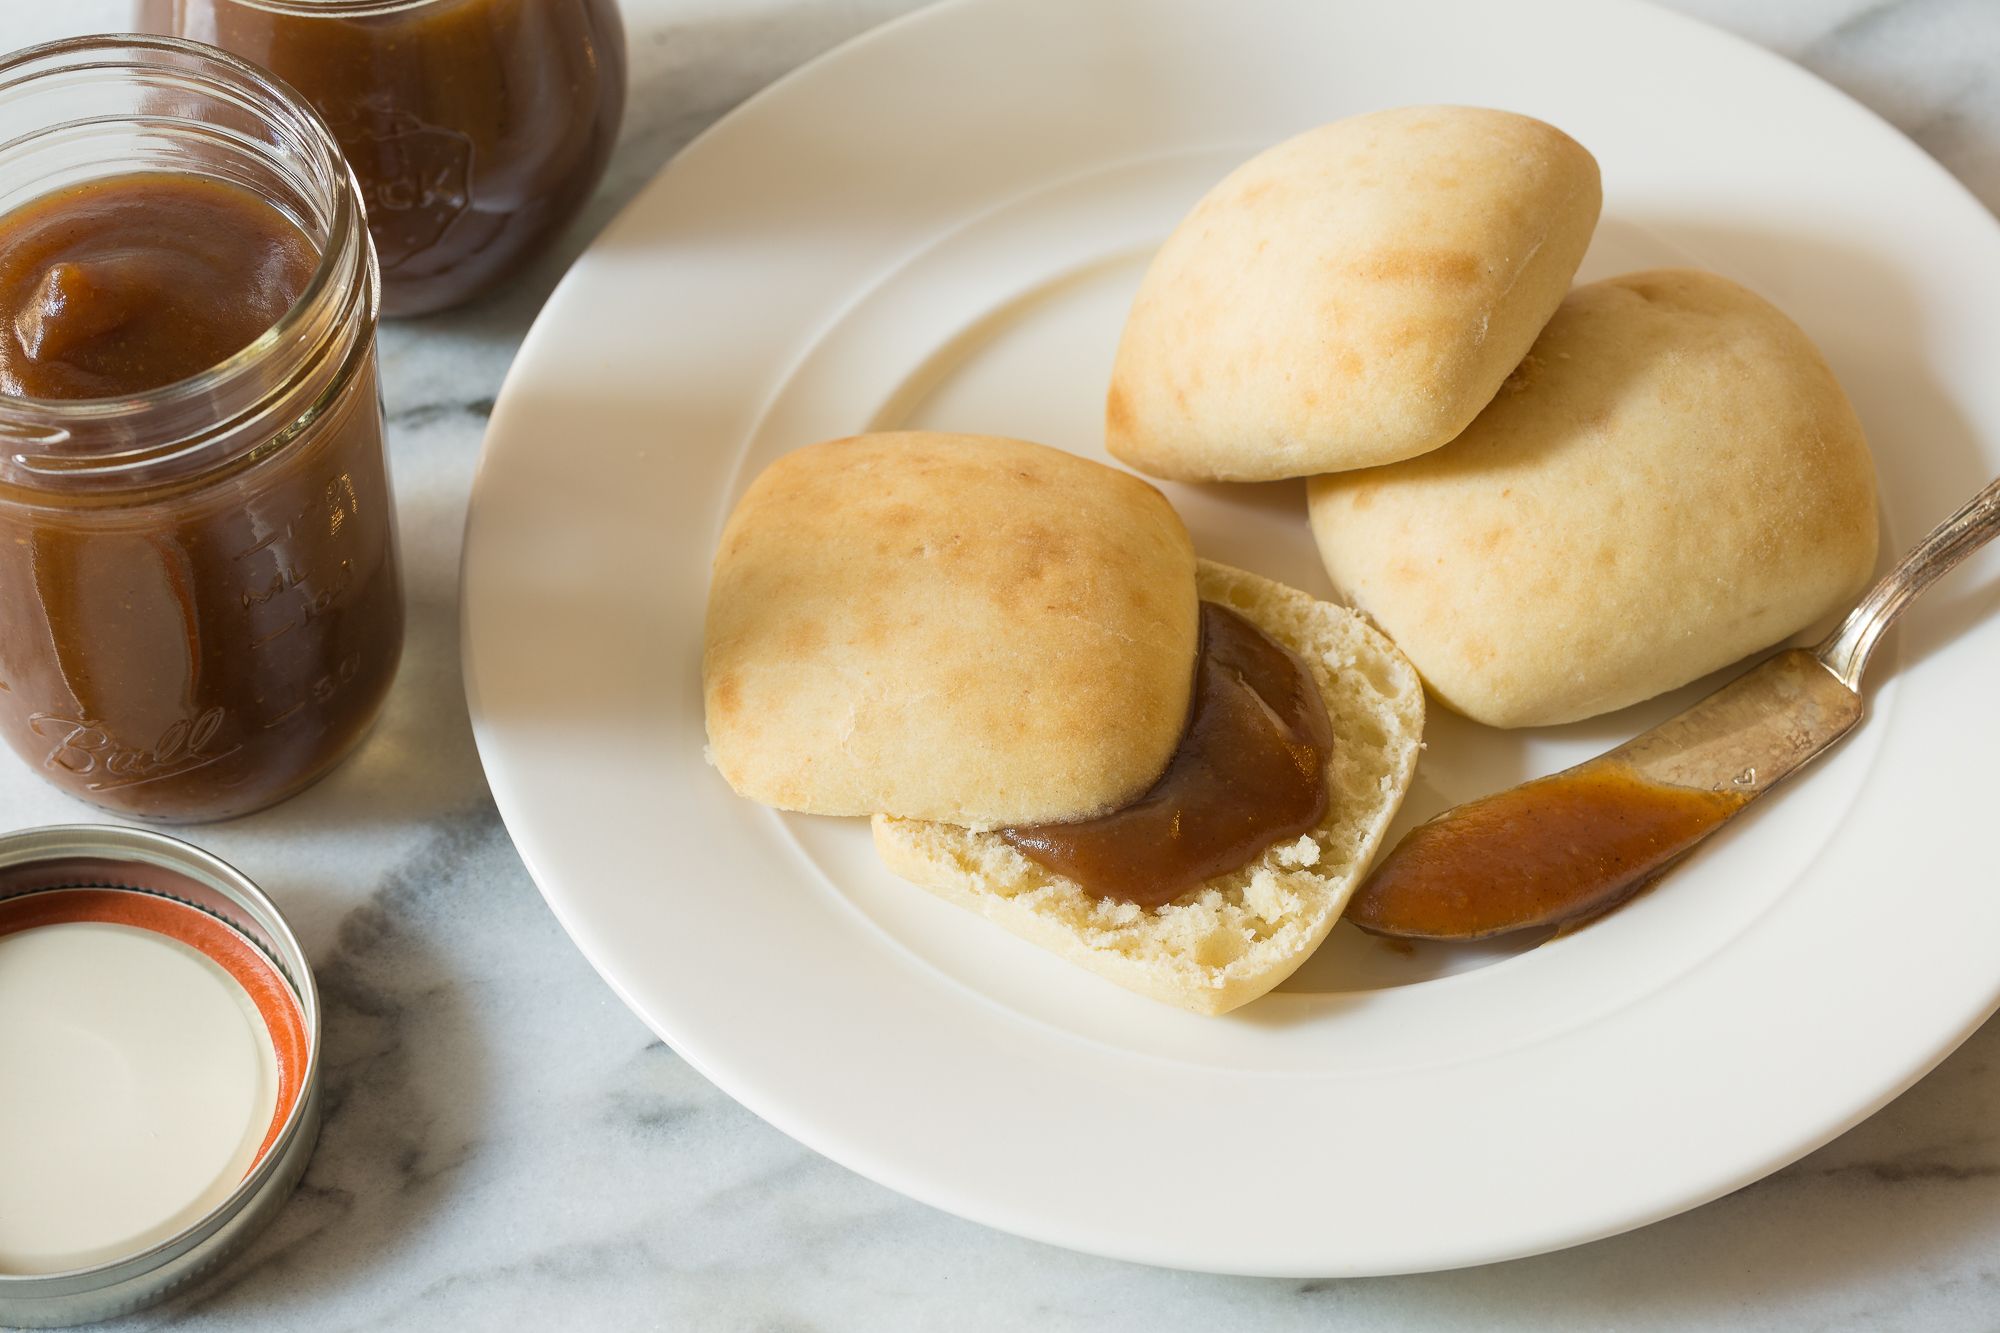
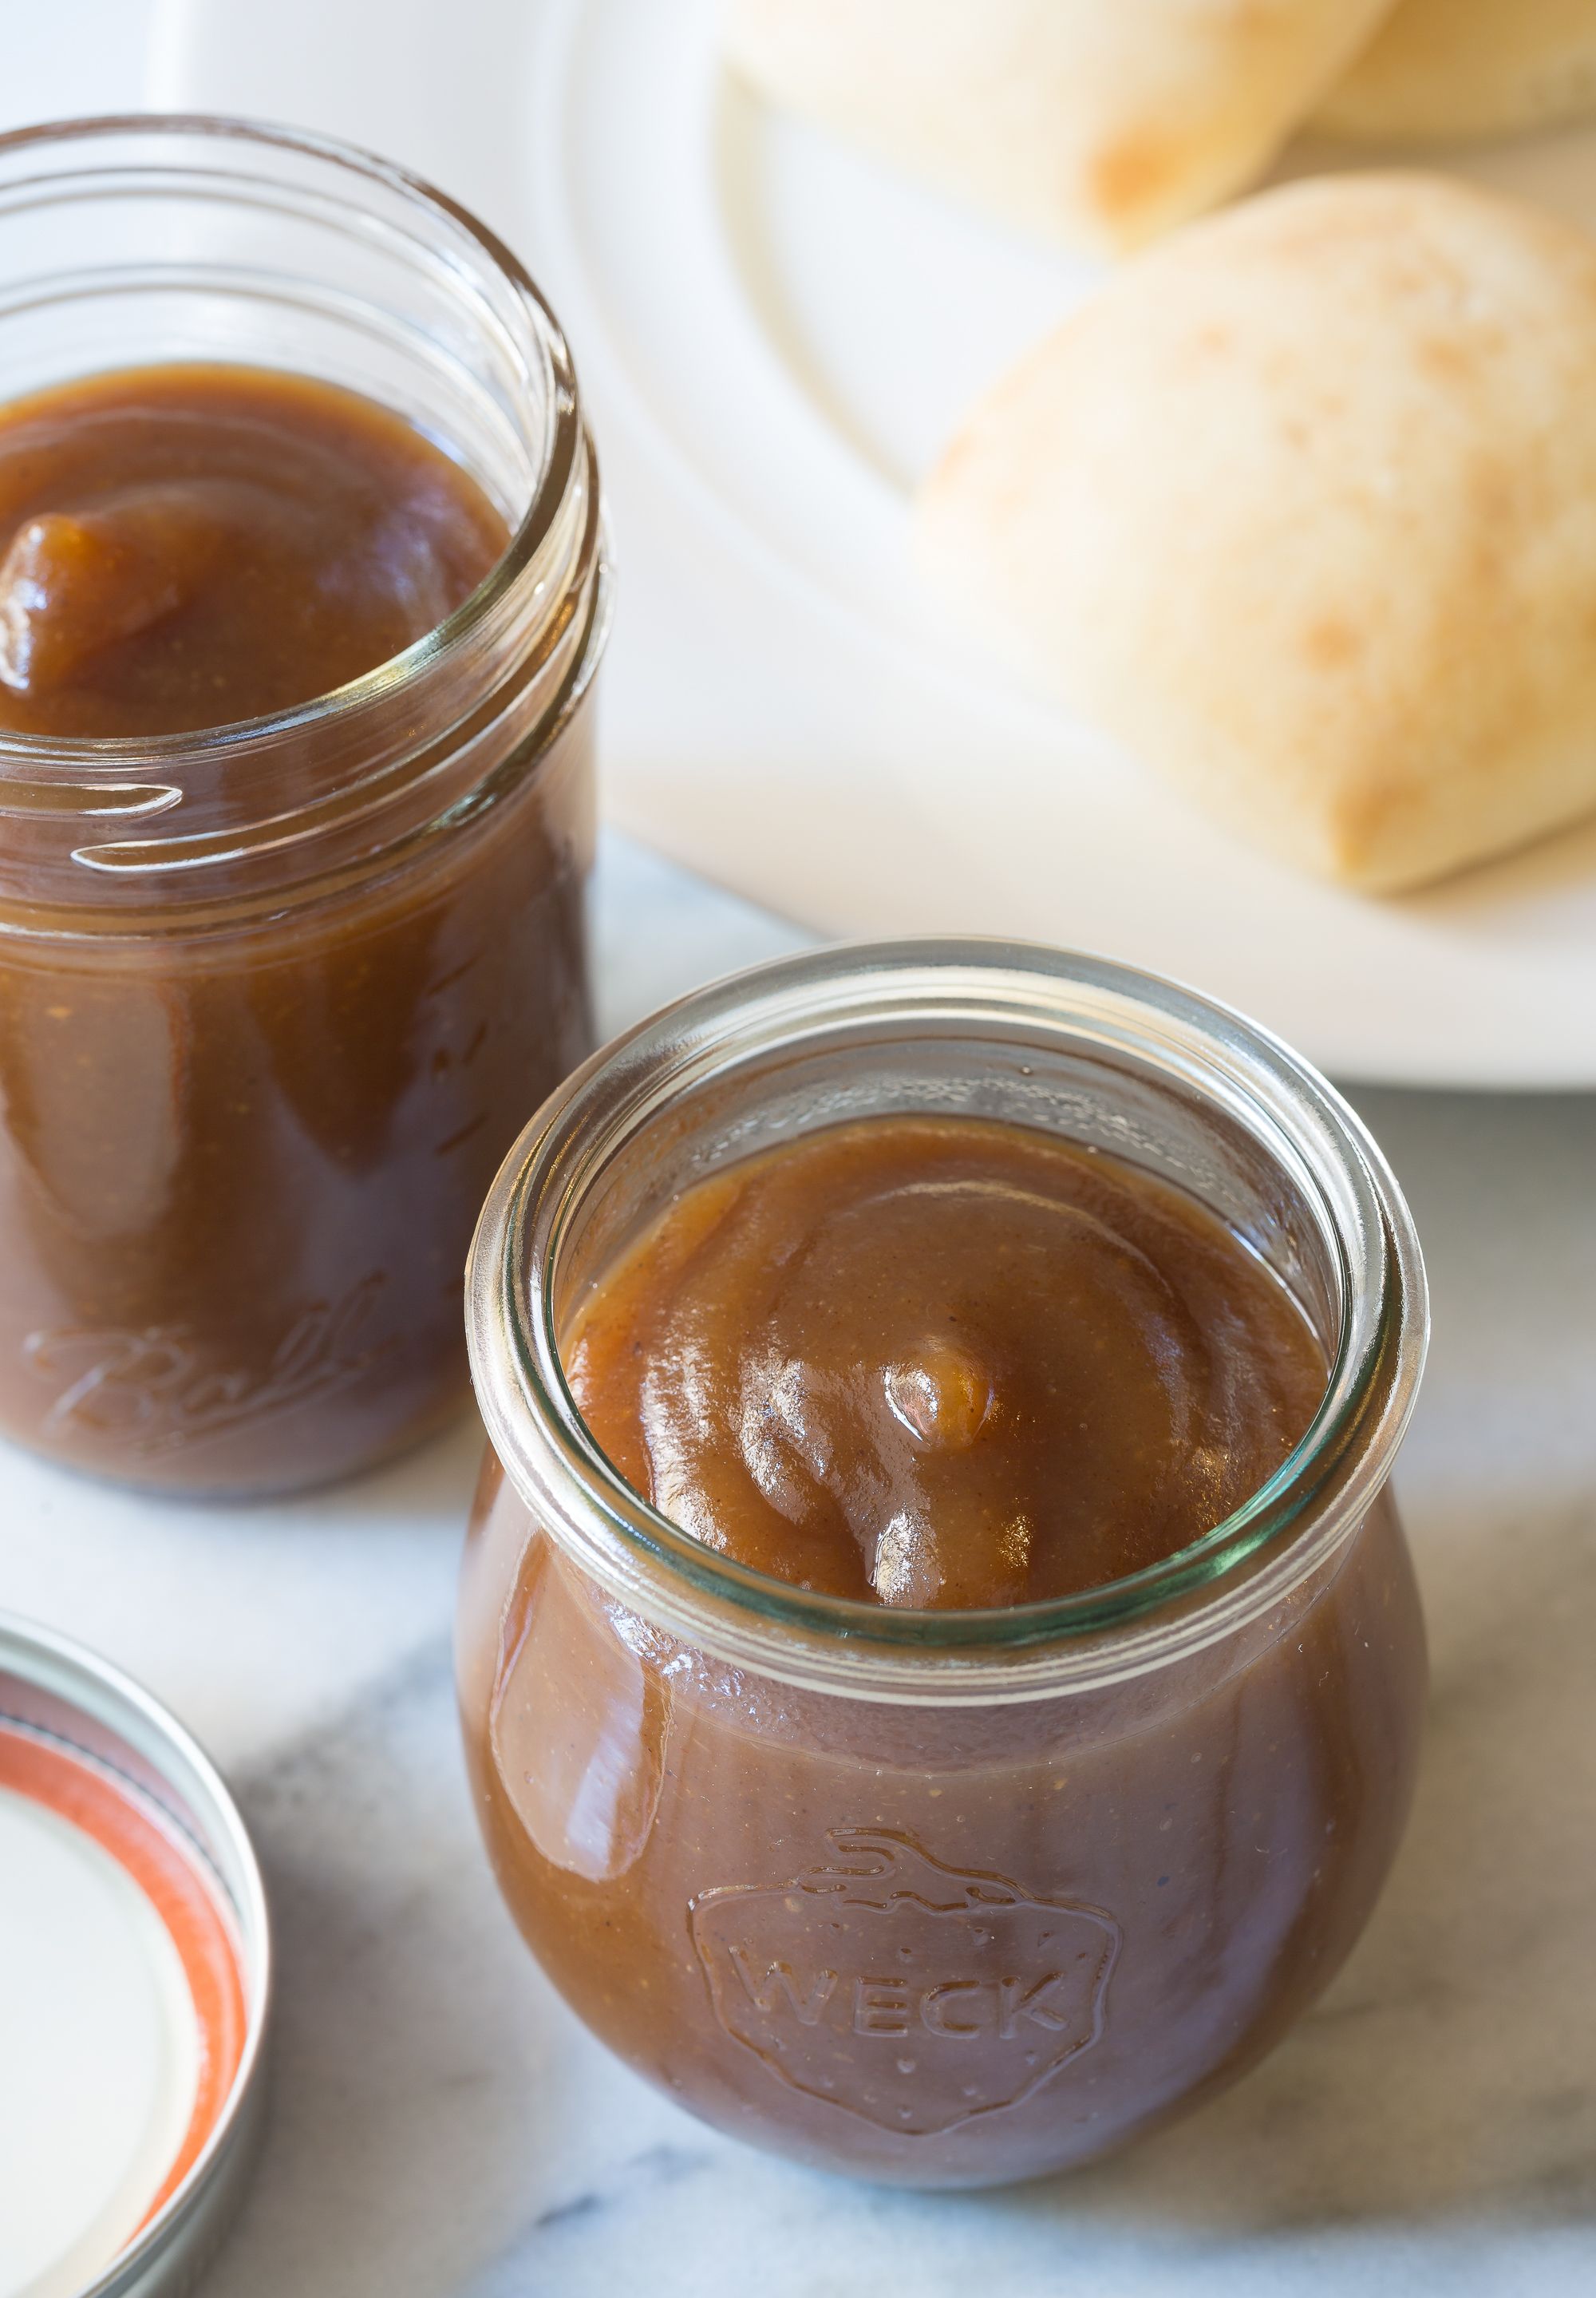
Give it to your loved ones during the holiday season! It has a fresh apple flavor, with deep spicy undertones, and an ultra silky texture.

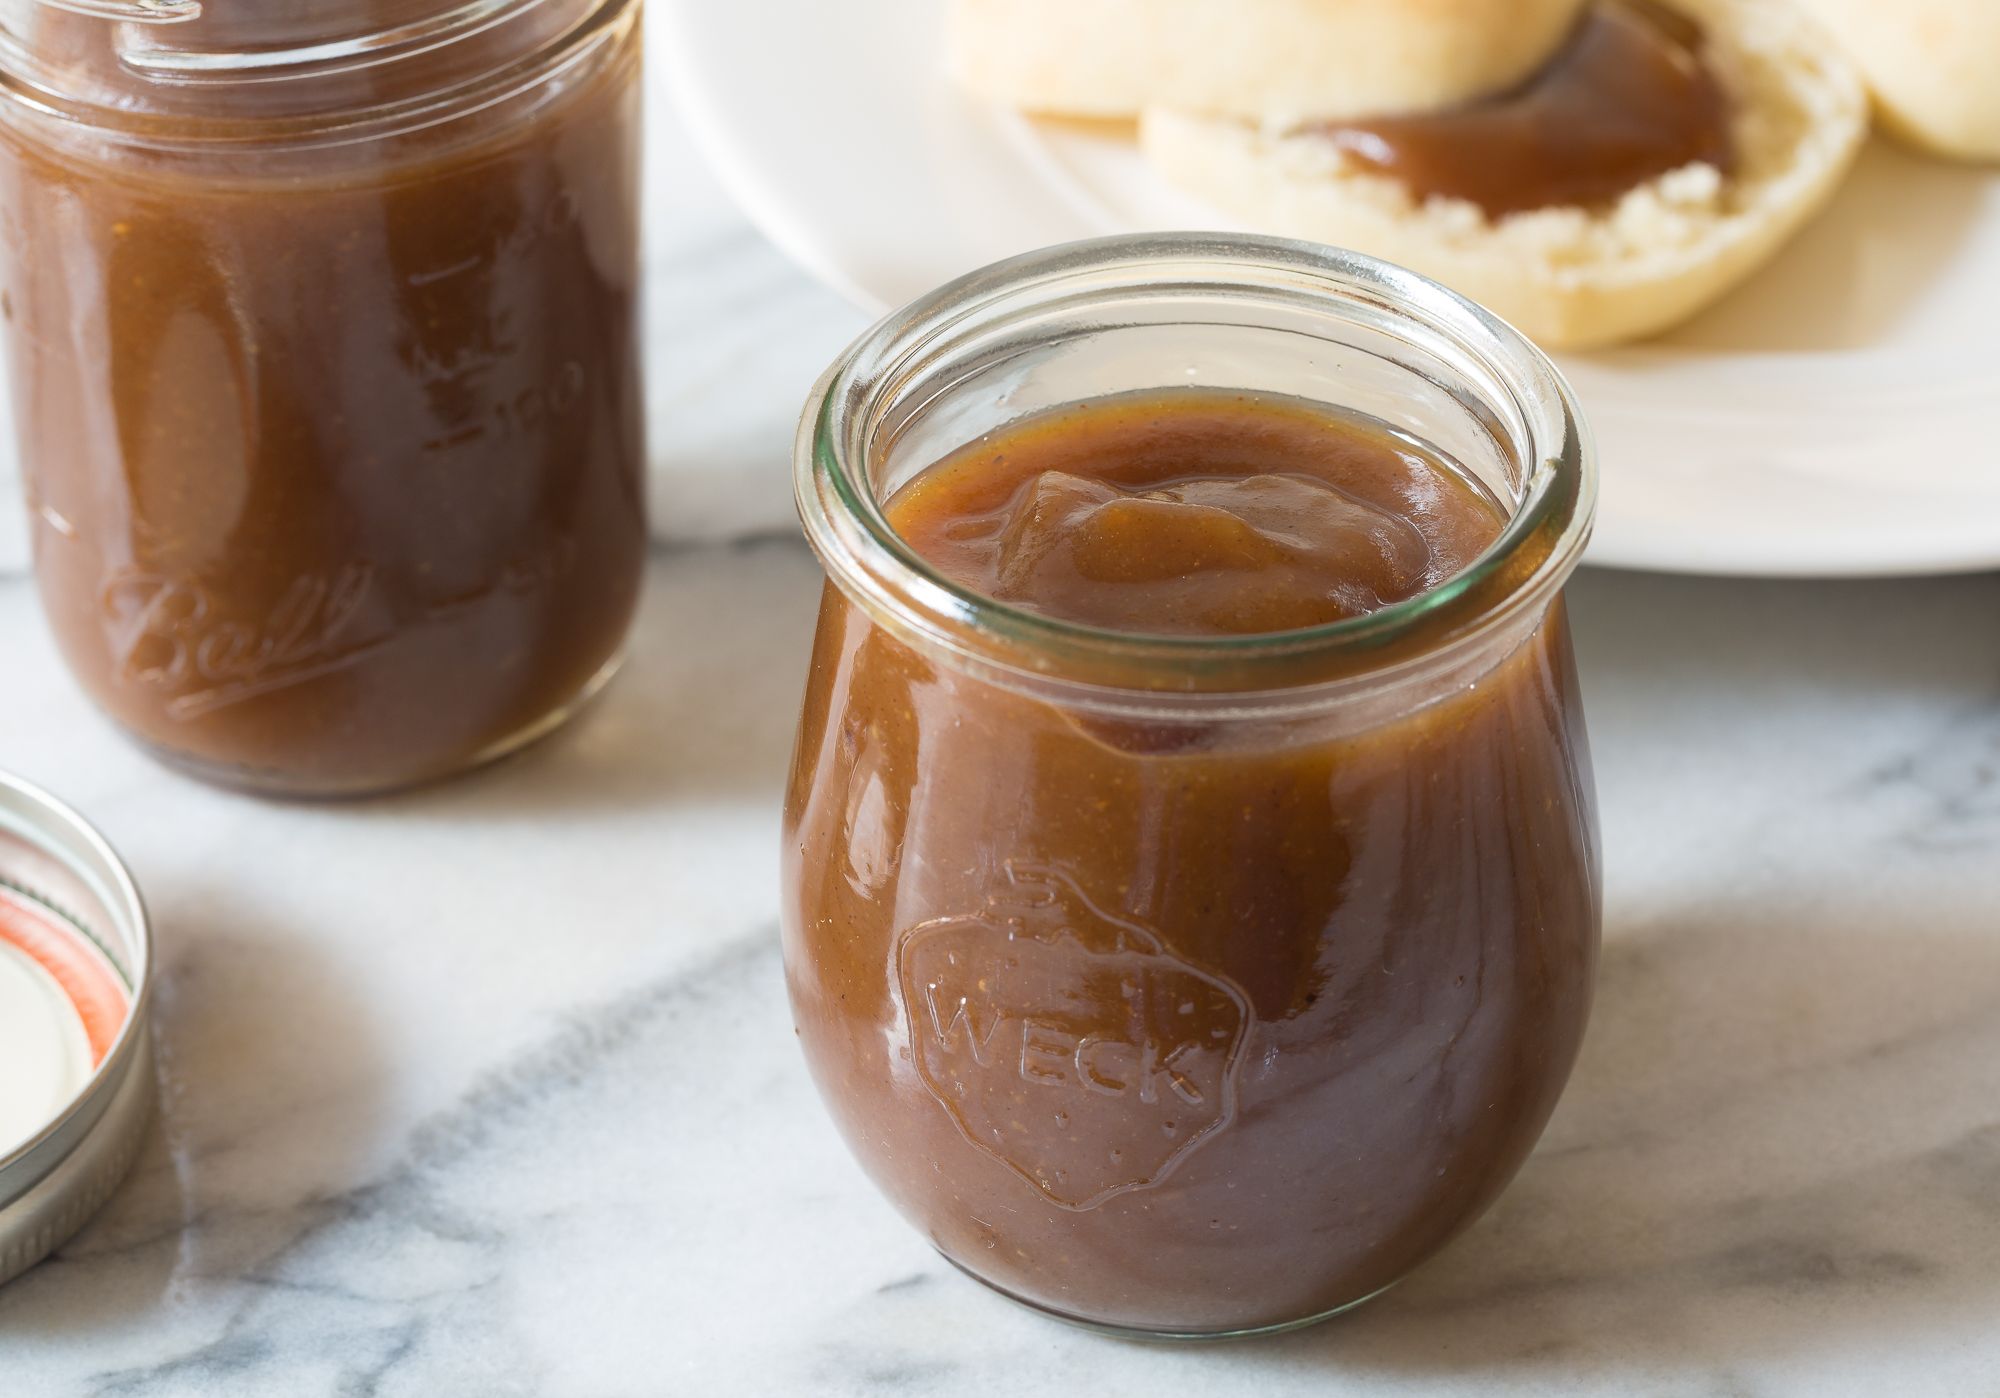
Apple butter is one of the most fabulous edible gifts to make during the holiday season. It has a fresh apple flavor, with deep spicy undertones, and an ultra silky texture. It tastes delicious spread over biscuits, toast, or on a peanut butter sandwich.
From Sommer Collier of A Spicy Perspective.
Granny Smith apples
apple cider vinegar
packed light brown sugar
apple pie spice (or pumpkin pie spice)
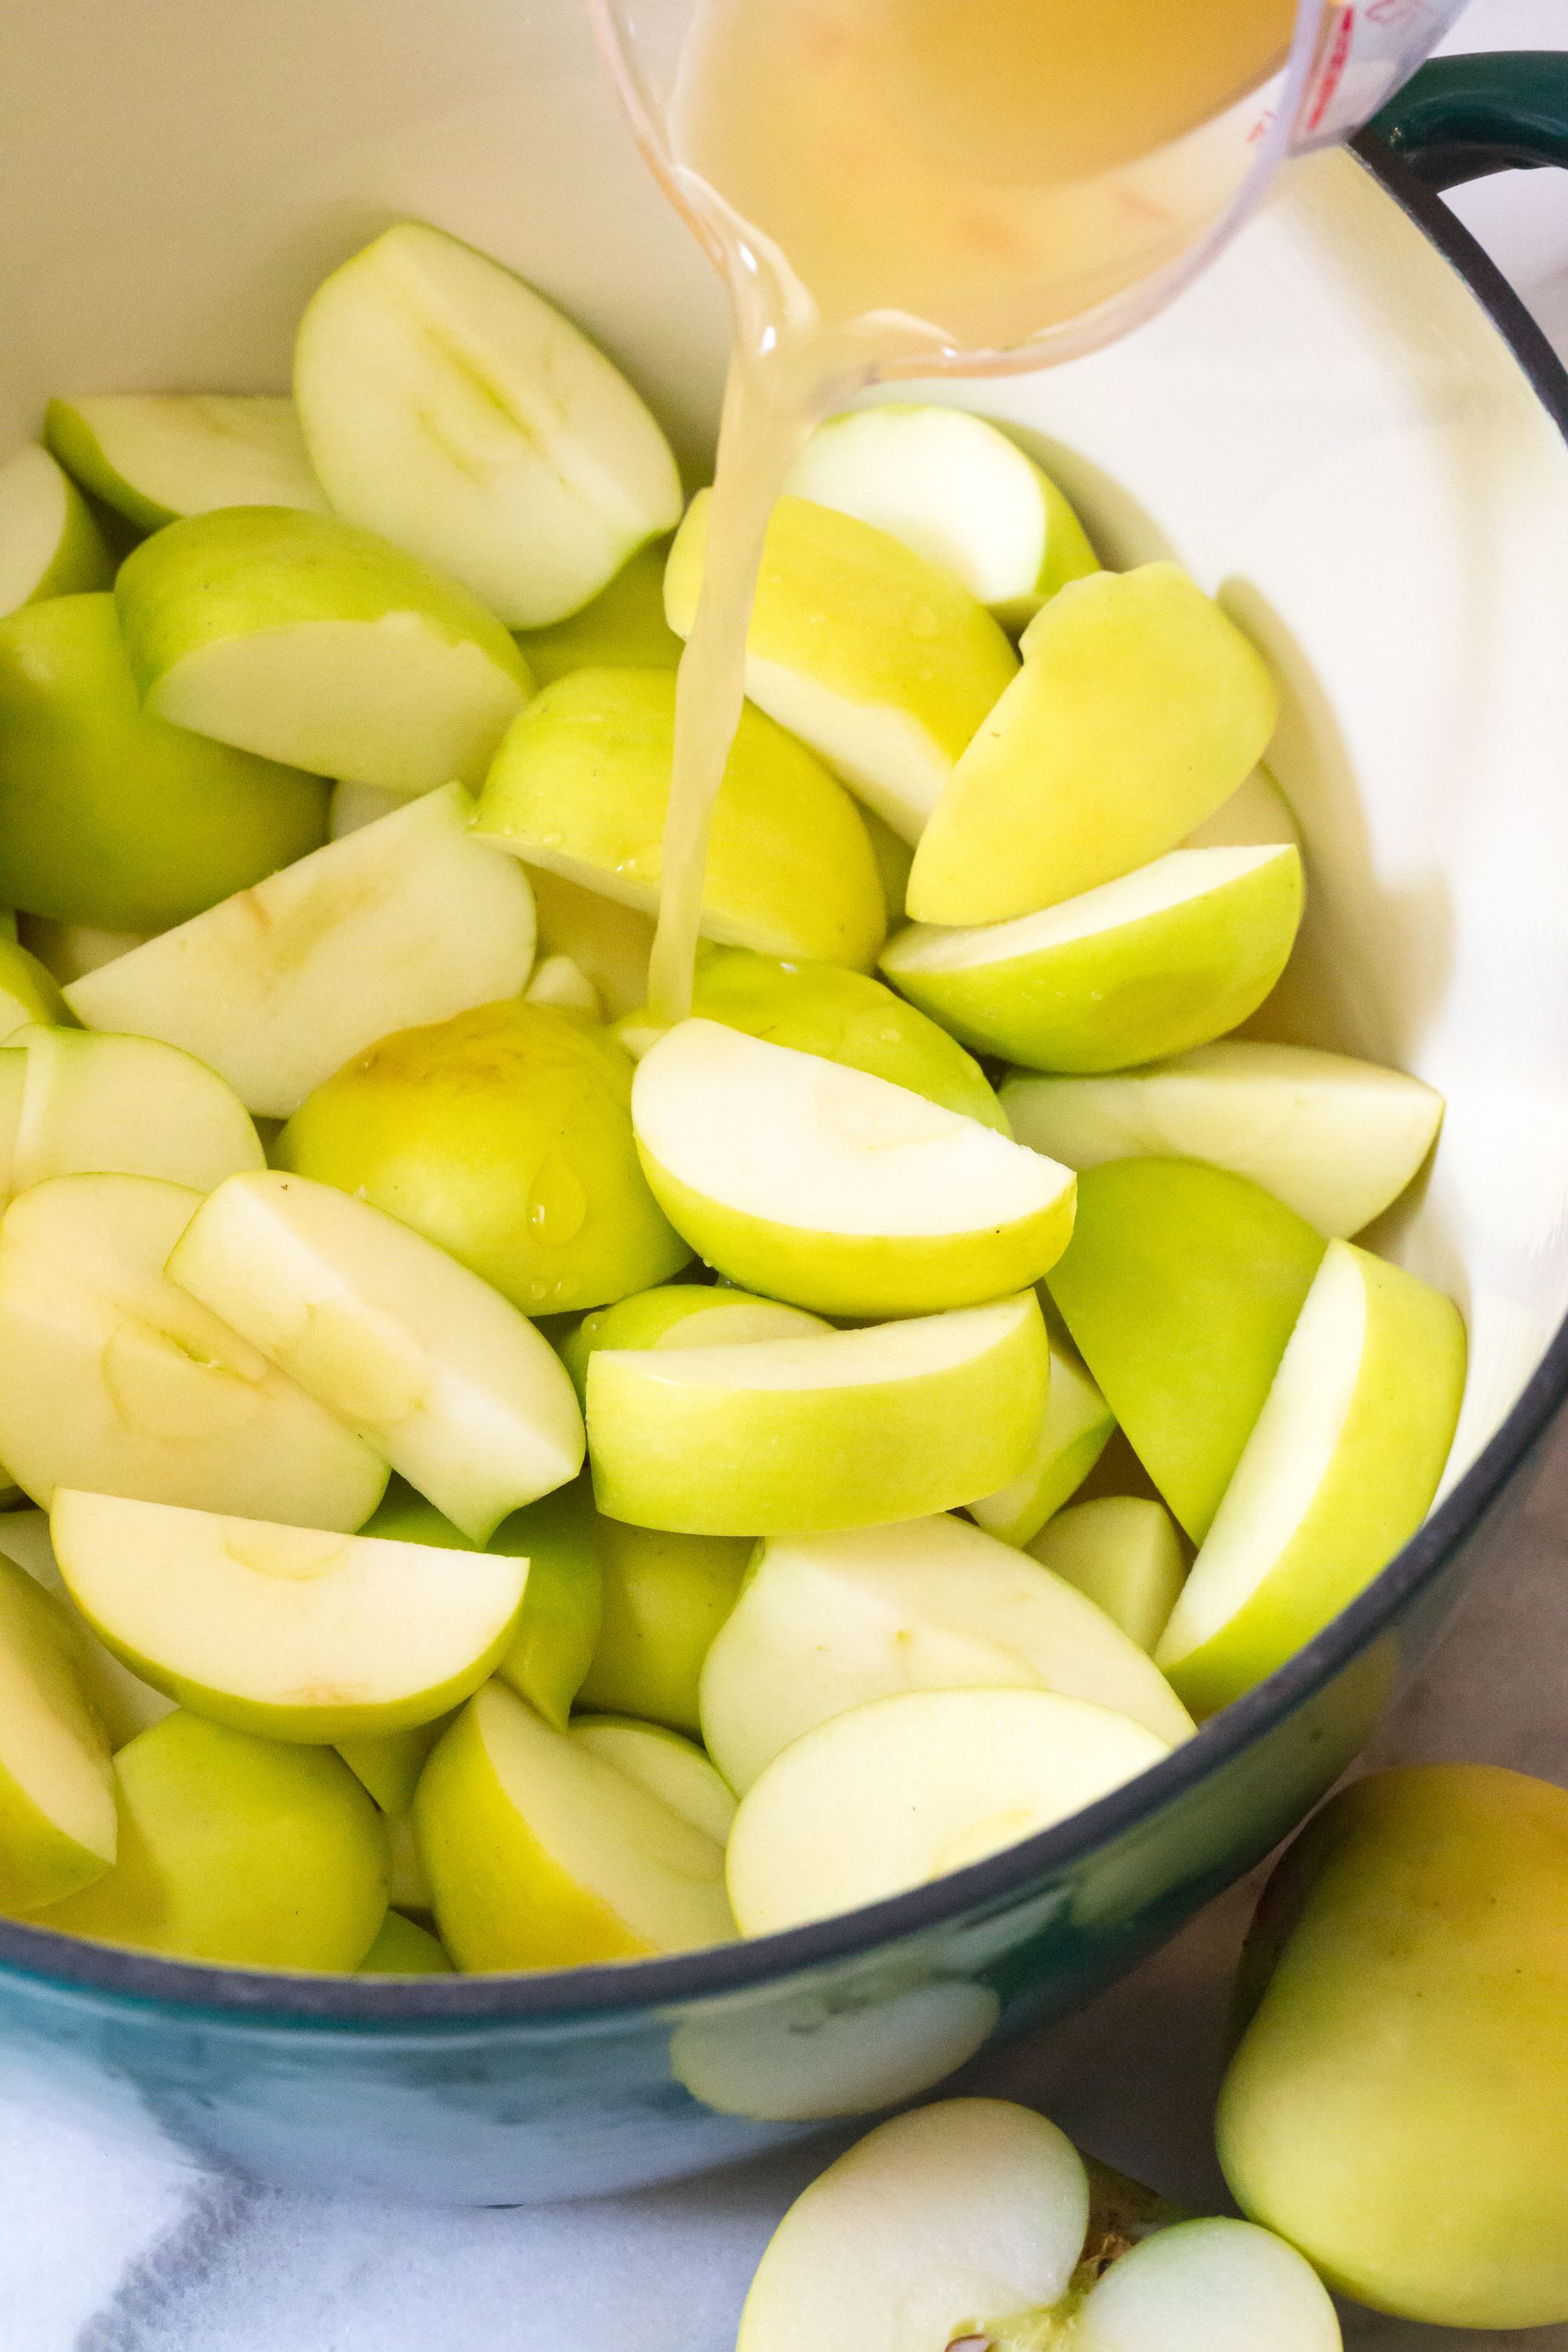
- Core the apples. Cut into wedges and place the pieces in a medium saucepot. (No need to peel the apples.) Add apple cider vinegar, salt, and water.
- Set the pot over medium heat. Cover, leaving a little space open for the pot to vent, and simmer for 20–30 minutes, stirring occasionally. Turn off heat when apples are extremely tender and most of the liquid has evaporated.
- Place apple mash and liquid in a food mill set over a large bowl. Grind the apples into a fine sauce. Discard the peels. (Don’t have a food mill? Peel the apples before cooking, and then puree the apple mash in the blender!)
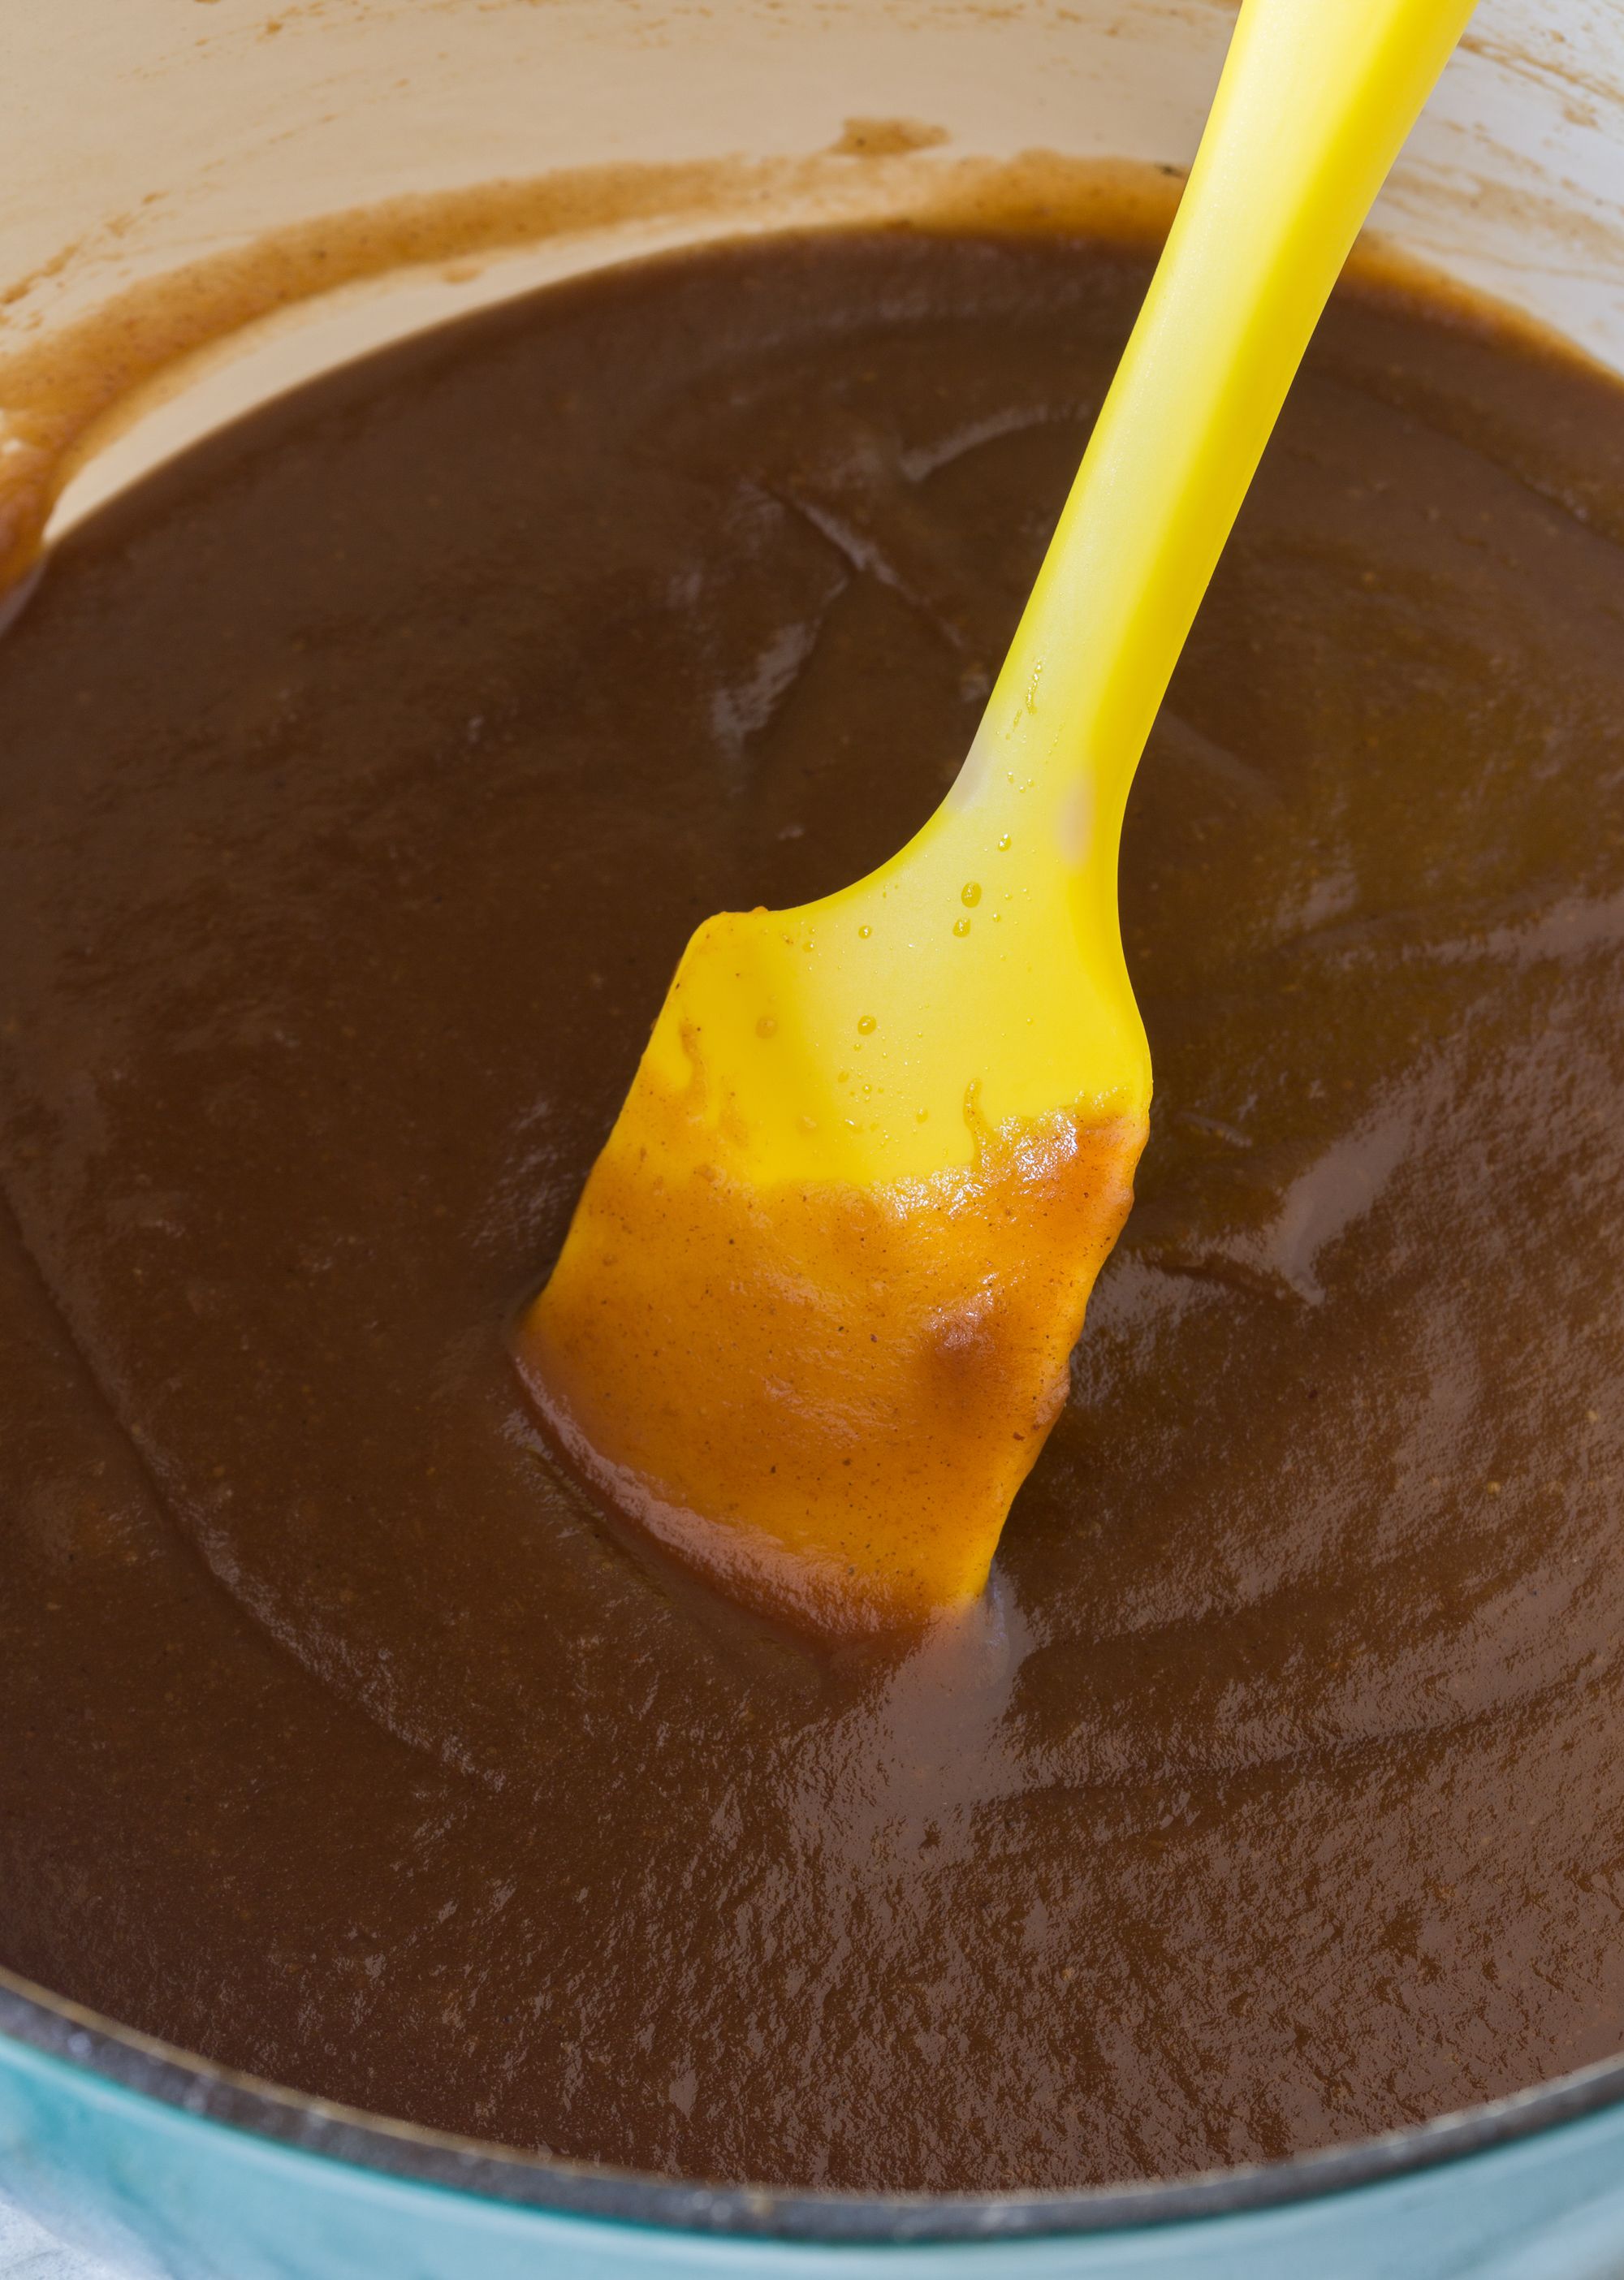
- Place apple sauce back into the original pot. Set back over medium heat and add sugar, spices, and vanilla. Simmer, stirring every couple minutes, until sauce thickens and turns dark brown, about 15 minutes.
- Cool, then store in the refrigerator for up to 3 weeks, or can for long-term storage.
- Makes 4 to 5 cups, depending on how much you cook it down.
You can make small batches of apple butter for personal enjoyment, or multiply your recipe for plenty of gifts to go around. Best of all, it’s a gift that can be canned for long-term storage, so the recipients don’t have to eat it right away!
Homemade apple butter requires a two-step cooking process. Don’t let that deter you from giving it a try. It’s extremely easy to make!
It’s important to cook the apples twice for two reasons: One, if you add the sugar to the apples when they are simmering to soften, the sugar may burn before the apples are soft enough to mash. Two, the sugar and spices can’t fully infiltrate the apples until they are mashed or pureed.
So first, cook the apples with apple cider vinegar and water. This allows them to soften into mush and the vinegar gives the apple butter a fresh tangy quality.

Once the apples are soft, use a food mill to grind the apples into a fine sauce. A food mill produces the absolute best texture: smooth with tiny bits of apple speckled throughout. Using a food mill also means there’s no need to peel the apples before cooking. The food mill will separate them out.
If you don’t have a food mill, you can still make apple butter by pureeing the cooked apples in a blender. Just be sure to peel the apples before cooking.
The second cooking time is when you add in the sugar, spices, and a little vanilla.
Cook the apple butter just long enough to melt the sugar, intensify the spices, and thicken the apple butter to your desired consistency.
If you like a perky apple butter, just 5–10 minutes will do. If you like your apple butter to have a dark rich flavor, cook it for 15–20 minutes.
Источник
Apple Butter
Learn how to make apple butter and fill your house with the aroma of cooking apples, cinnamon, allspice, and cloves. Our apple butter recipe is great on toast or spooned into oatmeal!
:max_bytes(150000):strip_icc()/SRHeadshots-EliseBauer-5c36c598a88d4ba3bff66260a792ea47.jpg)
Elise founded Simply Recipes in 2003 and led the site until 2019. She has an MA in Food Research from Stanford University.
:max_bytes(150000):strip_icc()/SRHeadshots-EliseBauer-5c36c598a88d4ba3bff66260a792ea47.jpg)
:max_bytes(150000):strip_icc()/Simply-Recipes-Apple-Butter-LEAD-3-867605c81db04f87be4f8d1f01098717.jpg)
It’s hard to find any apple butter, let alone good apple butter in the grocery store these days. Making apple butter is a great way to preserve the fruits of an apple harvest.
What is Apple Butter?
Apple butter is made by slowly cooking pureed apples for over an hour. The sugars in the apples caramelize as the puree cooks, giving the apple butter its rich, sweet flavor and dark color.
In contrast to what the name implies, there is no «butter» in apple butter. The name comes from its smooth and buttery texture. Apple butter is delicious on buttered toast.
:max_bytes(150000):strip_icc()/Simply-Recipes-Apple-Butter-SEO-2-99a2e44dcd89417c8b47f336b86aef84.jpg)
Don’t Throw Away Your Apple Cores!
Although apple butter takes time to make, the upfront part is easy. You do not have to peel or core the apples.
The pectin for firming up the resulting apple butter resides mostly in the cores and there is a lot of flavor in the apple peels. After the first cooking, these parts get discarded as the pulp is run through a food mill.
This recipe produces a traditional apple butter, which is both sweet and sour, the addition of cider vinegar just intensifying the flavor and giving it its tangy edge. It’s seasoned with cinnamon, cloves, allspice and lemon.
For more information on apple varieties, check out our Guide to Apples.
The Difference Between Applesauce and Apple Butter
Apple butter is a smoother, more concentrated form of applesauce. The methods for making the two both start out similarly, by slow-cooking apples until they’re soft and mushy. Applesauce will be ready at this saucy stage, sometimes with the addition of sugar and/or spices to flavor it. But to make apple butter, you puree the stewed apples and cook them down further so more liquid evaporates and the apples caramelize.
Alternatives to Stovetop Cooking
Don’t love standing at the stove stirring for ages? These two methods are way more hands-off.
- Microwave: Instead of cooking the seasoned puree on the stovetop in Step 5, cook it uncovered in a microwave, on medium heat setting to simmer, for around 30 minutes. If you do this, monitor the cooking every 5 or 10 minutes. Microwaves vary in their power.
- Slow cooker: In Step 5, transfer the seasoned puree to a slow cooker. Cook on low with the lid ajar (lay spoons across the cooker and set the lid on top) so steam can escape. Stir once every hour or so. Depending on your cooker, it could take up to 5 hours for the apple butter to cook down.
The Best Apples for Apple Butter
Look to softer apples, like Gravenstein, to make apple butter, as they will cook down faster. We also like the tart flavor of Granny Smith apples. Combine different apples to match your taste preferences. We recommend the following varieties:
- Braeburn
- Cortland
- Fuji
- McIntosh
- Golden Delicious
- Jonagold
Learn which apples are best to use in cooking and baking in our guide to apples.
Swaps and Suggestions for Homemade Apple Butter
- Switch up the spices. This recipe calls for cinnamon, allspice, cloves, and some lemon to bring out the flavor, but feel free to play around with others spices such as ginger and nutmeg if you wish.
- Switch up the sweetener. We recommend sticking with white sugar for a straightforward apple flavor. But readers have shared some of the swaps they’ve made in the comments. Check them out!
To Can or Not to Can?
Want to make larger batches of apple butter so you can have jars on hand for later and not worry about refrigerating them? Planning to give jars as gifts? If so, sterilize glass jars for canning. We offer detailed directions for water bath canning in the recipe below.
If you want to eat your apple butter up quickly, skip the canning. It keeps in the fridge for weeks as long as you’re not dipping dirty spoon into it. Or freeze it for later.
NOTE: For this recipe to be safe for canning, the sugar levels should not be reduced lower than to 1/3 cup sugar per 1 cup apple pulp.
Storing and Freezing Apple Butter
- Fresh apple butter will keep in the fridge for at least couple of weeks, if not longer.
- Sealed, canned jars of apple butter will keep for years in the pantry (they’re best used within a year, though). Once opened, they’ll also keep for weeks in the refrigerator.
- Frozen apple butter will keep up to a year.
Ways to Use Your Apple Butter
Whether you spread it on toast, swirl it into oatmeal, or serve it on a cheese plate, you’ll find a plethora of delicious ways to incorporate apple butter.
Источник


