- How to Fix Corrupted Video Files from Android
- In this article
- Part 1. Can You Uncorrupt A File from Android?
- Part 2. How to Fix Corrupted Video Files from Android
- Clear Camera App Data
- Try Changing the Video Format
- Try MP4Fix Video Repair Tool
- How to Perform Android Video Repair on Computer
- Part 3. How Can Data and Video Corruption Be Prevented?
- Conclusion
- How to Delete Corrupted Android OS Files
- Related
- Key Combination Method
- Settings Menu Method
- How to fix corrupted sd card on android without computer?
- Category of errors in SD card
- The pseudo corruption
- No Access to files
- Unable to write
- Card not detected
- How to fix corrupted sd card on android without computer?
- Solution1: Unmount and Erase SD card
- Solution2: Formatting SD card on PC
- Free Data Recovery Tools
- Recuva
- Minitool Power Data Recovery
- Scanning the SD card
- Selecting the Files
- Restoration of Files
- Conclusion
How to Fix Corrupted Video Files from Android

Eleanor Reed
Nowadays surfing the web and accessing social media has become a norm. People make memories and share them on the go. Smartphones have replaced professional DSLR cameras because they are handy and easy to carry. Your video file can become corrupted due to various reasons and it can be a real headache to deal with corrupted video files on Android.
In this article
Part 1. Can You Uncorrupt A File from Android?
Yes, you can easily corrupt a video file. Nowadays it has become a fashion to increase the number of cameras on an Android phone. Starting from a dual rear-facing camera now we have Samsung’s quad-camera setup. People are recording more videos from their smartphones as it is easy and handy. They also edit all these videos on the go. The basic format to shoot videos on an Android phone is .mp4. These .mp4 files can become easily corrupted therefore it is important to fix these corrupted video files.
When a video file becomes inoperable or usable is termed a corrupted video file. There are various reasons for the corruption of a video file. There is a good chance that your video file will become corrupted due to any of the following reasons:
Turning off the phone while recording the video
Crash of camera app
Transferring the video to an unsafe system
There wasn’t enough storage space on your smartphone to save the complete video
Even if the video is saved properly and smoothly bad sectors can also cause video corruption
Removing the SD card while transferring the video
Viruses and malware are also a culprit in the corruption of video files on Android phones
These files can become unplayable from the system and can become corrupted if the system is also corrupted.
You can easily uncorrupt these video files on Android and resolve this problem by using different methods and video repair tools available online. You can either repair the corrupted video file or change the format of the video to a more suitable format by using different video repair tools.
Part 2. How to Fix Corrupted Video Files from Android
Corrupted video files on your Android can stop you from watching and sharing your precious moments. There are various reasons for the corruption of video files on Android phones. You can try these effective methods below to fix corrupted video files on your Android phone. You can use these methods to fix corrupted video files in any Android phone such as Xiaomi, HTC, Samsung, Nokia, Motorola, etc.
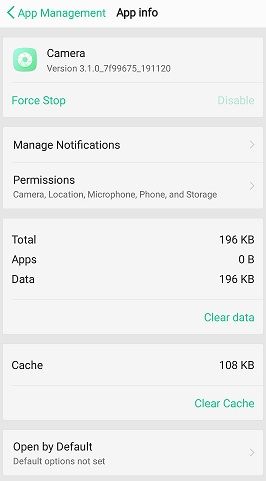
Clear Camera App Data
If your camera app keeps on creating corrupted files you can clean the cache and data of this app by using these steps to avoid corrupted video files.
Through your Notifications or Settings open the Settings menu.
Navigate down and look for App Management and then tap the Camera application.
Tap it and you will see information about the camera app like storage, permission, memory use, etc.
Tap on the Clear cache option to erase all data
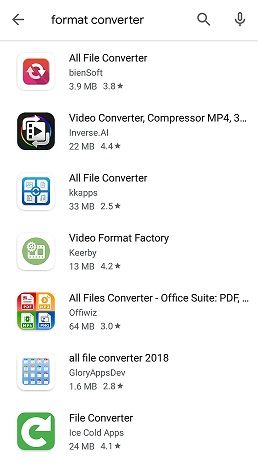
Try Changing the Video Format
It is quite possible that the corrupted video file isn’t playing on your Android phone because it doesn’t have a supported format or codecs. Try converting the corrupted video to some other format that is supported by your device. For this purpose, you can download video converting software such as Video format factory, File converter, or Media converter app from the Google Play store.
Try MP4Fix Video Repair Tool
MP4Fix video repair tool can work proficiently with the phone camera recordings and video files that are broken or corrupted by a dead battery, lack of memory, and a camera crash.
MP4Fix video repair is a great tool and easy-to-use app which can repair corrupted videos on all Android phones.
Step 1: Download the MP4Fix video repair on your Android phone
To download the MP4Fix video repair app open Google Play Store on your android phone and search MP4Fix video repair in the search bar. Download the app by tapping the Install button.
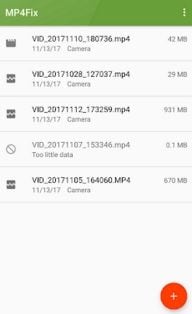
Step 2: Launch the MP4Fix video repair app and select the corrupted videos from your Android phone
Open the MP4Fix video repair app on your Android phone and select any of the broken videos from the list.
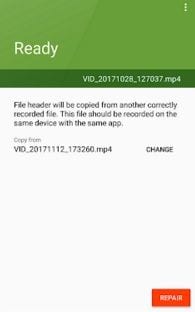
Step 3: Add a correct video to MP4Fix video repair from your phone
To repair the broken videos MP4Fix video repair uses a correct video. This file should be recorded on the same device by using the same camera app. You can change the sample video by clicking the Change option.
Step 4: Start repairing the corrupted video file on your Android phone
To start the repairing process select the Repair option and wait for a few minutes. While your file is being repaired you can use also your phone.
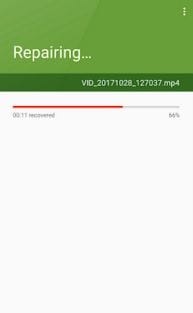
Step 5: Export or Preview the repaired video file on your Android phone
After the repair is complete you will be notified. Save the repaired file or Preview it by taping either of these options.

How to Perform Android Video Repair on Computer
You can easily repair your corrupted video files on Android by transferring them to a computer. First, download a video repair app on your computer. The most widely used and recommended video repair app is the Wondershare Repairit Video Repair.
Wondershare Repairit Video Repair can repair videos that are unplayable on mobile phones, PC, or laptops. It easily fixes the videos which get corrupted during the shooting, recording, editing, processing, transferring, or converting process and is compatible with Windows 10/8/7/Vista/XP, and Mac OS X 10.9 — 10.15.
It is the best and most user-friendly video repair app which supports the repairing of major video file formats such as 3GP, MOV, FLV, AVI, MKV, MP4, M4V, M2TS, AND MTS. It can resolve file transfer errors, file read and write errors, change in video format, video compression issues, videos without sound errors, video black screen, audio-video sync error, corruption on video header, slider, or frame, and interrupted video recordings. You can also preview your repaired videos free of cost before saving them to your desired destination.
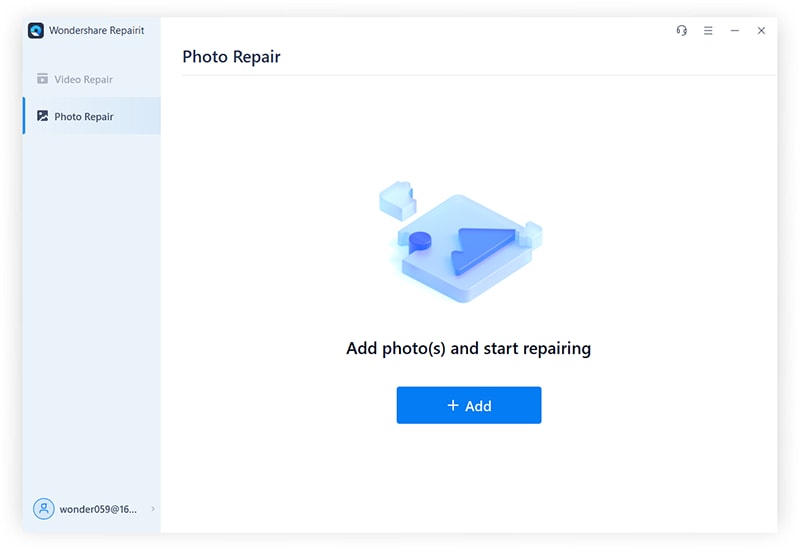
Step 1: Add the corrupted video file from your computer
Open the Wondershare video repair app by clicking the app icon on your desktop or by searching the app name. Upload the corrupted mp4 video files from your computer by clicking the Add to start the repairing button. You can also add multiple files with different file formats.
After adding the corrupted file the information of corrupted video as File Name, File Path, File Size, Date Created, Operation will be shown by an interface.
Step 2: Fix the corrupted mp4 video file
After you are done adding the video files click the Repair button to start the repairing process of corrupted video files.

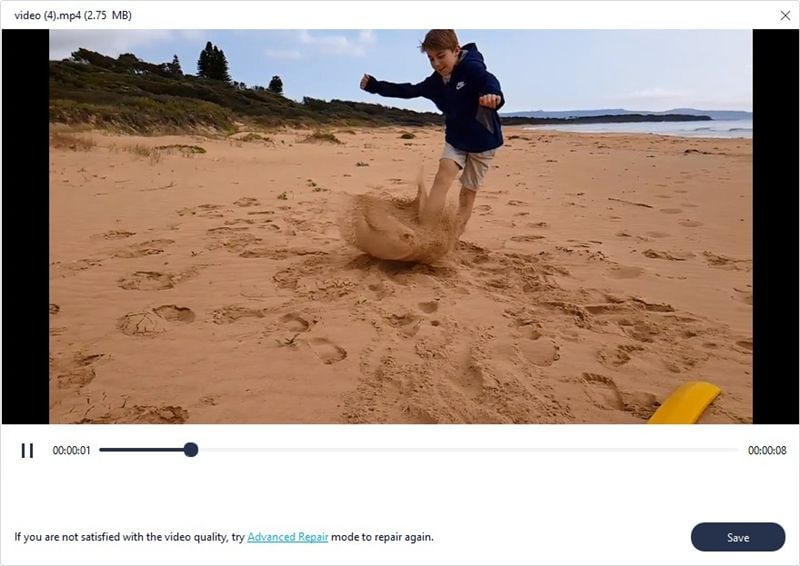
Step 3: Review the quality of the repaired video files
You can examine and check the quality of the repaired video file by previewing the video. If you are unsatisfied with the quality you can use the Advanced repair option.
Step 4: For severe damage use the Advanced repair
If you are unsatisfied with the video quality or the video is still unrepaired and corrupted use the Advanced repair option. For this, you need to upload a sample video from the same device and with the same format as the corrupted video file. Wondershare video repair will use this video as a reference to repairing the corrupted video file.

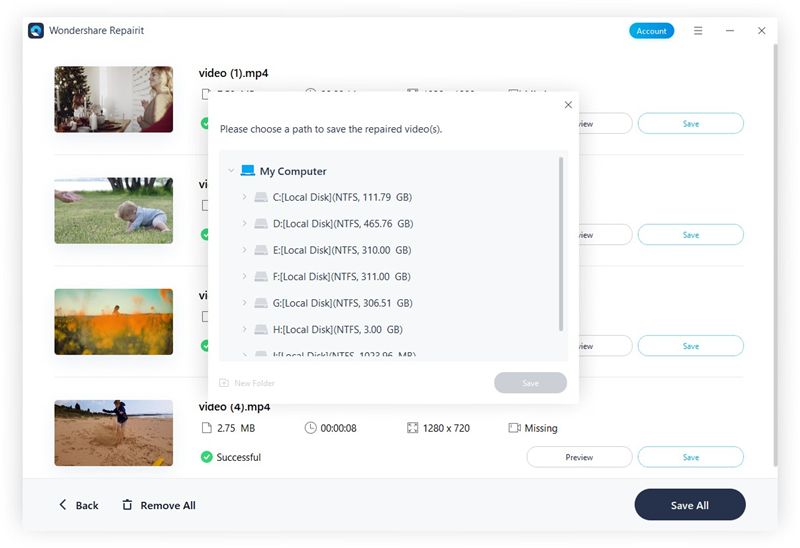
Step 5: Save and transfer the repaired video files
By clicking the Save button you can easily export the repaired mp4 video files to the desired location on the computer. You can now transfer this repaired video file back to your Android phone, watch it smoothly or share it with your family and friends.
Part 3. How Can Data and Video Corruption Be Prevented?
You can prevent the corruption of data or video files with ease by using these preventive measures:
Backup your important data and videos as file corruption can occur any time
Keep your device protected with anti-malware and antivirus
Avoid ejecting or removing the external devices during the file transfer process
Avoid recording videos when your phone has a low battery
When your phone memory is full avoid recording videos
Before altering the video make a copy of the video
Before recording a video clean your phone by deleting useless data or cache to overcome the low storage issues
Conclusion
In this guide, we have explained in depth how you can fix a corrupted video file from your Android phone. There are so many reasons behind a corrupted video file on an Android phone such as viruses, camera crashes, insufficient storage, cache, low battery, etc. Many solutions are stated above to repair a corrupt video file. None of these methods provide a complete hassle-free and positive outcome. Corrupt video files can be very frustrating but by using Wondershare Repairit you can easily combat all the corrupt video issues. It is highly recommended to use the Wondershare video repair app to repair your corrupted video files.
Источник
How to Delete Corrupted Android OS Files

Related
If your Android-powered smartphone begins to exhibit strange behavior, your device may have some corrupted operating system files. Symptoms of corrupted Android OS files may include apps that fail to run properly or functions that cease to work. One example of such behavior is if your Contacts list no longer opens when you tap the “People” icon. There is only one way to delete corrupted Android OS files. You must perform a factory reset to refresh the operating system files. Perform a factory reset from the phone’s Settings menu, or by using a key combination on the device.
Key Combination Method
Press and hold the “Volume Down” button on the side of the device.
Press and hold the “Power” button while still holding the “Volume Down” button. Hold both buttons until the Android screen displays.
Release both buttons when you see three Android images on the screen. The Recovery menu displays.
Press the “Volume Down” button to navigate through the recovery choices. Highlight the “Factory Reset” option.
Press the “Power Button.” The phone turns off, and then reboots. When the phone boots back up, the original factory settings, including a fresh copy of the Android operating system, are restored.
Settings Menu Method
Tap the “Application Launcher” key, and then tap “Settings” in the Applications screen.
Tap the “Backup & Reset” option. The Backup & Reset menu displays.
Tap the “Reset Phone” option. The Reset dialog box opens.
Tap the “Erase All Data” option, and then tap “OK.” The phone powers down, and then reboots. When the phone powers back up, the original factory settings are restored.
Источник
How to fix corrupted sd card on android without computer?
How to fix corrupted sd card on android without a computer? Tasks like file recovery and fixing up storage media are a cakewalk, if to be done via PC. But on Android, things are quite complex. Despite being highly efficient the Smartphones are still way behind PCs. When going for tasks like installation of OS, recovery and fixing up of storage media, etc. The capabilities of smartphones are no match for PCs. But today, our matter of concern is fixing up a corrupted SD card without using a computer.
When you apply the constraint, “not using a PC” to this problem it gets quite complex. This is because there are not many worthy tools to accomplish this task. If right now you perform a Google search for this problem. It’s quite possible that you get a 100 links on How to fix corrupted sd card on android without a computer. And not a single post on accomplishing this task on Android. But here I am discussing the information on completing this task in both ways. By the end of this, you are going to know enough about solving this problem with and without a PC. See also: Android Recovery Mode How to fix corrupted sd card on android without computer?
Category of errors in SD card
First of all, you need to know that your sd card belongs to which category of errors does. The SD card errors can be prompted by:
Primary Category
- Bad sectors
- Corrupted file system
Secondary Category
- Adware/malware/virus attack
- Inappropriately inserting or ejecting SD Card
There are many problems that allow you to say that your SD card is corrupted. Both Hardware and Software level issues can be responsible for corrupting your SD card. For instance a corrupted file system or virus could possibly be responsible for errors. Also inserting and ejecting the SD card improperly and bad sectors can lead to SD card corruption. Let’s discuss in brief a few of the most common errors.
The pseudo corruption
It is possible that you might be trying to store a file that is more than 4GBs in size. SD cards are FAT32 formatted out of the box. And the FAT32 format has a maximum size boundation of 4GB. So it could possibly make you think that the SD card is corrupted. But in reality it is the file size that is the cause of the error. Thus this issue requires no further clarification. You just need to reduce the file size, if possible. And if not try formatting the SD card in exFAT. But keep in mind two factors. First one is that, not all smartphones support the exFAT format and the secondly you are going to end up losing all your data.
No Access to files
Another possible error you might be facing is that the files you stored in the SD card aren’t accessible anymore. This is a software glitch and can be very easily resolved using some third party tools.
Unable to write
The most common symptom of a corrupt SD card is the restriction on writing data to the SD card. The SD card can no longer be used as a storage medium since you cannot write data into it.
Card not detected
Maybe you are facing the most basic error of a corrupt SD card. The issue of your SD card not being detected either on your android device or on your PC.
How to fix corrupted sd card on android without computer?
By now you must have got an idea of which category your SD card belongs to. Now that we are quite familiar with the problem let’s get into the methods of resolving these errors one by one. And let’s get your corrupted SD card fixed up.
Formatting an SD card is the only method to fix up a corrupt SD card on Android. Without the involvement of a PC, this is the only way to fix your problems. In smartphones, the formatting option is provided in the Settings menu.
Solution1: Unmount and Erase SD card
Android provides you with this feature of unmounting and erasing your SD card. So you can format your SD card right from your android device. It does not require any third party apps or connectivity to a PC. Keep in mind that performing the erase function over the SD card will wipe off all your data. Thereafter you would need a Data Recovery app.
Also once the SD card is formatted it would necessarily remove the errors and issues. So your SD card would be fixed up. Following it, you may use a PC to recover data easily from the SD card.
To format the SD card on Android device follow the steps stated below
- Open up the settings on your Android Device.
- Select the Storage option from the settings menu.
- Scroll down to the SD card information.
- Select the Erase SD card option
- Wait for the process of formatting to be completed.
- Thereafter unmount the SD card and remount it.
Note that Android formats the SD card in FAT32 file format by default.
Solution2: Formatting SD card on PC
Now that we have learned about the sole savior of yours. Let’s get into the method involving the use of a PC. An SD card just like any other drive can be formatted on PC very easily. With just a few clicks your job gets done. To format the SD card on PC just plug it in via a card reader.
Next, select the FAT32 file format and perform a quick format. The entire data present on the SD card is wiped off after this process. And you can now use the SD card as usual.
Now that you have formatted the SD card. The next step that comes into play is the recovery of data. If you have been taking a backup of the data stored in your SD card from time to time. Then the article has already ended for you. But not all of us are in the habit of taking a backup regularly. At least I am not, so if we are on the same sides then the next half of the article is important and quite informative. Hence its time now to discuss some of the data recovery tools floating around in the market
Free Data Recovery Tools
Recuva
Probably the best of all recovery tools in the market that come free of cost. I personally use it for data recovery from time to time. Recuva can perform data recovery from all kinds of storage media including SD cards and flash drives.
Comes in a very small size setup and performs huge tasks.
But it has some drawbacks as well. Not all the files can be recovered from the storage media. According to my personal analysis, nearly 55-60% of the files are fully recovered. Though it will show all the files during the recovery process but will not be able to recover all of them. There is also an unofficial android app for video and image recovery.
Minitool Power Data Recovery
The Power Data Recovery by Minitool is a data recovery tool for Windows. It comes with a set of various tools. The different tools can be used to recover lost, deleted, or corrupted data from internal and external hard drives. Also, data from USB drives can be recovered using this tool.
This is a kind of freemium service provider. You can use the Free edition of the data recovery tool to recover upto 1 GB of data. The personal and business editions are the paid ones. The pricing of the personal edition is shown in the image.
Here I am discussing, in brief, the process of restoring lost files from your SD card by using the Recovery tool by Minitool. Follow the steps stated below to recover your files easily and efficiently. Download it now.
Note: Never install Minitool on the drive which has lost the data or data to be recovered from.
Scanning the SD card
- Plugin the SD card using a card reader and wait for the PC to detect it.
- Start the MiniTool Power Data Recovery tool.
- Within the Removable Disk Drive option choose, phone SD card device
- Initiate the Recovery by selecting the SD card for scanning
Selecting the Files
- On successful completion of the scan, the tool will allow you to browse and analyze the results of the scan. From the results, you can find the files that you require.
- Power recovery enlists the lost files of your SD in the scan results. Out of the lost files, you can select the files you need to restore.
- Use the Find feature to search a required file by its name.
- Use the Filter option to contract the range of file searching. Also, filters can be used to find files by categorizing the search. For instance, extensions and date of creation can be used to find the necessary files faster.
Restoration of Files
Once you are done with the selection of all the required files from the set of lost files. Click the Save button to store the recovered files. The restored files can be saved to a new destination folder or an existing computer folder. The files can even be stored in an external storage device. It is important to know that the recovered SD card files should not be directly stored on the SD card. This is because it will lead to overwriting of data and may result in data loss permanently.
Conclusion
In this article, my sole focus was to fix a corrupted SD card without using a PC. Android is growing gradually in its capabilities but it still is far behind a PC. In other words, fixing up a corrupted SD card has just one solution on Android i.e formatting. Though there are many data recovery apps for Android like EaseUS data saver, Disk Digger, etc.
But their capabilities are limited to the internal storage of smartphones. So it was worthless to discuss their features over here. To conclude my write up I would say that take a regular backup of your important files. So that you can skip the recovery phase and fix your SD card easily. One of my favorite, MiniTool Power Data Recovery is the most famous and powerful file and data recovery tool for Windows available free. Consist of several tools bundle that mutually can retrieve lost and erased data from sd card, external/internal hard drives, pen drive, and many more.
Источник


