- Countdown timer java android
- CountDown Timer in Android
- Pre-Requisites:
- Content:
- Let’s get started
- How does the timer works ?
- How to run ?
- Last Step
- Создание таймера CountDownTimer в Android на примере
- Android CountDownTimer Example
- Android Tutorial
- Android CountDownTimer
- Android Countdown Timer Example Project Structure
- Android Countdown Timer Code
Countdown timer java android
В этом небольшом уроке мы научимся использовать в своем приложении такую простую и распространенную штуку, как CountDownTimer — счетчик обратного отсчета. Этот элемент Android интерфейса, как и любой другой мобильной или компьютерной ОС каждому из нас знаком до боли. Сколько времени вы убили глядя на надпись в файлообменнике — ссылка будет доступна через 10, 9, 8. Теперь пришло время и нам научиться делать в своем приложении такую пакость.
Создаем новый проект, выбираем Blank Activity и Android 2.2+. Пользовательский интерфейс нашего сегодняшнего приложения будет прост как дважды два — всего лишь один элемент TextView, в котором будет происходить текстовое отображение обратного отсчета. Открываем файл activity_main.xml и добавляем туда элемент TextView:
Создание таймера обратного отсчета совсем не сложно, для этого используется специальный встроенный класс под названием CountDownTimer. При настройке таймера такого типа используется всего 2 переменные: время до окончания обратного отсчета и шаг, с которым происходит отсчет, все это в миллисекундах. В классе CountDownTimer используется два метода: onTick () и onFinish (). В методе onTick () происходит настройка обновления текстовой информации о изменении показаний таймера, а в методе onFinish () происходит настройка желаемых действий после окончания обратного отсчета (например, подождите 3, 2, 1. Скачать файл, или переход на другой экран, что то в этом роде).
Мы сделаем простейшую программу, в которой таймер обратного отсчета будет отсчитывать 20 секунд, после чего в элементе TextView будет появляться надпись «Бабах!» (как будто мы сделали таймер на бомбе).
Чтобы это сотворить, открываем файл MainActivity.java и добавляем сюда код:
Запускаем и проверяем работоспособность нашего таймера обратного отсчета:
Источник
CountDown Timer in Android

Jan 26, 2020 · 8 min read
Hey Guys. This is another useful post which solves another common problem. If you frequently need to use a countdown timer inside your apps for building tracking,verification or delay screens then this CountDown Timer I developed is tailored to your needs. You can create as many timer objects needed.
Pre-Requisites:
(Java 8 or Kotlin), Android (CountDown Timer,Handler,Handler Thread and basics of Multi-threading). The Android portion is only necessary if you want to understand the timer code in details.
Content:
This project is availab l e for both Java and Kotlin including examples. But for the majority of readers I will be explaining the java example here.
Let’s get started
First, You will need to create an instance/object of SimpleCountDownTimer class in your activity or fragment. Since the timer object doesn’t rely on activity or fragment life-cycle it can be safely declared as a final object like a field below or in a constructor. When you create the timer object it is required to provide countdown minutes,seconds,delay and a countdown listener as well to the constructor.
Then by calling simpleCountDownTimer. start( false) method you can start the timer and registered listener will receive updates from ticks with the latest time after provided delay. For example, the listener will receive ticking event for a countdown of 10 seconds with delay of 1 second in above example. After 1 second below callback will be invoked on the main thread by default. And when the countdown is finished the subsequent one is invoked once.
Let’s understand the java activity example below.
A simple activity demonstrating how the countdown timer works with 3 buttons.
When start button clicked, The timer starts from the provided minutes and seconds and the button is disabled to prevent abnormal operation.
When resume button clicked, The timer resumes operation from the time it was paused at. You would have noticed that the start(true) method of the timer takes a true/false parameter. It’s self-explanatory but when you pass true to the method it resumes the timer whereas false starts/restarts it. Only on completion or paused, the start method can be invoked again with false parameter to restart the timer.
When pause button clicked, pause() method is invoked and the countdown pauses. It’s safe to call this method whenever required.
setTimerPattern(String pattern): The method is used to set the appearance of countdown time the patterns can be found in its documentation. This method can be called anytime safely.
runOnBackgroundThread(): Only a single call to this method will move entire countdown operation to a background thread and the countdown listener callbacks onCountDownActive(String time) and onCountDownFinished() will be invoked on background thread only that is why view’s post method is used in example above which will post countdown time to main thread’s message queue asynchronously. For now, you cannot switch the timer to main thread again after a call to this method is made for a timer instance. Also note the timer keeps running whether on main thread or not even if activity is paused due to usage of handler. If your timer is already running on a background thread then more calls to this method will have no effect.
What’s the abnormal operation ?
This timer works on recursive approach. Improper use of start method can lead to multi-recursions/messages. This behaviour is identical to improper use of start method of official countdown timer.
Thing to note: There might be a possibility that the occurrence of this identical behaviour is indicative of same recursive approach being used in the android’s official countdown timer.
That covers up all about the timer. If you are interested in learning how it works, then keep reading.
How does the timer works ?
The code for the simple countdown timer is below.
When the call to the constructor is made, It first validates the given minutes and seconds. On success, All countdown values are adjusted for countdown by method setCountDownValues(long minutes,long seconds) else an illegalStateException is thrown. This is how countdown timer gets ready for use.
How does recursion works ?
When start() method is called, the runCountdown() method is also invoked. It updates UI for ticking by calling updateUI() and then calls decrementSeconds() method in which the handler is used to post a delayed runnable to decrement seconds after the specified delay which was provided in constructor. This then leads to decrementMinutes() method being called inside the run() method. When this happens, the seconds are decremented, then its checked whether the decrements have caused the minutes and seconds to be equal to 0 if they are then the countdown is finished by calling finish() method which marks the timer finished by setting the finish boolean flag to true which breaks recursion.
The basic formula involved is that when seconds field value reaches 0 minutes field value is decremented by 1 and runCountdown() method is called again this keeps recurring until both minutes and seconds field values equal to 0.
In the whole process, If pause() method is called it removes the runnable callback from handler therefore breaking the recursion.The method start(true) is a resume call and start(false) on finish or pause restarts the timer.
How does background thread work ?
When runOnBackgroundThread() method is called, a new Handler thread is created and started which is then used to recreate the handler with it. The method is validated to create the background thread only once and start it only if it is not already running a boolean flag isBackgroundThreadRunning is set to true with the 1st call to this method. Then each time this method is called again the flag is used to verify if its true it returns from method immediately nothing happens.
How does timer is formatted for appearance ?
Calendar API is used to set minutes and seconds on the timer and then return the time set by formatting with SimpleDateFormat. The method setTimerPattern() also uses the above mentioned object to format time appearance as per requirement and validates the provided pattern against supported ones. Default pattern is used if validation fails.
How to run ?
You can find the project on Github. It contains a Java and Kotlin activity as samples. You can clone the project in Android Studio to run it.
Last Step
Many thanks to everyone who read this. You can follow me here for updates and/or reach me at LinkedIn or Facebook. You can greatly help by starring and forking on github.
Источник
Создание таймера CountDownTimer в Android на примере
 Проблема
Вам нужен простой таймер обратного отсчета, программа, которая будет отсчитывать заданное количество секунд, пока не достигнет нуля.
Решение
Платформа Android поставляется со встроенным классом для создания таймера обратного отсчета CountDownTimers . Он прост в использовании, эффективен и работоспособен (это само собой разумеется!).
Обсуждение
Для создания таймера обратного отсчета выполните следующие действия.
- Создайте подкласс Конструктор этого класса принимает два аргумента: CountDownTimer (long millisInFuture, long countDownlnterval) . Первый — это количество миллисекунд с того момента, когда нужно сделать интервал; на данный момент будет вызываться метод подкласса onFinish() . Второй — частота в миллисекундах, определяющая, как часто вы хотите получать уведомления о том, что таймер все еще работает. Это типично для обновления монитора прогресса или другого обмена данными с пользователем. Ваш метод подкласса onTick() будет вызываться каждый раз по истечении данного количества миллисекунд.
- Переопределите методы onTick()
- Создайте новый экземпляр класса
- Вызовите метод start() для вновь созданного экземпляра!
Пример программы для таймера обратного отсчета состоит из компоновки XML (показанной в примере 1) и некоторого кода Java (показанного в примере 2). При запуске он должен выглядеть примерно так, как показано на рис. 1, хотя время, вероятно, будет иным.
Пример 1. Файл main.xml
Пример 2. Файл Main, java
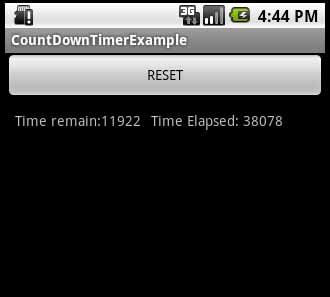
Рис. 1. Сброс таймера
URL-адрес для загрузки исходного кода
Исходный код этого примера можно посмотреть и скачать на странице Github.
Источник
Android CountDownTimer Example
Android Tutorial
In this android countdown timer example, we’ll implement a timer object to display the progress in a ProgressBar. The application we’ll build in this tutorial is a useful component in Quiz apps where the time left to complete the level is displayed graphically to enhance the user experience.
Android CountDownTimer
Android CountDownTimer class is used to schedule a countdown until a time in the future defined by the user, with regular notifications on intervals along the way. This class is an abstract class whose methods need to be overridden to implement it in our project. The following line needs to be added in our activity to import the class :
The relevant methods of the CountDownTimer Class are given below.
- synchronized final void cancel() : This is used to cancel the countdown
- abstract void onFinish() : This callback method is fired when the timer finishes
- abstract void onTick(long millisUntilFinished) : This callback method is fired on regular intervals
- synchronized final CountDownTimer start() : This method is used to start the countdown
The signature of the public constructor of the CountDownTimer class is given below.
CountDownTimer(long millisInFuture, long countDownInterval)
The parameters of the constructors are defined as follows :
- millisInFuture : The number of milli seconds in the future from the call to start() until the countdown is done and onFinish() is called
- countDownInterval : The interval along the way to receive onTick(long) callbacks
In this project we’ll update the time values in a ProgressBar as the onTick() method is invoked repeatedly.
Android Countdown Timer Example Project Structure

Android Countdown Timer Code
The activity_main.xml consists of two buttons i.e. the start and stop timer buttons and a ProgressBar to display the time.
The MainActivity.java is given below :
In the above code we’ve defined an Anonymous Inner Class called MyCountDownTimer . In this example we’ve set a Timer for 10 seconds that updates after every second. By default the timer displays/updates the time in decreasing order ( as its named CountDown!), Hence to show the progress in increasing order we’ve subtracted the time from the max time.
The timer once stopped restarts from the beginning. Below is our android countdown timer app in action.

This brings an end to countdown timer android tutorial. You can download the final Android CountDownTimer Project from the below link.
Источник


