- My First App: How to Create Your First Android App Step by Step
- Prerequisites
- 1. Create a New Project
- 2. Create an Activity
- 3. Create a Layout
- 4. Implement Event Handlers
- Conclusion
- Android App Templates and UI Kits From CodeCanyon
- Android App Maker to Create Android App Online
- Make an Android App Online with Appy Pie’s Android App Maker.
- Go Native
- Monetization
- App Analytics
- Real-Time Update
- Codeless Development
- 200+ Striking Features
- How to Create an Android App in 3 Easy Steps?
- Enter business name
- Add the features you want
- Publish your Android app
- The 1# No-code Android App Building platform
- Create your own Android app within minutes with Appy Pie’s Android App Maker
- Gain access to the largest app market in the world with Appy Pie Android App Maker
- Drag n Drop Android app creator for the masses
- The Best Appy Pie App Maker Features for Your Android App
- Why You Should Build Android Mobile Apps?
- What are the Benefits of Android Apps?
- For Businesses
- For Personal Use
- Related Blog Posts
- Best Programming Languages for Mobile Apps
- How to Promote Your Mobile App for Free?
- Tips To Get 1 Million Installs For Your App!
- Top Frequently Asked Questions
- How can I create an Android application?
- How to create an android app without coding?
- What programming language is used for Android Apps?
- How much does it cost to make an android app?
- How to Download Android APK File and Install your Android App?
My First App: How to Create Your First Android App Step by Step
To create a native Android app, one that can directly use all the features and functionality available on an Android phone or tablet, you need to use the Android platform’s Java API framework. This is the API that allows you to perform common tasks such as drawing text, shapes, and colors on the screen, playing sounds or videos, and interacting with a device’s hardware sensors. Over the years, the Android API framework has evolved to become more stable, intuitive, and concise. As a result, being an Android developer today is easier than ever—even more so if you use Android Studio, the official tool for working with the framework.
In this tutorial, I’ll show you how to create your first Android app. While doing so, I’ll also introduce you to important Android-specific concepts such as views, layouts, and activities.
We’ll be starting from scratch to create a very simple app in this tutorial. If you prefer writing less code or need to develop your app as quickly as possible, however, consider using one of the native Android app templates available on CodeCanyon.


Using an app template, you can have a polished, ready-to-publish app in just a matter of hours. You can learn how to use an Android app template by referring to the following tutorial:


Prerequisites
To be able to follow along, you’ll need:
- the latest version of Android Studio
- a device or emulator running Android Marshmallow or higher
If you don’t have Android Studio, do refer to the following tutorial to learn how to install and configure it:


1. Create a New Project
You’ll need an Android Studio project to design, develop, and build your app. So launch Android Studio and click on the Start a new Android Studio project button.
On the next screen, choose Add No Activity because we don’t want to use any of the templates offered by Android Studio. Then press Next to proceed.


You’ll now see a form where you can enter important details about your app, such as its name and package name. The name is, of course, the name your users will see on their phones when they install your app.
The package name, on the other hand, is a unique identifier for your app on Google Play. You must follow the Java package naming conventions while specifying it. For example, if your app’s name is MyFirstApp and you work for an organization whose website address is example.com, the package name would ideally be «com.example.myfirstapp».
Next, you must decide the programming language you want to use while coding the app. For now, select Java and press Finish.


Android Studio will now take a minute or two to generate and configure the project.
2. Create an Activity
An activity is one of the most important components of an Android app. It is what allows you to create and display a user interface to your users. An app can have one or more activities, each allowing the user to perform an action. For example, an email client app can have three activities: one for the user to sign up, one to sign in, and one to compose an email.
To keep this tutorial simple, we’ll be creating an app with just one activity. To create the activity, in the Project panel of Android Studio, right-click on app and select New > Activity > Empty Activity.
In the dialog that pops up, type in MainActivity as the name of the activity, check the Launcher Activity option, and press Finish.
Checking the Launcher Activity option is important because it is what allows your users to open the activity using an Android launcher. As such, a launcher activity serves as an entry point to your app.


3. Create a Layout
Each activity usually has at least one layout associated with it. When you created your activity in the previous step, you also generated an empty layout for it. To take a look at it, open the activity_main.xml file.
An activity’s layout primarily consists of views and view groups. A view, sometimes referred to as a widget, is an individual component of your user interface. Buttons, text fields, labels, and progress bars are common examples of views. A view group is a component that can serve as a container for views. Usually, view groups also help you position and set the dimensions of your views.
ConstraintLayout is one of the most powerful and flexible view groups available today. By default, it is the root node of your activity’s layout XML file. It looks like this:
We’ll be creating a simple clock app in this tutorial. In addition to the local time, it will be able to show the current time in two different countries: India and Germany.
To allow the user to choose the country they’re interested in, our layout will have two Button views, one for Germany, and one for India. And to actually show the time, our layout will have a TextClock view.
Accordingly, add the following code inside the ConstraintLayout :
Note that each view must have the layout_width and layout_height properties. They decide how large the view is. Other properties such as layout_constraintBottom_toBottomOf and layout_constraintLeft_toLeftOf are necessary to position the view. With the above code, the TextClock view will be placed at the center of the screen, and both the Button views towards the bottom of the screen.
By default, the TextClock view only shows the hours and minutes. The format12Hour property, however, allows you to change that. In the above code, its value is set to h:mm:ss a . This tells the TextClock view that it should display the hours, minutes, seconds, and also an AM/PM suffix.
Also note that each Button view has an onClick property. This property is used to assign click event handlers to the buttons.
The handlers don’t exist yet, but you can ask Android Studio to generate them for you. To do so, hover over the name of the handler until you see a red light bulb appear beside it. Then click on the light bulb and select the second option, the one with the yellow light bulb.


At this point, you can try pressing Shift-F10 to run the app. If there are no errors in your XML code, you should see something like this on your phone or emulator:


Although the buttons don’t work yet, the TextClock view should show the local time, updating itself every second.
4. Implement Event Handlers
When you generated event handlers for the two buttons, Android Studio added two methods to your activity’s Java file, MainActivity.java. If you open it, you should find the following code in it:
Inside the event handlers, all we need to do is change the time zone of the TextClock view. But how do you reference a view that’s in your layout XML file from inside your Java file? Well, you just use the findViewById() method.
Once you have a reference to the TextClock view, you can call its setTimeZone() method to change its time zone. So add the following code inside the onClickGermany() method:
Similarly, add the following code inside the onClickIndia() method:
If you’re wondering what R is, it’s an auto-generated class that contains, among other things, the IDs of all the views you have in your layouts. The findViewById() method expects you to use this class while passing an ID to it.
At this point, you can press Shift-F10 again to re-run the app. You should now be able to click on the buttons to change the clock’s time zone.
Conclusion
You just created your first fully functional, native app for Android! I encourage you to make a few changes to it. For instance, you could try using other time formats or time zones. You could also try changing the positions of the buttons and the clock view.
There are dozens of views and view groups you can use to create your apps. Do refer to the official documentation to learn about them.
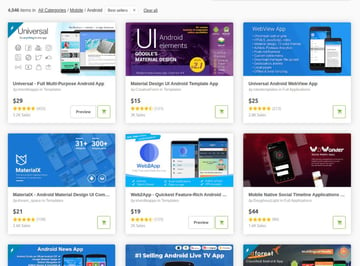
Android App Templates and UI Kits From CodeCanyon
You may have noticed that our app looks very plain and simple. That’s because we’re using the default theme, without applying any styles to our views. CodeCanyon is full of Android UI kits that offer beautiful, hand-crafted styles you can apply to your views.
The kits generally also have several custom views and layouts. You can refer to the following articles to learn more about them:
Источник
Android App Maker to Create Android App Online
Make an Android App Online with Appy Pie’s Android App Maker.
Try Android App Builder Now. Trusted by 7 million businesses worldwide!
Go Native
Let users enjoy the most fastest and responsive experience
Monetization
Let your app earn money for you while you sleep.
App Analytics
Use critical data and create metrics to understand users behavior
Real-Time Update
Automatically update content in app without resubmission
Codeless Development
No professional knowledge of coding language required
200+ Striking Features
Explore and add features as per your industry needs
How to Create an Android App in 3 Easy Steps?
Last Updated on October 4th, 2021
Follow these steps to make your own Android App:
Enter business name
Choose the category and color scheme.
Add the features you want
Build your own Android app without any coding.
Publish your Android app
Go live on Google Play Store and reach out to more customers.
The 1# No-code Android App Building platform
Appy Pie App Maker is the world’s best Android app making platform. With over 200 key app features and a completely no-code interface, thousands of apps are built and published through the Appy Pie platform each day!
- Error-free and fast native mobile apps
- An intuitive, engaging app-building experience
- An active community of Android app creators(beginners and veterans)
Create your own Android app within minutes with Appy Pie’s Android App Maker
Appy Pie gives you the tools you need to build amazing Android Apps without coding. The builder has been carefully optimized to ensure that all the apps you create work seamlessly with Android. Appy Pie’s Android app maker is:
- Tailored for Android OS
- Easy-to-use and hassle-free
- Play-store compliant
Gain access to the largest app market in the world with Appy Pie Android App Maker
Android is used by more than 50% of all smartphone users. Android is likely to increase its market share in the near future. With Appy Pie, you can create Android apps by simply dragging and dropping the features you need into your app. Create your apps and be a part of the smartphone ecosystem today!
- Appeal to your target market and customers
- Increase your business revenues
- Increase customer convenience and satisfaction
Drag n Drop Android app creator for the masses
Appy Pie aims to democratize Android app development by providing everybody the ability to create their own mobile apps. With our Android app maker, anyone irrespective of their coding experience can create their own Android mobile apps.
- Drag and drop interface
- Meant for everyone
- No coding skills needed
The Best Appy Pie App Maker Features for Your Android App
Photo/Video
With photo and video features in your app, you can easily showcase your products and services, and attract your target audience.
Social Network
The social network feature makes it easy for you to connect with users through your own social network. Just like Facebook, it allows users to post updates, comments, and like posts.
Push Notifications
Push notifications is the most powerful feature that proves to be beneficial in instantly updating users about the latest news, promotions, and offers, etc.
In-App purchases
Create subscription based models and more with in-app purchases within your Android app. Lock features and functionalities behind paywalls with ease. You can even create completely paid apps with this feature.
Shopping Cart
The shopping cart feature is essential for apps that sell products. Allow your app users to add items to their shopping carts to make purchasing products off of your app easy.
App Analytics
Undoubtedly one of the best features, app analytics helps you analyze your app performance and keep track of user behavior, further benefitting you in delivering an amazing user experience.
Website
Using our website feature, you can easily bring your business website to app and provide an amazing user experience.
Directory
Appy Pie’s directory feature allows users to add their own listings and create the next generation of store finder, restaurant locator and city guide apps.
Contact
One of the top Appy Pie’s Android app builder features, contact lets you to share important contact details with your users, thus providing an easy way to connect with you in times of need.
Radio & Audio
The radio & audio feature allows you to add sound to your app. This feature is great for podcasts, radio, and music apps. It can also be used for apps that provide online education, training courses, or for personalized messaging and chatting apps.
Why You Should Build Android Mobile Apps?
If you are clear about what you need and are planning to build and launch your own applications, going the Android way will certainly turn your fortune around. Not only are Android users high, compared to Apple, it is also quite cost-effective than iOS, when it comes to publishing app on app stores. Here are some top reasons why you should build Android mobile app:
Open Source
Being an open source platform, Android has comparatively low entry barriers, thus allowing you to develop apps easily at lower prices.
Multi-Network Distribution
Apart from Google Play Store, Android apps can also be distributed through third-party app stores, helping you create a great impact and reach out to a wider audience.
Easy App Approval Process
Publishing a mobile app on Google Play is a simple undertaking. With flexible submission policies, and quick approval process, you can make your Android app available to the world with great ease.
Multi-Device Functionality
Android apps work well on a range of devices including smart TVs, tablets, portable media players, cameras, car systems, smartwatches and much more.
Customizable User Interface
User interface plays a major role in the success of an app, and when it comes to Android apps, their highly customizable user interface makes it easy for app owners to manage them and deliver enhanced user experience.
Low Barriers to Entry
Android has a low barrier to entry, which makes it simple for you to leverage any computer device and build amazing apps. However, you need to pay a one-time $25 registration fee for a Google Play Developer Console account to distribute your Android app globally.
Market Share
As of November 2020, the global share for Android is 71.18%. When you build an Android app this is the sharpest edge you get. The more audience you have at your disposal, greater would be the chances of your app being a success.
Portability
As Android apps are developed using Java, these apps can be easily ported to almost every other mobile operating system. Even better you can port an Android app to even the Chrome OS! This portability makes Android app development quite lucrative.
Secure platform
The platform is Linux based, which assures you about the security and crash-free operation of your app. In the entire existence of the platform, there is not even a single instance of a crash or information leak.
What are the Benefits of Android Apps?
A dedicated Android app can benefit in numerous ways as follows:
For Businesses
- Increased productivity
Help employees be more productive by providing them with the information they need at their fingertips.
Improved customer service
Gives customers access to important company information and allows them to contact you directly from within the Android app itself.
Enhanced revenues
Leads to increased sales or leads for your business, which is always good news!
Increased brand awareness
Easier to promote and market the company as well as reach out to customers and potential clients.
Efficient data collection
Collects data more efficiently by allowing employees access information at all times without having to go back and forth between different programs.
For Personal Use
- Easy to download and install
Easily download and install Android apps on your smartphone or tablet by visiting Google Play Store.
Customizable
Customize your phone with Android apps like changing themes, wallpapers etc., according to your choice or taste.
Free support
Google Play Store provides free support for all Android apps, including installation of updates, if any.
Security
Android apps are safe and secure to use as they have been tested by the developers before being uploaded to the store.
No need to root your phone
You don’t have to root your phone or tablet device in order to install android apps on it.
Related Blog Posts

Best Programming Languages for Mobile Apps
How to Promote Your Mobile App for Free?

Tips To Get 1 Million Installs For Your App!
Top Frequently Asked Questions
How can I create an Android application?
Creating Android apps with Appy Pie Android app builder is as easy as pie. No coding skills required. Follow steps below to create your own Android app in a few minutes:
- Go to Appy Pie App Builder and click on “Create your app”
- Enter your business name and click on Next
- Choose the category that best fits your business
- Pick a color scheme you like
- Select the device to test your app on
- Customize your app design the way you want and click on Save and Continue
- Take a deep breath, your app is getting ready. Once built, scan the QR code or send the app installation link to your device via email or SMS, and test the demo app
- Go to My Apps section by opening the Welcome drop down menu present in top navigation
- Click on Edit option to edit your app.
- You will see the Basic plan. You can either go with Try Now or Buy Now option. The ‘Try now’ option comes with a 7-Day Trial so that you are fully satisfied with the app before you make the purchase.
Please note whichever option you choose, you need to provide credit card details. We use credit card details to check the authenticity of the users. - On the creator software, you can add your desired features
- Once you are done, click on Save and Continue to finish creating your app
How to create an android app without coding?
Here are the steps to help you create an android app without coding:
- Go to Appy Pie Android App Builder and click on “Create your app”
- Enter business name, then choose category and color scheme
- Select the device to test your app on
- Customize the app design and click on Save and Continue
- Go to My Apps section and click on Edit option to edit the app as per your needs
- Drag and drop your desired features and create your own Android app in just a few minutes
What programming language is used for Android Apps?
The official programming language used for Android Apps is Java. Some other popular programming languages are Kotlin, C/C++, C#, Phongap, etc.
How much does it cost to make an android app?
You can make an Android app under free trial plan using Appy Pie’s Android app builder. However, if you want to publish it on Google Play Store, you need to upgrade your app to one of our paid plans. Starting from just $18 per month, we have different SMB and enterprise plans, which you can check on Appy Pie Pricing.
How to Download Android APK File and Install your Android App?
Follow the steps below to easily download Android APK file and install your android app on your Android device:
- Login to your Appy Pie account
- Go to My Apps area and click on Test app on device
- Scan the QR code, or send app installation link via email or SMS to your Android device
- Click on the link to download the Android APK file
- A popup will appear redirecting you to your default browser’s page
- Once the Android APK file is downloaded, tap open it
- You will now be asked to allow installation from unknown sources. Enable it
- Your Android app will start installing
- Once installed, test your app the way you want
Источник


