- Designing Adaptive Icons
- Understanding Android Adaptive Icons
- Android O introduces a new format for app icons called adaptive icons. To better understand the motivation and…
- Fundamentals
- Size and shape
- Keylines
- Layers
- Design Considerations
- Clipping
- Background Anchoring
- Masked masks
- Light & shadows
- Leave behinds
- Resources and tools
- Adaptive Icon Playground
- MakeAppIcon on your mac.
- Faster. Smarter. More organized than ever.
- Best app icon resizer for mobile developers.
- Optimized for both for Xcode and Android Studio.
- MakeAppIcon Desktop for Mac and Windows
- Besides MakeAppIcon, We also build your web / mobile app with passion.
- How to Create Icons for Your Android App
- Preparation
- Creating Your Custom Icon
- Get Real? Get Material
Designing Adaptive Icons

Android O introduces a new app icon format: adaptive icons. Adaptive icons can make devices more coherent by unifying the shape of all app icons and opening the door to interesting visual effects. This post explains how they work and explores some techniques for designing them.
For a look back at where this feature has come from, see:
Understanding Android Adaptive Icons
Android O introduces a new format for app icons called adaptive icons. To better understand the motivation and…
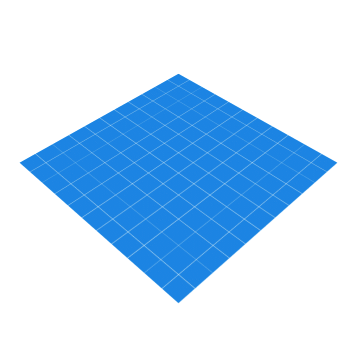
Fundamentals
Size and shape
Adaptive icons are 108dp*108dp in size but are masked to a maximum of 72dp*72dp. Different devices can supply different masks which must be convex in shape and may reach a minimum of 33dp from the center in places.

Because of the minimum reach of the mask, you can consider a centered 66dp diameter circle as a safe zone, guaranteed not to be clipped.

Keylines

Keyline shapes are the foundation of the icon grid helping your icon’s visual proportions be consistent with other apps’ icons . The keyline shapes are:
- Circles: 52dp & 36dp diameter
- Square: 44dp*44dp, 4dp corner radius
- Rectangles: 52dp*36dp & 36dp*52dp, 4dp corner radius
See the templates included at the end of this article.
Layers
Adaptive icons are actually made up of two layers; a foreground and a background. Both layers are 108dp*108dp; the background must be fully opaque while the foreground may include transparency. These layers are stacked on top of each other.
Providing elements in two separate layers which are larger than the displayed (i.e. masked) size creates the opportunity for interesting visual treatments and animations. Exactly what effects may be applied and when is still something of an open question; it is up to device and launcher makers to decide. Here are some simple examples you could imagine: parallax or pulsing by independently translating or scaling each layer before applying the mask.
As the 108dp*108dp icons are masked up to 72dp*72dp, the outer 18dp on each side can be considered the “extra” content, only revealed during motion.
Design Considerations
The material design guidelines for creating product icons still very much apply. Specifically the icon anatomy, shadows and finish remain, but you can now place elements in either the foreground or background layers yielding different effects.
Now I’m sure that many icons will be well served by placing their brand mark in the foreground on a solid colored background and calling it a day. This will ensure that your icon fits in well on the device. What excites me is how we as a community will explore these new constraints and find interesting, playful and innovative ways to make delightful icons. Here are a few things to keep in mind and a few ideas to potentially explore.
Clipping
Due to the dynamic nature of adaptive icons, you cannot know the exact mask shape that will be applied. For that reason it’s best to place any critical elements like your brand mark inside the safe-zone and to stay away from the mask edges.
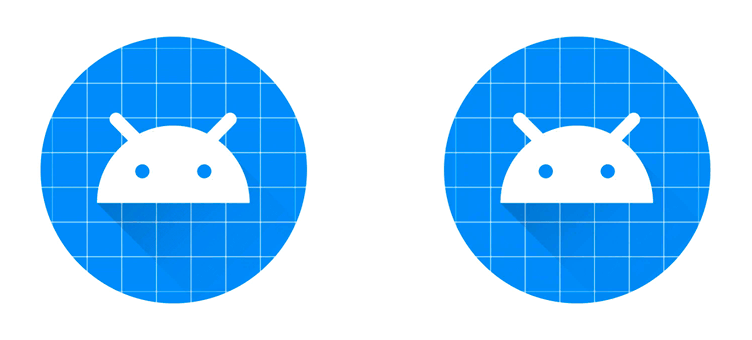
Background Anchoring
Placing some elements which might appear to be foreground, actually in the background means that they will move independently. For example the calculator app places most elements in the foreground, but the equals button on the accent color block in the background:
This creates interesting opportunities for motion where you visually anchor on the bright color block, but it moves less than the foreground elements, creating a sensation of depth.
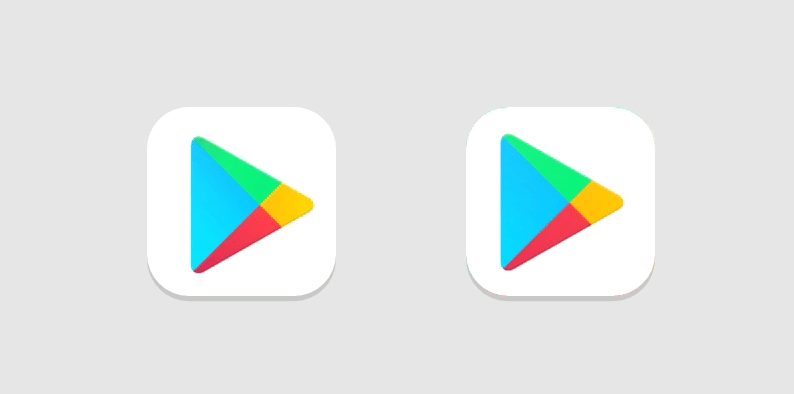
Masked masks
I think that there may be interesting opportunities for placing masking elements in the foreground — that is solid elements with areas cut out. Consider a possible icon for the Google Play Store, this might be constructed in an ‘obvious’ manner, that is placing the colored triangle in the foreground atop a white background.

Instead of doing this, we might use a colorful background and a white foreground with the triangle subtracted to produce the same static output:

This setup would allow the colors ‘peeking through’ to move independently of the mask revealing different parts of the background when translated or scaled.
Light & shadows
The interaction of lighting effects and shadows placed in separate layers can have interesting results. For example using the long-shadow technique on the foreground element can have a playful interaction as it moves within the masked area. Similarly lighting effects can be placed in the foreground layer rather than being baked into the background. For example, a ‘finish’ layer can be placed in the foreground to emulate a light source. Placing this in the foreground means that it will play over the background layer when under motion, moving at a different rate to it.

Be careful not to create an effect that doesn’t make sense e.g. a shadow detaching from a foreground element or moving behind a background element. Also remember that many icons are likely to be seen together so be conservative with bespoke lighting effects and stick close to the material guidelines.
Leave behinds
You could place elements in the background layer which are completely obscured by the foreground layer and only revealed under motion.

Resources and tools
Here is my sketch file which you can use as a template whilst creating adaptive icons. It includes the icon grid, keyline shapes and safe area. It’s implemented as a symbol so changing the master element will update the copies giving you a preview with different masks applied.

I’ve also uploaded an Adobe Illustrator template if that’s more your thing.
Additionally check out these other resources i’ve come across:
Adaptive Icon Playground
In developing adaptive icons, I’ve come to appreciate that many of the subtleties come from the interaction of the foreground and background elements when motion effects are applied. This is still something of an open question as we are yet to see how device and launcher makers will implement this. To help investigate this space, I’ve created a small test app to help you evaluate it whilst creating your icon:

The app displays all applications installed on your device with adaptive icons. Scrolling the grid applies parallax effects to the icons and touching an icon applies a scale effect. You can configure the strength of the effects and change the mask applied to all icons. Hopefully this tool helps you to envisage how your icon will appear and may move on different devices.
You can download an APK or checkout the source on github:
Источник
MakeAppIcon on your mac.
Faster. Smarter. More organized than ever.
MakeAppIcon powered by Oursky
Generate App iOS and Android Icons of all sizes with a click!
Thanks for interested in MakeAppIcon Desktop!
It will be available very soon.
Best app icon resizer for
mobile developers.
Optimized for both for Xcode and Android Studio.
MakeAppIcon Desktop for Mac and Windows
MakeAppIcon.com has always been the best icon resizer for mobile app developers and designers.
With the desktop app, you can:
- Save upload time to MakeAppIcon Server
- Generate Android and iOS icons in bulk
- Preview icons
- Simple yet easy to use interface
- *30-day money back guarantee
Also available on App Store
*Priced at $14.99 because Apple takes commission
This icon resizer optimizes your icon designs into all formats needed for iOS and Android mobile app!
Generate icons that are required in an iOS and Android app
Quick preview of your app icon on the devices
Auto enhancement for the smaller icons!
- About
- About MakeAppIcon
- Desktop App
- Other Tools
- Privacy Statement
- Contact Us
- Apple Developers
- Use icons for iOS app
- OS App Icons for macOS
- App Icons for watchOS
- App Icons for iMessage
- tvOS App Icons
- Import into XCode
- Android Developers
- Use icons for Android
- Import into Android Studio
- Web & API
- Use icons for mobile web app
- API
Proudly powered by
Design and build award-winning apps
Besides MakeAppIcon,
We also build your web / mobile app with passion.
Drop us a line and we will get in touch with you soon.
Источник
How to Create Icons for Your Android App

You’ve finished your great new app, it runs smoothly and you can’t wait to tell everyone about it.
But wait, there’s something very important missing. If you are not a designer and get nightmares from staring at too many pixels, you’ve probably left working on the launch icon to the end of the process. This is perfectly fine, you wouldn’t want to waste your time if your app will never see the light of the day, right?
We are going to have a look at creating your own launch icon for Android apps and getting them ready for use. We will also have a look at some various resources which will be helpful in the creation process.
Preparation
Before we begin you should check out the iconography reference guides on the Android Developers site.
Note: The link above is the style guide for Android 4.4 KitKat. If you want to follow Material Design (as we will do in this tutorial) you will have to dig a bit deeper, as Android L and Material Design are not finished yet. I will point out changes throughout the tutorial. You can find the Material Design reference and general philosophy here.
Android L generally has a different icon style than KitKat. Material Design is more simplified and uses contrast rich colors for its elements. You may notice the fake shadow implemented in the icons and other elements, which is unique to Material Design, but seen before (for example the Google Admin launch icon, released last year).
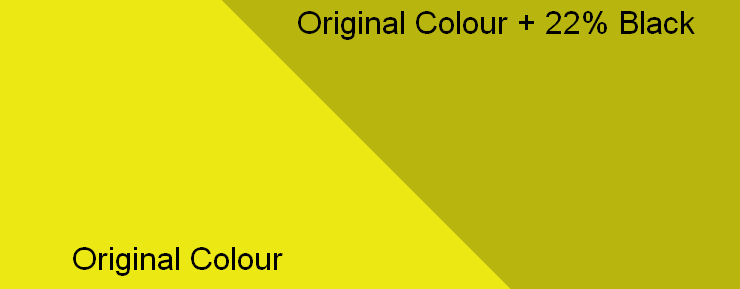
There seems to be no general rules for implementing this kind of shadow, but experiment yourself and make your own mind up. The shadow is a shape filled with black and a transparency of 22%, which covers the main color. For example in the Google Admin app icon you can see 2 main colors, but when the shadow is added, 2 additional colors are created. The shadow is usually 45Лљ diagonally aligned.
Let’s try to use the same concept for a custom icon.
Creating Your Custom Icon
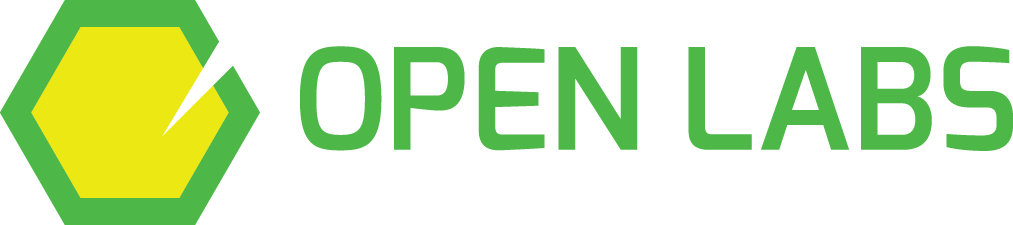
I decided to use a special icon (you will see why later), specifically the logo for Open Labs Albania, a great open source community in Albania. The logo looks like this:
We will not include the text, only the actual symbol. Then we play with the remaining logo slightly until we get something we like the look of.
The problem with many logos, as here, is that they might not work well as monochrome logos. With the Open Labs logo it’s mostly due to 3 colors colliding in the same place (technically 2, but the lack of a 3rd and it’s blank space counts), so the shape would be not recognizable.
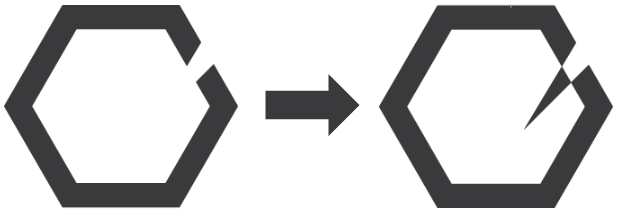
We can make use of negative space and use the other half of the cut color (and may remind you of Pink Floyd). This monochrome logo is perfect for notification bar icons or other occasions where monochrome icons are needed.
A different approach could be adding strokes to the shapes we can’t convey with the same monochrome color. Instead of filling it with a color it can have a set amount of stroke width. In our case though, it wouldn’t work well with the Open Labs logo.
That said, I tweaked the logo in Illustrator and added the shadow where I thought it would work well.
After a quick overhaul, this is the result:

As you can see, you will need different approaches depending on the style you choose.
In our case, I made a version with minimal changes, only adding a slight shadow to the frame. The second and third variations are pure Material Design, as the icons have a circle and a box with rounded corners as containers respectively.
These shapes would either have a 3D effect or a gradient element in KitKat or earlier Android versions, but these icons will look great on non Android L devices to.
Pick what suits you best and export the icon to a 512Г—512 PNG (the largest resolution available for icons on Android).
Take a look at the great Android Asset studio by Roman Nurik where you can export your finished icons and much more.
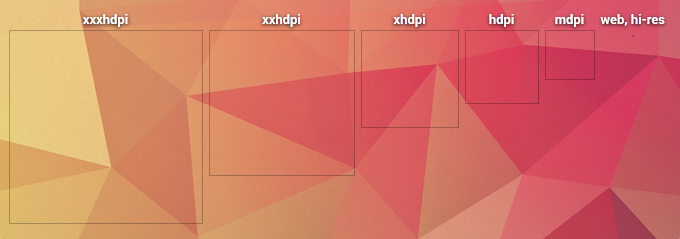
You can also accomplish this via the help of the launch icon generator, which will automatically export the icons for various DPIs.
Get Real? Get Material
It’s true that we still need to wait a few months until we can enjoy the full power of Material Design and Android L, but there is no harm in being prepared and be one of the first to have your app ready for Material Design.
If you get overwhelmed by all the rules and guidelines of the style guide, start small and create your icons in Material Design style as we did. You will eventually get the hang of it. Let us know your results!
Источник


