- Пишем первое приложение для Android
- Установка необходимых программ и утилит
- Запуск виртуального устройства
- Список устройств
- Создание проекта
- Структура проекта
- Первые строки
- Square.java
- Player.java
- Game.java
- Определение победителя
- WinnerCheckerHorizontal.java
- WinnerCheckerVertical.java
- WinnerCheckerDiagonalLeft.java
- WinnerCheckerDiagonalRight.java
- Видео готового приложения
- Tutorial: Create your first Android application
- Create a new Android project
- Create a project
- Configure project JDK
- Explore the project structure
- Edit the UI layout
- Open the UI designer
- Add image to the UI layout
- Add text to the UI layout
- Add style to text
- Make the application interactive
- Build and run the application
- Configure Android virtual device
- Run the application
Пишем первое приложение для Android
В любом деле самое сложное — это начало. Часто бывает тяжело войти в контекст, с чем столкнулся и я, решив разработать свое первое Android-приложение. Настоящая статья для тех, кто хочет начать, но не знает с чего.
Статья затронет весь цикл разработки приложения. Вместе мы напишем простенькую игру “Крестики-Нолики” с одним экраном (в ОС Android это называется Activity).
Отсутствие опыта разработки на языке Java не должно стать препятствием в освоении Android. Так, в примерах не будут использоваться специфичные для Java конструкции (или они будет минимизированы на столько, на сколько это возможно). Если Вы пишете, например, на PHP и знакомы с основополагающими принципами в разработке ПО, эта статья будет вам наиболее полезна. В свою очередь так как, я не являюсь экспертом по разработке на Java, можно предположить, что исходный код не претендует на лейбл “лучшие практики разработки на Java”.
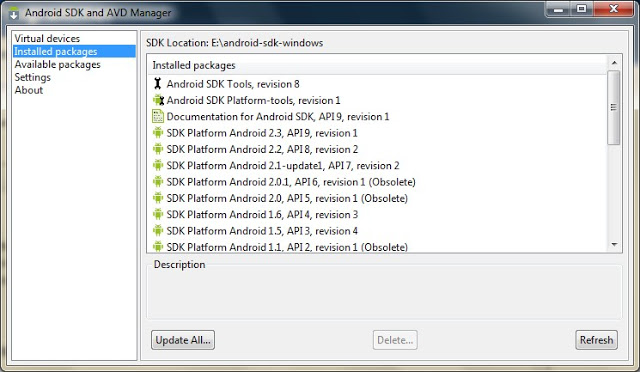
Установка необходимых программ и утилит
Перечислю необходимые инструменты. Их 3:
- JDK — набор для разработки на языке Java;
- Android SDK and AVD Manager — набор утилит для разработки + эмулятор;
- IDE c поддержкой разработки для Android:
- Eclipse + ADT plugin;
- IntelliJ IDEA Community Edition;
- Netbeans + nbandroid plugin;
Утилиты устанавливаются в определенном выше порядке. Ставить все перечисленные IDE смысла нет (разве только если Вы испытываете затруднения с выбором подходящей). Я использую IntelliJ IDEA Community Edition, одну из самых развитых на данный момент IDE для Java.
Запуск виртуального устройства
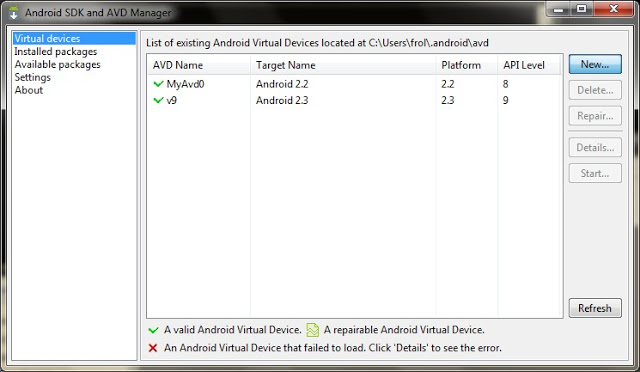
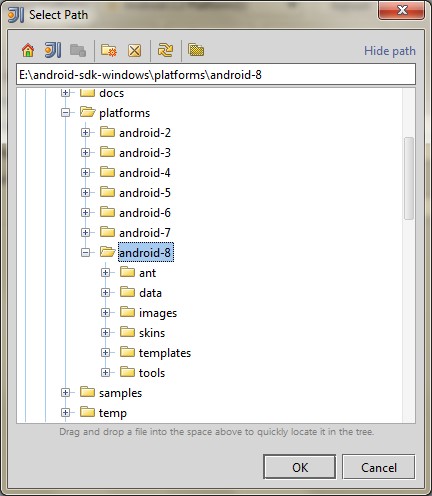
Запустив AVD Manager и установив дополнительные пакеты (SDK различных версий), можно приступить к созданию виртуального устройства с необходимыми параметрами. Разобраться в интерфейсе не должно составить труда.
Список устройств
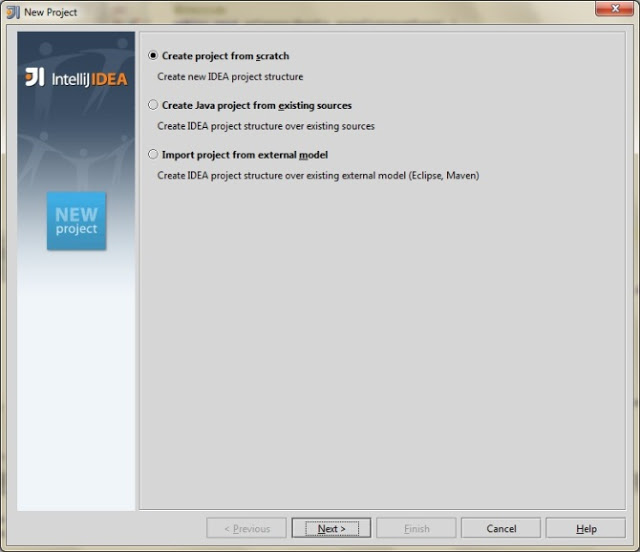
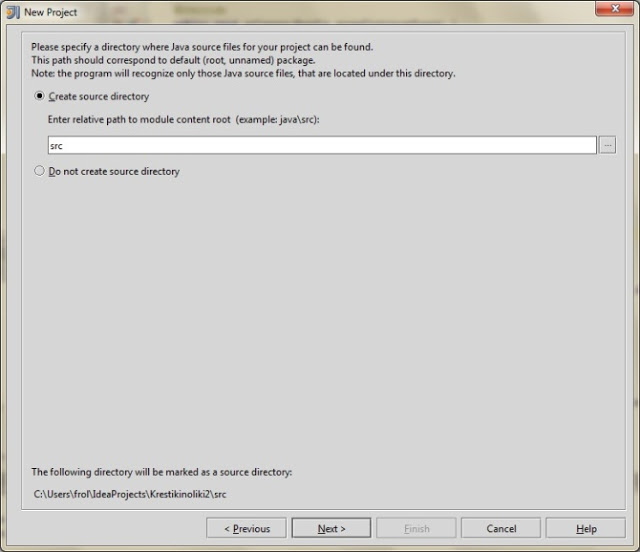
Создание проекта
Мне всегда не терпится приступить к работе, минимизируя подготовительные мероприятия, к которым относится создание проекта в IDE, особенно, когда проект учебный и на продакшн не претендует.
Итак, File->New Project:
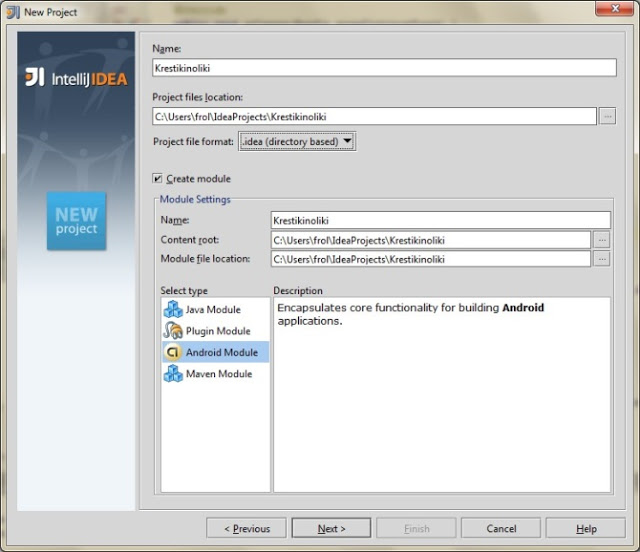


По нажатию кнопки F6 проект соберется, откомпилируется и запустится на виртуальном девайсе.
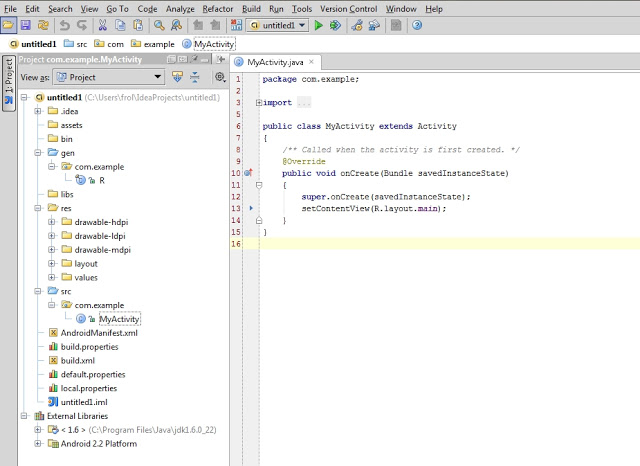
Структура проекта
На предыдущем скриншоте видна структура проекта. Так как в этой статье мы преследуем сугубо практические цели, заострим внимание лишь на тех папках, которые будем использовать в процессе работы. Это следующие каталоги: gen, res и src.
В папке gen находятся файлы, которые генерируются автоматически при сборке проекта. Вручную их менять нельзя.
Папка res предназначена для хранения ресурсов, таких как картинки, тексты (в том числе переводы), значения по-умолчанию, макеты (layouts).
src — это папка в которой будет происходить основная часть работы, ибо тут хранятся файлы с исходными текстами нашей программы.
Первые строки
Как только создается Activity (экран приложения), вызывается метод onCreate(). IDE заполнила его 2 строчками:
Метод setContentView (равносильно this.setContentView) устанавливает xml-макет для текущего экрана. Далее xml-макеты будем называть «layout», а экраны — «Activity». Layout в приложении будет следующий:
Для этого приложения идеально подойдет TableLayout. Id можно присвоить любому ресурсу. В данном случае, TableLayout присвоен При помощи метода findViewById() можно получить доступ к виду:
Теперь необходимо реализовать метод buildGameField(). Для этого требуется сгенерировать поле в виде матрицы. Этим будет заниматься класс Game. Сначала нужно создать класс Square для ячеек и класс Player, объекты которого будут заполнять эти ячейки.
Square.java
Player.java
Все классы нашего приложения находятся в папке src.
Game.java
Инициализация Game в конструкторе KrestikinolikiActivity.
Метод buildGameField() класса KrestikinolikiActivity. Он динамически добавляет строки и колонки в таблицу (игровое поле):
В строке 8 создается объект, реализующий интерфейс View.OnClickListener. Создадим вложенный класс Listener. Он будет виден только из KrestikinolikiActivity.
Осталось реализовать логику игры.
Определение победителя
К. О. подсказывает, что в крестики-нолики выирывает тот, кто выстроет X или O в линию длиной, равной длине поля по-вертикали, или по-горизонтали, или по-диагонали. Первая мысль, которая приходит в голову — это написать методы для каждого случая. Думаю, в этом случае хорошо подойдет паттерн Chain of Responsobility. Определим интерфейс
Так как Game наделен обязанностью выявлять победителя, он реализует этот интерфейс. Настало время создать виртуальных «лайнсменов», каждый из которых будет проверять свою сторону. Все они реализует интерфейс WinnerCheckerInterface.
WinnerCheckerHorizontal.java
WinnerCheckerVertical.java
WinnerCheckerDiagonalLeft.java
WinnerCheckerDiagonalRight.java
Проинициализируем их в конструкторе Game:
Победителя проверяем после каждого хода. Добавим кода в метод onClick() класса Listener
Метод gameOver() реализован в 2-х вариантах:
Для Java, gameOver(Player player) и gameOver() — разные методы. Воспользовавшись Builder’ом Toast.makeText, можно быстро создать и показать уведомление. refresh() обновляет состояние поля:
Готово! Надеюсь, эта статья помогла Вам освоиться в мире разработки под OS Android. Благодарю за внимание!
Видео готового приложения
PS: статья была опубликована по просьбе комментаторов этого поста.
Источник
Tutorial: Create your first Android application
In this tutorial, we will create a simple yet fully-functional Android application that counts how many times you tap a droid image. After that, we will run it on an Android virtual device.
This tutorial covers a simple scenario to help you get started with Android development in IntelliJ IDEA. For comprehensive how-to guides and reference documentation, visit the Android Studio user guide.
Create a new Android project
Create a project
Launch IntelliJ IDEA. On the Welcome screen, click New Project . If you already have a project open, from the main menu select File | New | Project .
In the New Project wizard, select Android on the left.
If you don’t have the Android SDK configured, IntelliJ IDEA will detect this and prompt you to download it:

Select the components you want to install. If you haven’t installed the Android SDK tools before, all the required components will be preselected.
Optionally, modify the location for the Android SDK, and click Next :

Review the installation settings and click Finish to start the download:

When all components have been downloaded and installed, click Finish :

Select Empty Activity as the project template:

On the last step, type HelloDroid as the project name and select Java as the language:

Configure project JDK
Now that we have created our first project, let’s make sure it uses the correct JDK.
From the main menu, choose File | Project Structure and go to Platform Settings | SDKs . Select the Android SDK and make sure that the correct Java version is selected in the Java SDK field.

We recommend that you use Java SE 11 or Java SE 8 for Android development in IntelliJ IDEA. If you don’t have the correct JDK installed, in the Project Structure dialog, click the Add New SDK button on the toolbar and select Download JDK :

In the Settings/Preferences dialog ( Ctrl+Alt+S ), go to Build, Execution, Deployment | Build Tools | Gradle and select the correct Java version (8.x or 11.x).

Explore the project structure
For Android projects, there’s a dedicated view in the IntelliJ IDEA Project tool window: click Project in the top-left corner and select Android .

This view doesn’t reflect the actual hierarchy of files on your disk — it is organized by modules and file types to ease navigation between source files of your project. Note that it hides project files and directories that you don’t commonly use (to see them, choose the Project view):

The app folder consists of the following subfolders:
manifests : contains the AndroidManifest.xml file, which holds general information about the application processed by the Android operating system. Among other things, it declares the package name that serves as a unique identifier for your application and the minimum version of the Android SDK required for the device where the application will run. It also declares the entry points of the application, along with permissions the application requires. For details, see App Manifest Overview.
java : contains the Java source code files grouped by packages, including JUnit tests.
res : contains all non-code resources, such as XML layout files, UI strings, images, and so on.
The Gradle Scripts folder contains all the project’s build-related configuration files.
Edit the UI layout
At this stage, the user interface of our sample HelloDroid application is based on a very simple layout defined in the activity_main.xml file located in the res/layout folder.
Let us modify the auto-generated user interface and see how the application layout is rendered without running it on any physical or virtual device.
Open the UI designer
In the Android project view, go to the app/res/layout and double-click the activity_main.xml file to open it. Note that since IntelliJ IDEA downloads the components required to render layout files, opening it may take a few seconds.
If the UI designer fails to open, and you get the Design editor is unavailable until after a successful project sync error, press Ctrl+Shift+A , search for the Sync Project with Gradle Files action, and wait for the sync to finish.
By default, IntelliJ IDEA provides a graphical view of the layout file, but you can also switch to the source code view, or view the text and the graphical representation side by side — use the icons in the top-right corner of the UI Designer pane:

This pane shows a rectangular canvas that is synchronized with the layout definition and with the Component Tree , so any changes to the canvas are reflected there accordingly.
Normally, layout files have a layout manager as their root element (for example, LinearLayout , FrameLayout , ConstraintLayout , and so on). In our example, the root element in activity_main.xml is ConstraintLayout that is responsible for positioning the elements of the application interface. For the purpose of this tutorial, we are not going to modify it, but you can learn more about designing interfaces from Build a Responsive UI with ConstraintLayout.
To eliminate distraction and only see how your layout is represented, click the Select Design Surface icon in the top-left corner and choose Design :

Now let’s delete the existing text element. To do this, right-click the text label and choose Delete from the context menu.
Now the UI layout looks like the following, and we are ready to start designing the layout of our application:

Add image to the UI layout
Now let’s add a droid image to our layout.
In the Android project view, expand the app/res folder and drag the image you want to use into the drawable folder. For this tutorial, we’ve downloaded a Hello Droid image from the Internet and saved it with the dimensions 50×50 px.
Return to the activity_main.xml file opened in the Designer pane, from the Palette choose the ImageView element, and drag it to the canvas to the position where you want the image to appear.
In the Pick a Resource dialog that opens, choose the resource file you’ve added and click OK :

Next, we need to modify the default id of the imageView element to be able to reference it later.
Select it in the Component Tree and in the Attributes pane on the right, enter the new identifier in the id field: droidImage . Press Enter ; in the dialog that opens, confirm that you want to update all references to the image element id:

Add text to the UI layout
Now let’s add some text to our layout.
In the Palette pane, pick the TextView element and drag it to the canvas below the image.
The widget displays some default text: TextView . To change it and link it to a string, we need to create a new text resource.
Select the textView element in the Component Tree on the left. In the Attributes pane on the right, click the Pick a Resource icon next to the text attribute:

In the dialog that opens, click the Add resource to the module icon in the top left corner and choose String Value .
In the New String Value dialog, enter the resource name ( welcome_text ) and the resource value ( Hello! I’m a droid. ):

Click OK to save the value and then click OK in the Pick a Resource dialog.
Now let’s modify the textView element id the same way we did with imageView .
Select textView in the Component Tree on the left, and in the Attributes pane set the id to a new value: clickCounter .
Add style to text
Now let’s add some style to the text to make it look more appealing.
Pad the text a bit: locate the padding attribute, and set all values to 10dp :

Change the font color: locate the textColor attribute, and click the Pick a Resource icon next to it.
In the dialog that opens, click the Add resource to the module icon in the top left corner and choose Color Value .
Enter the resource name ( text_color ) and the value ( #9C27B0 ):

Change the font size: locate the TextSize property and click the Pick a Resource icon next to it.
In the dialog that opens, click the Add resource to the module icon in the top left corner and choose Dimension Value .
Enter the resource name ( text_size ) and the value ( 24sp ):

As a result, your user interface now looks like the following:

To check what your application UI looks like in landscape orientation, click the Orientation for Preview icon on the Designer toolbar and choose Landscape :

To preview what your layout looks like on different devices, select another device from the device list:

Make the application interactive
Although our sample application is fully functional at this point, it does not support any form of interaction yet. Let’s modify it to support tap events.
In the Android project view, locate the MainActivity file under app\java\com.example.hellodroid and double-click to open it.
MainActivity is not a very meaningful class name, so let’s rename it.
Right-click this file in the Android project view and choose Refactor | Rename from the context menu or press Shift+F6 . In the dialog that opens, change the class name HelloDroidActivity and click Refactor :

All references to this class will be updated automatically, and your application’s source code will look as follows:

Replace the code in HelloDroid.java with the following:
Note that the identifiers we’ve used in the source code correspond to those we’ve set in our layout definition file, otherwise our code would not work.
Build and run the application
Now let’s build our application and run it on a virtual device.
Configure Android virtual device
First of all, to be able to run our application, we need to configure a virtual device.
In the main IntelliJ IDEA toolbar, click the devices list and choose AVD Manager :

On the first step of the wizard, click Create Virtual Device :

On the next step, we need to select the hardware that our virtual device will emulate.
Let’s select Phone on the left, and choose Pixel 2 as the target device:

Choose the system image you want to mimic on the virtual device, that is the OS version, the Android API level, the application binary interface (ABI), and the target SDK version:

Click the Download link next to the system image you want to mimic on the virtual device. For this tutorial, we’ve chosen to download the R system image.
In the License Agreement dialog that opens, read the license agreement and accept it, then click Next and wait for the download to finish. When the system image has been downloaded, select it and click Next in the System Image step of the wizard.
On the last step, you can modify your virtual device name and select the startup size and orientation of the screen. Choose the portrait layout and click Finish :

The newly configured device appears in the Android Virtual Device Manager .
Run the application
On the main IntelliJ IDEA toolbar, make sure the automatically created Run configuration and the virtual device we’ve just configured are selected and click :

The Android emulator will launch after the build has successfully finished, with our application started:

Click the droid image and see how the application processes the tap events, counts them and returns the corresponding message:

For information on how to run the app on a hardware device, refer to Android Studio: Run apps on a hardware device.
Источник


