- Create a Custom Keyboard on Android
- Premium Option
- 1. Prerequisites
- 2. Create a New Project
- 3. Edit the Manifest
- 4. Create method.xml
- 5. Edit strings.xml
- 6. Define the Keyboard Layout
- 6. Define the Keyboard Keys
- 7. Create a Service Class
- 8. Testing the Keyboard
- Как написать свою клавиатуру для Android
- Кастомизируем раскладку внешней клавиатуры на Android без root
- Теория
- Key Layout файлы
- Key Character Map файлы
- Дополнительные клавиатурные раскладки
- Практика
- Описание проекта
- Кастомизация файла раскладки
- Добавляем раскладку с другим языком
- Установка
- Заключение
Create a Custom Keyboard on Android
Most Android devices don’t have a physical keyboard. Instead, they rely on a virtual or soft keyboard to accept user input. If you’re into Android personalization, knowing how to build a custom, soft keyboard can take your hobby to a whole new level.
Using the Android SDK, you can quickly create a soft keyboard with surprisingly few lines of code, because the SDK takes care of a lot of the low level tasks, such as recognizing key touches, drawing the keyboard, and establishing connections between the keyboard and input fields.
In this tutorial, you will learn how to create a fully functional soft keyboard that can serve as your Android device’s default keyboard.
Premium Option
If you’re in a hurry, check out Android Keyboard Themes, a ready-to-use solution from Envato Market.
The app gives you the flexibility to choose one of the 22 built-in keyboard themes or create your own custom theme.
Or you could hire a freelancer on Envato Studio. Just browse through our Mobile & Apps section and you’re sure to find an expert who can help you.

 Mobile & app developers on Envato Studio
If you prefer to build your own, read on to find out how.
1. Prerequisites
You will need the Eclipse ADT Bundle installed. You can download it from the Android Developer website.
2. Create a New Project
Fire up Eclipse and create a new Android application. Call this application, SimpleKeyboard. Make sure you choose a unique package name. Set the minimum required SDK to Android 2.2 and set the target SDK to Android 4.4.


This app will have no activities so deselect Create Activity and click Finish.


3. Edit the Manifest
A soft keyboard is considered as an Input Method Editor (IME) by the Android operating system. An IME is declared as a Service in AndroidManifest.xml that uses the BIND_INPUT_METHOD permission, and responds to the action android.view.InputMethod .
Add the following lines to the application tag of the manifest:
4. Create method.xml
The service tag in the manifest file containes a meta-data tag that references an XML file named method.xml. Without this file, the Android operating system won’t recognize our Service as a valid IME service. The file contains details about the input method and its subtypes. For our keyboard, we define a single subtype for the en_US locale. Create the directory res/xml if it doesn’t exist, and add the file method.xml to it. The contents of the file should be:
5. Edit strings.xml
The strings that this app uses are defined in the res/values/strings.xml file. We’re going to need three strings:
- the name of the app
- the label of the IME
- the label of the IME’s subtype
Update your strings.xml so that it has the following contents:
6. Define the Keyboard Layout
The layout of our keyboard contains only a KeyboardView . The layout_alignParentBottom attribute is set to true so that keyboard appears at the bottom of the screen.
Create a file named res/layout/keyboard.xml and replace its contents with the following:
The keyPreviewLayout is the layout of the short-lived pop-up that shows up whenever a key on the keyboard is pressed. It contains a single TextView . Create a file named res/layout/preview.xml and add the following to it:
6. Define the Keyboard Keys
The details of the keyboard keys and their positions are specified in an XML file. Every key has the following attributes:
- keyLabel : This attribute contains the text that is displayed on the key.
- codes : This attribute contains the unicode values of the characters that the key represents.
For example, to define a key for the letter A, the codes attribute should have the value 97 and the keyLabel attribute should be set to A.
If more than one code is associated with a key, then the character that the key represents will depend on the number of taps the key receives. For example, if a key has the codes 63, 33, and 58:
- a single tap on the key results in the character ?
- two taps in quick succession results in the character !
- three taps in quick succession results in the character :
A key can also have a few optional attributes:
- keyEdgeFlags : This attribute can take the value left or right . This attribute is usually added to the leftmost and rightmost keys of a row.
- keyWidth : This attribute defines the width of a key. It’s usually defined as a percentage value.
- isRepeatable : If this attribute is set to true , long-pressing the key will repeat the action of the key multiple times. It is usually set to true for the delete and spacebar keys.
The keys of a keyboard are grouped as rows. It’s good practice to limit the number of keys on a row to a maximum of ten, with each key having a width equal to 10% of the keyboard. The height of the keys is set to 60dp in this tutorial. This value can be adjusted, but values less than 48dp are not recommended. Our keyboard will have five rows of keys.
We can now go ahead and design the keyboard. Create a new file named res/xml/qwerty.xml and replace its contents with the following:
You may have noticed that some keys have negative values for the codes attribute. Negative values are equal to predefined constants in the Keyboard class. For example, the value -5 is equal to the value of Keyboard.KEYCODE_DELETE .
7. Create a Service Class
Create a new Java class and call it SimpleIME.java. The class should extend InputMethodService class and implement the OnKeyboardActionListener interface. The OnKeyboardActionListener interface contains the methods that are called when keys of the soft keyboard are tapped or pressed.
The SimpleIME class should have three member variables:
- a KeyboardView referencing the view defined in the layout
- a Keyboard instance that is assigned to the KeyboardView
- a boolean telling us if the caps lock is enabled
After declaring these variables and adding the methods of the OnKeyboardActionListener interface, the SimpleIME class should look like this:
When the keyboard is created, the onCreateInputView method is called. All the member variables of the Service can be initialized here. Update the implementation of the onCreateInputView method as shown below:
Next, we create a method that plays a sound when a key is pressed. We use the AudioManager class to play the sounds. The Android SDK includes a few default sound effects for key presses and those are used in the playClick method.
Finally, update the onKey method so that our keyboard app can communicate with input fields (usually EditText views) of other applications.
The getCurrentInputConnection method is used to get a connection to the input field of another application. Once we have the connection, we can use the following methods:
- commitText to add one or more characters to the input field
- deleteSurroundingText to delete one or more characters of the input field
- sendKeyEvent to send events, like KEYCODE_ENTER , to the external application
Whenever a user presses a key on the soft keyboard, the onKey method is called with the unicode value of the key as one of its parameters. Based on this value, the keyboard performs one of the following actions:
- If the code is KEYCODE_DELETE , one character to the left of the cursor is deleted using the deleteSurroundingText method.
- If the code is KEYCODE_DONE , a KEYCODE_ENTER key event is fired.
- If the code is KEYCODE_SHIFT , the value of the caps variable is changed and the shift state of the keyboard is updated using the setShifted method. The keyboard needs to be redrawn when the state changes so that the labels of the keys are updated. The invalidateAllKeys method is used to redraw all keys.
- For all other codes, the code is simply converted into a character and sent to the input field. If the code represents a letter of the alphabet and the caps variable is set to true , then the character is converted to uppercase.
Update the onKey method so that it looks like this:
8. Testing the Keyboard
The soft keyboard is now ready to be tested. Compile and run it on an Android device. This app doesn’t have an Activity , which means that it won’t show up in the launcher. To use it, it should first be activated in the device’s Settings.


After activating Simple IME, open any app that allows text input (for example, any messaging app) and click on one of its input fields. You should see a keyboard icon appear in the notifications area. Depending on your device, you can either click on that icon or drag the notification bar down and select Simple IME as the input method. You should now be able to type using your new keyboard.
Источник
Как написать свою клавиатуру для Android
Здравствуйте. В данной статье я постараюсь рассказать и показать основные моменты написания собственной клавиатуры для Android’а. Статья предназначена для разработчиков, которые с этим не сталкивались, но имеют опыт знакомства с Android’ом.
Сразу оговорюсь, что мнение и код автора не являются истинной в последней инстанции, а ваши предложения и критика лишь приветствуются. И если не охота все читать, ссылка на исходники в конце статьи.
Для начала необходимо создать пустой Android проект без Activity. После этого приступим к подготовке .xml файлов, которые будут описывать Android’у нашу клавиатуру.
Базовый layout-файл, keyboard.xml
Содержит в себе View класс Android’а под названием KeyboardView и описывает внешний вид клавиатуры.
- android: keyPreviewHeight — задает высоту элемента подсказки, на котором отображается текущая нажатая клавиша.
- android:keyPreviewLayout — указываем layout-файл, который описывает внешний вид preview’шки.
Код preview:
Важный момент, атрибут background является обязательным, если его не указать, то при каждом нажатии клавиши ваша клавиатура будет падать.
Итак, мы подготовили 2 .xml файла, которые описывают внешний вид, теперь настал черед описать саму раскладку клавиатуры. Назовем этот файл keys_definition_ru.xml и находится он будет в xml ресурсах проекта. Здесь будет представлен лишь его кусок, так как файл достаточно большой.
Все атрибуты описывать не будем, лишь «не очевидные».
- android:horizontalGap — горизонтальный отступ между клавишами
- android: verticalGap — вертикальный отступ
- android:codes — код нужного символа в html utf-8 (и не только utf-8, подробнее в оф. документации)
- android:keyEdgeFlags — атрибут может применять значение left или right. Эти атрибуты добавляются клавишам, которые расположены в самом левом крае или самом правом крае клавиатуры
- android:isRepeatable — повторять действие клавиши при долгом нажатии (обычно используется на пробеле или backspace)
Заключительный файл — описание локализаций (подтипов инпута):
InputMethodService — сервис клавиатуры
Теперь, после того как мы создали все необходимые xml файлы, приступаем к описанию сервиса, который будет слушать события InputMethod.
Для этого создадим сервис, наследуясь от InputMethodService и сразу реализуем интерфейс KeyboardView.OnKeyboardActionListener. В итоге у вас получиться набор методов, которые вы можете переопределить и наполнить необходимой функциональностью, которые позволяют широко кастомизировать вашу клавиатуру. Но здесь я приведу лишь примеры базовых моментов.
Одним из методов жизненного цикла InputMethodService является onCreateInputView внутри которого мы создаем View клавиатуры и привязываем к ней необходимые листенеры.
Событие onKey срабатывает между onPress и onRelease, на вход им подается код нажатой клавиши.
Итак, все готово… почти, осталось добавить наш сервис в манифест.
Поздравляю, вы написали свою первую клавиатуру!
Источник
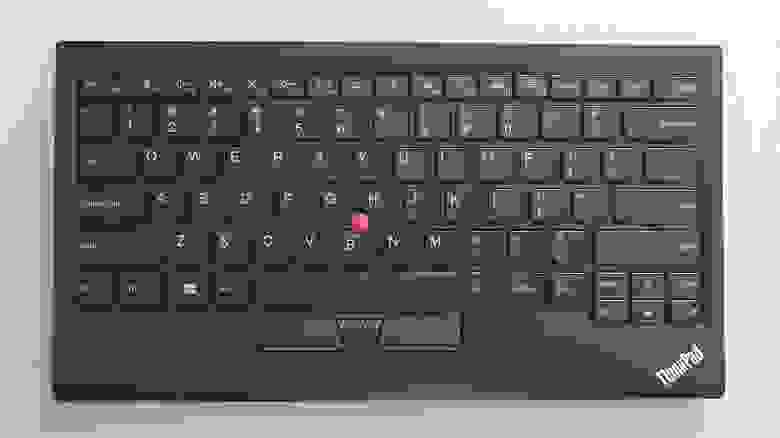
Кастомизируем раскладку внешней клавиатуры на Android без root
Мне нравится раскладка клавиатур на Mac: Cmd(Ctrl) под большим пальцем и возможность, без шаманства, прямо в настройках изменить поведение CapsLock. Такого же результата легко добиться в Linux с помощью setxkbmap в консоли или, например, gnome-tweak-tool в UI. Но что делать, если клавиатура подключается к Android?
В Android существует несколько способов кастомизировать внешнюю клавиатуру:
- Установка сторонней клавиатуры. Например, External Keyboard Helper.
- Правка/добавление kl или kcm файлов (требуется root). Как, например, в этом посте.
- Установка приложения, которое добавляет дополнительные клавиатурные раскладки.
Устанавливать стороннюю клавиатуру не хочется. Рутовать телефон — тоже. Остаётся третий вариант.
Теория
Вкратце пробежимся по основным понятиям со ссылками на документацию.
Key Layout файлы
Key layout (.kl) файлы отображают линуксовые коды клавиш (Linux Key Code), т.е. код, который производит конкретная клавиша на клавиатуре, на андродовские клавиши (Android Key), т.е. TAB, ENTER или просто буква F. Отображение по-умолчанию можно посмотреть здесь. Узнать, какая клавиша на клавиатуре какой код производит, можно, например, с помощью Gamepad Tester.
Key Character Map файлы
Key Character Map (.kcm) файлы позволяют задать поведение для сочетания клавиш, а также нужны для добавления раскладок, отличных от English(US).
Дополнительные клавиатурные раскладки
Начиная с версии 4.1 в Android стало возможным устанавливать вместе с приложением дополнительные раскладки клавиатуры. После установки раскладки доступны в Settings -> Language & input -> Physical keyboard . Минус этого подхода в том, что раскладки неизменяемы, и нет возможности кастомизировать их «на лету».
Практика
Вот что я хочу получить для моей клавиатуры:
- Esc вместо CapsLock.
- Поменять Ctrl/Win/Alt на Win/Alt/Ctrl слева и Alt/PrintScreen/Ctrl на Ctrl/Alt/Ctrl справа.
- Поменять переключение приложений с Alt+Tab на Ctrl+Tab.
- Скриншот на Ctrl+Shift+3.
- Переключение языков по Win+Space.
- Поддержка английской и русской раскладок.
Описание проекта
Т.к. мои вкусы весьма специфичны (Ты же хочешь Ctrl вместо CapsLock, мой дорогой любитель Vim?), а раскладки неизменяемы «на лету», я не предоставляю готовый apk-файл. Вместо этого создан custom-keyboard-layout — проект основа для кастомизации раскладки внешней клавиатуры на Android.
Клонируем проект к себе
Манифест приложения app/src/main/AndroidManifest.xml :
Приложение состоит из одного reciever . Забавно, что само наличие класса с заданным именем (в нашем случае InputDeviceReceiver ) не требуется — всё работает и без него, но имя мы задать обязаны. Этот reciever предоставляет список клавиатурных раскладок, хранящийся в app/src/main/res/xml/keyboard_layouts.xml :
В списке только одна раскладка — keyboard_layout_en_us .
Кастомизация файла раскладки
Файл раскладки app/src/main/res/raw/keyboard_layout_en_us.kcm состоит из одной строки, задающей тип раскладки:
Про этот тип ничего не сказано в документации, но опытным путём выяснено, что раскладка с таким типом по-умолчанию берёт значения из Generic.kcm. Т.е. мы уже получили английскую раскладку и всё что остаётся — это добавить наши правила.
Но сперва небольшое отступление про Key Layout файлы. Раскладки задаётся как kcm-файл, но для того чтобы поменять местами, например, Ctrl и Alt необходим kl-файл. Тут на помощь приходит ещё одна незадокументированная фича: с помощью команды map можно добавлять правила из kl-файла в kcm-файл.
Файл keyboard_layout_en_us.kcm с моими правилами:
К сожалению, у меня не получилось задать переключение языков по Win+Space — такое правило просто не срабатывало.
Добавляем раскладку с другим языком
Для добавления раскладки другого языка, отличного от English(US), нужно сперва составить kcm-файл с раскладкой этого языка, затем добавить к нему наши правила. Взять готовый файл для своего языка можно отсюда. Берём keyboard_layout_russian.kcm, кладём в app/src/main/res/raw/ и, соответственно, добавляем ещё одну раскладку в app/src/main/res/xml/keyboard_layouts.xml :
Не забываем добавить keyboard_layout_ru_label в app/src/main/res/values/strings.xml .
Теперь можно добавить наши правила, как в примере с английской раскладкой, но с небольшим изменением. В русской раскладке уже есть правило для ‘3’, поэтому нужно лишь изменить его, а не добавлять новое:
Состояние проекта после этой кастомизации можно посмотреть в ветке Vendor_17ef_Product_6048.
Установка
Собираем и устанавливаем наше приложение. Проще всего это сделать с помощью Android Studio следуя официальной документации.
Если всё сделано правильно, то в Settings -> Language & input -> Physical keyboard появятся наши раскладки, а в списке приложений — Custom Keyboard Layout .
Заключение
Кастомизация внешней клавиатуры без root возможна. Не все хотелки при этом достижимы: переключение языков по Win+Space так и не заработало, но это может быть проблемой прошивки.
Статья нарочно сделана краткой — все подробности можно найти по ссылкам.
Источник


