- How to Add and Customize Back Button of Action Bar in Android?
- Android Custom Toolbar In Kotlin | Toolbar Kotlin Example
- What is Android Toolbar
- Android custom Toolbar with Kotlin
- How to Change Background Color of Action Bar in Android?
- Kotlin Android – Change Background Color of Action Bar
- Change Background of Action Bar via themes.xml
- Step 1 – Open themes.xml
- Step 2 – Change colors
- Step 3 – Run
- Change Background of Action Bar via Kotlin Activity File
- Conclusion
- ActionBar in Android with Example
- Designing a Custom ActionBar
How to Add and Customize Back Button of Action Bar in Android?
The action bar (sometimes referred to as the app bar), if it exists for an activity, will be at the top of the activity’s content area, typically directly underneath the status bar. It is a menu bar that runs across the top of the activity screen in android. Android ActionBar can contain menu items that become visible when the user clicks the “menu” button. In general, an ActionBar composed of the following four components:
- App Icon: App branding logo or icon will be shown here
- View Control: A dedicated space to display the Application title. Also provides the option to switch between views by adding spinner or tabbed navigation
- Action Buttons: Major actions of the app could be added here
- Action Overflow: All unimportant action will be displayed as a menu
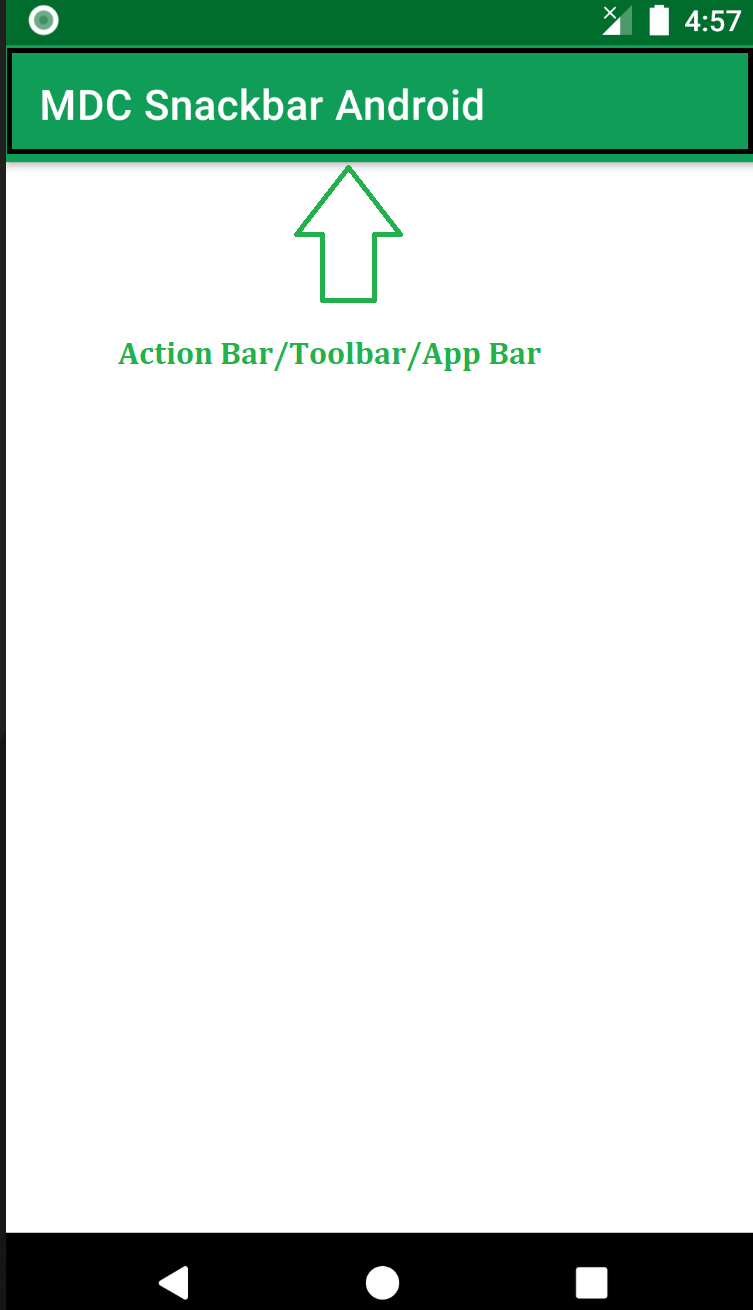
Below is a sample image to show where the Action Bar/Toolbar/App Bar is present on an android device.
Attention reader! Don’t stop learning now. Get hold of all the important Java Foundation and Collections concepts with the Fundamentals of Java and Java Collections Course at a student-friendly price and become industry ready. To complete your preparation from learning a language to DS Algo and many more, please refer Complete Interview Preparation Course.
The action bar is a primary toolbar inside an activity that can be used to display an activity title and other interactive items. One of the most used items is a Back Navigation Button. The back button is used to move backward from the previously visited screen by the user. Most Android devices have a dedicated back button still a back button on the action bar enhances the user experience.
Источник
Android Custom Toolbar In Kotlin | Toolbar Kotlin Example
In this custom Toolbar Android Kotlin Tutorial, I will tell you how to create a Toolbar for your Android applications. We will also learn how to add different features to the Toolbar. So, let’s create an Android custom Toolbar with Kotlin.
What is Android Toolbar
Toolbar Android is a ViewGroup that usually appears at the top of the application. It can have a menu icon, logo/title/navigation icon, etc. Toolbar first came with API 21 (Lollipop, Android 5.0). The Toolbar is the replacement of ActionBar which is deprecated now.
 Android Toolbar
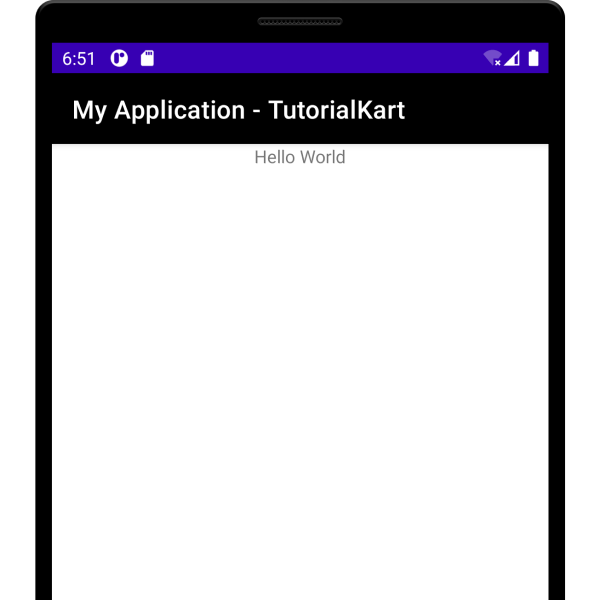
So, because of the DarkActionBar theme, you see a default Toolbar with the application name on the top.
We will change the theme from
After doing this, it will remove the default Toolbar of your application. Then, first, change the default Constraint Layout to a Relative Layout . Now to add a custom Toolbar we add a Toolbar widget in activity_main.xml.
After adding the above code you will see a transparent Toolbar with no Text or Color. So, we have to add more properties to style our Toolbar.
Android Toolbar Title: Add a title to the Toolbar
Android Toolbar Logo: Set Logo for the Toolbar
Toolbar Background Color: Change the background color of your Toolbar
Enter Subtitle below Main Title:
These are some attributes to make changes in the toolbar for Android. After all this, the final Toolbar will look like this:
Android custom Toolbar with Kotlin
Now, Let’s learn how to create a custom Toolbar programmatically. Since we have equivalent functions for our XML attributes and properties in Kotlin. So, in our MainActivity.kt file we will add some code.
First, come to your activity_main.xml file and add a Toolbar widget here with id my_toolbar and width and height should be wrap_content.
To add Title, Subtitle, and icon add the following code into your MainActivity.kt file.
The complete MainActivity.kt file look like this:
Note: Since I am using the latest version of Android with the androidx library. I have customized the Toolbar in a simple way. You can add as many styles/colors and appearances to your Toolbar from your styles.xml.
OUTPUT
Android Toolbar / Android Custom Toolbar In Kotlin
 Toolbar Android / Android Custom Toolbar In Kotlin
 Android Custom Toolbar In Kotlin
CONCLUSION
So, in this Toolbar Android Kotlin tutorial, I have explained some steps about the Kotlin toolbar on Android and because of that, I am pretty sure that this Android toolbar example is going to help beginners who want to learn Android toolbar menu example in android studio with Kotlin.
So, What is your favorite attribute to style your Toolbar?
Источник
How to Change Background Color of Action Bar in Android?
Kotlin Android – Change Background Color of Action Bar
To change background color of Action Bar in Kotlin Android, set the colorPrimary in themes.xml, with a required color. We can also dynamically change the background color of Action Bar programmatically by setting background drawable for support action bar with the required color drawable.
In this tutorial, we will go through the two processes: via themes.xml and via Kotlin file, to change the background color of Action Bar in Android Application.

Change Background of Action Bar via themes.xml
The following is a step by step process to change the background color of Action Bar in Android Application.
Step 1 – Open themes.xml
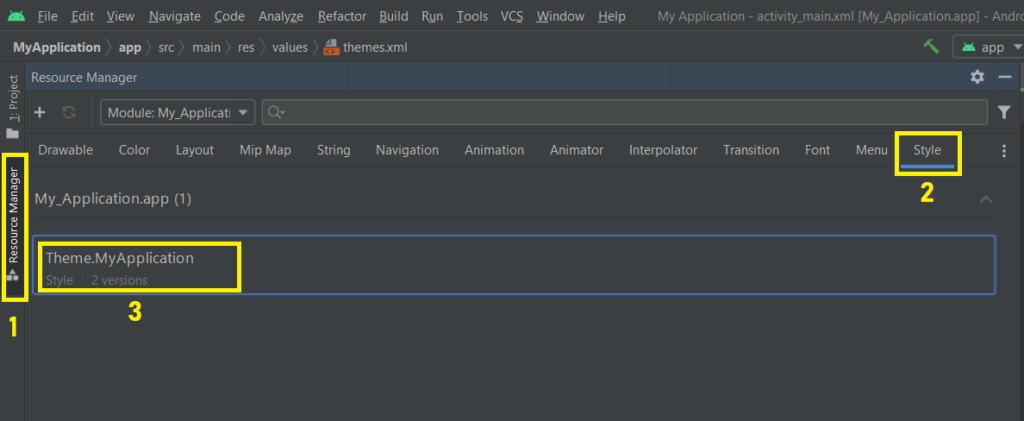
1. Click on Resource Manager present on the left side of the Android Studio window.
2. In this Resource Manager window, click on Style tab.
3. Double click on the theme for our application. In this case, Theme.MyApplication.
Theme items present for this theme will be displayed as shown in the following screenshot.
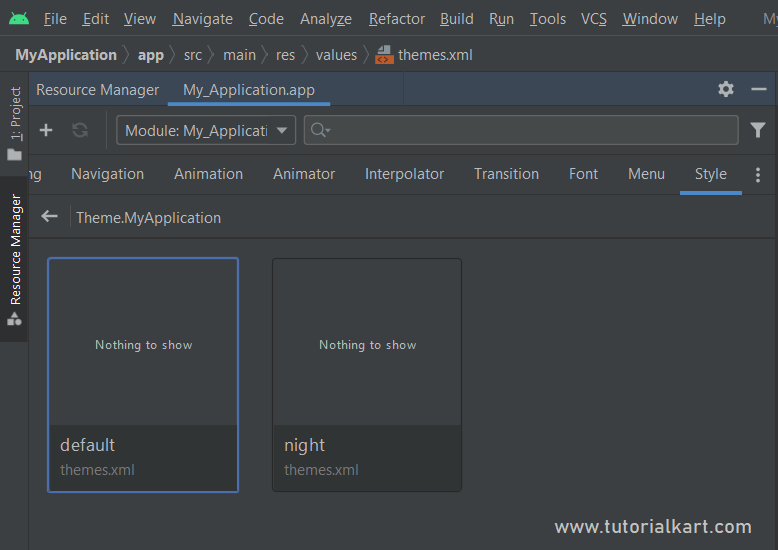
Double click on the default theme.
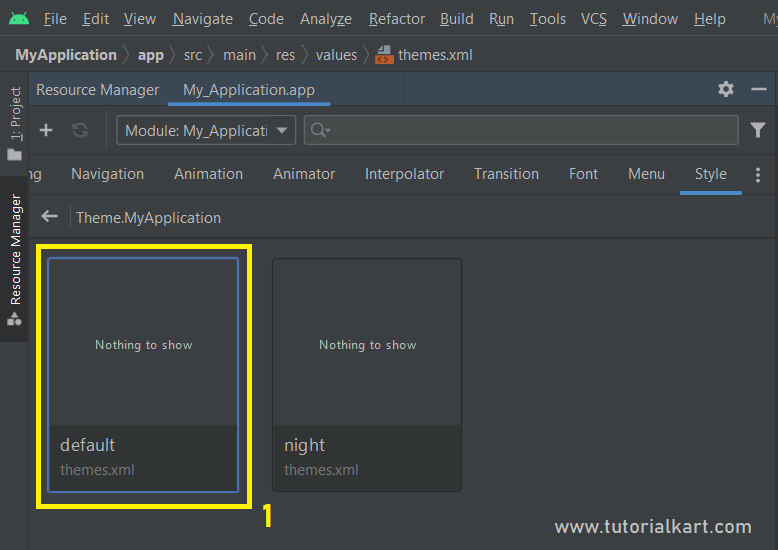
The contents of this style file, themes.xml, will be displayed in the editor.
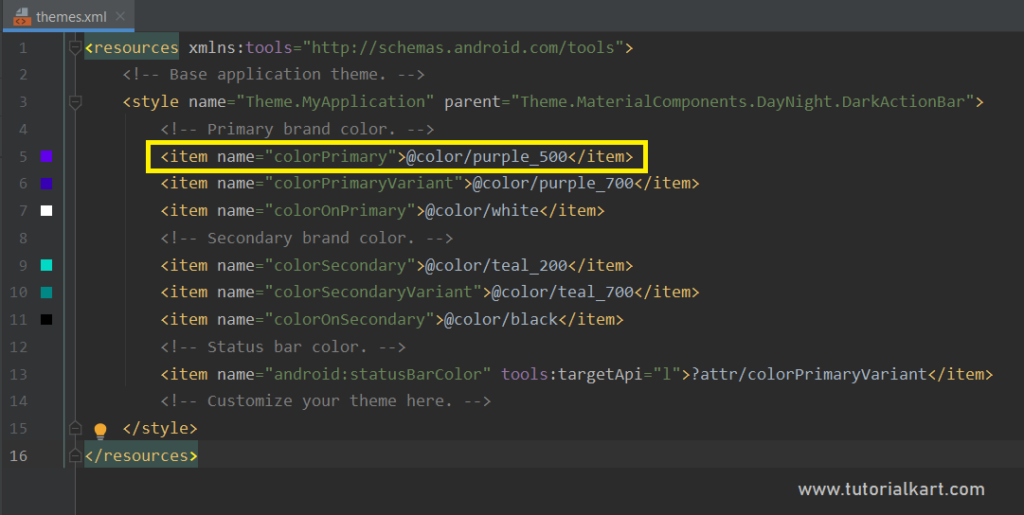
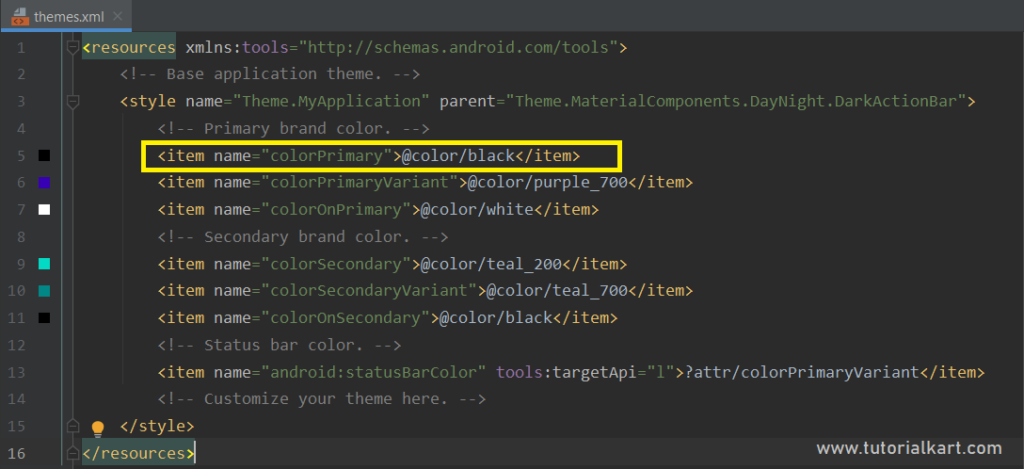
Step 2 – Change colors
Now, we have to change color value for the item with the attribute colorPrimary.
Let us assign black color to this item.
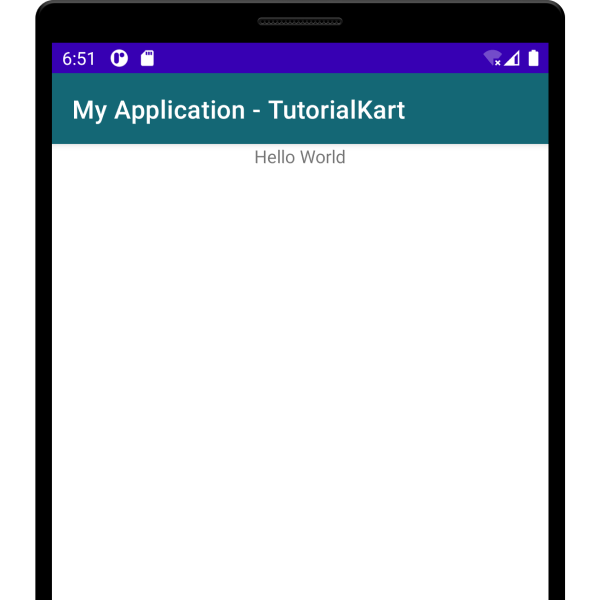
Step 3 – Run
Now, let us run this Android Application and observe the background color of Action Bar.
The background color of our Android Application is changed to the set color.
Change Background of Action Bar via Kotlin Activity File
To change the background color of Action Bar programmatically or dynamically, set background drawable for support action bar with the required Color drawable.
In the following example, we set the background color for Action Bar with the color represented by hex value “#146775” in RGB format.
MainActivity.kt
Run the Android Application, and the background color of Action Bar will be set to the color «#146775» , as shown in the following screenshot.
Conclusion
In this Kotlin Android Tutorial, we learned how to change the background color of Floating Action Button (FAB) widget via layout file or programmatically in Kotlin Activity file, with examples.
Источник
ActionBar in Android with Example
In Android applications, ActionBar is the element present at the top of the activity screen. It is a salient feature of a mobile application that has a consistent presence over all its activities. It provides a visual structure to the app and contains some of the frequently used elements for the users. Android ActionBar was launched by Google in 2013 with the release of Android 3.0(API 11). Before that, the name of this top most visual element was AppBar. AppBar contains only the name of the application or current activity. It was not very much useful for the users and developers also have negligible option to customize it.
Google announced a support library along with the introduction of ActionBar. This library is a part of AppCompat and its purpose is to provide backward compatibility for older versions of Android and to support tabbed interfaces. All applications that use the default theme provided by the Android(Theme.AppCompat.Light.DarkActionBar), contains an ActionBar by default. However, developers can customize it in several ways depending upon their needs. Components included in the ActionBar are:
Attention reader! Don’t stop learning now. Get hold of all the important Java Foundation and Collections concepts with the Fundamentals of Java and Java Collections Course at a student-friendly price and become industry ready. To complete your preparation from learning a language to DS Algo and many more, please refer Complete Interview Preparation Course.
- App Icon: Display the branding logo/icon of the application.
- View Controls: Section that displays the name of the application or current activity. Developers can also include spinner or tabbed navigation for switching between views.
- Action Button: Contains some important actions/elements of the app that may be required to the users frequently.
- Action Overflow: Include other actions that will be displayed as a menu.
Designing a Custom ActionBar
The following example demonstrates the steps involved in creating a custom ActionBar for the MainActivity of an application. All important aspects of visual elements like icon, title, subtitle, action buttons, and overflow menu will be covered.
Note: Following steps are performed on Android Studion version 4.0
Step 1: Default ActionBar
As mentioned earlier, every android app contains an ActionBar by default. This pre-included ActionBar display title for the current activity that is managed by the AncdroidManifest.xml file. The string value of the application’s title is provided by @string/app_name resource present under the application nodes.
Output:

Step 2: Creating a new directory and design items of ActionBar
To code the elements of ActionBar, create a new directory in the resource folder of the application project files. Right-click on the res folder and selects New -> Directory. Give the name “menu” to the new directory.

Further, create a new Menu Resource File by right click on the menu directory. As the ActionBar is being created for the main Activity, type the name as “main” to the Menu Resource File. With this, a new file named “main.xml” must be created under the menu directory. In this file, one can declare the items which will be displayed as the action buttons of the ActionBar.

For every menu items, the following attributes are needed to be configured:
- android:title: Its value contains the title of the menu item that will be displayed when a user clicks and holds that item in the app.
- android:id: A unique ID for the menu item that will be used to access it anywhere in the whole application files.
- android:orderInCategory: The value of this attribute specify the item’s position in the ActionBar. There are two ways to define the position of different menu items. The first one is to provide the same value of this attribute for all items and the position will be defined in the same order as they are declared in the code. The second way is to provide a different numeric value for all items and then the items will position themselves according to ascending order of this attribute’s value.
- app:showAsAction: This attribute defines how the item is going to be present in the action bar. There are four possible flags to choose from:
- a. always: To display the item in the ActionBar all the time.
- b. ifRoom: To keep the item if space is available.
- c. never: With this flag, the item will be not be displayed as an icon in ActionBar, but will be present in the overflow menu.
- d. withText: To represent an item as both icon and the title, one can append this flag with the always or ifRoom flag(always|withText or ifRoom|withText).
- android:icon: The icon of an item is referenced in the drawable directories through this attribute.
Icon of an ActionBar Item
In order to provide an icon to an item, right-click on the res folder, select new, and then Image Asset. A dialog box will appear, choose the Icon Type as Action Bar and Tab Icons. Choose assets type as “Clip Art” and select an image from the clip art collection. Provide a desired name to the icon. Click on Next, then Finish. This icon will now get loaded in the drawable directory of the res folder. The name provided by the developers to these icons will now be used to reference the item’s icon resource.
Below is the code to place a search icon, refresh icon, and an overflow menu in the ActionBar.
Источник


