ArrayAdapter
Создание адаптера
ArrayAdapter является простейшим адаптером, который специально предназначен для работы с элементами списка типа ListView, Spinner, GridView и им подобным. Создать адаптер этого вида можно так:
В параметрах используется контекст, XML-разметка для отдельного элемента списка и массив данных. Контекстом может быть сама активность (this), под разметкой подразумевается компонент, в котором выводится текст, например, TextView, а данными является подготовленный массив, все элементы которого по очереди вставляются в указанную разметку.
Разметку можно создать самостоятельно, а можно использовать готовую системную разметку. Если посмотреть на исходники файла simple_list_item_1.xml в документации Android SDK, то увидим, что он содержит TextView. В этом коде мы создали адаптер ArrayAdapter, в котором данные элемента TextView представлены в виде строк.
Чтобы код был более читаемым, можно сделать ещё так:
Мы вынесли массив строк в отдельную переменную.
Используем ресурсы
Если у нас есть готовый файл ресурсов (массив строк), то можно использовать специальный метод createFromResource(), который может создать ArrayAdapter из ресурсов:
Подготовим массив строк:
Теперь мы можем воспользоваться адаптером и применить к Spinner:
В этом примере мы использовали системную разметку android.R.layout.simple_spinner_item, которая тоже содержит TextView.
При использовании этого метода вы можете применять локализованные версии, что очень удобно.
Или можно пойти другим путём. Получить массив из ресурсов и вставить его в адаптер, как в самом первом примере.
Динамическое наполнение
Также мы можем создать массив программно.
ListAdapter
ListAdapter является интерфейсом. По сути ничего не меняется. Заменяем ArrayAdapter adapter на ListAdapter adapter и получаем тот же результат.
Данный интерфейс может пригодиться при создании собственного адаптера, а для стандартных случаев выгоды не вижу.
SpinnerAdapter
SpinnerAdapter также является интерфейсом и может использоваться при создании собственных адаптеров на основе ArrayAdapter. В стандартных ситуациях смысла использования его нет. Вот так будет выглядеть код:
Переопределяем адаптер
По умолчанию ArrayAdapter использует метод toString() из объекта массива, чтобы наполнять данными элемент TextView, размещённый внутри указанной разметки. Если вы используете ArrayAdapter , где в параметре используется ваш собственный класс, а не String, то можно переопределить метод toString() в вашем классе. Пример такого решения есть в конце статьи Android: Простейшая база данных. Часть вторая.
Другой способ. Мы хотим выводить данные не в одно текстовое поле, а в два. Стандартная разметка для списка с одним TextView нам не подойдёт. Придётся самостоятельно создавать нужную разметку и наполнять её данными.
В этому случае нужно наследоваться от класса ArrayAdapter, указывая конкретный тип и переопределяя метод getView(), в котором указать, какие данные должны вставляться в новой разметке.
Метод getView() принимает следующие параметры: позицию элемента, в котором будет выводиться информация, компонент для отображения данных (или null), а также родительский объект ViewGroup, в котором указанный компонент поместится. Вызов метода getItem() вернёт значение из исходного массива по указанному индексу. В результате метод getView() должен вернуть экземпляр компонента, наполненный данными.
Допустим, у нас есть простой класс Cat с двумя полями — имя и пол. Нашему списку понадобится специальная разметка, состоящая из двух текстовых полей. Создадим адаптер, который будет использовать класс Cat вместо String и будем извлекать данные из объекта класса.

Как видите, достаточно просто изменить программу, используя свой класс вместо String.
В методе getView() используется не совсем корректная версия метода inflate(). Подробнее об этом читайте в статье LayoutInflater
Класс ArrayAdapter позволяет динамически изменять данные. Метод add() добавляет в конец массива новое значение. Метод insert() добавляет новое значение в указанную позицию массива. Метод remove() удаляет объект из массива. Метод clear() очистит адаптер. Метод sort() сортирует массив. После него нужно вызвать метод notifyDataSetChanged.
Несколько советов
ArrayAdapter имеет шесть конструкторов.
- ArrayAdapter(Context context, int resource)
- ArrayAdapter(Context context, int resource, int textViewResourceId)
- ArrayAdapter(Context context, int resource, T[] objects)
- ArrayAdapter(Context context, int resource, int textViewResourceId, T[] objects)
- ArrayAdapter(Context context, int resource, List objects)
- ArrayAdapter(Context context, int resource, int textViewResourceId, List objects)
У них у всех первые два параметра — это контекст и идентификатор ресурса для разметки. Если корневой элемент разметки является контейнером вместо TextView, то используйте параметр textViewResourceId, чтобы подсказать методу getView(), какой компонент используется для вывода текста.
Сам адаптер работает с данными, как со списками. Если вы используете стандартный массив, то адаптер переконвертирует его в список. Сами данные необязательно сразу передавать адаптеру, можно сделать это позже через метод addAll().
Другие полезные методы адаптера:
- add() — добавляет объект в коллекцию
- remove() — удаляет объект из коллекции
- getItem(int position) — возвращает объект из позиции position
- getContext() — получает контекст
На последний метод следует обратить внимание при создании собственного адаптер на основе ArrayAdapter. Не нужно в своём классе объявлять контекст таким образом.
Через метод getContext() вы уже можете получить доступ к контексту, не объявляя новой переменной.
Тоже самое применимо и к массивам. Не нужно объявлять массив:
Используйте метод getItem(position), который может получить доступ к массиву.
Если позволяет логика, используйте списки вместо массивов для большей гибкости. Тогда вы можете добавлять и удалять данные через методы add() и remove().
Источник
Custom Array Adapters made Easy!

In the Field of Android Development, Array Adapters have always played an important role in populating and controlling the ListViews and Spinners. Whenever we need to show our data as a list to the user, Array Adapters always come handy to easily manage the behaviour of the ListView and their items. But does the default Adapter class help us to create our own list item that we want to show to the user?? I guess not..So I have created a sample project called Popular Movies in which we will create a custom array adapter which which will help us to add an Image and Text to the ListItem (For those who don’t know, ListItem is an item of your total list whose layout will remain the same for every item and data will change).
Why Custom Array Adapter??
Android framework by default provides us the ability to create listItems which includes only a single information or a single TextView. But we always come across apps that show multiple information in a single ListItem such as Instagram, BookMyShow, Whatsapp and many more. Implementing your own custom array adapter can seem an intimidating job at first but once you create some more, you will get hold. As a beginner when I started with ArrayAdapters it was very difficult to hold on to the concepts which were used to correctly implement it but I made atleast 4–5 implementations just to make sure I understand what exactly was going on in the code. I would suggest that you should practice it because custom array adapters are very important when it comes to showing information in List.
Lets Start!
We am going to make a custom project which is called PopularMovies App in which we will list the information of some movies with their poster. This will be the final stage of the app :

Create a layout xml file which will have the design of your ListItem.
All the files related to the layout of the app are contained in the layout folder of the res directory. So first navigate into the directory

Notice that this folder contains only single file i.e activity_main.xml. This file will contain the layout and design to your Main Activity which contains your ListView. We are going to make a list_item.xml file that contains the code to the basic structure and design of the list item of the List view. Here is a snippet of the list_item.xml file :
In this file we added a ImageView and 2 TextViews to display the movie details.
Create a Java class which will define your ListItem and store data for every Movie.
It is important to create a Java Class that will store the details for your movie. These classes are called pojos (plain old java objects). These are used to define a collection of related information which can be used to bind that information together and use it to show in Lists or store in databases. In a pojo you should define the type of information you are about to show in the list. For example, if I intent to show an image and textView so I will create variables that will store the image and the data. Pojo should contain getter() and setter() methods which are used to set values to the pojo object and get the data from the object. Here is a code snippet for a pojo class for Movie :
It is important that your Java class should be declared public because you will need to create an instance of it in the MainActivity Class. The variables should be declared as private as there are cases in which you need to make variables with same names in different objects. This is the reason we need to create the getter and setter methods which are used to add and extract to and from the object.
Create a Java class which will extend the Default ArrayAdapter class.
Now is the time when you implement your own array adapter. Create a java class and give it any relative name. I named it MovieAdapter.class . Your class should extend ArrayAdapter class where T should be replaced by the pojo class you just made. It is done to tell the adapter about what type of data the adapter has to display. The first step is to define a constructor. You can use any type of constructor mentioned in the documentation here. We will make a constructor which takes 2 arguments i.e the Context and the list of movies. The arguments received in the constructor should be saved in a private variable as they are used to inflate and add data into the view.
Next, you need to Override a method called getView() method. This view is called when a listItem needs to be created and populated with the data.In this method first the View is inflated using the LayoutInflator.inflate() method. It is important that you check that if the view you are trying to inflate is new or reused. If convertView == null then the view should be inflated. In this view, you should set the data into the views. First get the correct movie from the list of movies using the get() method on moviesList and passing position as the argument.
Now using the getter methods defined in the pojo class, store the information encapsulated in the object in different variables. This information is to be set in the view you just inflated so, findViewById() is called on the inflated view and the information is set. At last the view is returned. Here is code snippet of the MovieAdapter.class file :
Add a ListView in the appropriate layout where you want to show your list.
After creating the Custom Adapter you need a ListView which will show the adapter contents. So in the layout file of you Activity (in this case MainActivity) add a tag. Here is code snipet of the activity_main.xml file :
Create an instance of the Custom ArrayAdapter class which you just created and add it to the ListView
This is the final step. After the Custom Adapter is created and ListView is added to the layout file of the activity, an instance of the adapter is to be created and is set to the listView by calling setAdapter() method on the listView. Here is code snippet of the MainActivity.java file :
It is always a good practice to go through the documentation of the topic as you may find the best method for your use. You can now start by customizing the list item to the way you want to show your data and easily make a custom array adapter to control the flow of list.
Thank you for reading this far! If you found this useful , kindly show some love and share it! Stay tuned for more blogs…
Источник
Creating a custom ArrayAdapter for a user defined ArrayList in Android

May 11, 2018 · 6 min read
Custom ArrayAdapters are implemented when we define a custom list. By default we can pass list items provided to us by the android team as a parameter in ArrayAdapters. But, if we want to provide a custom list with only two textviews, then the following steps must be taken:-
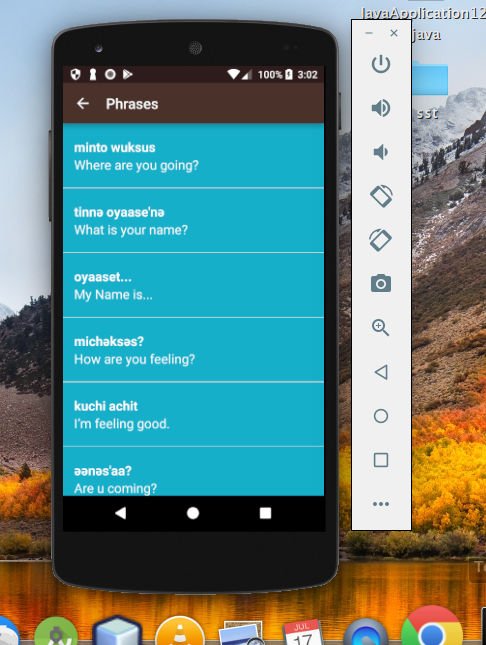
In this article I will be taking an example of Miwok app (taken reference from Udacity Android App Development Course) This app lists the English translation of the Miwok Language (spoken by Native Americans)
Let us first look at our Word object class, the gist of which is provided below (Comments are present in the gist for understanding)
Here a constructor is also used stated in comments, a constructor defines default values that can be provided by the calling functions the syntax of a constructor is just like function but it does not have any return type also the name of the constructor should be same as the name of class.
It is to be NOTED:- we always create private variables in a class and public methods this is because if we create public variables, any outside class can modify them accidentally, which would crash our app also since we need to access those variables we create public methods for the same, that they show the private data of the class to outside world.
Now we can use this Word object in our ArrayAdapter:-

In the above code list_item is our XML file where we have created our custom list element, a sample gist is provided below
At this point if we try to run our app it will crash because R esource ID for the arrayAdapter should be a single textview and we have passed two textviews and so we have to define a custom ArrayAdapter that takes two textviews.
First let us understand about custom arrayAdapter through another example of androidFlavors app (Link of the app:-https://github.com/udacity/ud839_CustomAdapter_Example) with two TextViews (namely versionName and versionnumber)
So we create our new adapter class named as wordAdapter class which extends ArrayAdapter class which means that wordAdapter is the subclass and ArrayAdapter is super class, since our wordAdapter class does not have a default constructor and the super class demands it we use the same constructor defined in the super class i.e. ArrayAdapter and pass the arguments (why only these are passed, it is stated in the comments in code, however it is explained below also.)

The default syntax of the array adapter is like this

notice that we have passed ‘0’ for the input resource this is because we don’t want, ArrayAdpter to inflate(or generate) the TextViews, since in our custom adapter it is handled by getView() method. Let’s discuss the arguments of the Constructor
Context:- this is of the activity which uses it
androidFlavor:- it is the object which is passed into the default constructor, usually it is the list which we have created.
After dealing with this we move further down the code we find the overrided method getView we notice it’s arguments i.e. position, convertView, parent getView method require these to run, these automatically appear when we ovverride a method through ctrl+O

Let’s first have a brief introduction of the formal arguments which appeared automatically on overriding the getView() method:-
- Position it is the list of data which can be requested like textView
- convertView is the recycledView which we want to fill.
- ParentViewGroup:- so the list item is added to this parent viewGroup
Let us have a Detailed discussion of code and how to modify the arguments in order to use our custom array adapter:-
Let’s talk about position argument:-

Moving down we see further on line 71 we see the getItem method which is defined in the superclass(i.e. ArrayAdapter) and this method returns the item in the list at the given index position and notice that the return type of this method is AndroidFlavour which is a custom Datatype class in our case it is Word.
Let’s Talk about convertView argument:-
on line 64 notice that we have assigned convertView to listView so we can easily understand that it is our listView however it is not nescessary and we can continue to use convertView if we want.
Then in line 65 we check if the view is null or not, to check if there is some existing views that we can reuse, if the view is null than in line 66 we inflate the view from the xml view which we created on page 52 a layout inflater is nothing but a method which converts the xml file to actual view object automatically, so we can perform operations on them, since we are manually inflating the view that’s why we don’t need to pass the layout resource id in the default constructor
Back to understanding this
At line 74 we passed the resource ID of the textView we created in our XML File (list_item). Since it is a textView we can use setText() method on it the only catch is on line 77 (notice we have used currentAndroidFlavour which was actually our position integer, this position integer is then used for the getter method of the custom class so that we can access it’s private variable), We have done the same process for second TextView

Note that the currentAndroidFlavour is our variable for position of objects and their values so we are getting values through it as knowing the position of the object we can set their values, keep this in mind moving on now we return the listitemview, (do remember that this listitemView is actually convertView)

On returning this we update the listItemView with the new settings from the currentAndroidFlavour (position) object, so this itemView is added as the child to the adapterView.
In my custom version of the Miwok app I have implemented the above approach in the following way:-

I hope now you can understand the above code to the fullest.
Finally we modify code in our original Activity to set our customAdapter:-
Источник


