- Кастомизируем раскладку внешней клавиатуры на Android без root
- Теория
- Key Layout файлы
- Key Character Map файлы
- Дополнительные клавиатурные раскладки
- Практика
- Описание проекта
- Кастомизация файла раскладки
- Добавляем раскладку с другим языком
- Установка
- Заключение
- Custom keyboard android kotlin
- Let’s build a custom keyboard for Android
- Layout files. LOTS of layout files
- Designing your keyboard
- At your service
- Testing it out and customization
- Closing comments
Кастомизируем раскладку внешней клавиатуры на Android без root
Мне нравится раскладка клавиатур на Mac: Cmd(Ctrl) под большим пальцем и возможность, без шаманства, прямо в настройках изменить поведение CapsLock. Такого же результата легко добиться в Linux с помощью setxkbmap в консоли или, например, gnome-tweak-tool в UI. Но что делать, если клавиатура подключается к Android?
В Android существует несколько способов кастомизировать внешнюю клавиатуру:
- Установка сторонней клавиатуры. Например, External Keyboard Helper.
- Правка/добавление kl или kcm файлов (требуется root). Как, например, в этом посте.
- Установка приложения, которое добавляет дополнительные клавиатурные раскладки.
Устанавливать стороннюю клавиатуру не хочется. Рутовать телефон — тоже. Остаётся третий вариант.
Теория
Вкратце пробежимся по основным понятиям со ссылками на документацию.
Key Layout файлы
Key layout (.kl) файлы отображают линуксовые коды клавиш (Linux Key Code), т.е. код, который производит конкретная клавиша на клавиатуре, на андродовские клавиши (Android Key), т.е. TAB, ENTER или просто буква F. Отображение по-умолчанию можно посмотреть здесь. Узнать, какая клавиша на клавиатуре какой код производит, можно, например, с помощью Gamepad Tester.
Key Character Map файлы
Key Character Map (.kcm) файлы позволяют задать поведение для сочетания клавиш, а также нужны для добавления раскладок, отличных от English(US).
Дополнительные клавиатурные раскладки
Начиная с версии 4.1 в Android стало возможным устанавливать вместе с приложением дополнительные раскладки клавиатуры. После установки раскладки доступны в Settings -> Language & input -> Physical keyboard . Минус этого подхода в том, что раскладки неизменяемы, и нет возможности кастомизировать их «на лету».
Практика
Вот что я хочу получить для моей клавиатуры:
- Esc вместо CapsLock.
- Поменять Ctrl/Win/Alt на Win/Alt/Ctrl слева и Alt/PrintScreen/Ctrl на Ctrl/Alt/Ctrl справа.
- Поменять переключение приложений с Alt+Tab на Ctrl+Tab.
- Скриншот на Ctrl+Shift+3.
- Переключение языков по Win+Space.
- Поддержка английской и русской раскладок.
Описание проекта
Т.к. мои вкусы весьма специфичны (Ты же хочешь Ctrl вместо CapsLock, мой дорогой любитель Vim?), а раскладки неизменяемы «на лету», я не предоставляю готовый apk-файл. Вместо этого создан custom-keyboard-layout — проект основа для кастомизации раскладки внешней клавиатуры на Android.
Клонируем проект к себе
Манифест приложения app/src/main/AndroidManifest.xml :
Приложение состоит из одного reciever . Забавно, что само наличие класса с заданным именем (в нашем случае InputDeviceReceiver ) не требуется — всё работает и без него, но имя мы задать обязаны. Этот reciever предоставляет список клавиатурных раскладок, хранящийся в app/src/main/res/xml/keyboard_layouts.xml :
В списке только одна раскладка — keyboard_layout_en_us .
Кастомизация файла раскладки
Файл раскладки app/src/main/res/raw/keyboard_layout_en_us.kcm состоит из одной строки, задающей тип раскладки:
Про этот тип ничего не сказано в документации, но опытным путём выяснено, что раскладка с таким типом по-умолчанию берёт значения из Generic.kcm. Т.е. мы уже получили английскую раскладку и всё что остаётся — это добавить наши правила.
Но сперва небольшое отступление про Key Layout файлы. Раскладки задаётся как kcm-файл, но для того чтобы поменять местами, например, Ctrl и Alt необходим kl-файл. Тут на помощь приходит ещё одна незадокументированная фича: с помощью команды map можно добавлять правила из kl-файла в kcm-файл.
Файл keyboard_layout_en_us.kcm с моими правилами:
К сожалению, у меня не получилось задать переключение языков по Win+Space — такое правило просто не срабатывало.
Добавляем раскладку с другим языком
Для добавления раскладки другого языка, отличного от English(US), нужно сперва составить kcm-файл с раскладкой этого языка, затем добавить к нему наши правила. Взять готовый файл для своего языка можно отсюда. Берём keyboard_layout_russian.kcm, кладём в app/src/main/res/raw/ и, соответственно, добавляем ещё одну раскладку в app/src/main/res/xml/keyboard_layouts.xml :
Не забываем добавить keyboard_layout_ru_label в app/src/main/res/values/strings.xml .
Теперь можно добавить наши правила, как в примере с английской раскладкой, но с небольшим изменением. В русской раскладке уже есть правило для ‘3’, поэтому нужно лишь изменить его, а не добавлять новое:
Состояние проекта после этой кастомизации можно посмотреть в ветке Vendor_17ef_Product_6048.
Установка
Собираем и устанавливаем наше приложение. Проще всего это сделать с помощью Android Studio следуя официальной документации.
Если всё сделано правильно, то в Settings -> Language & input -> Physical keyboard появятся наши раскладки, а в списке приложений — Custom Keyboard Layout .
Заключение
Кастомизация внешней клавиатуры без root возможна. Не все хотелки при этом достижимы: переключение языков по Win+Space так и не заработало, но это может быть проблемой прошивки.
Статья нарочно сделана краткой — все подробности можно найти по ссылкам.
Источник
Custom keyboard android kotlin
Fully customizable Android keyboard written in Kotlin.
This package is no longer maintained. I’m no longer an Android developer and have not committed any code in a couple of years now. Please feel free to fork this project and make improvements as needed.
Make sure you have a version of Android Studio installed that supports Kotlin (3+ should be fine).
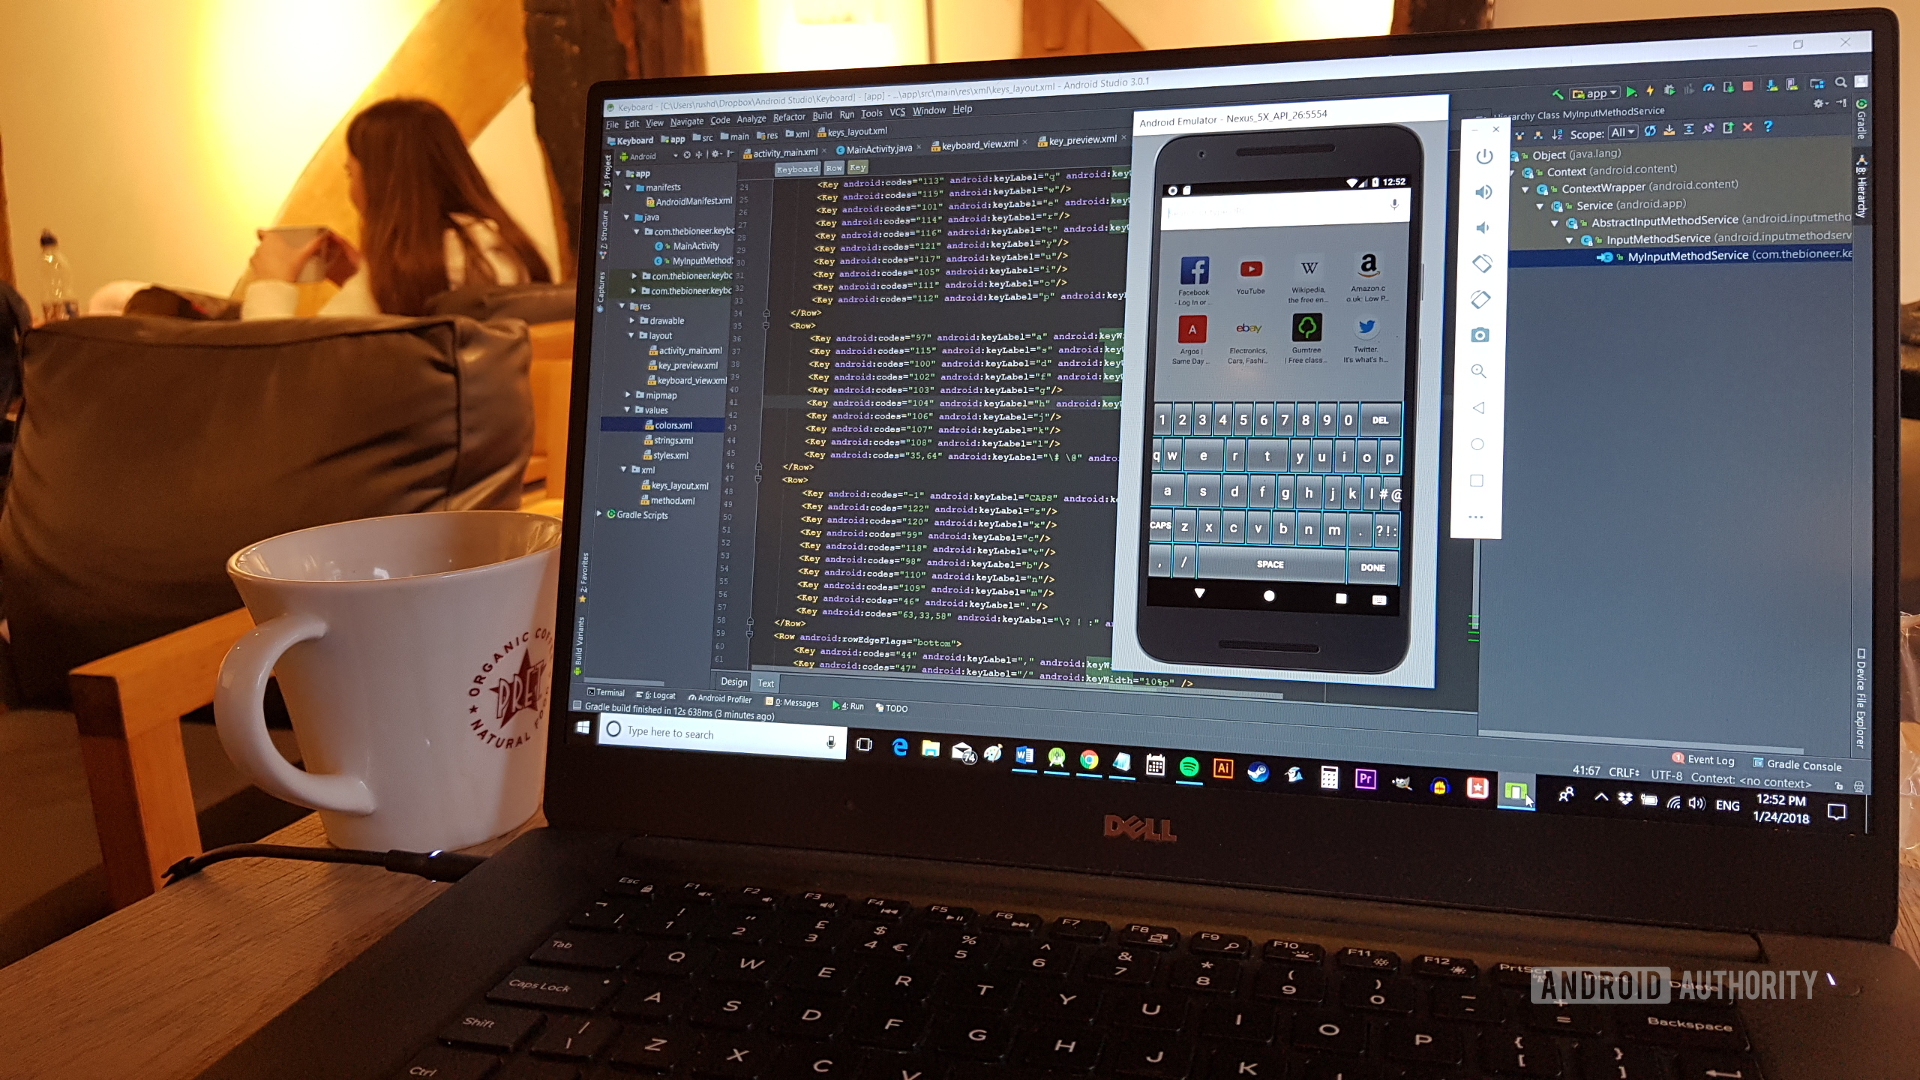
Running the Demo
Just download the project, open it in Android Studio, connect to a virtual or physical device, and run it! There shouldn’t be any further configuration required (unless you need to download build tools, etc., but Android Studio should prompt you to do that).
Below are GIF’s of the functionality in both ladscape and portrait. Notice that in both orientations the keyboard takes up the full screen width, and the button widths change (they are a percentage of the screen width). That is because it extends the ResizableRelativeLayout. Additionally, the component responsible for the expansion and collapse of the keyboard is the ExpandableView. Please take a look at their documentation for more detail.

The Android system keyboard API is limited and difficult to work with. I spent many hours researching different ways to gain full control of the keyboard, and ended up piecing together a few different approaches and adding some of my own flavor to it. I hope that I can save somebody else a lot of time and headache.
The CustomKeyboardView can be injected with any keyboard layout and controller. All you need to do is create an EditText , pass it to the CustomKeyboardView , and indicate what keyboard type it should be using. Below is the entire MainActivity demo class:
The EditText ‘s are stored in a map by the CustomKeyboardView :
As you can see, they are mapped to their KeyboardLayout , which stores its own controller. This process is shown below:
You might also notice that the CustomKeyboardView is currently using some very basic controllers, so why would we separate the controller logic from the layout? Because more complicated controllers may be needed in the future. This architecture allows for more complex keyboard layouts to be created. For example, what if we need to create a keyboard that handles latitudes. That can get pretty complicated. Not only do we have to consider that latitudes can only span between S 90.0000 and N 90.0000 degrees, but what if we want to represent those values in degrees and minutes, or degrees and minutes and seconds, or whatever format the user chooses? The architecture might be a little overkill for simple keyboards, but it leaves open the possibility to create any keyboard we may need to in the future without any significant changes to the architecture.
The CustomKeyboardView is capable of auto registering all EditText ‘s within a ViewGroup . Just pass any ViewGroup to the autoRegisterEditTexts method of any CustomKeyboardView instance, and it will recursively search the View tree for EditText ‘s, check their type, and automatically bind to their InputConnection ‘s.
Additionally, there is a CustomTextField component. This component is a simple extension of the Android EditText component. It auto sets simple settings such as background color, max characters, and text size. The most important addition to this extension is the keyboard type property. You can create this component programmaticaly, set it’s type, and pass it’s containing ViewGroup to the CustomKeyboardView to auto bind to it’s InputConnection . This allows you to create keyboard types that are not recognized by Android, set the keyboard type of this new component, and have that type auto recognized by the CustomKeyboardView . Note: The CustomTextField is a very simple component, and like the custom keyboard’s in this repository, it’s expected that you’ll override their attributes to fit your project’s needs.
Take a look at the AdvancedFeaturesActivity.kt class to see examples of advanced use.
Add the CustomKeyboardView to any (and hopefully all 🙂 of your projects, add any layout or controllers you’d like, modify the UI in any way that fits your needs, and enjoy!
This project is licensed under the MIT License — see the LICENSE file for details
Источник
Let’s build a custom keyboard for Android
When thinking of building an Android app, we often think of something with a screen and a contained function. It could be a game, or a tool to perform a common task.
But apps can come in a variety of shapes and sizes. You could build a service that runs in the background and quietly makes life easier for the user. You could create a widget, or a launcher. How about a keyboard?
Upgrading the software keyboard on your device is one of the most profound ways to customize a device. Most of us use the keyboard as our primary input method. It’s integral to nearly every interaction with your phone. In the best-case scenario, it can make everything quicker, easier, and less error-prone.
Keyboard apps can be highly successful for this reason too; just look at the ubiquity of Swype and SwiftKey.

Whether you just want to take your Android customization to the next level, or you’d like to sell a whole new way to interact with a smart device, read on and let’s explore how to create an Android keyboard.
Note: This project is relatively simple and requires mostly copying and pating XML script. However, it does include some more advanced concepts like services and inheritance. If you’re happy to follow along to get a keyboard running, then anyone should be able to reproduce the app. If you want to understand what everything does, this is a good intermediate project to wrap your head around. You will of course need Android Studio and the Android SDK already set-up.
Layout files. LOTS of layout files
To build our custom keyboard, we’re first going to need to create a new xml file, which will define the layout and appearance of our keyboard. That file will be called keyboard_view.xml. To create this, right click on the “layout” folder in your “res” directory and choose “layout resource file.” In the dialog box that pops up, clear the text where it says “Root element” and start typing “keyboard.” Select the first option which comes up, which should be: android.inputmethodservice.KeyboardView. Call the file keyboard_view.xml (remember, no capitals for resources!).

You will be greeted by a file looking like this:
![]()
We’re going to add a few elements now:
We’ve assigned an ID here so we can refer to the keyboard later in our code. The code aligns our keyboard to the bottom of the screen and the background color is set to colorPrimary. This color is the one set in our values > colors.xml file — it’s easy to change later on. So just hop in there and change the respective color code to change the look a little.
We’ve also referred to another layout for “keyboard preview.” In case you’re scratching your head, that’s the image of the key that flashes up in a large font when you make contact. This assures the user they hit the right key.

As you’ve possibly guessed, this means we need another new layout file, the aforementioned keyboard_preview.xml. Create it in just the same way, though the root element this time is TextView.
Add this code and you’ll define the color of the square and the color of the letter appearing in the square. I also set the alignment to center, which ensures it looks the way it should.
The next new XML file is called method.xml. This will go in your resources folder and have the root element input-method. This file will tell Android what type of input is available through your app. Again, you want to replace the boilerplate code that’s there so that it reads like this:
You can also put information such as language in here later on.
This is where we will create the layout for our keyboard — it’s nearly the fun part!
That will go in a new directory you’ll create (res — xml) and I’m calling mine keys_layout.xml. Replace the code that’s there with this:
This is what we’ll be populating with the keys and their behaviors.
Designing your keyboard
We’ve built a bunch of XML files and now we’re ready to start having some fun. It’s time to create the layout of the keys!
This is what I used. It’s basically a slightly tweaked version of a keyboard layout I found online, with the keys all in standard rows. It’s not exactly beautiful, but it’ll do.
You’ll notice a few interesting things here. The android:codes tell us what each key needs to do. This is what we’ll be receiving through our service shortly and you need to make sure the keyLabel (the text on the keys) lines up with what it actually does. Well, unless your objective is to create a “troll keyboard.”
If you place more than one code separated by commas, your keys will scroll through those options if the user double or triple taps. That way we can make a keyboard that works like the old T9 numpad keyboards on Nokia phones, for instance.
Negative codes represent the constants in the keyboard class. -5 is the equivalent of KEYCODE_DELETE. Play around, use your imagination, and see if you can come up with a “better keyboard.”

An obvious choice is to make the more popular keys a little larger. That’s what I’ve started doing.
At your service
Now it’s time to create a java class. This is going to be called MyInputMethodService and, as the name suggests, it’s going to be a service. The superclass will be android.inputmethodservice, meaning it will inherit properties from that kind of class and behave like an input method service should (politely).
Under Interface(s), we’ll be implementing OnKeyboardActionListener. Start typing and then select the suggestion that springs up.

Being a service, this means your app can run in the background and then listen out for the moment when it is needed – when the user selects an edit text in another application for example.
Your class will be underlined red when this is generated, which is because it needs to implement the methods from InputMethodService. You can generate this automatically by right clicking on your class and choosing generate — implement methods.
Here’s what it should look like:
You also need to override the onCreateInputView() method, which is going to grab the keyboard view and add the layout onto it.
Now add the following code, remembering to import all classes as necessary.
When the input view is created, it takes the layout file keyboard_view and uses it to define how it looks. It also adds the keys_layout file we created and returns the view for the system to use.
I’ve also added a Boolean (true or false variable) called caps so we can keep track of caps-lock.
The other important method here, is the one handling key presses. Try this:
This is a switch statement which looks for the key code and acts accordingly. When the user clicks specific keys, the code will change course. KEYCODE_SHIFT changes our caps Boolean, sets the keyboard to “Shifted,” and then invalidates the keys (to redraw them).

commitText simply sends text (which can include multiple characters) to the input field. sendKeyEvent will send events like “return” to the app.
The class in its entirety should look like this:
Testing it out and customization
In order to test your new keyboard, you’ll need to add it via your device’s settings. To do this, go to Language & Input — Virtual Keyboard — Manage Keyboards and turn on the keyboard you created. Select “OK” a few times to dismiss the notifications.

Now open up any app with a text input and bring up your keyboard. You’ll notice a little keyboard icon in the bottom right. Select that and then pick your app from the list. If all has gone to plan, your keyboard should now spring to life!
This is a little confusing for new users, so if you plan on selling this app, it might be a good idea to add some text to the MainActivity.Java file, explaining how to select the keyboard. You could also use this in order to add some customization or settings for the users to tweak.
You could add plenty of customization options. How about letting the user change the height and size of their keyboard? You could let them change the colors, use different icons for the keys (android:keyicon), or change the images entirely (android:keybackground=@drawable/). For more advanced options — like changing the color of each individual key — you’ll need to use Java, not XML.

Another common feature of keyboards is to add sounds on each click. You can do this easily by adding a new method in your service and calling it onKey.
The nice thing is that Android actually provides some sounds for us ready to use, so we can do this very easily:
Now just use playSound() at the top of the onKey method and make sure to create a vibrator and audio manager (private AudioManager am; private Virbator v;). You could just as easily swap out the key sounds for your own in the assets folder, or change the duration and behavior of the virbration.
Closing comments

Now you have your very own custom keyboard! Another challenge ticked off of your Android development list. Play around with different key sizes, customization, and features to create the perfect typing experience.
Be sure to share your finished products in the comments down below! Happy text-inputting!
Источник


