- ScrollView и HorizontalScrollView
- Методы scrollBy() и scrollTo()
- Tutorialwing
- Output
- Getting Started
- 1. Creating New Project
- 2. Modify values folder
- 3. Download Drawable Resources Needed
- 4. Modify Layout Folder
- 5. Create Android ScrollView Programmatically / Dynamically
- AndroidManifest.xml file
- Android ScrollView (Horizontal, Vertical) with Examples
- Android ScrollView Example
- activity_main.xml
- Output of Android ScrollView Example
- Android HorizontalScrollView Example
- activity_main.xml
- Output of Android HorizontalScrollView Example
- Android Custom Vertical ScrollView Example
- Create a new Android Project
- Add ScrollView in XML Layout File
- XML Drawable Resource
- Java Activity File
- Tutorialwing
- Output
- Getting Started
- Attributes of Android ScrollView Widget
- Example of Android ScrollView Widget
- 1. Creating New Project
- 2. Modify Values folder
- 3. Download Drawable resources Needed
- 4. Use ScrollView Widget in xml file
- 5. Access ScrollView Widget in java file
- AndroidManifest.xml
ScrollView и HorizontalScrollView
При большом количестве информации, которую нужно поместить на экране приходится использовать полосы прокрутки. В Android существуют специальные компоненты ScrollView и HorizontalScrollView, которые являются контейнерными элементами и наследуются от ViewGroup. Обратите внимание, что класс TextView использует свою собственную прокрутку и не нуждается в добавлении отдельных полос прокрутки. Но использование отдельных полос даже с TextView может улучшить вид вашего приложения и повышает удобство работы для пользователя.
На панели инструментов компоненты можно найти в разделе Containers.
В контейнеры ScrollView и HorizontalScrollView можно размещать только один дочерний элемент (обычно LinearLayout), который в свою очередь может быть контейнером для других элементов. Виджет ScrollView, несмотря на свое название, поддерживает только вертикальную прокрутку, поэтому для создания вертикальной и горизонтальной прокрутки необходимо использовать ScrollView в сочетании с HorizontalScrollView. Обычно ScrollView используют в качестве корневого элемента, а HorizontalScrollView в качестве дочернего. Можно и наоборот, пробуйте.
В в теле метода onCreate() создайте ссылку на элемент TextView, объявленный в XML-разметке, и запишите в него через метод setText() какой-нибуль длинный текст, который не поместится в видимые размеры экрана устройства:
Запустив проект, вы должны увидеть вертикальную и горизонтальную полосы прокрутки при попытке скролирования.
Если полосы прокрутки вас раздражают, то используйте атрибут android:scrollbars=»none», который скроет их.
По такому же принципу можете вложить ImageView, чтобы просматривать большие картинки:
Методы scrollBy() и scrollTo()
Вы можете программно прокручивать контент с помощью методов scrollBy() и scrollTo(). Например, можно организовать автоматическую прокрутку во время чтения. В нашем примере мы будем прокручивать контент с помощью трёх кнопок.
Сам код для методов:

Дополнительное чтение
Библиотека ParallaxScrollView с использованием эффекта параллакса. Вы прокручиваете длинный текст, а задний фон прокручивается чуть медленнее. Возможно, кому-то пригодится. Там же можно скачать готовое демо и просмотреть в действии.
Источник
Tutorialwing
Hello Readers! In this post, we are going to learn how to create and use android scrollView programmatically in any android application. We will also learn to add scrollView in linearLayout programmatically in any application.
Output
Tutorialwing Android Dynamic ScrollView Output
Tutorialwing Android Dynamic ScrollView Output
Getting Started
At first, we will create an android application. Then, we will use scrollView widget in the application.
1. Creating New Project
Follow the steps below to create a new project. Please ignore the steps if you have already created a new project.
| Step | Description |
|---|---|
| 1. | Open Android Studio. |
| 2. | Go to File => New => New Project. Write application name as DynamicScrollView. Then, click next button. |
| 3. | Select minimum SDK you need. However, we have selected 17 as minimum SDK. Then, click next button |
| 4. | Then, select Empty Activity => click next => click finish. |
| 5. | If you have followed above process correctly, you will get a newly created project successfully. However, you can also visit post to create a new project to know steps in detail. |
Now, we will modify xml and java file to use android scrollView programmatically.
2. Modify values folder
Open res/values/strings.xml file and add below code into it.
3. Download Drawable Resources Needed
You need some images, stored in res/drawable folder, that will be used in the application. These drawable images will be used by scrollView created dynamically in the application.
4. Modify Layout Folder
Open res/layout/activity_main.xml file. Then, add below code into it.
In activity_main.xml file, we have defined linearLayout, with id rootContainer, that will act as container for the scrollView widget created programmatically in the application.
5. Create Android ScrollView Programmatically / Dynamically
Open app/src/main/java/com.tutorialwing.dynamicscrollview/MainActivity.java file and add below code into it.
We have created scrollView in java file (i.e. in MainActivity.java file). Then, we have created and added a linearLayout as direct child in scrollView. After that we have created and added 6 imageView widgets in that linearLayout. After that, we have added scrollView into linearLayout, having id rootContainer.
Since AndroidManifest.xml file is very important in any android project. We are also going to see the content inside this file.
AndroidManifest.xml file
Code inside src/main/AndroidManifest.xml file would look like below –
When we run the application, we will get output as shown above.
That’s the end of tutorial on Creating Android ScrollView Programmatically.
Источник
Android ScrollView (Horizontal, Vertical) with Examples
In android, ScrollView is a kind of layout that is useful to add vertical or horizontal scroll bars to the content which is larger than the actual size of layouts such as linearlayout, relativelayout, framelayout, etc.
Generally, the android ScrollView is useful when we have content that doesn’t fit our android app layout screen. The ScrollView will enable a scroll to the content which is exceeding the screen layout and allow users to see the complete content by scrolling.
The android ScrollView can hold only one direct child. In case, if we want to add multiple views within the scroll view, then we need to include them in another standard layout like linearlayout, relativelayout, framelayout, etc.
To enable scrolling for our android applications, ScrollView is the best option but we should not use ScrollView along with ListView or Gridview because they both will take care of their own vertical scrolling.
In android, ScrollView supports only vertical scrolling. In case, if we want to implement horizontal scrolling, then we need to use a HorizontalScrollView component.
The android ScrollView is having a property called android:fillViewport, which is used to define whether the ScrollView should stretch it’s content to fill the viewport or not.
Now we will see how to use ScrollView with linearlayout to enable scroll view to the content which is larger than screen layout in android application with examples.
Android ScrollView Example
Following is the example of enabling vertical scrolling to the content which is larger than the layout screen using an android ScrollView object.
Create a new android application using android studio and give names as ScrollViewExample. In case if you are not aware of creating an app in android studio check this article Android Hello World App.
Once we create an application, open activity_main.xml file from \res\layout folder path and write the code like as shown below.
activity_main.xml
If you observe above code, we used a ScrollView to enable the scrolling for linearlayout whenever the content exceeds layout screen.
Output of Android ScrollView Example
When we run the above example in android emulator we will get a result as shown below.

If you observe the above result, ScrollView provided a vertical scrolling for linearlayout whenever the content exceeds the layout screen.
As we discussed, ScrollView can provide only vertical scrolling for the layout. In case, if we want to enable horizontal scrolling, then we need to use HorizontalScrollView in our application.
We will see how to enable horizontal scrolling for the content which is exceeding the layout screen in the android application.
Android HorizontalScrollView Example
Now open activity_main.xml file in your android application and write the code like as shown below.
activity_main.xml
If you observe above code, we used a HorizontalScrollView to enable horizontal scrolling for linearlayout whenever the content exceeds layout screen.
Output of Android HorizontalScrollView Example
When we run the above example in the android emulator we will get a result like as shown below.

If you observe above result, HorizontalScrollView provided a horizontal scrolling for linearlayout whenever the content exceeds the layout screen.
This is how we can enable scrolling for the content which exceeds layout screen using ScrollView and HorizontalScrollView object based on our requirements.
Источник
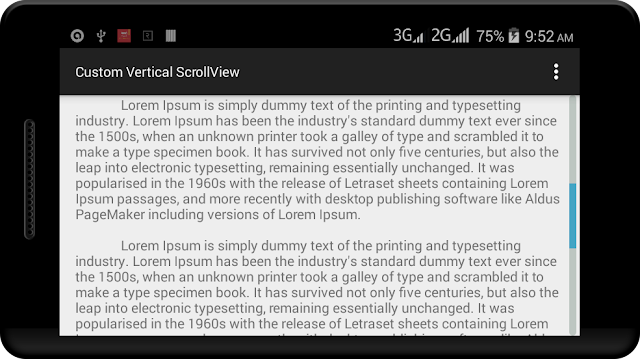
Android Custom Vertical ScrollView Example
In this example, I’m going to share a simple tip to make custom vertical android ScrollView. Android has provided us lots of ScrollView attributes and with the help of these attributes, we can customize ScrollView in our own way.
Create a new Android Project
Let’s start by creating a new android project to customize android vertical ScrollView with following information.
Application Name: Custom Vertical ScrollView
Company Domain: viralandroid.com
Package Name: com.viralandroid.customverticalscrollview
Minimum SDK: Android 2.2 (API 8 Froyo)
Add ScrollView in XML Layout File
Look at the following code I have added scrollbarThumbVertical and scrollbarTrackVertical xml attribute to customize android ScrollView. Following is the final code of xml layout file.
res/layout/activity_main.xml
XML Drawable Resource
Create two xml files vertical_scrollview_track.xml and vertical_scrollview_thumb.xml inside res/drawer and add following code.
res/drawer/vertical_scrollview_track.xml
Java Activity File
Your default java activity file looks like this.
src/MainActivity.java
Now, run your application. Your application looks like above screenshot.
Источник
Tutorialwing
Hello Readers! In this post, we are going to learn about how to use android scrollView widget in any android application. We will also go through different attributes of scrollView widget that can be used to customise it.
Output
Tutorialwing Android ScrollView Output
Tutorialwing Android ScrollView Output
Getting Started
ScrollView widget can be defined as below –
ScrollView is widget that are used to vertically scroll the views placed within it (i.e. vertically scroll the child element). Note that ScrollView supports only vertical scrolling. It can have only one direct child . So, if you want to place multiple child within it, you need to place a viewGroup (i.e. LinearLayout , RelativeLayout etc.) inside ScrollView. Then, you can place multiple views as child of that viewGroup.
Attributes of Android ScrollView Widget
Some of the popular attributes of android scrollView widget are –
| Sr. | XML Attributes | Description |
|---|---|---|
| 1 | android:fillViewport | Determines whether scrollView should stretch it’s content to fill the viewport |
Some of the popular attributes of android ScrollView inherited from FrameLayout are –
| Sr. | XML Attributes | Description |
|---|---|---|
| 1 | android:foregroundGravity | Specifies the gravity of the foreground drawable |
| 2 | android:measureAllChildren | Specifies whether to measure all children or only those in VISIBLE or INVISIBLE state when measuring |
Some of the popular attributes of ScrollView inherited from ViewGroup are –
| Sr. | XML Attributes | Description |
|---|---|---|
| 1 | android:animateLayoutChanges | Specifies whether LayoutTransition should run whenever there is any changes in layout |
| 2 | android:animationCache | Specifies whether layout animations should create a drawing cache for their children. |
| 3 | android:clipToPadding | Specifies whether the ViewGroup will clip its children and resize (but not clip) any EdgeEffect to its padding, if padding is not zero. |
| 4 | android:layoutAnimation | Specifies the layout animation to use the first time the ViewGroup is laid out |
| 5 | android:layoutMode | Specifies the layout mode of this viewGroup |
Some of the popular attributes of android ScrollView inherited from View are –
| Sr. | XML Attributes | Description |
|---|---|---|
| 1 | android:alpha | Specifies the alpha of the view |
| 2 | android:background | Specifies the background of the view |
| 3 | android:padding | Specifies padding of the view for all edges |
| 4 | android:tooltipText | Specifies text displayed in a small popup window on hover or long press |
| 5 | android:clickable | Specifies whether view is clickable or not |
| 6 | android:theme | Specifies a theme override for view |
| 7 | android:id | Specifies id of the view |
| 8 | android:padding | Specifies padding of the view |
Example of Android ScrollView Widget
At first, we will create android application. Then, we will use scrollView widget in this application.
1. Creating New Project
Follow steps below to create new project. Please ignore the steps if you have already created a new application.
| Step | Description |
|---|---|
| 1. | Open Android Studio. |
| 2. | Go to File => New => New Project. Write application name as ScrollView. Then, click next button. |
| 3. | Select minimum SDK you need. However, we have selected 17 as minimum SDK. Then, click next button |
| 4. | Then, select Empty Activity => click next => click finish. |
| 5. | If you have followed above process correctly, you will get a newly created project successfully. However, you can also visit post to create a new project to know steps in detail. |
Now, we will modify xml and java file to use scrollView widget in the application.
2. Modify Values folder
Open res/values/strings.xml file. Then, add below code into it.
3. Download Drawable resources Needed
You will need some images, stored in res/drawable folder, to be used in the application. These drawable images are being used by imageViews inside scrollView widget to create view.
4. Use ScrollView Widget in xml file
Open res/layout/activity_main.xml file. Then, add below code into it.
In activity_main.xml file, we have defined ScrollView widget. Note that there are only one direct child of scrollView i.e. LinearLayout. Inside linearLayout, we have defines some imageViews and added drawable images in it.
5. Access ScrollView Widget in java file
Open src/main/java/com.tutorialwing.scrollview/MainActivity.java file. Then, add below code into it.
We have not modified anything in MainActivity.ja file. So, it is as it was after creating application.
Since AndroidManifest.xml file is very important in any android application, we are also going to see the content inside this file.
AndroidManifest.xml
Code inside src/main/AndroidManifest.xml file is as below –
When we run the program, we will get output as shown above.
That’s end of tutorial on Android ScrollView widget.
Источник


