WebView — создай свой браузер
Android позволяет создать собственное окно для просмотра веб-страниц или даже создать свой клон браузера при помощи элемента WebView. Сам элемент использует движок WebKit и имеет множество свойств и методов. Мы ограничимся базовым примером создания приложения, с помощью которого сможем просматривать страницы в интернете. В последних версиях используется движок от Chromium, но большой разницы в этом нет для простых задач.
Создадим новый проект MyBrowser и сразу заменим код в файле разметки res/layout/activity_main.xml:
Теперь откроем файл активности MainActivity.java и объявим компонент WebView, а также инициализируем его — включим поддержку JavaScript и укажем страницу для загрузки.
Так как приложение будет использовать интернет, необходимо установить разрешение на доступ к интернету в файле-манифесте.
Там же в манифесте модифицируем строчку для экрана, удалив заголовок из нашего приложения (выделено жирным):
Запустим приложение. В нашем распоряжении появился простейший вьювер веб-страниц, но с одним недостатком. Если вы щёлкнете на любой ссылке, то у вас автоматически запустится браузер по умолчанию и новая страница отобразится уже там. Точнее так было раньше. На новых устройствах при запуске приложения сразу открывается браузер.

Чтобы решить данную проблему и открывать ссылки в своей программе, нужно переопределить класс WebViewClient и позволить нашему приложению обрабатывать ссылки. Добавим в коде вложенный класс:
Затем в методе onCreate() определим экземпляр MyWebViewClient. Он может находиться в любом месте после инициализации объекта WebView:
Теперь в нашем приложении создан WebViewClient, который позволяет загружать любой указанный URL, выбранный в WebView, в сам контейнер WebView, а не запускать браузер. За данную функциональность отвечает метод shouldOverrideUrlLoading(WebView, String), в котором мы указываем текущий WebView и нужный URL. Возвращаемое значение true говорит о том, что мы не нуждаемся в запуске стороннего браузера, а самостоятельно загрузим контент по ссылке. В версии API 24 добавили перегруженную версию метода, учитывайте это обстоятельство.
Повторно запустите программу и убедитесь, что ссылки загружаются теперь в самом приложении. Но теперь возникла ещё одна проблема. Мы не можем вернуться к предыдущей странице. Если мы нажмём на кнопку «BACK» (Назад) на устройстве, то просто закроем своё приложение. Для решения новой проблемы нам необходимо обрабатывать нажатие кнопки «BACK». Добавляем новый метод:
Мы должны проверить, что WebView поддерживает навигацию на предыдущую страницу. Если условие верно, тогда вызывается метод goBack(), который возвращает нас на предыдущую страницу на один шаг назад. Если таких страниц набралось несколько, то мы можем последовательно вернуться к самой первой странице. При этом метод всегда будет возвращать значение true. Когда мы вернёмся на самую первую страницу, с которой начали путешествие по интернету, то вернётся значение false и обработкой нажатия кнопки BACK займётся уже сама система, которая закроет экран приложения.
Запустите приложение ещё раз. У вас появился свой собственный веб-браузер, позволяющий ходить по ссылкам и возвращаться на предыдущую страницу. Изучив документацию, вы можете оснастить приложение и другим вкусными плюшками для своего браузера.

Если вам нужно часть ссылок, ведущих на ваш сайт открывать в браузере, а локальные ссылки открывать в приложении, то применяйте условие с разными возвращаемыми значениями.
Универсальный метод, который все локальные ссылки откроет в приложении, остальные в браузере (меняем одну строчку):
А сейчас немного усложним пример, чтобы у пользователя появилась альтернатива стандартным браузерам.
Чтобы было понятнее, переделаем пример следующим образом. Создайте две активности. На первой активности разместите кнопку для перехода на вторую активность, а на второй активности разместите компонент WebView.
В манифесте прописываем у второй активности фильтр.
Код для кнопки для перехода на вторую активность.
Мы создали собственное намерение с указанием фильтра и предоставили данные — адрес сайта.
Вторая активность должна принять данные:
В фильтре для второй активности мы указали два действия.
Это означает, что любые активности (читай, приложения) могут вызвать вашу активность с мини-браузером по такому же принципу. Запустите в студии в отдельном окне любой старый проект или создайте новый и добавьте в него кнопку и пропишите тот же код, который мы использовали для щелчка кнопки.
Запустите второе приложение (первое приложение можно закрыть) и нажмите на кнопку. У вас запустится не первое приложение с начальным экраном, а сразу вторая активность с мини-браузером. Таким образом, любое приложение может запустить браузер, не зная имени класса вашей активности, а используя только строку «ru.alexanderklimov.Browser», передаваемую в Intent. При этом ваша активность с браузером должна иметь категорию по умолчанию и данные. Напомню:
Вы можете представить свою строку в виде строковой константы и сообщить всем потенциальным пользователям вашего браузера, как они могут запустить его у себя. Но в Android уже есть такая готовая константа ACTION_VIEW, которая по справке документации представляет собой следующее:
Перепишем код для кнопки у второго приложения
Что произойдёт на этот раз? Мы помним, что у нас прописано два действия, включая и android.intent.action.VIEW. А значит наше первое приложение с браузером тоже должно распознавать эту команду, когда какое-то приложение у пользователя использует этот код. На эмуляторе как минимум есть одна такая программа «Browser», и теперь к ней добавилась наша вторая активность из первого приложения. На экране появится выбор из двух приложений.

А если удалить все альтернативные браузеры и оставить только вашу программу, то и выбора не будет. Ваш браузер станет основным. И если какое-то приложение захочет запустить веб-страницу указанным способом, то откроется ваша программа.
Небольшое замечание. Если заменить последнюю строчку на такую:
То в окне выбора программы вместо верхней строки «Open with» или её локального перевода появится ваша строка. Но не это главное. Если по каким-то причинам на устройстве не окажется ни одного браузера, то данный вариант кода не вызовет краха приложения, в отличие от первоначального варианта. Поэтому используйте предложенный вариант ради надёжности.
Источник
Data android scheme http
Добавляет данные для фильтра намерений. Это может быть тип данных (атрибут mimeType ), URI, или и то и другое одновременно. URI указывается с помощью нескольких атрибутов, раздельно для каждой его части:
Эти атрибуты необязательны, но зависят друг от друга:
- Если не указана схема (scheme) для фильтра, остальные атрибуты URI игнорируются.
- Если не указан хост (host), port и все остальные атрибуты пути игнорируются.
Все элементы , помещенные в один элемент , указывают условия одного фильтра. К примеру, код:
эквивалентен следующему коду:
Вы можете указывать любое количество элементов внутри элемента , чтобы указать несколько видов данных. Ни один из атрибутов не имеет значения по умолчанию.
Информация о работе фильтров намерений находится в разделе Намерения и фильтры намерений.
Указывает схему URI (scheme). Этот обязательный атрибут необходим для минимального указания URI. По крайней мере один атрибут scheme должен быть установлен для фильтра, иначе остальные атрибуты не имеют значения.
Схема указывается без двоеточия (то есть http , а не http: ).
Если фильтр имеет тип данных (атрибут mimeType ), о не имеет схемы, предполагается, что используется схема content: или file: .
Примечание: схема в Android является регистрозависимой, в отличие от RFC. Поэтому указывайте схему маленькими буквами.
Указывает хост (host) URI. Атрибут не имеет смысла, если не указана схема для того же фильтра.
Примечание: название хоста в Android является регистрозависимым, в отличие от RFC. Поэтому указывайте хост маленькими буквами.
Порт URI. Атрибут имеет смысл, только если для того же фильтра указана схема (scheme) и хост (host).
android:path
android:pathPrefix
android:pathPattern
Путь URI. Атрибут path определяет полный путь, в соответствии с полным путем в объекте Intent. pathPrefix определяет только начальную часть пути из объекта Intent. pathPattern определяет полный путь из объекта Intent, но может включать следующие символы:
- Звездочка (*) – означает последовательность из 0 и более символов, предшествующих звездочке.
- Точка перед звездочкой (.*) – означает последовательность из 0 и более любых символов.
Поскольку наклонная черта ‘\’ используется как экранирующий символ при считывании XML (прежде чем он будет проанализирован), необходимо добавлять двойную черту: например, символ ‘*’ должен быть записан как «\\*» , а наклонная черта ‘\’ как «\\\\» . Это аналогично построению строк в Java.
Подробная информация о шаблонах находится в документации по PATTERN_LITERAL, PATTERN_PREFIX и PATTERN_SIMPLE_GLOB класса PatternMatcher.
Атрибут имеет значение, только если указана схема (scheme) и хост (host) для того же фильтра.
Указывает MIME тип, вроде image/jpeg или audio/mpeg4-generic . Подтип может быть задан как ‘*’, что означает любой подтип.
Часто используется как единственный атрибут элемента .
Примечание: MIME тип в Android является регистрозависимым, в отличие от RFC. Поэтому указывайте MIME тип маленькими буквами.
ДОБАВЛЕНО: уровень API 1 СМОТРИТЕ ТАКЖЕ:
Источник
Быстрое перенаправление в приложение с AutoVerify

Jan 26 · 3 min read

Сайты с множественной переадресацией и поддержкой диплинков
Представьте, что у вас есть сайт, к примеру, https://www.yoursite.com . Когда пользователь кликает по ссылке http://www.yoursite.com , где нет s или https , вы хотите, чтобы он оказался на вашем сайте, поэтому включаете автоматическое перенаправление на https .
Также предположим, что у вас есть https://m.yoursite.com и http://m.yoursite.com с переадресацией на https://www.yoursite.com , как показано ниже:

И вам хочется, чтобы мобильные и https-версии через глубинное связывание (иначе — диплинк) вели в ваше приложение с помощью AutoVerify. Как этого добиться?
Некорректное решение
Чтобы удостовериться, что все эти сайты ссылаются на приложение, вы пишете в AndroidManifest.xml такие строки:
Это делается , чтобы охватить все возможные комбинации из диаграммы выше. Также у вас есть файл assetlink.json по адресу https://www.yoursite.com/.well-known/assetlinks.json
Результат
Если вы воспользуетесь глубинной ссылкой с вашего сайта на приложение, то увидите всплывающее окно:

Такой вариант может показаться работоспособным, но он просто неправильный. AutoVerify, начиная с Android SDK 23, не спрашивает разрешения, открывая глубинную ссылку сразу в приложении.
Если вы не видите этого запроса, то, вероятно, столкнулись с багом.
Есть способ быстро решить эту проблему: просто удалите из файла AndroidManifest.xml .
Результат
На первый взгляд всё хорошо: нет всплывающего окна с просьбой открыть браузер или приложение. Последнее, что вы точно видите — ваше приложение, открытое через диплинк без запроса. На самом деле происходит вот что: сначала открывается браузер и только после — ваше приложение. Причина в том, что m.yoursite.com нет в AndroidManifest.xml . Происходит именно то, что должно происходить.
- Вы переходите по глубинной ссылке на m.yoursite.com , открывается браузер.
- Браузер перенаправляет пользователя на www.yoursite.com .
- Поскольку www.yoursite.com указан в AndroidManifest.xml , вместо страницы браузер открывает приложение.

Такой подход позволяет избежать появления всплывающего окна, но пользователь всё равно может на секунду увидеть браузер, открытый раньше приложения.
Источник
Developers Hub
![]()
![]()
![]()
![]()
The compiled Android SDK footprint is 187kb
Just add implementation ‘io.branch.sdk.android:library:2.+’ to the dependencies section of your build.gradle file.
- If you don’t plan to use the Fabric Answers integration, and don’t want to import the answers-shim , just import your project as follows:
- This supports minimum sdk level 21. If you want to support minimum sdk level 9 please consider using version 1.14.5. If you want to to support a minimum SDK of 15, use the 2.x versions.
- Android SDK versions 3.x and above communicate over TLS1.2.
- If you want to import the AAR directly, you can find the build in Nexus here: https://search.maven.org/artifact/io.branch.sdk.android/library.
- Or you can clone this repo and import the source as a library into your project
You can sign up for your own app id at https://dashboard.branch.io
In your project’s manifest file, you can register your app to respond to direct deep links (yourapp:// in a mobile browser) by adding the second intent filter block. Also, make sure to change yourapp to a unique string that represents your app name.
Secondly, make sure that this activity is launched as a singleTask. This is important to handle proper deep linking from other apps like Facebook.
Typically, you would register some sort of splash activitiy that handles routing for your app.
If you are building applications targeting for Android M or above, Branch make it really easy to configure your app for deep linking using App Links. In your project’s manifest file, you can register activities to for App Linking by adding an intent filter as follows.
With app.link, there’s no need to use the encoded id and you just need to list the domains.
You only need to know live_app_alpha_encoded_id and test_app_alpha_encoded_id which you can obtain from the Branch dash board once you enable App Linking support for your application.
That’s all you need. Deep linked parameters associated with the link is passed through Branch initialization process.
Note: While using App Links please make sure you have registered the Activity for deep linking using Branch URI scheme as discussed in the previous session inorder to get deep link work on previous versions of Android
(which does not support App Links).
You can deep link to content from push notifications just by adding a Branch link to your result intent. Simply pass the a Branch link with gcm payload and add it to your resultIntent with key branch .
If you would like to support push notification based routing while your app already in foreground, please add the following to your notification intent.
Branch support hundred percent guaranteed matching with cookie based matching using Custom Chrome Tabs. This is highly recommended if you like to do user authentication through deep link metadata.
Just add the following to your build.gradle file to enable guaranteed matching
Note : Adding additional dependencies may overrun the dex limit and lead to NoClassDefFoundError or ClassNotFoundException . Please make sure you have enabled multi-dex support to solve this issue. For more information on enabling multi-dex support please refer to Troubleshooting
Note: Provide internet permission. Branch SDK need internet access to talk to Branch APIs.
After you register your app, your Branch key can be retrieved on the Settings page of the dashboard. Add it (them, if you want to do it for both your live and test apps) to your project’s manifest file as a meta data.
Edit your manifest file to have the above items
To collect the Google Advertising ID, you must ensure that proguard doesn’t remove the necessary Google Ads class. The surest way to do this is add it to your proguard rules. If your Application is enabled with proguard, add the following instruction to your proguard.cfg or proguard-rules.pro file:
In case you are using Facebook SDK to support deep linking through Facebook ads, please make sure to keep the Facebook SDK classes in proguard
If you are adding support for Huawei devices without Google Mobile Services, please make sure to add this to your proguard rules.
The Branch SDK make it easier to deep link and attribute your Instant Apps. Since Branch automatically configures and hosts the assetlinks.json file for you, you don’t need to worry about all the complexity involved in setting up Android App Links. Additionally, the Branch SDK makes it easy to deferred deep link from the Instant App through the full Android app install, providing attribution for every step of the way. Please make sure you have the following added along with regular Branch implementation for instant app enabled project
You can check out a full demo application on our Github. We’ve replicated our original Android demo application and modified it to support Android Instant Apps.
1. Initialize the Branch SDK
Head to your core library project, where your Application class is defined and drop in the snippet of code to the onCreate() method as follows.
2. Add your Branch keys
Instant Apps can be rather confusing as there are many different manifests, but you want to find the Manifest that contains your application tags. Make sure your Application class name is defined here, and then specify the Branch keys inside the application element.
3. Configure your Branch links as Android App Links
This guide presumes that you’ve already configured Branch for Android App Links in the past. If you haven’t configured your full native app to use Branch as Android App Links, please complete this guide which will correctly configure the dashboard and manifest.
Now, you simply need to edit the above manifest and paste in the following snippet inside the application element. Then you’ll need to replace the xxxx with your own custom subdomain which will be visible on the Branch link settings dashboard at the bottom of the page. If you’re using a custom subdomain, you can find the advanced instructions in the above link regarding configuring Android App Links.
4. Retrieve Branch deep link data
Now that you’ve outfitted your Instant App project with the above, you can now register a deep link router function for activities you want to receive the deep link data in any Activity split, similar to how you would retrieve deep link data in the full app.
5. Configure the deep linking from Instant App to your Full App
Now, the user has arrived in your Instant App and you’re ready to convert them to install your full native app. Don’t worry, Branch as got your covered! We have overridden the default showInstallPrompt with a method that auto configures the Google Play prompt with all of the deep link data you need to carry context through install. Additionally, we can provide you the full set of attribution on how many users conver through this prompt.
Branch SDK provides convenient methods to check for app types and full app conversion. This eliminates the dependency on Google IA support SDK (‘com.google.android.instantapp’). Here are some of the methods that makes life easy
This convenience methods checks whether the current version of app running is Instant App or Full Android App to allow you convenience
This methods shows an install prompt for the full Android app, allowing you an easy way to pass Branch referring deep data to the full app through the install process. Similar to how deferred deep linking works for Branch normally, the full app will receive the deep link params in the handle callback.
The below example shows how to create a custom Branch Universal Object, the associate it with the installation prompt that will be passed through to your full native Android app after the user installs.
If your minimum sdk level is 15+, To receive the deep link parameters from the Branch SDK, call initSession and pass in the BranchReferralInitListener. This will return the dictionary of referringParams associated with the link that was just clicked. You can call this anywhere at any time to get the params.
If you need to support pre 15, Branch must know when the app opens or closes to properly handle the deep link parameters retrieval. You can see more details on how to do this at [this docs site](/developers-hub/docs/android-sdk-overview. Basically, if you don’t close the Branch session, you’ll see strange behaviors like deep link parameters not showing up after clicking a link the second time.
Initialising and closing session is done automatically with our new automatic session management.
If you have a custom Application class, just add this call in onCreate
If you are not creating or using an Application class throughout your project, all you need to do is declare BranchApp as your application class in your manifest.
NOTE if you’re calling this inside a fragment, please use getActivity() instead of passing in this . Also, this.getIntent().getData() refers to the data associated with an incoming intent.
Next, you’ll need to hook into the onNewIntent method specified inside the Activity lifecycle and set the intent. This is required for conformity with Facebook’s AppLinks. Verify that the activity you’re implementing has launchMode set to singleTask inside the Manifest declaration. Once that is done, go to said activity and do something like the following:
Previously, Branch did not return any information to the app if initSession was called but the user hadn’t clicked on a link. Now Branch returns explicit parameters every time. Here is a list, and a description of what each represents.
denotes analytics
| Parameter | Meaning |
|---|---|
| The channel on which the link was shared, specified at link creation time | |
| The feature, such as invite or share , specified at link creation time | |
| Any tags, specified at link creation time | |
| The campaign the link is associated with, specified at link creation time | |
| The stage, specified at link creation time | |
| Where the link was created (‘API’, ‘Dashboard’, ‘SDK’, ‘iOS SDK’, ‘Android SDK’, or ‘Web SDK’) | |
| +match_guaranteed | True or false as to whether the match was made with 100% accuracy |
| +referrer | The referrer for the link click, if a link was clicked |
| +phone_number | The phone number of the user, if the user texted himself/herself the app |
| +is_first_session | Denotes whether this is the first session (install) or any other session (open) |
| +clicked_branch_link | Denotes whether or not the user clicked a Branch link that triggered this session |
| +click_timestamp | Epoch timestamp of when the click occurred |
These session parameters will be available at any point later on with this command. If no params, the dictionary will be empty. This refreshes with every new session (app installs AND app opens)
To retrieve this information synchronously, call the following from a non-UI thread:
If you ever want to access the original session params (the parameters passed in for the first install event only), you can use this line. This is useful if you only want to reward users who newly installed the app from a referral link or something.
To retrieve this information synchronously, call the following from a non-UI thread:
Often, you might have your own user IDs, or want referral and event data to persist across platforms or uninstall/reinstall. It’s helpful if you know your users access your service from different devices. This where we introduce the concept of an ‘identity’.
To identify a user, just call:
If you provide a logout function in your app, be sure to clear the user when the logout completes. This will ensure that all the stored parameters get cleared and all events are properly attributed to the right identity.
Warning this call will clear the referral credits and attribution on the device.
OR if you want to store some state with the event
Some example events you might want to track:
As more methods have evolved in Android, we’ve found that it was increasingly hard to manage them all. We abstracted as many as we could into the concept of a Branch Universal Object. This is the object that is associated with the thing you want to share (content or user). You can set all the metadata associated with the object and then call action methods on it to get a link or register a view.
Here are a set of best practices to ensure that your analytics are correct, and your content is ranking on Spotlight effectively.
- Set the canonicalIdentifier to a unique, de-duped value across instances of the app
- Ensure that the title , contentDescription and imageUrl properly represent the object
- Initialize the Branch Universal Object and call userCompletedAction with the BranchEvent.VIEW on page load
- Call showShareSheet and createShortLink later in the life cycle, when the user takes an action that needs a link
- Call the additional object events (purchase, share completed, etc) when the corresponding user action is taken
Practices to avoid:
- Don’t set the same title , contentDescription and imageUrl across all objects
- Don’t wait to initialize the object and register views until the user goes to share
- Don’t wait to initialize the object until you conveniently need a link
- Don’t create many objects at once and register views in a for loop.
The universal object is where you define all of the custom metadata associated with the content that you want to link to or index. Please use the builder format below to create one.
canonicalIdentifier: This is the unique identifier for content that will help Branch dedupe across many instances of the same thing. If you have a website with pathing, feel free to use that. Or if you have database identifiers for entities, use those.
title: This is the name for the content and will automatically be used for the OG tags. It will insert $og_title into the data dictionary of any link created.
contentDescription: This is the description for the content and will automatically be used for the OG tags. It will insert $og_description into the data dictionary of any link created.
imageUrl: This is the image URL for the content and will automatically be used for the OG tags. It will insert $og_image_url into the data dictionary of any link created.
metadata: These are any extra parameters you’d like to associate with the Branch Universal Object. These will be made available to you after the user clicks the link and opens up the app. To add more keys/values, just use the method addMetadataKey .
price: The price of the item to be used in conjunction with the commerce related events below.
currency: The currency representing the price in ISO 4217 currency code. Default is USD.
contentIndexMode: Can be set to the ENUM of either ContentIndexModePublic or ContentIndexModePrivate . Public indicates that you’d like this content to be discovered by other apps. Currently, this is only used for Spotlight indexing but will be used by Branch in the future.
expirationDate: The date when the content will not longer be available or valid. Currently, this is only used for Spotlight indexing but will be used by Branch in the future.
Use BranchEvent class to track special user actions or application specific events beyond app installs, opens, and sharing. You can track events such as when a user adds an item to an on-line shopping cart, or searches for a keyword etc.
BranchEvent provides an interface to add content(s) represented by a BranchUniversalObject in order to associate content(s) with events.
You can view analytics for the BranchEvents you fire on the Branch dashboard. BranchEvents provide a seamless integration with many third party analytics providers like Google Analytics, Criteo.
BRANCH_STANDARD_EVENT enumerate the most commonly tracked events and event parameters that can be used with BranchEvent for the best results. You can always use custom event names and event parameters.
This functionality is deprecated. Please consider using BranchEvent for tracking user action and events as described here.
We’ve added a series of custom events that you’ll want to start tracking for rich analytics and targeting. Here’s a list below with a sample snippet that calls the register view event.
| Key | Value |
|---|---|
| BranchEvent.VIEW | User viewed the object |
| BranchEvent.ADD_TO_WISH_LIST | User added the object to their wishlist |
| BranchEvent.ADD_TO_CART | User added object to cart |
| BranchEvent.PURCHASE_STARTED | User started to check out |
| BranchEvent.PURCHASED | User purchased the item |
| BranchEvent.SHARE_STARTED | User started to share the object |
| BranchEvent.SHARE_COMPLETED | User completed a share |
Once you’ve created your Branch Universal Object , which is the reference to the content you’re interested in, you can then get a link back to it with the mechanisms described below. First define the properties of the link itself.
You do custom redirection by inserting the following optional keys in the control params:
| Key | Value |
|---|---|
| «$fallback_url» | Where to send the user for all platforms when app is not installed. Note that Branch will forward all robots to this URL, overriding any OG tags entered in the link. |
| «$desktop_url» | Where to send the user on a desktop or laptop. By default it is the Branch-hosted text-me service |
| «$android_url» | The replacement URL for the Play Store to send the user if they don’t have the app. Only necessary if you want a mobile web splash |
| «$ios_url» | The replacement URL for the App Store to send the user if they don’t have the app. Only necessary if you want a mobile web splash |
| «$ipad_url» | Same as above but for iPad Store |
| «$fire_url» | Same as above but for Amazon Fire Store |
| «$blackberry_url» | Same as above but for Blackberry Store |
| «$windows_phone_url» | Same as above but for Windows Store |
You have the ability to control the direct deep linking of each link by inserting the following optional keys in the control params:
| Key | Value |
|---|---|
| «$deeplink_path» | The value of the deep link path that you’d like us to append to your URI. For example, you could specify «$deeplink_path»: «radio/station/456» and we’ll open the app with the URI «yourapp://radio/station/456?link_click_id=branch-identifier». This is primarily for supporting legacy deep linking infrastructure. |
| «$always_deeplink» | true or false. (default is not to deep link first) This key can be specified to have our linking service force try to open the app, even if we’re not sure the user has the app installed. If the app is not installed, we fall back to the respective app store or $platform_url key. By default, we only open the app if we’ve seen a user initiate a session in your app from a Branch link (has been cookied and deep linked by Branch) |
Then, make a request to the Universal Object in order to create the URL.
Getting your Branch link and app content listed in Google search is very easy with BranchUniversalObject. Once you’ve created the BUO, use the following API to list your app contents in Google Search via Firebase App Indexing API. Your app will be opened with deep link data upon user clicking the search result and the session will be tracked.
This also allow your contents Indexed locally and shown in Google In Apps search. By default the the BranchUniversal objects are locally indexable. Set your BranchUniversalObject’s local index mode to private if intended to avoid indexing locally
NOTE Please make sure Firebase app indexing is enabled for your application and has Firebase app indexing dependency added
To test content indexing follow instructionshere.
Please enable debug mode and check the logs to get the Branch link used for indexing and use it with the above link to verify content indexing.
NOTE Use BranchUniversalObject#removeFromLocalIndexing method to remove the contents from local index. Please make sure to remove user specific contents from local index up on user logout.
We’ve realized that Android had some very poor offerings for native share sheet functionality, so we built our own and bundled it into the core SDK. This share sheet it customizable and will automatically generate a link when the user selects a channel to share to.
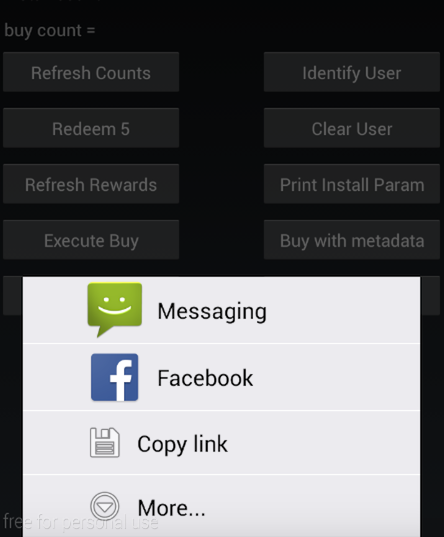
To use it, first define the custom share sheet style like so. Most of these are completely optional and we’ve got a great set of defaults if you don’t want to spend hours customizing.
To show the share sheet, call the following on your Branch Universal Object. There are plenty of callback methods for you to hook into as you need for your own customizations on top of our animation.
In order to comply with tracking requirements, you can disable tracking at the SDK level. Simply call:
This will prevent any Branch requests from being sent across the network, except for the case of deep linking. If someone clicks a Branch link, but has expressed not to be tracked, we will return deep linking data back to the client but without tracking information captured.
In do-not-track mode, you will still be able to create and share links. They will not have identifiable information. Event tracking won’t pass data back to the server if a user has expressed to not be tracked. You can change this behavior at any time, but calling the above function. This information will be saved and persisted.
By default, Branch Android SDK uses Java’s javax.net.ssl.HttpsURLConnection for network requests. There are known issues with that interface and typically applications use third party networking libraries, such as OkHttp, to customize their networking. Branch SDK provides an interface, BranchRemoteInterface , to apply your networking customization to how Branch handles network requests. Use the below API to set your implementation of BranchRemoteInterface to handle Branch requests.
Below is an example of an implementation of BranchRemoteInterface using OkHttp.
Источник


