- Android — SQLite Database
- Database — Package
- Database — Creation
- Database — Insertion
- Database — Fetching
- Database — Helper class
- Example
- How to Create and Add Data to SQLite Database in Android?
- What is SQLite Database?
- How Data is Being Stored in the SQLite Database?
- Important Methods in SQLite Database
- What we are going to build in this article?
- Step by Step Implementation
- Правильная работа с БД в Android
Android — SQLite Database
SQLite is a opensource SQL database that stores data to a text file on a device. Android comes in with built in SQLite database implementation.
SQLite supports all the relational database features. In order to access this database, you don’t need to establish any kind of connections for it like JDBC,ODBC e.t.c
Database — Package
The main package is android.database.sqlite that contains the classes to manage your own databases
Database — Creation
In order to create a database you just need to call this method openOrCreateDatabase with your database name and mode as a parameter. It returns an instance of SQLite database which you have to receive in your own object.Its syntax is given below
Apart from this , there are other functions available in the database package , that does this job. They are listed below
| Sr.No | Method & Description | |||||||||||||||||||||||||||||||||||||||||
|---|---|---|---|---|---|---|---|---|---|---|---|---|---|---|---|---|---|---|---|---|---|---|---|---|---|---|---|---|---|---|---|---|---|---|---|---|---|---|---|---|---|---|
| 1 |
| Sr.No | Method & Description | ||||||||||||||||||||||||||||||||||||||
|---|---|---|---|---|---|---|---|---|---|---|---|---|---|---|---|---|---|---|---|---|---|---|---|---|---|---|---|---|---|---|---|---|---|---|---|---|---|---|---|
| 1 |
| Sr.No | Method & Description | |||||||||||||||||||||||||||||||||||
|---|---|---|---|---|---|---|---|---|---|---|---|---|---|---|---|---|---|---|---|---|---|---|---|---|---|---|---|---|---|---|---|---|---|---|---|---|
| 1 |
| Steps | Description |
|---|---|
| 1 | You will use Android studio to create an Android application under a package com.example.sairamkrishna.myapplication. |
| 2 | Modify src/MainActivity.java file to get references of all the XML components and populate the contacts on listView. |
| 3 | Create new src/DBHelper.java that will manage the database work |
| 4 | Create a new Activity as DisplayContact.java that will display the contact on the screen |
| 5 | Modify the res/layout/activity_main to add respective XML components |
| 6 | Modify the res/layout/activity_display_contact.xml to add respective XML components |
| 7 | Modify the res/values/string.xml to add necessary string components |
| 8 | Modify the res/menu/display_contact.xml to add necessary menu components |
| 9 | Create a new menu as res/menu/mainmenu.xml to add the insert contact option |
| 10 | Run the application and choose a running android device and install the application on it and verify the results. |
Following is the content of the modified MainActivity.java.
Following is the modified content of display contact activity DisplayContact.java
Following is the content of Database class DBHelper.java
Following is the content of the res/layout/activity_main.xml
Following is the content of the res/layout/activity_display_contact.xml
Following is the content of the res/value/string.xml
Following is the content of the res/menu/main_menu.xml
Following is the content of the res/menu/display_contact.xml
This is the defualt AndroidManifest.xml of this project
Let’s try to run your application. I assume you have connected your actual Android Mobile device with your computer. To run the app from Android studio , open one of your project’s activity files and click Run  icon from the tool bar. Before starting your application,Android studio will display following window to select an option where you want to run your Android application.

Select your mobile device as an option and then check your mobile device which will display following screen −
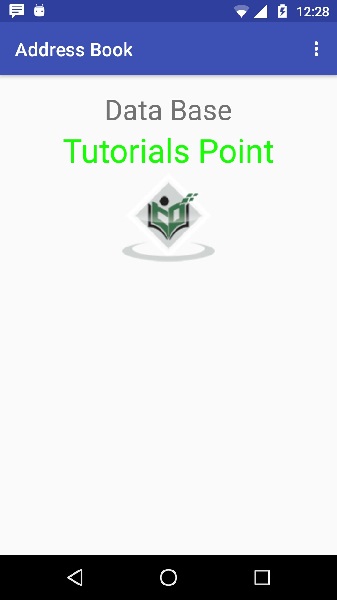
Now open your optional menu, it will show as below image: Optional menu appears different places on different versions
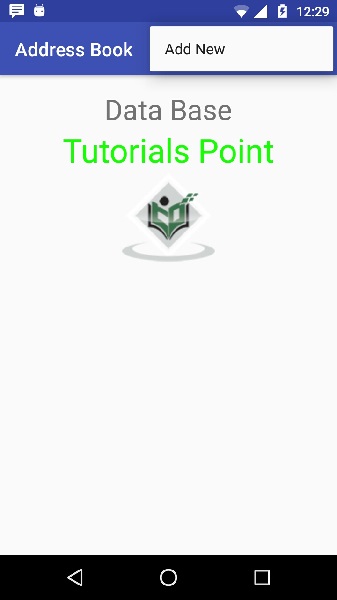
Click on the add button of the menu screen to add a new contact. It will display the following screen −
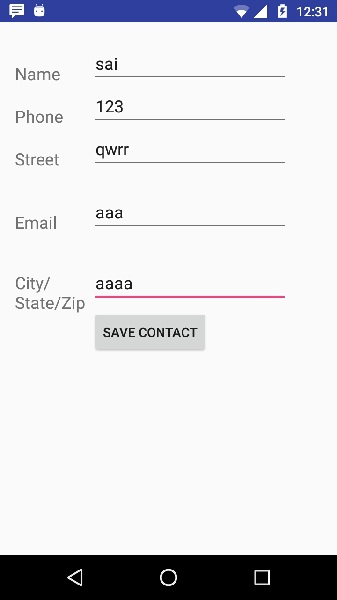
It will display the following fields. Please enter the required information and click on save contact. It will bring you back to main screen.
Источник
How to Create and Add Data to SQLite Database in Android?
SQLiteis another data storage available in Android where we can store data in the user’s device and can use it any time when required. In this article, we will take a look at creating an SQLite database in the Android app and adding data to that database in the Android app. This is a series of 4 articles in which we are going to perform the basic CRUD (Create, Read, Update, and Delete) operation with SQLite Database in Android. We are going to cover the following 4 articles in this series:
- How to Create and Add Data to SQLite Database in Android?
- How to Read Data from SQLite Database in Android?
- How to Update Data to SQLite Database in Android?
- How to Delete Data in SQLite Database in Android?
What is SQLite Database?
SQLite Database is an open-source database provided in Android which is used to store data inside the user’s device in the form of a Text file. We can perform so many operations on this data such as adding new data, updating, reading, and deleting this data. SQLite is an offline database that is locally stored in the user’s device and we do not have to create any connection to connect to this database.
Attention reader! Don’t stop learning now. Get hold of all the important Java Foundation and Collections concepts with the Fundamentals of Java and Java Collections Course at a student-friendly price and become industry ready. To complete your preparation from learning a language to DS Algo and many more, please refer Complete Interview Preparation Course.
How Data is Being Stored in the SQLite Database?
Data is stored in the SQLite database in the form of tables. When we stored this data in our SQLite database it is arranged in the form of tables that are similar to that of an excel sheet. Below is the representation of our SQLite database which we are storing in our SQLite database.

Important Methods in SQLite Database
Below is the several important methods that we will be using in this SQLite database integration in Android.
| getColumnNames() | This method is used to get the Array of column names of our SQLite table. |
| getCount() | This method will return the number of rows in the cursor. |
| isClosed() | This method returns a Boolean value when our cursor is closed. |
| getColumnCount() | This method returns the total number of columns present in our table. |
| getColumnName(int columnIndex) | This method will return the name of the column when we passed the index of our column in it. |
| getColumnIndex(String columnName) | This method will return the index of our column from the name of the column. |
| getPosition() | This method will return the current position of our cursor in our table. |
What we are going to build in this article?
We will be building a simple application in which we will be adding data to the SQLite database. We will be creating a database for adding course name, course description, course duration, and course tracks. We will be saving all this data in our SQLite database. A sample video is given below to get an idea about what we are going to do in this article. Note that we are going to implement this project using the Java language.
Step by Step Implementation
Step 1: Create a New Project
To create a new project in Android Studio please refer to How to Create/Start a New Project in Android Studio. Note that select Java as the programming language.
Источник
Правильная работа с БД в Android
Приветствую всех дроидеров в эти непростые для нас времена.
Честно говоря, заколебала эта шумиха о патентах, войнах и т.д., но в данной статье речь пойдет не об этом.
Я не собирался писать статью на данную тему, так как везде всего полно о работе с базой данных в Android и вроде бы все просто, но уж очень надоело получать репорты об ошибках, ошибках специфичных и связанных с БД.
Поэтому, я рассматрю пару моментов с которыми я столкнулся на практике, чтобы предостеречь людей, которым только предстоит с этим разбираться, а дальше жду ваших комментариев на тему решения указанных проблем после чего внесу изменения в пост и мы сделаем отличный туториал, который будет образцом работы с SQLite в Android не только для начинающих, но и для тех, кто уже знаком с основами и написал простые приложения.
Способы работы с БД
Существует три способа работы с данными в БД, которые сразу бросаются на ум:
1) Вы создаете пустую структуру базы данных. Пользователь работает с приложением(создает заметки, удаляет их) и база данных наполняется. Примером может служить приложение NotePad в демо-примерах developer.android.com или на вашем дроид-девайсе.
2) Вы уже имеете готовую БД, наполненную данными, которую нужно распространять с приложением, либо парсите данные из файла в assets.
3) Получать данные из сети, по мере необходимости.
Если есть какой-то еще один или два способа, то с радостью дополню данный список с вашей помощью.
Все основные туториалы расчитаны как раз на первый случай. Вы пишите запрос на создание структуры БД и выполняете этот запрос в методе onCreate() класса SQLiteOpenHelper, например так:
Примерно так. Более полный вариант класса и других составляющих можно посмотреть по ссылке внизу статьи.
Дополнительно можно переопределить методы onOpen(), getReadableDatabase()/getWritableDatаbase(), но обычно хватает того, что выше и методов выборки данных.
Далее, экземпляр этого класса создаем в нашем приложении при его запуске и выполняем запросы, то бишь проблемная часть пройдена. Почему она проблемная? Потому что, когда пользователь качает приложения с маркета, то не задумывается о вашей базе данных и может произойти что угодно. Скажем сеть пропала или процесс другой запустился, или вы написали уязвимый к ошибкам код.
Кстати, есть еще один момент, на который стоит обратить внимание. Переменную экземпляра нашего класса можно создать и хранить в объекте Application и обращаться по мере необходимости, но нужно не забывать вызывать метод close(), так как постоянный коннект к базе — это тяжелый ресурс. Кроме того могут быть коллизии при работе с базой из нескольких потоков.
Но есть и другой способ, например, создавать наш объект по мере необходимости обращения к БД. Думаю это вопрос предпочтения, но который также необходимо обсудить.
А теперь самое главное. Что, если нам понадобилось использовать уже сушествующую БД с данными в приложении?
Немного погуглив, Вы сразу наткнетесь на такую «замечательную статью» — www.reigndesign.com/blog/using-your-own-sqlite-database-in-android-applications в которой, как покажется, есть нужная панацея. Но не тут то было. В ней еще и ошибок несколько.
Вот они:
1) В методе createDataBase() строка:
SQLiteDatabase dbRead = getReadableDatabase();
и далее код… содержит crash приложения на НТС Desire, потому что получаем БД для чтения(она создается), но не закрывается.
Добавляем строкой ниже dbRead.close() и фикс готов, но момент спорный.
Вот что говорит дока на тему метода getReadableDatabase():
Create and/or open a database. This will be the same object returned by getWritableDatabase() unless some problem, such as a full disk, requires the database to be opened read-only. In that case, a read-only database object will be returned. If the problem is fixed, a future call to getWritableDatabase() may succeed, in which case the read-only database object will be closed and the read/write object will be returned in the future.
Like getWritableDatabase(), this method may take a long time to return, so you should not call it from the application main thread, including from ContentProvider.onCreate().
И так. Данный метод не стоит вызывать в главном потоке приложения. В остальном все понятно.
2) Ошибка: No such table android_metadata. Автор поста выкрутился, создав данную таблицу заранее в БД. Не знаю на сколько это правильный способ, но данная таблица создается в каждой sqlite-бд системой и содержит текущую локаль.
3) Ошибка: Unable to open database file. Здесь много мнений, разных мнений, которые Вы можете прочесть по ссылкам ниже.
Возможно, что проблемы связаны с тем, что один поток блокирует БД и второй не может к ней обратиться, возможно проблема в правах доступа к приложению(было замечено, что чаще проблемы с БД проявляются на телефонах марки НТС именно на тех моделях, которые нельзя рутануть, хотя не только на них, например на планшетах Асер), но как бы то ни было проблемы эти есть.
Я склоняюсь к варианту, что проблема в потоках, не зря ведь нам не рекомендуют вызывать методы создания базы в главном потоке.
Возможно выходом из этого будет следующее решение(рассматривается вариант №2). Используя первый вариант работы с базой, наполнить ее данными после создания, например:
Данный подход еще нужно проверить на практике, но так как этот пост нацелен на выработку верного коллективного решения по данной тематике, то комментарии и пробы на даннную тему только приветствуются.
Мораль истории такова: если вы нашли какой-то хороший кусок кода для вашего решения, то проверьте его, не поленитесь, прежде чем копипастить в свой проект.
Вцелом, данный пост показывает(касательно способа №2) как делать не надо, но и также содержит пару любопытных мыслей.
Метод getReadableDatabase() можно переопределить например так:
Кстати: следуя практике самой платформы, поле первичного ключа стоит называть «_id».
Пишите в комментарии свои используемые практики. Мы сделаем данный пост лучше для всех, а может и мир станет чуточку добрее.
UPD Только что проверил свой подход. Все работает в эмуляторе, но будьте осторожны.
Файлик data.txt лежит в assets такой:
Zametka #1
Zametka #2
Zametka #3
Zametka #4
И класс приложения:
Отмечу, что данный класс используется только для демонстрации и проверки того, что произойдет при вызове методов getReadableDatabase()/getWritableDatabase() и создании базы. В реальных проектах код нужно адаптировать.
Кроме того в базе появилась табличка android_metadata(без моего участия), поэтому указанная выше ошибка решена.
Надеюсь кому-то пригодится.
Любопытные дополнения №1(от хабраюзера Kalobok)
Источник


