- How to Securely Delete Photos and Clear All Data From Your Android Phone
- Найден секретный способ освободить до 20 Гб памяти в телефоне
- Удаление папки Telegram
- Удаление папки.Thumbnails
- Удаление папки Data
- Заключение
- How to Delete Files on Android
- Part 1. The Best Way to Delete Files on Android
- Step 1 Install dr.fone — Data Eraser (Android) on PC
- Step 2 Connect Android to PC
- Step 3 Confirm to Delete Files on Android
- Part 2. Delete Files with Built-in Storage Tool
- Step-by-Step Guide on How to Delete Files on Android:
- Part 3. Delete Files on Android with SD Card
- Step-by-Step Guide on How to Delete Files on Android:
- Part 4. Upload Photos to Dropbox and Delete Them on Android
- Step-by-Step Guide on How to Delete Files on Android:
- Part 5. How to Delete Data from Lost Android Phone
How to Securely Delete Photos and Clear All Data From Your Android Phone
If you are reselling your old phone, or just handing it over to a loved one, you want to make sure that all your personal data is completely deleted before you do this. We’ve already described the process in case you’re moving on from an iPhone, and if you have an Android phone, this is what you need to know.
Please note that the exact steps will vary depending on the version of Android that you are using, and the manufacturer of the device. Settings are slightly different in the versions of Android, and manufacturer skins can change the names of settings or the exact menus. However, the general instructions are the same across all devices.
microSD card
The first decision you need to make is about the microSD card. In case your old phone has a microSD card, you can simply insert the card in your new phone and continue using it — most data like photos, videos etc. should get migrated seamlessly.
In case your new phone does not have a microSD card slot, or you would not like to carry forward the card for some reason then you should delete all the data on the card by formatting it. First, back up all your pictures and videos.
- Connect your phone to the computer with a USB cable. If you are on a Mac, make sure you have the Android File Transfer application installed before you do this.
- Open My Computer on your PC, or Finder on your Mac.
- Navigate to the SD card and copy all the files you want to save to your computer.
- After the copying is done, you can unplug your phone.
Now, you can format your memory card.
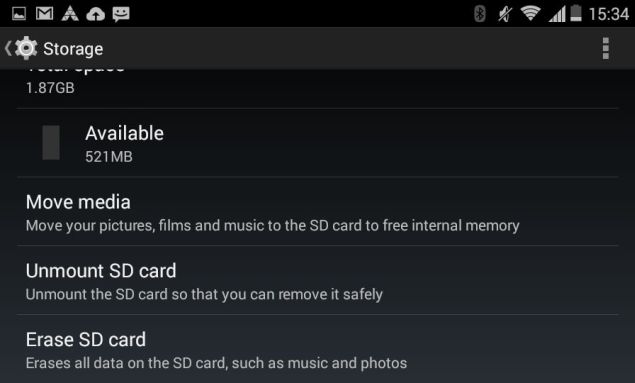
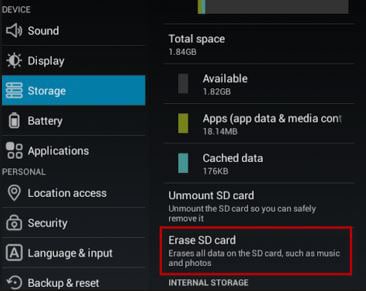
- On your phone, go to Settings > Storage.
- Scroll to the bottom and tap Erase SD card. You’ll see a warning message telling you that you’ll lose all the data on the card.
- Tap the Erase SD card button to continue. If your SD card is secured with a password, you’ll need to enter the PIN to continue.
 A determined person can still recover your files from a formatted SD card, but the easiest way to deal with this is by «layering». Simply put, fill the space with something else, delete it, and repeat this process a couple of times and your original data is gone forever.
So for example, if you have a 2GB microSD card you’ve erased — reconnect it to your PC, and copy a file that’s about 2GB to the card. Delete the file right away. Do this again, two or three times. The whole process shouldn’t take more than ten minutes, but you can then safely sell the card as well.
Backing up the data on your phone
The most important thing to do is to ensure that you don’t lose any of your contacts or pictures. The good thing with Android is that you need a Google account to set up the phone, and it automatically backs up your device. To make sure that this is the case, do the following.
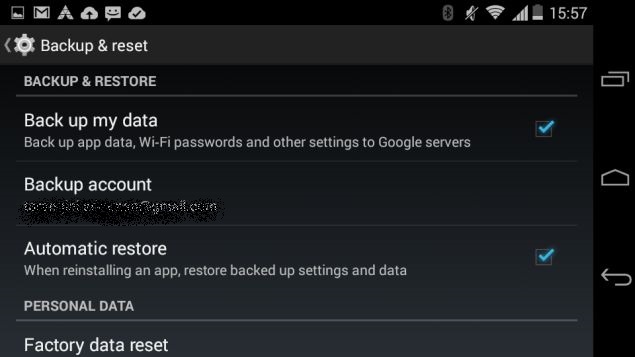
- On your phone, go to Settings > Backup & reset.
- You should see a setting called Back up my data. Make sure that it’s ticked.
- Next, press Back, and then scroll down to ACCOUNTS. Tap on Google.
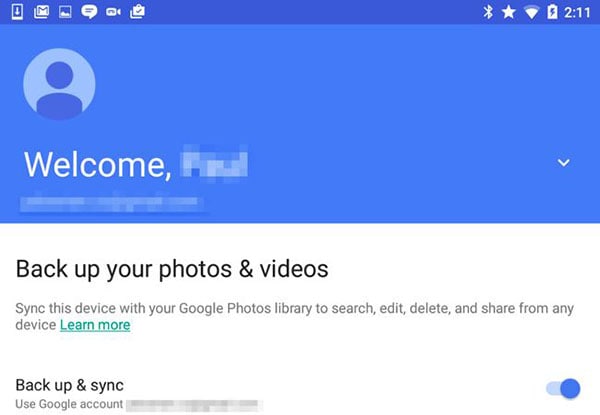
- You’ll see your Google account which was used to set up the phone with a green sync symbol next to it. Tap the account.
- Make sure that all the options are ticked — this will use your Google account to sync everything from your calendar to contacts to email to the photos that you take, which get automatically backed up to Google+.
- Not all versions of Android automatically back up pictures. We checked on a 2011 Samsung Galaxy Note and didn’t see the option, while the recent Moto E does have this option. In case your phone does not support this, you’ll have to use a PC to back up media via the USB as described above.
- Back up any other media files to your computer by connecting the phone to your PC using a USB cable. Follow the steps in the first half of the SD card section above to copy the files to your computer.
This option will also backup the application data for some of your apps. Apps need to be registered with the Android operating system for this backup and restore service to work, and not all your apps may support this. To be safe, we recommend manually backing application data for all your favourite apps, like this method for backing up your WhatsApp messages.
Delete everything
Now that you’ve made a backup, you can safely delete everything on your phone. This is what you do.
First, fully erase the SD card as discussed above or take it out and keep it safely if you plan to use it in your new phone.

A simple factory reset will delete everything on your phone, but this data can still be recovered by a really determined user. If you want to be really sure no one can recover your data even after it is deleted then make sure you enable hardware encryption on your phone. For most people it should be safe to skip steps 1 and 2 and jump straight to step 3.
1. Go to Settings > Security and tap Encrypt phone. This takes a long time, so you need to connect your phone to the charger to proceed.
2. Tap Encrypt phone again to proceed. Some people have noted that at times this doesn’t work right away, and you might need to try it a few times.
The process can take an hour, and so you’ll need to leave your phone on the charger and wait.
Once this is done, just reset the phone:
3. Go to Settings > Backup & reset. Tap Factory data reset. On the next screen, tick the box marked Erase phone data. You can also choose to remove data from the memory card on some phones — so be careful what button you tap on.
4. You’ll see a warning screen — tap Reset phone to continue.
5. This process may take a few minutes and your phone should reboot to the state that it shipped in, prompting you to choose language and sign-in all over again.
Congratulations, you’ve deleted all the data on your Android phone.
Restoring your files on another phone
If you followed the steps mentioned above in backing up properly, then you should be able to get all your data back without any difficulty at all. For one thing, if you’re continuing to use your old microSD card in your new phone, then your movies, music and photos get transferred automatically.
Otherwise, when you get your new Android phones, just sign in with the same Google account to carry over your contacts and other data, and transfer the files from your computer using the USB cable in the same way that you copied them to the computer as described above.
In case you are switching to an iOS device, you can still sync your Google account to transfer your contacts and calendar, while you can use iTunes to transfer the backed up media files.If you found this tutorial useful, check out more in our How To section. If you have any tips that can help to securely wipe Android phones, let us know via the comments.
For the latest tech news and reviews, follow Gadgets 360 on Twitter, Facebook, and Google News. For the latest videos on gadgets and tech, subscribe to our YouTube channel.
Источник
Найден секретный способ освободить до 20 Гб памяти в телефоне
Существует несколько способов очистить систему Android от мусора и освободить таким образом память устройства. Это могут быть как встроенные сервисы, так и некоторые сторонние приложения для очистки. Но что делать, если ни один способ вам не помог и телефон все равно сигнализирует о нехватке памяти? В этом случае можно прибегнуть к ручной очистке и освободить таким образом до 20 Гб памяти смартфона.
Удаление папки Telegram
В 2021 году этот кроссплатформенный мессенджер по праву стал самым популярным приложением в мире, обогнав по числу скачиваний даже такого гиганта как Tik-Tok.
Но у Telegram есть одна небольшая проблема – вся просмотренная вами информация сохраняется во внутренней памяти телефона, тем самым засоряя систему.
Если вы являетесь активным пользователем Telegram, рекомендуем периодически очищать содержимое папки с приложением. Для этого достаточно перейти в любой файловый менеджер и полностью удалить папку Telegram. Не стоит переживать, с приложением после удаления ничего не случится. Система при следующем входе автоматически создаст папку Telegram заново.
Многим пользователям, которые делают такую процедуру впервые после установки Telegram, удается очистить таким образом от 1 до 10 Гб памяти. Проверьте и убедитесь сами.
Удаление папки.Thumbnails
Следующий способ – удаление папки, которая содержится в корневом разделе DCIM (или Pictures) системы Android и содержит в себе все мини копии картинок и фотографий, которые встречаются вам при серфинге в интернете и в приложениях. Этот раздел также может занимать очень большой объем данных, если ранее вы еще не проводили подобную очистку.
Папка.Thumbnails довольно хитрая и скрыта от глаз пользователя в каталогах системы. Чтобы ее найти и удалить, необходимо сначала включить отображение скрытых папок в настройках файлового менеджера.
В некоторых случаях системный файловый менеджер также не дает увидеть эту папку. В этом случае можно попробовать установить стороннее приложение, например ES-проводник, а затем перейти в каталог DCIM (Pictures), включить отображение скрытых папок и удалить папку.Thumbnails.
Если вы больше не хотите, чтобы миниатюры засоряли вам память устройства, можно немного перехитрить систему, создав в папке DCIM новый файл с другим расширением, но с тем же названием.Thumbnails.
Система Android устроена таким образом, что никогда не позволит создать два файла с одинаковым названием, поэтому папка.Thumbnails больше не сможет там появиться. Сделать это также можно с помощью ES-проводника.
Нажимаем на три точки в верхнем правом углу приложения → «+Создать» → Файл. Называем файл.Thumbnails (обязательно ставим точку вначале).
Готово! Теперь наш созданный файл не позволит системе Android создать папку.Thumbnails, а значит система больше не будет засоряться лишними миниатюрами.
Удаление папки Data
Еще одна папка, занимающая большое количество памяти в телефоне – папка Data, которая находится внутри каталога Android. Эта папка содержит кэш, а также некоторые настройки и служебную информацию о приложениях. Но каких-либо серьезных системных данных, влияющих на работу системы в целом, она не содержит. Поэтому ее также можно удалить, освободив до 10 Гб памяти.
Удалять ее нужно только в обход корзины, так как сама корзина является вложенной в папку Data, о чем система предупреждает при попытке удалить ее стандартным путем. Поэтому нам потребуется снова воспользоваться сторонним файловым менеджером, который позволит удалить папку Data напрямую, без промежуточных инстанций.
Открываем ES проводник и переходим во внутренний каталог системы. Затем переходим в папку Android→Выделяем папку Data→ Нажимаем Удалить. Убираем галочку с пункта «Перенести в корзину» и нажимаем ОК. Нам удалось очистить таким образом почти 3 Гб внутренней памяти.
Заключение
В далеком 1981 году на пути становления IBM, Билл Гейтс произнес, ставшую сегодня забавным мемом, фразу: «В будущем 640 Кб будет достаточно для каждого». Из-за особенностей первых процессоров, никто не мог и представить, что когда-нибудь в компьютерах, а тем более в мобильных устройствах удастся разместить большее количество памяти, а главное, что кому-то может понадобиться такой объем информации.
Несмотря на то, что сегодня любой смартфон обладает памятью в десятки тысяч раз, превышающий этот объем, нехватка памяти до сих пор остается актуальной проблемой, особенно для бюджетных моделей смартфонов. Мы надеемся, что с помощью нашей инструкции вам удастся очистить ваше устройство и наконец решить данную проблему.
Источник
How to Delete Files on Android
• Filed to: Erase Android • Proven solutions
Android smartphones and tablets can fill up very fast with the number of apps, media files and cached data in them. What’s more, some of the lower end devices come with just a few GB of storage space. The lesser the space left on your smartphone, the more time you are going to have to spend on micromanaging your storage. If you are constantly running out of space and need help managing it, or meet some emergency like you should send Samsung Note7 back for its battery failure, you could consider that you could try to delete files on Android.
Part 1. The Best Way to Delete Files on Android
dr.fone – Data Eraser (Android) is an easy and convenient way to use Android (including Samsung Galaxy Note7) data eraser which helps wipe out all of your Android phone data and erase backups and deleted data too in order to ensure the data cannot be recovered in any way. This tool has a number of stylish and incredible features which don’t just make everything easier but also help improve the performance of your smart phone.
Key Features of dr.fone — Data Eraser (Android):
- Powerful scanning ability.
- Removes all of the unnecessary junk files and background processes for Android users.
- Erases your device completely.
- Erases backup and deleted data completely as well.
- Frees space up and speeds your smart phone up.
Step-By-Step Guide on How to Dlete Files on Android
Step 1 Install dr.fone — Data Eraser (Android) on PC
Download the software and install it on your PC. After you complete the install, launch the application.
Step 2 Connect Android to PC
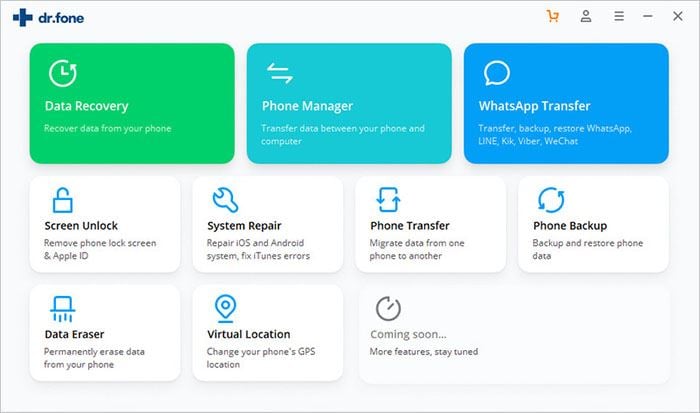
Connect your Android smartphone to your PC through a data cable. Once connected, click of the «Erase All Data» option from the menu on the extreme left of the interface.
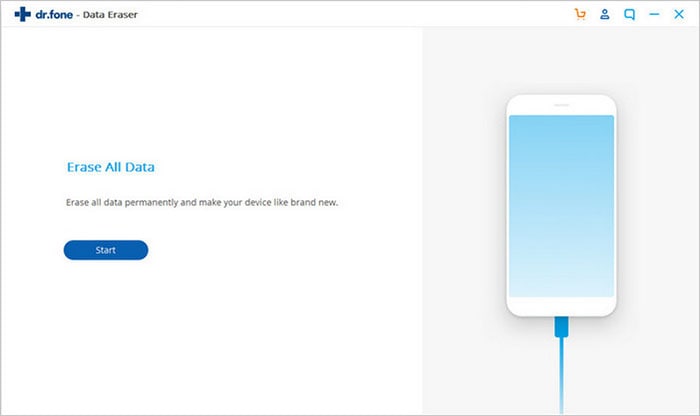
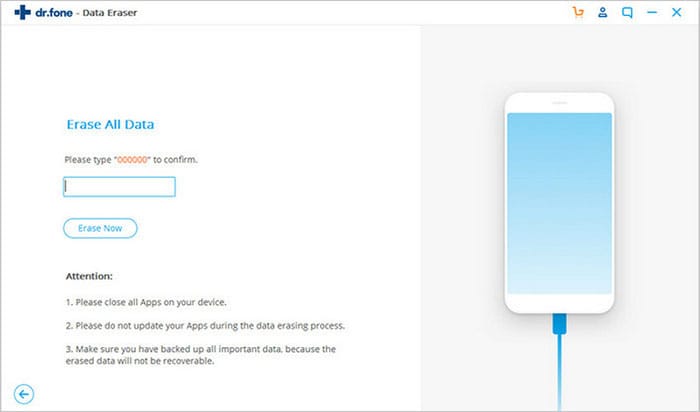
Step 3 Confirm to Delete Files on Android
You can click the «Erase all Data» button. Then a pop-up window will ask you to confirm your selection. Type «delete» in the dialogue box then click «Erase Now» button to permanently delete data from your Android smartphone.
Part 2. Delete Files with Built-in Storage Tool
Modern Android smartphones come with a storage pane where you can see exactly what’s taking up all the space on your smart phone. Here are the steps on how you can use it to delete files.
Step-by-Step Guide on How to Delete Files on Android:
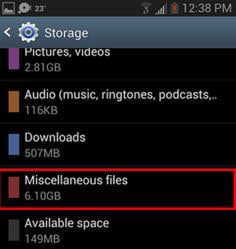
Step 1. Simply visit the settings menu and click on storage. You will be able to see the amount of space that is used by apps, pictures, audio files, cached data, etc.
Step 2. You can delete anything you don’t want from this screen. For example, visit the downloads page to remove files and clear cached data for all your installed apps.
Step 3. Once you’ve removed all the files you don’t want, you should have a lot of free space on your smartphone.
One more thing you should understand is the apps, data and cache all contribute to the amount of space used by an app. For example, if you’ve installed Spotify and have saved a lot of music offline, Spotify might just be using a couple of GB of storage space. All apps which cached data for offline use work like this. Removing cached data for apps is another terrific way of freeing up space on your smartphone.
Part 3. Delete Files on Android with SD Card
Most Android devices today have microSD card slots too. Even though they might not be common with the high end devices, most mid and low range devices do have them. If your phone has one, all you require to do is buy a microSD card and use it to free up space on your smartphone. This additional storage can’t be used to install apps or to save system files but it can be used for storing music, pictures, videos, etc. Some apps will also let you shift their cache locations to the memory card.
Step-by-Step Guide on How to Delete Files on Android:
Step 1. Once you’ve installed the SD card, connect your smartphone with your computer.
Step 2. Move all of your media, music and other files to the card. You can even erase all data on your SD card directly from there is you want.
Even if you are using an SD card already, you could simply replace it with one that has more storage. They aren’t too expensive. There’s no cheaper way of getting additional storage on your smartphone than this.
Part 4. Upload Photos to Dropbox and Delete Them on Android
Photos can take up lots of space on your smartphone. You can free up a lot of space by storing them on Dropbox instead of on your phone.
Step-by-Step Guide on How to Delete Files on Android:
Step 1. Download the Dropbox and install it on your smartphone.
Step 2. You can backup the photos or videos to your Dropbox account and then remove it from your phone.
Step 3. You can then access these photos using the Dropbox app on your smartphone or on the internet through Dropbox.com. As long as you have internet access, you will be able to instantly access your photos no matter where you are.
If you don’t like the idea of your photos being uploaded to the internet, you can simply copy them to your computer and then delete them from your smartphone.
So what are you waiting for? You no longer have to suffer with a smartphone that has no storage space and runs really slow. Just choose any one of these options or all of them and get rid of your problems once and for all.
Part 5. How to Delete Data from Lost Android Phone
To be able to remotely manage and secure delete Android devices with Android Device Manager, you must have enabled Android Device Manager before it was stolen, lost or misplaced, using the following steps.
Step-By-Step Guide to Enable Android Device Manager
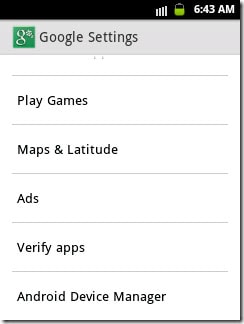
Step 1. Launch «Google Settings» app on your Android phone and tap «Android Device Manager».
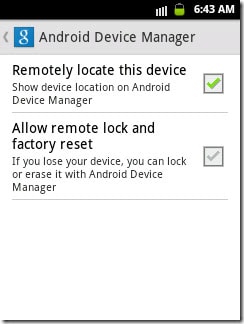
Step 2. Enable «Allow remote lock and factory reset». The box for «Remotely locate this device» is always checked by default, but you will just verify if it’s enabled.
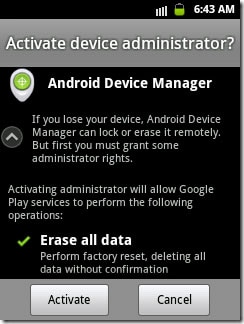
Step 3. You will then be asked to activate device administrator for Android Device Manager. Just tap the «Activate» button to grant ADM the administration rights to erase all your data, lock screen or ring it when it’s lost, stolen or misplaced.
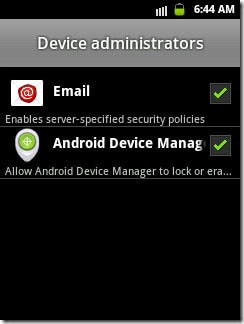
Step 4. To verify if Android Device Manager has been granted access to your device successfully, tap Settings> Security> Device Administrators and then check whether Android Device Manager is enabled.
Step-By-Step Guide on How to Delete Data from Lost Android Phone
Step 1. Go to this webside and log in with the Google account you use on your lost device. The online tool displays all the devices that are attached to your Google account. Select the lost Android phone.
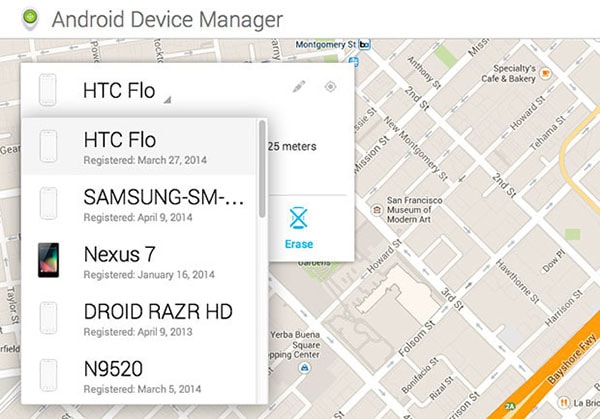
Step 2. You will be able to see the location of your phone, as well as the Ring, Lock and Erase buttons. Click on the «Erase» button to delete all the data from your lost Android phone remotely.
Источник


