- Как включить режим разработчика Android и отключить его. Полезные функции
- Содержание статьи:
- Как включить режим разработчика на Андроид
- Как как отключить режим разработчика на Андроид
- Что такое режим разработчика Андроид. Полезные функции
- Your Guide to Android Developer Options
- Android Developer Options Explained
Как включить режим разработчика Android и отключить его. Полезные функции

Операционная система Андроид привлекательна своей кастомизацией. Широкие возможности настройки интерфейса и функций смартфона стали дополнительным инструментом в маркетинговой компании Google на этапах зарождения Android OS. Мы уже говорили о тонкой настройке системных звуков Андроид в публикации Отключить звук садящейся батарейки на Android, звук клавиш громкости.
Сегодня рассмотрим, как открыть в своём Андроид смартфоне дополнительные функции разработчика, активировав соответствующий режим в системе аппарата.
Содержание статьи:
Как включить режим разработчика на Андроид
Чтобы включить режим разработчика на своём смартфоне выполним следующие шаги:
- Открываем Настройки телефона и находим пункт О телефоне . Обычно этот блок располагается в самом конце списка доступных опций. Название настройки также может отличаться: Сведения о телефоне, Информация или что-то подобное

- Теперь нам необходимо найти строчку, в которой будет прописан Номер сборки нашей прошивки.
Этот пункт может быть сразу в меню О телефоне, а может быть заложен в одном из под-меню, таких как О прошивке, Дополнительно и прочих - Дело за малым. Нам нужно несколько раз (обычно, это 7 касаний) подряд быстро тапнуть (нажать) на пункт Номер сборки.
Просто начинаем «постукивать» пальцем по экрану над нужным пунктом. Спустя 4-5 нажатий выскочит предупреждение с содержанием вроде: Вы почти у цели. Осталось 3 шагов — или что-то в этом духе. Это означает, что мы всё делаем правильно
Не останавливаемся и продолжаем стучать по экрану ещё несколько раз. Не бойтесь пропустить оповещение о том, что активация режима разработчика прошла успешно, даже если вы не успеете остановиться, лишние нажатия никак не повлияют на работу системы и не выключат Функции для разработчиков.
Наконец, перед нами появится оповещение: Вы стали разработчиком! - Собственно, это всё, что требовалось сделать. Чтобы убедиться, что нам теперь доступны функции для разработчиков Андроид, открываем Настройки и ищем там соответствующий пункт меню. Вероятно, он также будет расположен где-то внизу, рядом с разделом О телефоне


Как как отключить режим разработчика на Андроид
По большому счёту, наличие или отсутствие активного пункта меню функций для разработчиков никак не влияет на стандартную работу смартфона. При желании режим разработчика можно просто выключить соответствующим ползунком в настройках самого режима

Тем не менее, чтобы данный пункт «не мозолил глаза» или в любом другом случае, когда его нужно убрать, можно от него полностью избавиться.
По логике допустимо было бы предположить, что отключить функции для разработчиков можно также многократным нажатием на Номер сборки в информации о телефоне. Однако, легко убедиться, что это действие работает только на включение, поэтому при уже активированном режиме мы получим следующее оповещение:

Чтобы отключить режим разработчика на Андроид нужно проделать следующее:
- Для начала в настройках функций для разработчиков отключаем их, как было показано на скриншоте выше. Это не обязательный пункт, но в некоторых случаях помогает избежать мелких сбоев и ошибок.
- Открыть менеджер приложений из Меню — Настройки — Приложения (пути могут различаться в зависимости от версии ОС и от используемой оболочки).
- Перейти на вкладку отображения всех приложений: сторонних и системных.
- Найти приложение Настройки и тапнуть по нему
- В открывшемся меню нажать на кнопку Стереть данные. Также у вас может быть отдельная кнопка Управление памятью, под которой будет пункт Очистить данные . Подтверждаем операцию кнопкой OK
- На этом наши действия завершены, режим разработчика отключен, о чём свидетельствует отсутствие соответствующего пункта в меню настроек смартфона

Что такое режим разработчика Андроид. Полезные функции
Обычно описание функции размещается в начале статьи, в данном случае мы решили отойти от правила и сделать исключение.
Если вы открывали функции для разработчиков с определёнными намерениями, то уже можно приступать к их реализации. Если же вы сделали это с целью расширения общего понимания работы системы или просто из любопытства, то ниже мы приведём несколько пунктов меню из функций для разработчиков, которые могут быть полезны рядовому пользователю .
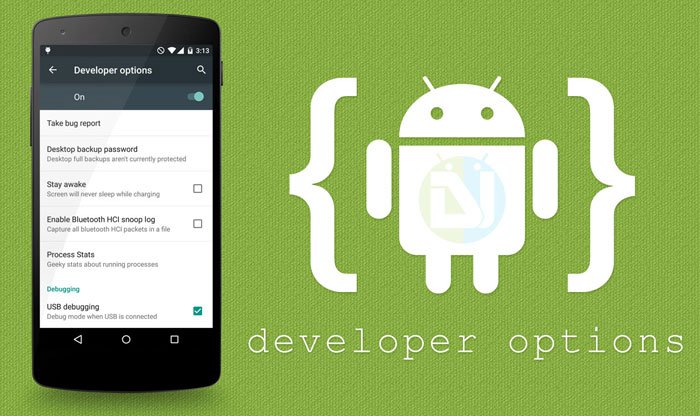
- Статистика процессов. Достаточно интересный пункт для отслеживания статистики работы приложений в фоне. Эта информация будет особенно полезна в тех случаях, когда нужно выяснить, например, какое из приложений постоянно сидит в фоне и отъедает драгоценный заряд у аккумулятора.
- Отладка по USB. Функция пригодится в тех случаях, когда вы широко используете соединение смартфона с ПК. Иногда активация отладки просто необходима, допустим, для подключения аппарата к компьютеру через adb. Данная настройка позволяет аппарату передавать по USB системную информацию , а не только обмениваться документами и медиа контентом.
- Анимация окна: масштаб, Анимация перехода: масштаб, Скорость анимации. Из названий ясно, что эти три пункта отвечают за настройку скорости и плавности анимации на телефоне. Не бойтесь поэкспериментировать с данными опциями. От себя хотелось бы добавить, что в случае, если вам важнее скорость работы аппарата и время реакции , то разумнее будет вовсе отключить анимацию на телефоне, выбрав пункты Анимация выключена и Без анимации , соответственно.
- Показать загрузку ЦП. Полезная фишка юзерам, привыкшим держать всё под контролем в режиме реального времени. При активации данного пункта на экране в правом верхнем углу будет выводиться информация о текущей загрузке процессора смартфона . Весьма полезно и при тестах аппаратов или их сравнении под нагрузкой.
- Ограничение фоновых процессов. Опция, позволяющая настроить многозадачность смартфона по своему вкусу. Важно понимать следующее: если вы выбираете пункт Без фоновых процессов , объём доступной оперативной памяти увеличивается. Если же выбрать большее количество допустимых процессов в фоне , то, соответственно, часть ОЗУ будет занята под нужды фоновых программ. Подробнее о структуре памяти в операционной системе Андроид описано в теме Память на Android. Все разделы памяти Андроид устройств.

Остальные пункты функций для разработчиков, на наш взгляд, имеют меньший интерес для рядовых пользователей. Но, разумеется, вы всегда можете использовать те возможности системы, которыми не пользуется большинство остальных владельцев устройств на Android OS.
Делайте бэкапы и будьте внимательны.
Источник
Your Guide to Android Developer Options
It has been a pretty long time since we’ve been publishing tips & tricks on our blog. But there is one term which is unique in most of them and is considered to be a top priority while performing these guides. And yes, we’re talking of the “Developer options”. While most of you might be aware of what it is, new users should also have this in their knowledge.
“Developer options” is a set of combined tools and options meant to be used by experienced users or developers, and could be found under device Settings on all Android device. It is highly essential to enable Developer options in order to switch USB Debugging ON, which is a necessary aspect when working on ADB/Fastboot commands and Android Developer Tools.
For many users, the Developer options is just a panel of options that lets them enable USB Debugging. The truth is, Developer options has a much more significant role to play that you think of. And so we take this privilege to explain the Android Developer options and all its related options/settings to you. However, to access these settings you first need to enable Developer options, which could be easily done following this guide:
Below is every term related to Developer options in the simplest manner possible.
Android Developer Options Explained
- Take bug report: A bug report is essential for reporting any crashed service, it may be an app or a system service. This option helps in gathering the device log and sending it to anyone (developer or developing community) for tackling and fixing issues. Tap on Take bug report and then on REPORT. It will take a minute or so to prepare and capture the bug report, then it shall appear in the notification panel. Tap on it and share it according to your will.
- Desktop backup password: ADB could be used to take backup or restore the Apps or App Data. This option forces a password on the backup process, which is later a mandatory aspect while restoring the same backup.
- Stay awake: There are situations when you need your screen to be awake at all times. Checking this option will keep your device’s screen fully awake when it is plugged in, either to a wall charger or your PC’s USB port. Do not enable this option endlessly as it will consume battery power constantly.
- HDCP checking: Enabling HDCP or High-bandwidth Digital Content Protection will start to protect DRM content by encrypting it.
- Enable Bluetooth HCI snoop log: A situation may arise, when an App developer or firmware developer may require a log related to Bluetooth. This option will create a log for Bluetooth HCI (Host Controller Interface) and push it to the device storage as btsnoop_hci.log.
- Process Stats: All the running process, viewed in-detail, all under one roof. Just tap it and go on tracking every background and foreground process running on your beloved Android. A magic wand for an App developer.
- USB Debugging: Toggle your Android’s debugging mode to be used by ADB commands. Of great use in countless processes.
- Bug Report Shortcut: Enabling this option will set a shortcut on the Power menu, tapping on which will capture a bug report, ready to be shared.
- Allow mock locations: This setting will let you overwrite the location information of your device.
- Enable view attribute inspection: Inspect views’ attributes in Android System Manager.
- Select debug app: A brilliant tool for App developers to debug their app individually and without using long ADB commands or a debugger. If you’re a layman in Android, you do not want to mess with this.
- Wait for debugger: Select this option to attach the above-debugged app instantly when a debugger is detected.
- Verify apps over USB: Installing content manually or via USB may infect your device with malicious content, which could be potentially harmful to your device. Google will scan it regarding the same.
- Show touches: This option was first introduced along Android 4.0 Ice Cream Sandwich. It displays a visual round mark at every location where you touch on the screen.
- Pointer location: This places a detailed information bar at the top of the screen telling the exact coordinates of the current point. This option comes to use at times when you need to check if your screen is responding well or if it is broken.
- Show surface updates: Flashes the screen every time there is an update in any of the surface elements. Annoying as it works.
- Show layout bounds: Outlines every single screen element to display every inch of the area of activation.
- Force RTL layout direction: RTL or Right-to-Left, enabling this option will turn every element of your device screen from right to left, just like a mirror image.
- Window animation scale: Change the speed of window animations on your Android according to your choice. The lower the number, the least amount of time allotted to an animation, hence a fast animation.
- Transition animation scale: The speed at which your system transitions work. Lower the number to get a faster response.
- Simulate secondary display: Enable a secondary display just alongside your primary display. You’ve got options for a large variety of screen sizes including mdpi, tvdpi and xhdpi.
- Force GPU rendering: 2D figures (applications, services or games) take support of the software libraries to work. Enabling this option will force 2D elements to be rendered using GPU.
- Show GPU view updates: When operating on GPU, this will flash a Red screen.
- Show hardware layer updates: Hardware layer means a layer rendered on your device’s screen using hardware acceleration (GPU). When this layer is updated, the screen shall flash Green.
- Debug GPU overdraw: Overdraw means to draw something on an already drawn element. On Android, while we activate the touch response, an overdraw takes place. Turning this ON will highlight and display every single overdraw that takes place.
- Force 4x MSAA: Multi-sample Anti-aliasing is a type of Anti-aliasing which could be used to improve the image quality, giving a little hard time to the performance (This depends on your smartphone’s hardware configuration)
- Disable HW overlays: Whenever the Android system is rendering a graphic (2D or 3D), it first decides to distribute the services to either CPU or GPU. Checking this option will force all rendering to the CPU only. Turning this ON might give you better battery life, but will not let your device perform up to its potential.
- Strict mode enabled: There are times when an operation takes a longer time than usual, it may be running on the background or on the main screen. Enabling this will flash the screen when any such process is taking place, bringing it to the user’s notice.
- Show CPU usage: Shows a window on the top-right of the screen which displays all the current CPU usage and process. If you’re a developer and not fond of using 3 rd party apps, this is your hold-up.
- Profile GPU rendering: Setting this ON will tell you how hard the GPU is operating. Either by displaying a graph or by writing it to a log file.
- Enable OpenGL traces: This will track OpenGL errors and push them to a log file. Meant to be used by professional developers.
- Don’t keep activities: Activities keep running in the background and a situation may arise when you might need to turn each and every one of them. Enabling this will terminate every process as soon as you exit the main application thread.
- Background process limit: Either prevent all the processes to run in the background or limit the processes to a specific number.
- Show all ANRs: Android Not Responding or ANR is a dialog shown to the user when a process or service terminates unexpectedly due to some error. Mostly this ANR dialog is displayed for known services or apps, and hidden for a lot of others. Enabling this setting will show the dialog for each and every process that is operating.
Generally, most of these settings are not put to use. But it is always wise to add knowledge, which may come in handy sometimes. We’ve given our best attempt to explain all the terms and settings for your reference.
Give us some feedback about our writings in the comments below and don’t miss our article describing the steps to speed up slow Android devices.
Источник


