- Animated Material Dialog — Android 📱 😍🎨
- 👉 About MaterialDialog Library :
- PatilShreyas/MaterialDialog-Android
- 📱Android Library to implement animated, 😍beautiful, 🎨stylish Material Dialog in android apps easily. …
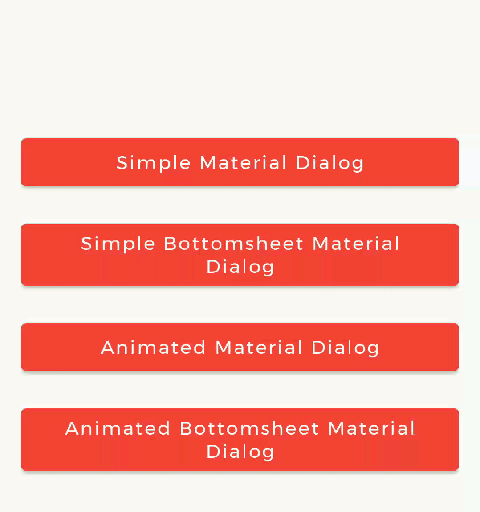
- 👇 Library provides two types of Dialogs :
- 1️⃣ Material Dialog:
- 2️⃣ Bottom Sheet Material Dialog:
- 💻 Getting Started :
- * Prerequisite:
- i. Gradle
- ii. Set up Material Theme
- iii. Customize Dialog Theme (Optional)
- Create Dialog Instance
- i. Material Dialog
- ii. Bottom Sheet Material Dialog
- 🎞 Showing Animations:
- i. Using Resource File
- ii. Using Asset File
- iii. Getting LottieAnimationView
- ◀️ Dialog State Listeners
- Dialog show animation android
- About
- Android Custom Dialog With Animation
- Changing app appearance
- Android custom dialog with rounded corners
- Android Alertdialog with animation
Animated Material Dialog — Android 📱 😍🎨

H ello everyone, in this article we will learn to implement animated, 😍beautiful, rich and stylish🎨 Material Dialog in the app using MaterialDialog android library.
Have you ever seen this dialog in Google Files app? When I saw it, I was impressed by its structure and design and curious about its implementation and how it works! Then I decided to develop a library for it which will help many developers to implement such dialog easily in their Android apps. After this, I started work on it and finally, I successfully developed library — MaterialDialog 😍.
👉 About MaterialDialog Library :
PatilShreyas/MaterialDialog-Android
📱Android Library to implement animated, 😍beautiful, 🎨stylish Material Dialog in android apps easily. …
MaterialDialog library is built upon Google’s Material Design library. This API will be useful to create rich, animated, beautiful dialogs in Android app easily. This library implements Airbnb’s Lottie library to render After Effects animation in the app. Refer this for Lottie documentation.
👇 Library provides two types of Dialogs :
1️⃣ Material Dialog:
This is basic material dialog which has two material buttons ( Same as Android’s AlertDialog ) as you can see in the image. For e.g. Here you can see the animated Material Dialog with Animation, Title, Message and two buttons.
2️⃣ Bottom Sheet Material Dialog:
This is Bottom Sheet material dialog which has two material buttons which is created at bottom of device as you can see in the image. For e.g. Here you can see the animated Bottom Sheet Material Dialog with Animation, Title, Message and two buttons.
💻 Getting Started :
This project is available on GitHub and you can clone this repository. https://github.com/PatilShreyas/MaterialDialog-Android.
Implementation of this Library is so easy. This library is developed as similar as AlertDialog of Android so that structure of implementation is also similar.
* Prerequisite:
i. Gradle
In Build.gradle of app module, include these dependencies. If you want to show animations, include Lottie animation library.
ii. Set up Material Theme
Setting Material Theme to the app is necessary before implementing Material Dialog library. To set it up, update styles.xml of a values directory in the app.
After these main two steps, we are done. Remaining work is so easy. Now, we are ready to create MaterialDialog instance.
iii. Customize Dialog Theme (Optional)
If you want to customize dialog view, you can override the style in styles.xml as below.
Create Dialog Instance
As there are two types of dialogs in the library. Material Dialogs are instantiated as follows.
i. Material Dialog
MaterialDialog class is used to create Material Dialog. Its static Builder class is used to instantiate it. After building, to show the dialog, show() method of MaterialDialog is used.
After running this code, its output will be as…

ii. Bottom Sheet Material Dialog
BottomSheetMaterialDialog class is used to create Bottom Sheet Material Dialog. Its static Builder class is used to instantiate it. After building, to show the dialog, show() method of BottomSheetMaterialDialog is used.
After running this code, its output will be as…

🎞 Showing Animations:
Animations in this library are implemented using Lottie animation library. You can get free animations files here. You can find varieties of animation files on https://lottiefiles.com. *.json file downloaded from LottieFiles should be placed in android project. There are two ways to place the animation file ( *.json ).
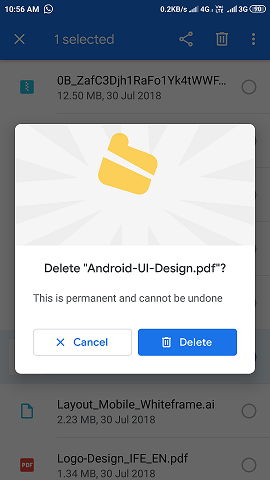
For example, here delete_anim.json animation file is used to show file delete animation.
i. Using Resource File
Downloaded *.json file should be placed in raw directory of res.

In code, setAnimation() method of Builder is used to set Animation to the dialog. Its prototype is as follows: setAnimation(int resourceId) .
Resource file should be passed to the method. e.g. R.raw.delete_anim .
ii. Using Asset File
Downloaded *.json file should be placed in asset directory.

In code, setAnimation() method of Builder is used to set Animation to the dialog. Its prototype is as follows: setAnimation(String fileName) .
iii. Getting LottieAnimationView
To get View of Animation for any operations, there is a method in Material Dialogs which returns LottieAnimationView of dialog.
◀️ Dialog State Listeners
There are three callback events and listeners for Dialog.
Following are interfaces for implementations:
- OnShowListener() — Listens for dialog Show event. Its onShow() is invoked when dialog is displayed.
- OnCancelListener() — Listens for dialog Cancel event. Its onCancel() is invoked when dialog is cancelled.
- OnDismissListener() — Listens for dialog Dismiss event. Its onDismiss() is dismiss when dialog is dismissed.
🎉 Hurrah. As thus, we have successfully implemented and demonstrated the use of MaterialDialog Android library. If you have any questions, suggestions and want any help you can contact me on details given at the end of the article.
If you need any help get in touch with me on
Источник
Dialog show animation android
![]()
![]()
Material Dialogs for Android 📱
📱 Android Library to implement animated, 😍 beautiful, 🎨 stylish Material Dialog in android apps easily.
| 1. Material Dialog | 2. Animated Material Dialog | 3. Bottom Sheet Material Dialog | 4. Animated Bottom Sheet Material Dialog |
|---|---|---|---|
 |  |  |  |
Table of Contents:
MaterialDialog library is built upon Google’s Material Design library. This API will be useful to create rich, animated, beautiful dialogs in Android app easily. This library implements Airbnb’s Lottie library to render After Effects animation in app. Refer this for Lottie documentation.
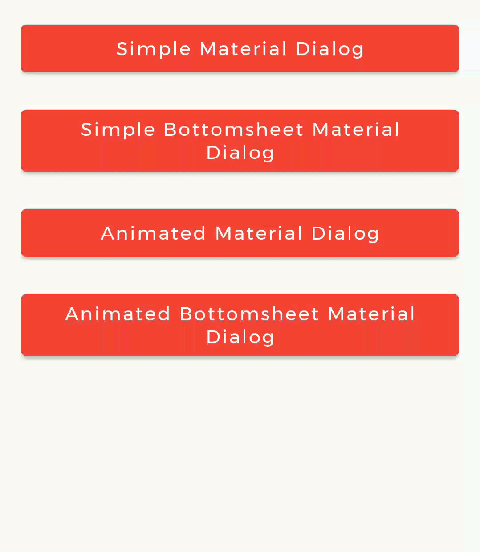
Types of Dialog
MaterialDialog library provides two types of dialog i.e.
| 1. Material Dialog | 2. Bottom Sheet Material Dialog |
|---|---|
| This is basic material dialog which has two material buttons (Same as Android’s AlertDialog) as you can see below. | This is Bottom Sheet material dialog which has two material buttons which is showed from bottom of device as you can see below. |
 |  |
Implementation of Material Dialog library is so easy. You can check /app directory for demo. Let’s have look on basic steps of implementation.
In Build.gradle of app module, include these dependencies. If you want to show animations, include Lottie animation library.
This library is available on MavenCentreal
ii. Set up Material Theme
Setting Material Theme to app is necessary before implementing Material Dialog library. To set it up, update styles.xml of values directory in app.
These are required prerequisites to implement Material Dialog library.
iii. Customize Dialog Theme (Optional)
If you want to customize dialog view, you can override style in styles.xml as below.
Create Dialog Instance
As there are two types of dialogs in library. Material Dialogs are instantiated as follows.
i. Material Dialog
MaterialDialog class is used to create Material Dialog. Its static Builder class is used to instantiate it. After building, to show the dialog, show() method of MaterialDialog is used.
ii. Bottom Sheet Material Dialog
BottomSheetMaterialDialog class is used to create Bottom Sheet Material Dialog. Its static Builder class is used to instantiate it. After building, to show the dialog, show() method of BottomSheetMaterialDialog is used.
Text alignment is supported for title and message of a dialog. It’s configurable while building a dialog. If it’s not provided in builder, TextAlignment.CENTER is considered by default i.e. it’ll be always aligned in a center.
Following Alignment Enum Values are allowed to be used for Dialog text alignment:
- TextAlignment.START : Aligns text at start / left.
- TextAlignment.CENTER : Aligns text at center.
- TextAlignment.END : Aligns text at end / right.
Example usage:
HTML formatting for Message
HTML spanned text is supported only for dialog’s message. While setting a message, you can directly provide Spanned instance as shown in following example.
| Material Dialog | Bottom Sheet Material Dialog |
|---|---|
| |
Animations in this library are implemented using Lottie animation library. You can get free animations files here. You can find varieties of animation files on https://lottiefiles.com. *.json file downloaded from LottieFiles should be placed in android project. There are two ways to place animation file ( *.json ).
For example, here delete_anim.json animation file is used to show file delete animation.
i. Using Resource File
Downloaded json file should placed in raw directory of res .

In code, setAnimation() method of Builder is used to set Animation to the dialog.
Resource file should be passed to method. e.g. R.raw.delete_anim .
ii. Using Asset File
Downloaded json file should placed in asset directory.

In code, setAnimation() method of Builder is used to set Animation to the dialog.
Only file name with extensions should passed to method.
iii. Getting LottieAnimationView
To get View of Animation for any operations, there is a method in Material Dialogs which returns LottieAnimationView of dialog.
Dialog State Listeners
There are three callback events and listeners for Dialog.
Following are interfaces for implementations:
- OnShowListener() — Listens for dialog Show event. Its onShow() is invoked when dialog is displayed.
- OnCancelListener() — Listens for dialog Cancel event. Its onCancel() is invoked when dialog is cancelled.
- OnDismissListener() — Listens for dialog Dismiss event. Its onDismiss() is dismiss when dialog is dismissed.
Let’s develop with collaborations. We would love to have contributions by raising issues and opening PRs. Filing an issue before PR is must. See Contributing Guidelines.
This library is built using following open-source libraries.
Project is published under the Apache 2.0 license. Feel free to clone and modify repo as you want, but don’t forget to add reference to authors 🙂
About
📱 Android Library to implement animated, 😍 beautiful, 🎨 stylish Material Dialog in android apps easily.
Источник
Android Custom Dialog With Animation
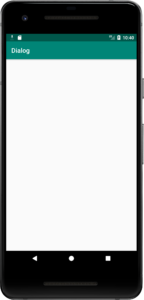
Hello and welcome to another tutorial from Codingdemos, today you will learn how to create an Android custom dialog, this dialog will have animation, background color, ImageView and Button. You can use this Alertdialog as an indicator when something good or bad occur while the user uses your app.
By the end of this tutorial, you will have an app that looks like this. (Large preview)
In this tutorial we will be using the following:
- – Android studio version 3.2.1
– Android emulator Nexus 5X with API 26
– Minimum SDK API 16
Create new Android Studio project or open existing project. (Large preview)
2- Open colors.xml file to change the colors of the main app.
Changing app appearance
3- Build and run the app to see the new colors.
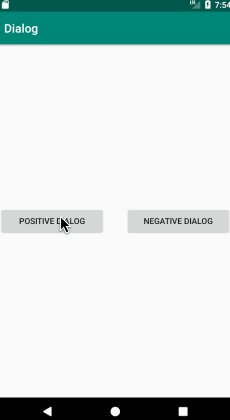
4- Open activity_main.xml file, here you need to add 2 Android Buttons. These 2 buttons will be placed on the same line in the center of the screen.
5- Create a new xml layout file and name it dialog_postive_layout, you will use this as the layout for Positive Dialog.
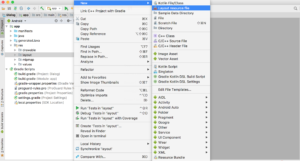
Create layout resource file in Android Studio. (Large preview)
6- Create an icon that you will use it for Android ImageView.

Create vector asset in Android Studio. (Large preview)
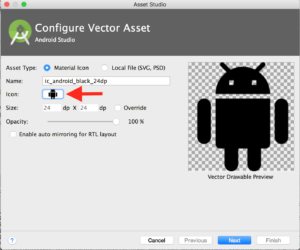
Choose icon inside Android studio asset studio. (Large preview)
7- Add the following code inside dialog_postive_layout.xml file.
In this layout you’ve added an Android ImageView which will show the icon that you’ve create it using Android asset studio, 2 Android Textviews that will show the title and a message and finally an Android Button that you will use it later to dismiss Android dialog box.
8- Here is how the layout looks like in Android Studio preview tab.
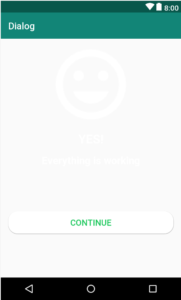
9- I’m sure you’ve noticed that you literally can’t see the text, let’s fix it by giving a green background color for the layout.

Here is how Android custom dialog look like. (Large preview)
10- Here is the full code for dialog_postive_layout.xml file.
11- Create a new Android layout resource file and name it dialog_negative_layout.
12- Add the following code inside dialog_negative_layout.xml file.
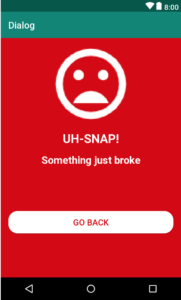
Here is how Android custom dialog look like. (Large preview)
13- Here is the full code for dialog_negative_layout.xml file.
14- Open MainActivity.java file, here is where you will reference those 2 Android Buttons as well as creating Alertdialog box.
15- Now you need to work on setting up Android dialog, since you have 2 custom alertdialog, instead of writing duplicate code you will create a function that will handle this work.
As you can see the function name is showAlertDialog that takes an int value which is the custom alertdialog layout ID. Inside this function you will setup alertdialog.
16- Next you need to make those 2 Buttons clickable by calling setOnClickListener and then you will call showAlertDialog function to show custom alertdialog on the user’s screen.
17- Build and run the app to see the output.

Here is Android Custom Alertdialog. (Large preview)
Android custom dialog with rounded corners
It’s good to finally see that custom alertdialog, it will be really cool if you can have rounded corners around alertdialog! Let’s do it now 🙂
18- Create a new Android drawable resource file, name it dialog_positive_round and add in the following code.
Here you use shape as the root layout, then you give it a color, set the radius and finally give it some padding around it.
19- Open dialog_postive_layout.xml and change the background value of the root layout.
20- Repeat the same steps (18 & 19) to have rounded corners for dialog_negative_layout.xml.
21- Build and run the app to see the result.
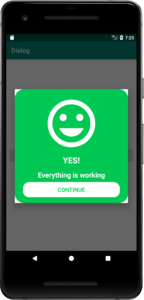
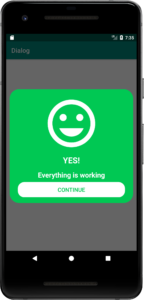
Android custom dialog positive status. (Large preview)
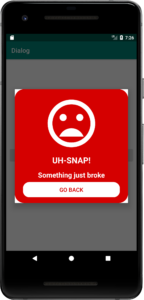
Android custom dialog negative status. (Large preview)
22- One thing you will notice is there is a white background at the corners of the dialog box. You can fix it by adding the following code inside showAlertDialog function.
23- Build and run the app to see the result.
Android custom dialog with round corners. (Large preview)
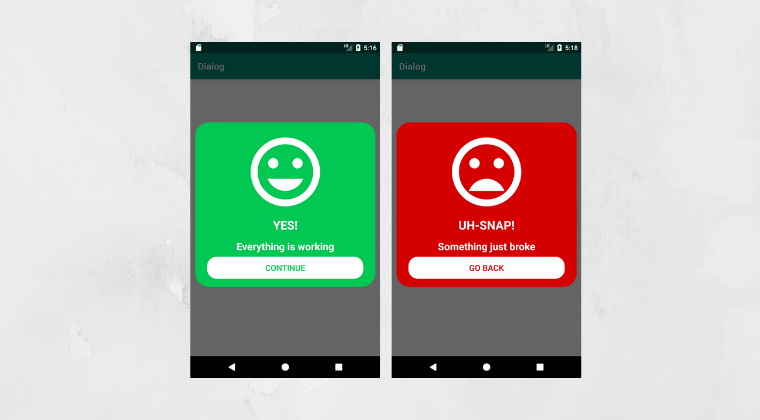
Android Alertdialog with animation
Let’s transform this boring Alertdialog to something more fun by adding some cool animation to it.
24- Open styles.xml file and add the following code.
Android basically have it’s built-in animation resource files that you can directly use them.
25- Open MainActivity.java file and add the following code inside showAlertDialog function.
Android alertdialog with animation. (Large preview)
26- Here is the full code for MainActivity.java file.
27- I hope you find this tutorial helpful and if you have any question please post them in the comment below.
Источник


