- Digital Piano Controller
- Упрощенная визуализация выбираемых ритмов! Слушайте демонстрационные композиции и пробуйте разные варианты звучания
- Простые настройки
- Сохраняйте предпочитаемые звуковые настройки в приложении, чтобы всегда иметь их при себе
- Digital Piano Controller
- Now even easier to see the Voices to select! Listen to the demo songs — try out new sounds
- Settings made simple
- Save your favorite sound settings in the app to take along anywhere
- Как подключить цифровое пианино к компьютеру или устройству на платформе iOS или Android
- Как подобрать качественное оборудование
- Как подключить пианино к ПК?
- Синхронизация с устройствами iOS и Android
- Как подключиться к iOS устройству
- Подключение к устройству Android
- Синхронизация через Bluetooth
- Более профессиональное подключение
- Нужно ли использовать драйвера и какие?
- Используйте клавишный инструмент в качестве MIDI-контроллера
- How to Connect Your Digital Piano to a Computer, iPad, or Android Device
- Getting The Right Equipment
- Connecting to a Computer
- Connecting to an iOS or Android device
- To Connect to an iOS Device
- To Connect to an Android Device
- Enabling Bluetooth MIDI Connectivity
- Need Something a Little More Advanced?
- Do I Need to Install Any Drivers?
- Use Your Keyboard as a MIDI controller
- Learn How to Play
- Make and Record Music
- Connect to External Instrument Libraries (VST s )
- Notation/Music Sheets
- Final Words
Digital Piano Controller
Упрощенная визуализация выбираемых ритмов! Слушайте демонстрационные композиции и пробуйте разные варианты звучания

Вы можете выбирать встроенные тембры цифрового пианино Yamaha, ориентируясь на изображения инструментов на экране. Данное приложение позволяет ознакомиться с характеристиками каждого тембра, дает рекомендации по их применению и предлагает к прослушиванию демонстрационные композиции, содержащие эти тембры. Демо-композиции можно слушать и в самом приложении.
Простые настройки
Прикоснитесь к специальной иконке и активируйте режим «Dual», накладывающий два разных тембра друг на друга. Так же просто вызвать метроном и другие функции.
Настройка может быть выполнена в 2 простых этапа: сначала вы подтверждаете значение поля «Song name» в меню «Song», а затем – значение «Type name» в меню регулирования реверберации и эффектов.
Сохраняйте предпочитаемые звуковые настройки в приложении, чтобы всегда иметь их при себе

Часто используемые вами звуковые настройки могут храниться прямо в приложении. Оно позволит вам одним касанием быстро загрузить их в инструмент тогда, когда это необходимо, например, на живом выступлении или на вечеринке.
Источник
Digital Piano Controller
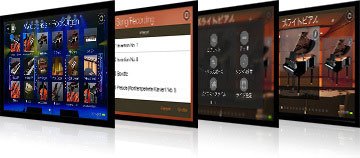
Now even easier to see the Voices to select! Listen to the demo songs — try out new sounds

You can select Yamaha Digital Piano onboard Voices by looking at the colorful instrument images on-screen. The app lets you read about the characteristics of each Voice and gives advice on their use, providing demo songs for you to listen to that use these Voices, in order to freely challenge yourself to try out Voices you’ve never used before. You can also listen to the demo songs in the application itself. First, get the Digital Piano Controller and experience the world view that it provides.
Settings made simple

Touch the screen to set up «Dual» mode (layering two different Voices together), Metronome, or other functions in a simple and intuitive manner. Selections can be made smoothly by checking the «song name» on the song screen and the «type name» on the reverb setting screen.
*There are functions that is not supported by some model.
Save your favorite sound settings in the app to take along anywhere
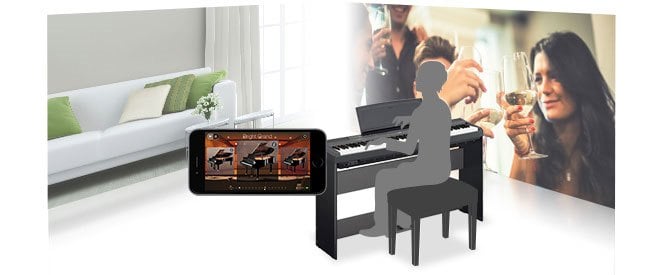
Favorite sound settings that you use frequently can be saved in the app. The app makes it convenient to load your favorite sound settings with a single touch at daily practice,live performances or parties.
Источник
Как подключить цифровое пианино к компьютеру или устройству на платформе iOS или Android
Новейшие разработки в сфере компьютерных технологий открывают неограниченное поле деятельности для музыкальных исполнителей. Однако заблудиться в этом поле слишком просто, так как новичку в этом ремесле многое непонятно. Как подключить музыкальный инструмент, что для этого нужно помимо кабеля и т.п. Данный материал даст читателю исчерпывающую информацию по всем возможным вопросам. В том числе, – как подключить цифровое пианино к компьютеру или планшету, какие возможности станут доступны исполнителю после синхронизации инструмента с ПК.
Современные модели цифровых пианино оснащены разъемами USB и MIDI, а также имеет беспроводное соединение Bluetooth. Благодаря этому реализуется подключение инструмента, что в результате позволяет организовать небольшую музыкальную студию прямо у себя дома.
Как подобрать качественное оборудование
Первым делом требуется подобрать кабель подключения к инструменту. Выбор кабеля зависит от модели клавишных и бывает следующих типов:
Их можно использовать для подключения музыкального инструмента к компьютеру, устройствам под управлением AndroidOS и iOS.
Кабель анализирует и передает сигнал в виде MIDI-сообщения в тот момент, когда вы зажимаете клавиши, выжимаете педали или применяете иные элементы управления. Разумеется, длительность и сила нажатия также учитываются. Все эти сигналы записываются в единый MIDI-файл, который может быть использовать для взаимодействия с музыкальным и обучающим ПО.
В новых моделях клавишных чаще всего можно обнаружить порт USB-B, а в профессиональных инструментах или более возрастных моделях обычно используется MIDI-соединение (порт In и Out).
Также есть модели с входом USB-A, однако они не подходят для передачи MIDI-данных. В этом случается исполнитель может вставить в разъем клавиатуры флэш-накопитель, который будет сохранять запись, учитывая звуковые настройки клавиатуры.
Наиболее простым способом синхронизации является Bluetooth-соединение, где необходимости в использовании кабеля вообще нет.
Как подключить пианино к ПК?
Для подключения к компьютеру потребуется один единственный кабель. Разберем процесс подробнее.
- Если на клавишных используется USB-B (USB-host), для подключения следует использовать кабель USB A-B.
Для этого присоедините кабель USB-B к музыкальному инструменту, а USB-A к порту компьютера. Если для подключения используется MacBook, потребуется кабель USB C-B.
- Если на клавишных реализован интерфейс MIDI (5-контактный порт In-Out), то купите кабель MIDI-USB.
Тогда, разъем USB-A подключите к своему ПК, а разъем MIDI типа In подключите к порту MIDI типа Out на клавишном инструменте. Теперь MIDI типа Out присоедините к порту MIDI типа In на пианино.
Как правило, устаревшие модели цифровых пианино оснащены исключительно MIDI In-Out разъемами. В современных же моделях уже реализованы порты MIDI и USB-B.
Синхронизация с устройствами iOS и Android
При синхронизации музыкального инструмента и устройства под управлением мобильных операционных систем, следует учитывать один очень важный факт. Так как iOS и Android устройства не оснащены адаптером USB, для подключения потребуется приобретение дополнительного переходного адаптера.
В некоторых случаях можно отыскать необходимый кабель с нужными для мобильного устройства разъемами, однако это скорее исключение, нежели правило.
Как подключиться к iOS устройству
Для синхронизации клавишного инструмента с iOS устройством, потребуется дополнительный адаптер типа «Lightning to USB Camera». Через него реализуется подключение пианино через USB A-B кабель, что в итоге дает единый провод, но с двумя соединениями. Оно надежное и качественное, пусть и выглядит слегка неаккуратно.
Также можно прибегнуть к покупке кабеля «Lightning to USB-B». Тогда соединение реализуется посредством одного кабеля, не требует дополнительных затрат на адаптеры. Однако надежность такого кабеля весьма условна, что вызвано их способностью к быстрому износу. Сложной задачей станет и поиск подобного аксессуара.
Подключение к устройству Android
Подключение музыкального инструмента с Android устройством аналогично способу подключения к гаджетам под управлением iOS. Только в этом случае потребуется не Lightning-кабель, а провод, совместимый с конкретной моделью Android.
Возможны следующие способы синхронизации:
- Для устройства с интерфейсом зарядки microUSB –– используйте OTG-кабель USB-A к microUSB.
- Для устройства с интерфейсом USB-C –– используйте OTG-кабель USB-A к USB-C.
Вне зависимости от интерфейса зарядки Android устройства не получится обойтись без кабеля USB A-B, в случае когда клавишные оснащены портом MIDI In-Out. В этом случае адаптер, о которых говорится в пункте 1 и 2, подключается к USB-A, в то время как USB A-B используется для разъемов MIDI.
При наличии в подключаемом гаджете интерфейса USB-C можно обойтись одним кабелем для синхронизации –- USB типа C к B.
Если же в смартфоне или планшете под управлением Android используется microUSB, то без одновременного использования двух кабелей не обойтись.
Синхронизация через Bluetooth
Подключить музыкальный инструмент к устройству с технологией беспроводного соединения можно даже в том случае, если клавишные не оснащены Bluetooth.
Цифровое фортепиано, оснащенное интерфейсом MIDI In-Out, легко подключить к устройству посредством использования беспроводного адаптера. Например, YAMAHA MD-BT01.
Данный адаптер необходимо подключить в порт MIDI, что позволит передавать данные с инструмента на необходимое устройство без каких-либо потерь.
Более профессиональное подключение
Профессиональное многоканальное подключение предполагает соответствующие затраты. Однако специальный интерфейс даст возможность синхронизировать с ПК или умным гаджетом не только цифровое фортепиано, но и микрофон, педали, другие музыкальные инструменты.
Для устройств от Apple лучшего всего подходит MIDI-интерфейс, а именно ALESIS I/O Dock II. Он синхронизирует клавишный инструмент с MIDI In-Out интерфейсом и позволит применять микрофон для записи гитары, вокала, инструментов оркестра.
Применение входа ¼ “ дает возможность записи MIDI-сигналов и реального аудиосигнала цифрового фортепиано.
Отсутствует необходимость в дополнительных функциях? Используйте решение попроще –– IK MULTIMEDIA iRIG MIDI 2. Для синхронизации подходит Lightning и USB-соединения, а в общий пакет предустановленных приложений входит такое ПО, как iGrand Piano и iLectric Piano.
Для применения интерфейса используется MIDI In-Out-Throught, а значит, он подходит для подключения клавишных с разъемом In-Out, но не USB-A.
Нужно ли использовать драйвера и какие?
Качественная передача звуковых данных с музыкального инструмента на компьютер невозможна без установки дополнительного программного обеспечения – драйверов. Они, как правило, индивидуальны для каждой модели цифрового фортепиано, поэтому при установке необходимо обратиться к руководству по эксплуатации.
В то же время большая часть современных цифровых клавишных моделей при подключении к ПК самостоятельно подгружают необходимое программное обеспечение, поэтому возможно обойтись без сложных манипуляций. При синхронизации музыкального инструмента и умных гаджетов на iOS и Android драйвера не потребуются.
Когда вам удастся синхронизировать пианино со своим ПК или умным устройством, перед вами откроется новый неизведанный мир создания авторской музыки в своей уютной домашней студии! Используйте оцифрованные ноты вместо стопок тетрадей, производите запись композиций, редактируйте их в любое время, используйте любые музыкальные инструменты для записи и творите искусство!
Используйте клавишный инструмент в качестве MIDI-контроллера
Теперь вы знаете, как синхронизировать клавишный инструмент с любым доступным устройством. Наверняка, в процессе прочтения статьи вы задумались над вопросом, что такое MIDI.
Все просто – это данные, исходящие с музыкального инструмента, которые считывает компьютер и трансформирует в музыкальные ноты. Сыграйте отрывок легато, а затем воспроизведите его на своем устройстве со стаккато. Удобно, не правда ли?
Такая трансформация звуков возможна благодаря CC (ControlChange). Теперь вы можете менять настройки как заблагорассудится, выбирая новые способы воспроизведения того или иного отрывка и произведения.
Главным отличием MIDI от Audio является возможность контроля нот и данных ControlChange. При неправильной записи нот, просто отрегулируйте их на ПК или умном устройстве.
Audio-данные также располагают неким функционалом, но довольно ограниченным. Здесь для музыканта доступно лишь изменение громкости, замедление и ускорение динамики. В случае с MIDI-данными, возможности воспроизведения бесчисленны.
Итак, у нас есть музыкальный инструмент, синхронизированный с ПК или умным устройством, что дает невероятные возможности для музыкальной деятельности. Как их все использовать? Для этого нужны специальные приложения.
В основном программное обеспечение для цифрового пианино делится на 4 категории:
- Обучающие приложения:
- Цифровые станции для работы (создание, запись и микширование композиций):
- Плагины VST (дает доступ к многочисленным библиотекам с плагинами для виртуальных студий):
- ПО для записи интерактивных нот:
- Flowkey: Learn Piano;
- Skoove;
- Simply Piano by JoyTunes;
- Piano Tutor for iPad;
- iReal Pro;
- Playground Sessions;
- Piano Marvel;
- Piano Chords, Scales Companion.
- Logic Pro X;
- Ableton Livel;
- Pro Tools 12;
- Cubase 10;
- FL Studio;
- GarageBand;
- Digital Performer 9 X;
- Pianoteq 6;
- Native Instruments Kontakt 6;
- Synthogy Ivory II Grand Pianos;
- EastWest Quantum Leap Pianos;
- Addictive Keys;
- Spectrasonics Omnisphere 2;
- Keyscape;
- Dorico;
- MuseScore;
- Sheet Music Direct PlayAlong;
- Sibelius Ultimate;
- Finale 26;
- PiaScore – Smart Music Score;
В результате всех проделанных действий, которые были описаны в данном материале, для музыкального исполнителя открывается расширенный функционал по созданию, редактированию и воспроизведению музыкальных композиций. Это не только новый подход к использованию цифровых инструментов, но и применение музыкальных технологий для обустройства собственной домашней студии.
Источник
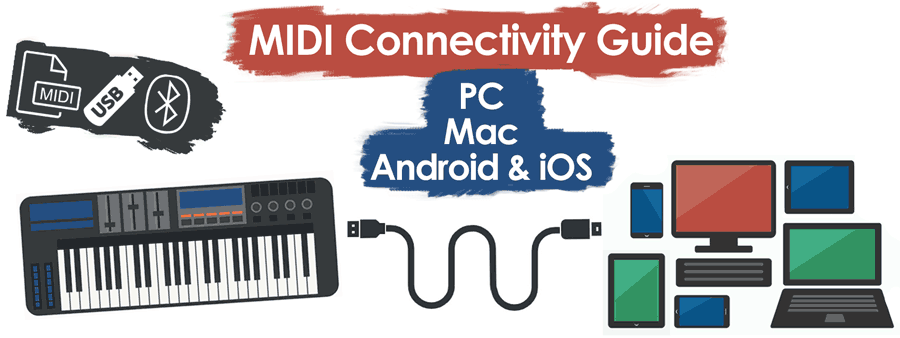
How to Connect Your Digital Piano to a Computer, iPad, or Android Device
There are now so many options as a modern musician in how we can play, practice, perform, transcribe, and compose music.
At times, it seems overwhelming with the choices available. It might also be daunting to figure out which cables to use, and what connections you may need.
In this article, I will be covering how to connect your keyboard or digital piano to a computer or a smart device, and reasons why it opens many new exciting opportunities as a musician.
Digital pianos now include USB, MIDI, and Bluetooth options available to you.
That is where I’d like to come in and help you with what would make sense to you and your needs as a modern-day musician.
You can basically set up a mini, portable home studio and use your digital pianos as a MIDI-controller following the guide below!
I ask you to make yourself comfy, with a beverage of your choice, and read on through to how you can start opening new ways of making music!
Getting The Right Equipment
Connecting your digital piano to an external device is a relatively simple and straightforward process once you have all the necessary equipment.
Firstly, you will need a cable that plugs directly into your keyboard.
Depending on the model of your keyboard, this is either a MIDI to USB cable converter or USB type A to B cable.
Both cables make it possible to connect your keyboard to a computer, Android, or Apple device in order to transfer MIDI data.
Note: MIDI (Musical Instrument Digital Interface) is a protocol that allows computers and electronic musical instruments to communicate with each other.
When you press a key on your keyboard, a sustain pedal, or use any other controller that your instrument has, you generate MIDI messages that tell which key was pressed, how much pressure was used for it, how long a note was held, etc.
All these messages can be sent to your computer and recorded as a MIDI file. You can also use them to control various music-making and learning apps (more on that in the following sections).
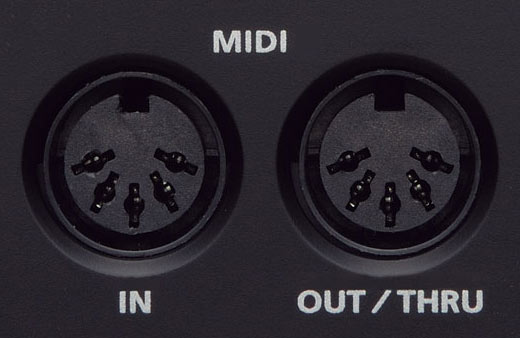
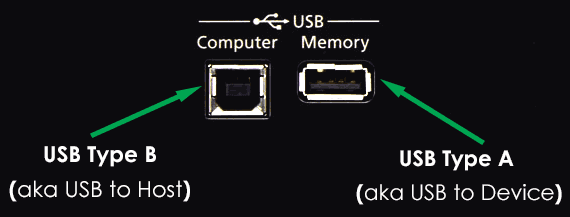
Most modern keyboards feature a USB Type B port, while some older keyboards and pro-grade instruments use a MIDI connection (dedicated MIDI In/Out ports).
You may notice a USB Type A port in your keyboard, but this cannot be used for transferring MIDI data, you can only insert a flash drive to save recordings onto using your keyboard’s internal sounds.
Take a look at the table below to understand what cables and adapters you’ll need to connect your digital piano to a smart device:
| Your Device Has ↓ | MIDI In/Out » style=»min-width:33.3333%; » >Your Keyboard Has |
| USB A to B cable | MIDI to USB Interface |
| USB A to B cable + USB A to C adapter » data-order=» USB C to B cable | MIDI to USB Interface + USB A to C adapter |
| USB A to B cable + Lightning to USB Camera Adapter » data-order=» Lightning to USB B cable | MIDI to USB Interface + Lightning to USB Camera Adapter |
| USB A to B cable + USB A to MicroUSB adapter | MIDI to USB Interface + USB A to MicroUSB adapter |
Note: Before buying any of the cables above, first check if your keyboard has Bluetooth MIDI connectivity.
If that’s the case, you may not need any cables at all. Instead, you can connect to your smart device wirelessly via Bluetooth (provided your smart device also supports it).
Connecting to a Computer
Connecting to a computer is very simple as you’ll only need one cable in this case.
1) If your keyboard has a USB type B port (aka USB to Host), you’ll need a USB A to B cable such as this one.
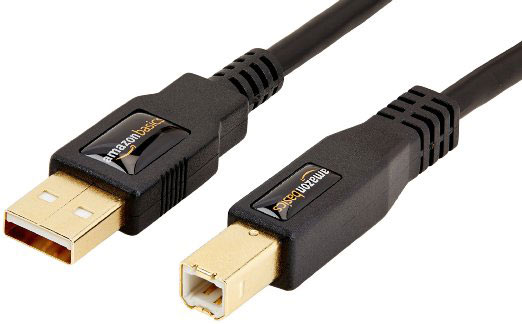
USB A-type to B-type Cable
Plug in the B-end into your keyboard, and the A-end into your computer’s USB port.
Note: If you’re the happy owner of a newer Macbook (2016 or later), which doesn’t have regular size USB ports, you’ll need a USB C to B cable instead of the USB A to B cable.
2) If your keyboard doesn’t have a USB Type B port, it will most probably use the traditional 5-pin MIDI In/Out ports.
All you’ll need in this case is a MIDI to USB interface. You can purchase one on Amazon or in your local electronics store for less than $50.
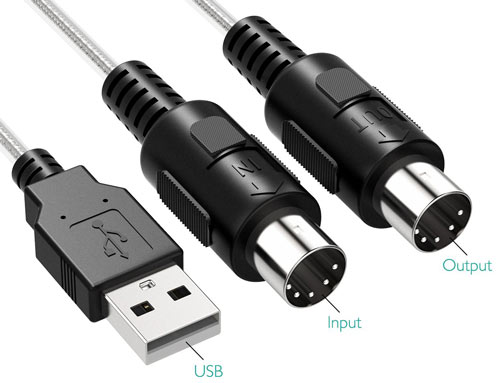
MIDI to USB Cable Converter
The iConnectivity mio has proven to be one of the most reliable MIDI to USB interfaces out there.
The USB A end will go to your computer’s USB port, while the MIDI In end of the cable will go to the MIDI Out port of your keyboard and MIDI Out end will go to the MIDI In port.
You might be wondering why we’re connecting an In end to the Out port and vice versa.
Quick fact: Think of MIDI moving like a signal flow – you want the MIDI to flow OUT of your keyboard, INTO your computer, which then goes out of your computer directly into your speakers.
The sound is moving in and out, communicating data between your keyboard and computer.
There are still many keyboards that only feature MIDI In/Out ports; typically with older models. A lot of modern ones will feature both MIDI and USB type B ports.
Note: If your keyboard has MIDI In/Out ports but your computer doesn’t have a regular size USB ports (e.g Macbook, Chromebook, etc.), then you’ll need to additionally purchase a USB C (male) to USB A (female) adapter to be able to use the MIDI to USB interface.
Connecting to an iOS or Android device
It becomes a little more complicated here, because mobile devices don’t have a full-size USB port, so you will need to purchase an extra adapter to be able to use USB A to B cable or MIDI to USB interface .
Alternatively, you can try to find a single cable that’s able to connect directly to your keyboard and into your mobile device, but this will not always be possible since some of these cables simply don’t exist (or very rare).
Feel free to comment below if you are not sure which cable to use for your device, and we can help you out!
To Connect to an iOS Device
The Lightning to USB Camera adapter is able to connect to your iOS device through a USB A to B cable (or MIDI to USB interface) in order to connect to your keyboard.
Connecting this way is a reliable solution, however a more bulky method as you need two cables.
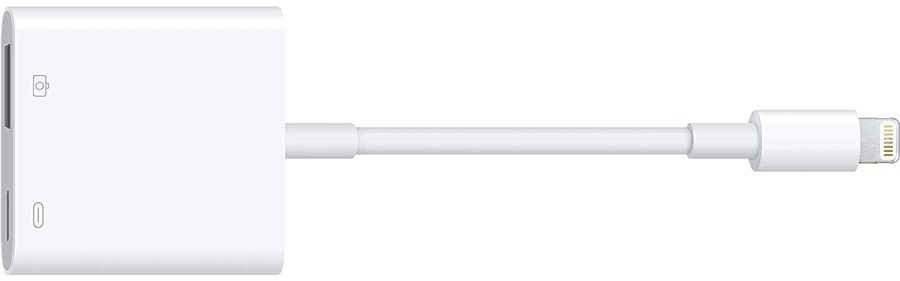
Lightning to USB Camera Adapter
Note: If you use an older Apple model (iPhone 4s or lower/ iPad 3 or lower) that doesn’t have a lightning port, you will need the Apple iPad Camera Connection Kit with a 30-pin connector to be able to connect to your keyboard.
If you just need a Lightning connection, you may also use the Lightning to USB type B connector.
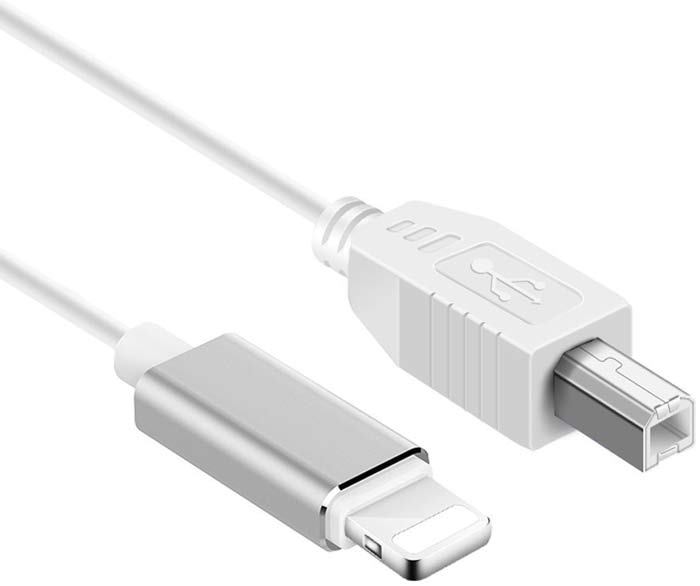
Lightning to USB type B cable
The pros of using this approach is you only need one cable, less bulk to deal with, and you are saving more money.
However, this method is not as reliable as using two cables, plus those single cable solutions can be quite hard to find and they tend to break easily.
To Connect to an Android Device
With android devices, connecting your digital piano will follow the same process as connecting your iOS device. However, the big difference is that you will require a different type of cable as the Lightning Adapter is not compatible with Android devices.
If you’re trying to connect your keyboard to an Android device, use either:
1) OTG (aka “On-The-Go”) USB type A to Micro USB adapter (if your Android device uses a microUSB port).
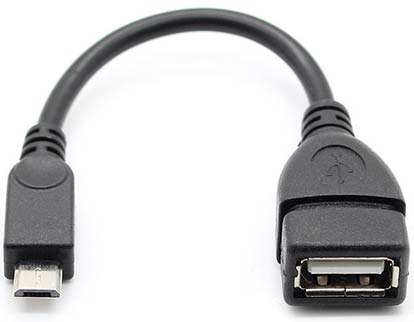
USB Type A (female) to MicroUSB (male)
OR
2) OTG USB type A to USB type C adapter (if your device features a USB type C port).
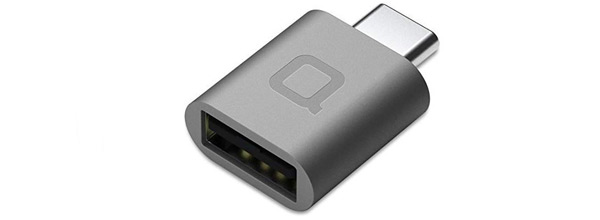
USB Type A (female) to USB Type C (male)
In either case you will still need a USB A to B cable (or MIDI to USB interface in case your keyboard has MIDI In/Out ports), which you’ll plug into the keyboard. The other end (USB-A) will connect to one of the adapters above.
Alternatively, you may want to consider buying a USB type C to B cable, which will allow you to connect to your Android device (if it uses USB type C port) without needing a second cable (USB A to B).
However, if your Android device uses a microUSB port rather than a USB type C, you’ll still need two cables.
I wasn’t able to find a single cable that would provide a direct connection between microUSB port and USB type B port (or MIDI In/Out).
Enabling Bluetooth MIDI Connectivity
If you want to connect your smart device wirelessly but your digital piano doesn’t have Bluetooth, there are tools out there that can help you do that.
For digital pianos that have dedicated MIDI In/Out ports you can use Yamaha’s solution, the wireless MD-BT01 adapter.
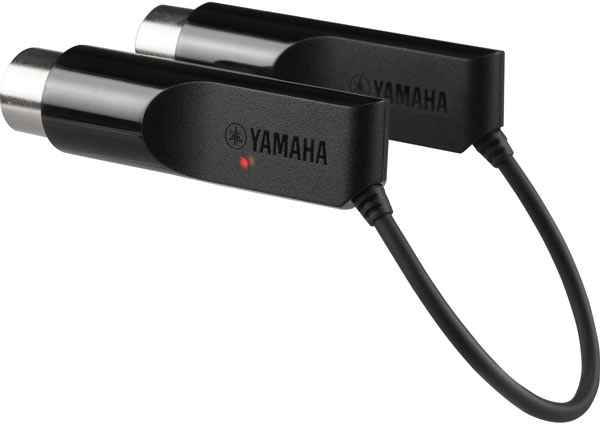
The MD-BT01 connects directly to your piano’s MIDI ports and enables Bluetooth connectivity, which means you can exchange MIDI data with your smart devices just as you would if your piano natively supported Bluetooth.
Need Something a Little More Advanced?
Alternatively, you may wish to use an audio interface (with MIDI ports) to connect to your computer or smart device. That way you can use one device for both MIDI and audio signal.
This is a more advanced approach that is more expensive, however, you will have access to extra connections for microphones and other instruments.
If you don’t any additional connections, you may simply want to use a more economical, portable MIDI interface like the IK Multimedia iRig MIDI 2.
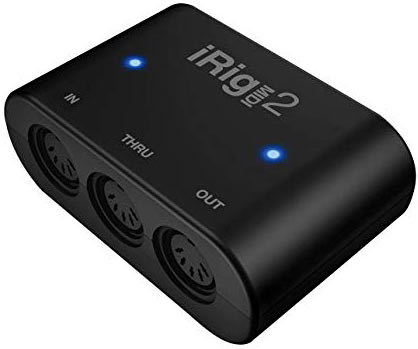
IK Multimedia iRig MIDI 2
This gives you the option of using Lightning, or USB connections. This interface includes a package of free applications including iGrand Piano and iLectric Piano.
The iRig MIDI 2 only has MIDI In/Out/Through and allows you to connect either to your computer (USB type A adapter included) or iOS device (Lightning adapter included). So it’s a great option if your keyboard uses MIDI In/Out ports rather than USB MIDI.
Do I Need to Install Any Drivers?
When connecting your digital piano to your PC, you may be required to install drivers in order for your device to work.
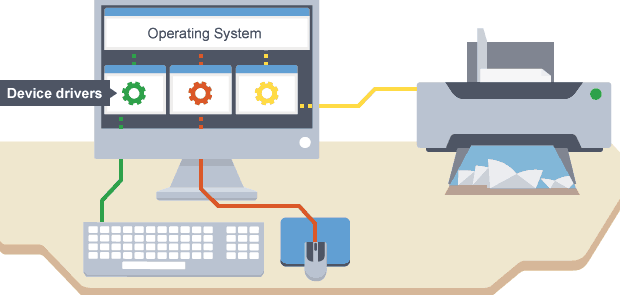
To quickly explain to you what a driver is, this is basically a software that allows for your digital piano to communicate with the computer’s operating system.
The driver allows for the computer to accurately send and receive data from the hardware device, which is the digital piano in this case.
Driver installation typically depends on the type of digital piano you are using, so please refer to your keyboard’s manual on any drivers you may need.
If you own a Yamaha instrument, you’ll likely need to install one of these drivers:
However, most digital pianos are plug and play meaning you need not worry about having to manually download and install these drivers.
When connecting to your iOS or Android device you will not have to worry about drivers as these typically do not require them.
You have now successfully connected your digital piano/keyboard to your computer/device! You have opened a world of possibilities on your journey to creating and performing music.
You will be able to use digital sheet music (no more heavy music books, or loose leaf pages!), notate your own scores, record compositions, edit ideas, record other instruments (guitar, drums, violin, etc) using your digital piano, and learn songs through Apple/Google apps!
Use Your Keyboard as a MIDI controller
Now that you have connected your keyboard to your desired setup, it’s time to learn a little about MIDI.
MIDI is the information read by your computer, translating notes and CC (Control Change) data into music.
For example, you may play a legato phrase on your piano, then repeat it the second time with staccato notes.
The computer recognizes the change, and represents the legato or staccato articulations as CC data. From your computer/device, you can adjust these expressions and articulations, and creatively change the way your phrase plays.
MIDI differs to audio, as we have control over the notes and CC data. If you accidentally record a MIDI phrase with incorrect notes, you can adjust these via a piano roll screen on your computer or device.
Audio is recorded information that has limited control over any adjustments you want to make.
You are able to cut, fade, raise/lower the volume, slow/speed tempo with recorded audio files, but with MIDI you have more control to change notes, the way they are expressed or articulated, dynamics, velocity, and modulation.
Both audio and MIDI files are very useful to a musician, and being able to work with MIDI will open up more possibilities with your music.
With MIDI, you are able to view notes on a piano roll, making it easier to:
- 1) Orchestrate, harmonize, and identify chords
- 2) Learn and teach the notes on the piano (as letters help represent the notes on the piano roll screen)
- 3) Compose and arrange music by listening to MIDI notes on different sample instruments; and
- 4) Enjoy the possibilities MIDI opens up to you as a performer, listener, teacher/student, and composer.
Now that you have the whole world of possibilities to make, learn and enjoy music, it’s time to talk about the apps and software that will allow you to do that.
You can use your digital piano as a MIDI controller to control various apps that we’ve split into 4 different categories below.
Before we go into any more details, take a look at the apps within each category that we recommend, and which, in our opinion provide, have the best quality and functionality.
Teaching Apps (Learn how to play):
- Flowkey: Learn Piano
- Skoove
- Playground Sessions
- Piano Marvel
- Piano Chords, Scales Companion
- Simply Piano by JoyTunes
- Piano Tutor for iPad
- iReal Pro
Digital Audio Workstations (make, mix, and record your own music):
- Logic Pro X
- Cubase 10
- FL Studio
- GarageBand
- Ableton Live
- Pro Tools 12
- Digital Performer 9 X
VST Plugin (Explore extensive high-quality libraries of virtual studio technology plugins):
- Pianoteq 6
- Addictive Keys
- Spectrasonics Omnisphere 2
- Keyscape
- Native Instruments Kontakt 6
- Synthogy Ivory II Grand Pianos
- EastWest Quantum Leap Pianos
Notation Apps and Interactive Sheet Music Apps:

- Finale 26
- Sibelius Ultimate
- Dorico
- MuseScore
- Sheet Music Direct PlayAlong
- PiaScore – Smart Music Score
Learn How to Play
Connecting to a DAW or piano app through your computer/device can greatly help you to learn music theory, chords, progressions, and learn your favorite songs.
The apps available to you vary from beginner to advanced – you can even learn songs without knowing how to read sheet music!
Flowkey is an excellent app to learn songs on the piano in a short amount of time, suited to your skill level. Flowkey is available on the computer and any smart device, and can also brush you up on your music theory skills, as well as practical skills.
Once in the app, you can choose through a wide category of music to learn, including classical music, pop hits, and film/TV/game music.
The app lets you connect your piano keyboard and tracks your progress as you play. Lessons begin with the basics of piano playing including posture and hand position.
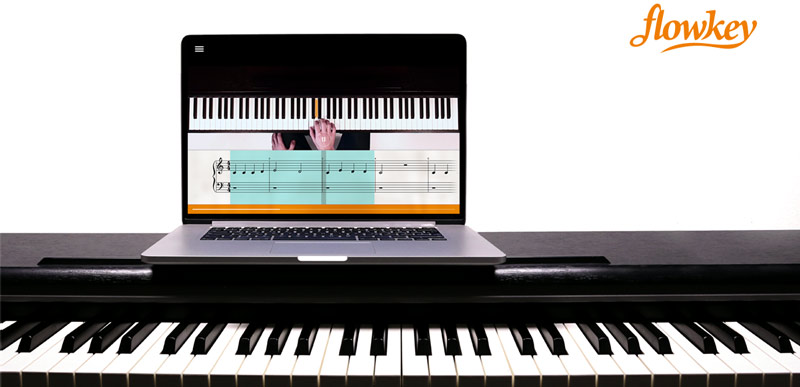
As you progress, Flowkey teaches you songs with four chord progressions, as well as major and minor chords.
You can use Flowkey as a free trial and decide for yourself whether or not you want to continue using it before you pay for a monthly or yearly subscription.
Skoove is a fun way to learn piano for beginners using popular soundtracks from movies such as Game of Thrones, Pirates Of The Caribbean, James Bond, Amelie, and hit songs from Adele, John Legend, The Beatles, Coldplay, and other popular artists.
The app is available on the computer and through the App Store. You can try it for free, or subscribe to one of their plans.
The lessons teach with the “Listen, Learn, Play” method, which is a great way to train your ear and your sight reading skills. Each lesson uses an excerpt from a well-known song to teach a musical concept.

Available on computer, android and iOS devices, Piano Chords, Scales Companion is piano chords and scales dictionary.
This app focuses on identifying chords and scales, which is helpful for piano students, and a great resource for orchestrators and arrangers brushing up on harmony.
There is also a handy chord progression builder that allows for you to experiment with different progressions.
There are over 1500 chords and 500 different scales, so you have a lot to learn from.
The app is MIDI compatible and all you have to do is connect your digital piano to your device of choice and you are good to go.

If learning with a piano teacher, it is a great idea to let them know which apps you are using so you can make the most of it! Your teacher will be able to guide you and make achievable piano goals for your needs.
For more information on different ways on how to learn the piano, refer to our comprehensive guide and check out our in-depth piano app reviews.
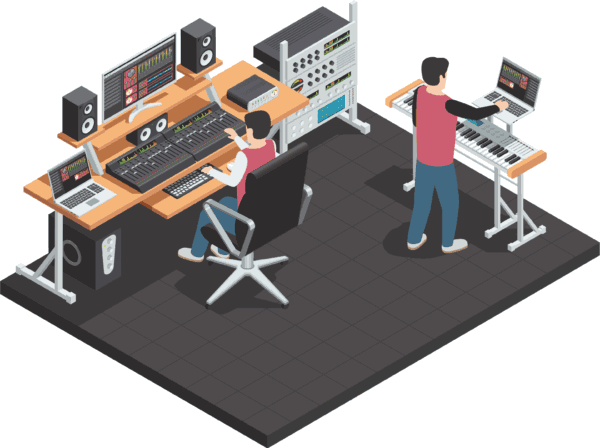
Make and Record Music
Now that you are getting familiar with software applications, and have connected your keyboard to your computer/device, you can now create your own little recording studio set-up in the comfort of your own home!
Not only can you teach, learn, and play the piano, but with DAW apps, you will be able to record, create, mix, and edit music. We have prepared two in-depth guides for you in case you want to go deeper with DAWs and their capabilities.
With a knowledge of MIDI usage, you are opening new, exciting ways to make music. You will be able to customize a set-up that makes the most sense to you.
You can keep a digital piano into a computer/device set-up, or eventually add MIDI controllers, synth pads, synthesizers, speakers… the possibilities are endless!
A great entry-level DAW to start working in is Garageband, which comes free with every Apple computer or device. The software allows you to create loops, and audio/MIDI recordings to edit, arrange, and mix your own song.
Garageband is great for producing compositions, tracks for a small ensemble, or generating ideas through the use of Apple loops. This is a good basis for learning to write and mix your own songs.
If you want to unlock some more advanced features using an Apple set-up, you can purchase Apple’s Logic Pro X.
Note this is only for Apple only, and not compatible for Windows desktops, and costs $199.99 on the App Store.
A DAW is a hefty upfront price, but usually a great investment if you plan on continuing to write and record your own music.
There is a great advantage in owning Logic Pro X, due to the fact that it is owned by Apple – if the OS upgrades, so does the DAW, making it compatible with Apple’s latest Operating Systems (currently on Mojave).
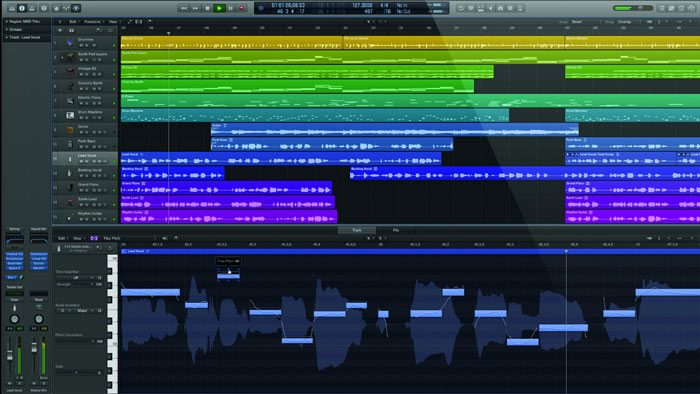
Logic Pro X’s Interface
Generally, in the DAW world of music, we should wait about 6 months before updating our computer’s operating system so that other DAW software can catch up with compatibility. With Logic Pro X, it updates together with Apple’s OS.
Another popular DAW is Cubase 10, compatible on both Mac OS and Windows.
This is another advanced DAW where you may want to invest in to have access to advanced features including detailed expression maps, macros, and logical editor presets.
Other popular DAW applications include FL Studio and Ableton Live. Both of these are great to develop your music production skills, and are popular with electronic music composers.
In the audio production world, Ableton Live is one of the most popular DAWs due to the attention to detail that it provides.

Apart from being able to record and mix audio tracks, you can also use Ableton Live for your on-stage performances. It’s actually quite popular amongst DJ’s as it can be used for matching tempos of dance songs and fixing timing problems.
One of the most popular and most widely used DAWs across the world is Fl Studio. Previously known as Fruity Loops, Fl Studio is a great audio workstation for creating beats and recording music.
Loaded with several powerful VST plugins, Fl Studio allows you to access different sounds from the built-in plugins ranging from synths, to keyboards and bass sounds.
You can also create and design your own specific sounds and tones, though you will no doubt need a bit of time and patience to achieve this.

As an Fl Studio user myself, I can attest to the simplicity of using my own MIDI controller with this DAW.
However, Rome wasn’t built in a day and it will no doubt take some practice in order for you to fully realize the potential of this amazing software.
Fl Studio is used by some of the most well-known producers around the world including CashMoneyAp, Martin Garrix, Boi-1da, TM88 etc. This should let you know of the potential you can unlock if you take the time to properly learn how to use this powerful DAW.
Connect to External Instrument Libraries (VST s )
As mentioned above, you can change your acoustic piano sounds into other traditional or electronic instruments, and sound effects.
You can take advantage of countless great VST plugins that provide you with top notch quality sounds of upright pianos, grand pianos, vintage pianos, and actually any instruments (guitars, violins, drums, etc.) you can imagine, as well as synths sounds.

VSTs, otherwise known as samples, or sample libraries, are pre-recorded notes, sounds and phrases that have been programmed into a plugin to be played by your keyboard.
Imagine playing middle C on your piano. Once you create a new track instrument in your chosen DAW, you can select a sample (let’s imagine you choose a violin), then play the same middle C on your piano and it sounds now like a violin playing middle C!
You can create multiple instrument tracks, and compose a string ensemble, or perhaps an entire orchestra! You can also learn about different electronically produced sounds, including many different synthesizers and effects.
Let’s take a quick glimpse at some sample libraries that can be beneficial to your music-making.
Firstly, we’ll discuss Spectrasonics Omnisphere 2, a powerful synthesizer which includes 14,000 sounds, a Sound Match feature that instantly locates related sounds, and an audio import option which allows you to import your own recorded snippets as a sound source – just to name a few!

Spectrasonics Keyscape Sample Library
This powerful plug-in is ideal for any modern musician wanting to explore music production, synth-based samples.
Although you can record your digital piano into a DAW as an audio file, when it comes to MIDI, you will still need a piano VST, as your digital piano acts more of a MIDI controller to send notes and CC data to your computer/device.
An excellent piano library is Pianoteq 6, a virtual copy of the Steinway & Sons D and B models.
This VST includes advanced tuning tools, the ability to save presets, and a playlist that stores your recorded MIDI files that you can use for playback (such as for generating ideas, etc).
A lot of VSTs can act as standalones, which require nothing else in order for you to make sampled sounds through your keyboard. However, you have the option to use a sampler which hosts many sampled libraries.
Note that there are some sample libraries that cannot operate without the use of a sampler.
Native Instruments Kontakt 6 is a must-have sampler for a modern musician’s setup.
It is the industry-standard for hosting the biggest selection of sampled instruments that also comes with its own library of over 55GB in sampled sounds! Kontakt 6 can act as a basic sampler, or go as in-depth as creating your own sampled instrument.

Native Instruments Kontakt 6 Sampler
Once you purchase some sample libraries, (eg. Spitfire, 8Dio, or CineSamples), they can then be opened via the Kontakt window.
As with all samplers, (Spectrasonics, Kontakt, Play, Garritan, etc), these can be accessed as a standalone application, or opened in the DAW of your choice.
Simply create a new software instrument track and open Kontakt in the instrument input selection.
You will be able to choose from various options including Mono, Stereo, 5.1 Sound, etc, but generally you will want to open a Stereo track of Kontakt. These other options are there for specific soundscapes for your project.
Notation/Music Sheets

With all this technology arising and various ways to play and create music, there is no need to handwrite/read paper versions of sheet music (if you choose not to).
You can easily search and find the sheet music you want, edit it, play along with it, turn pages using your digital piano pedals, (be sure to check your digital piano’s manual that you can do this), and much more.
PiaScore – Smart Music Score is an app available for iOS which makes storing sheet music, and reading it accessible in one large portable library!
No need to carry heavy books and loose pages of sheet music around when you can have all this at your fingertips.
You can browse and edit sheet music digitally, and then erase practice markings on your score not applicable anymore.
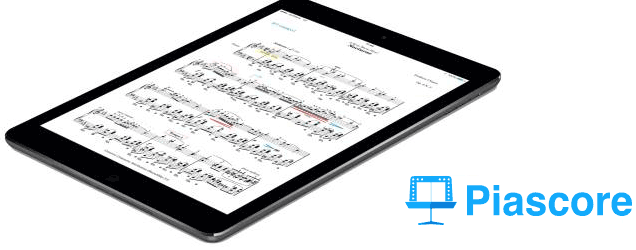
Some of its features include vertical screen scrolling with an adjustable speed (no page turns!), smart browsing that makes it easy to tab to the first and last pages without flipping through each page, easy management of scores by tagging composers/artists in a category filing system, and even face gesture page turning with the new iPhone X and iPad Pro.
For the purpose of creating notated sheet music, Sibelius, Finale 26, and MuseScore are great applications.
You can try a free trial of Sibelius Ultimate before purchasing for the full price.
If you are just getting started, perhaps Sibelius First, is best for you. This version is free but has a limitation of four instruments only per score.
This is excellent if you plan on transcribing solo or chamber instruments.
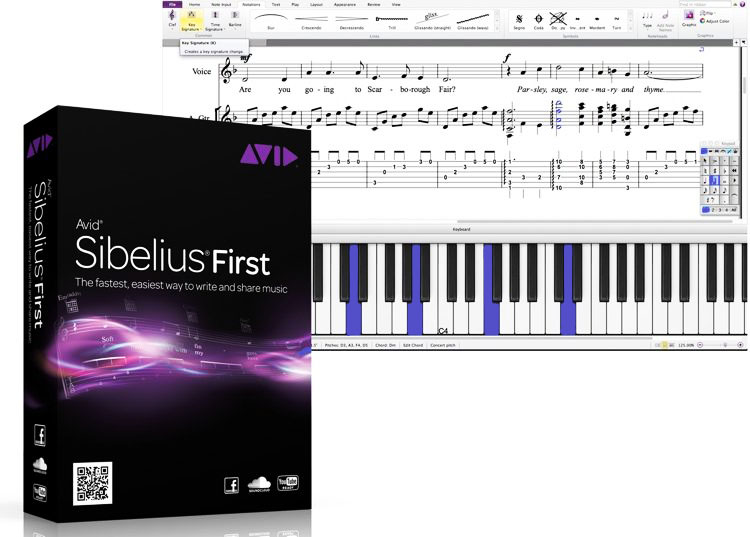
Sibelius First – Music Notation Software
Sibelius is the next upgrade from Sibelius First, which features scores up to 16 instruments and you will have access to sharing up to 20 scores online with Sibelius Cloud Sharing.
Sibelius Ultimate is the full version with unlimited instruments, custom parts and house styles (for how you want your scores to look like).
Finale 26 is the most recent version of Finale and starts at $99 for student educational discount, or $600 outright. Be wary, Finale is a little more complicated to use for a beginner learning notation on a computer set-up but presents a more slick design.

Don’t fret – if you have Sibelius but wish to cross grade to Finale (or vice versa), you may purchase your new notation software for a discounted price.
Another beginner-friendly app I recommend if you’re struggling with learning sheet music would be MusicScore. It’s free and excellent for beginners learning sheet music, and students.
MuseScore has a supportive, active community who are willing to learn and teach beside you. It is simple to use and can export XML, MIDI and audio files into other programs such as Finale/Sibelius, or straight into your DAW (GarageBand, Logic Pro X, Cubase, etc).
Final Words
Not only did you buy a digital piano, but it seems like you have your own studio set up right at your fingertips!
Music technology shouldn’t be a daunting, scary thing, but something to look forward to learning about the possibilities that come with it.
I hope you’ve had as much fun as we’ve had teaching you about the exciting ways to create music once you connect your digital piano to a computer or smart device.
If you have any further questions or comments, we’d love to hear from you!
Источник


